


Garment Length: Key to Fit And Customer Satisfaction


For many growing apparel businesses, achieving consistent sizing and fit can feel like a constant challenge. Inconsistent measurements often lead to customer dissatisfaction, costly returns, and damage to brand trust. Among the various measurements, getting the garment length right is fundamental.
Precise garment length ensures a predictable fit, is crucial for clear communication with manufacturers, and forms the backbone of reliable size charts. This guide offers practical insights into understanding what garment length truly signifies, demonstrates standard methods for obtaining accurate measurements, and provides actionable tips to enhance consistency, ultimately improving customer satisfaction and reducing operational headaches.
1. Defining garment length: more than just a number
1.1 What exactly is garment length?
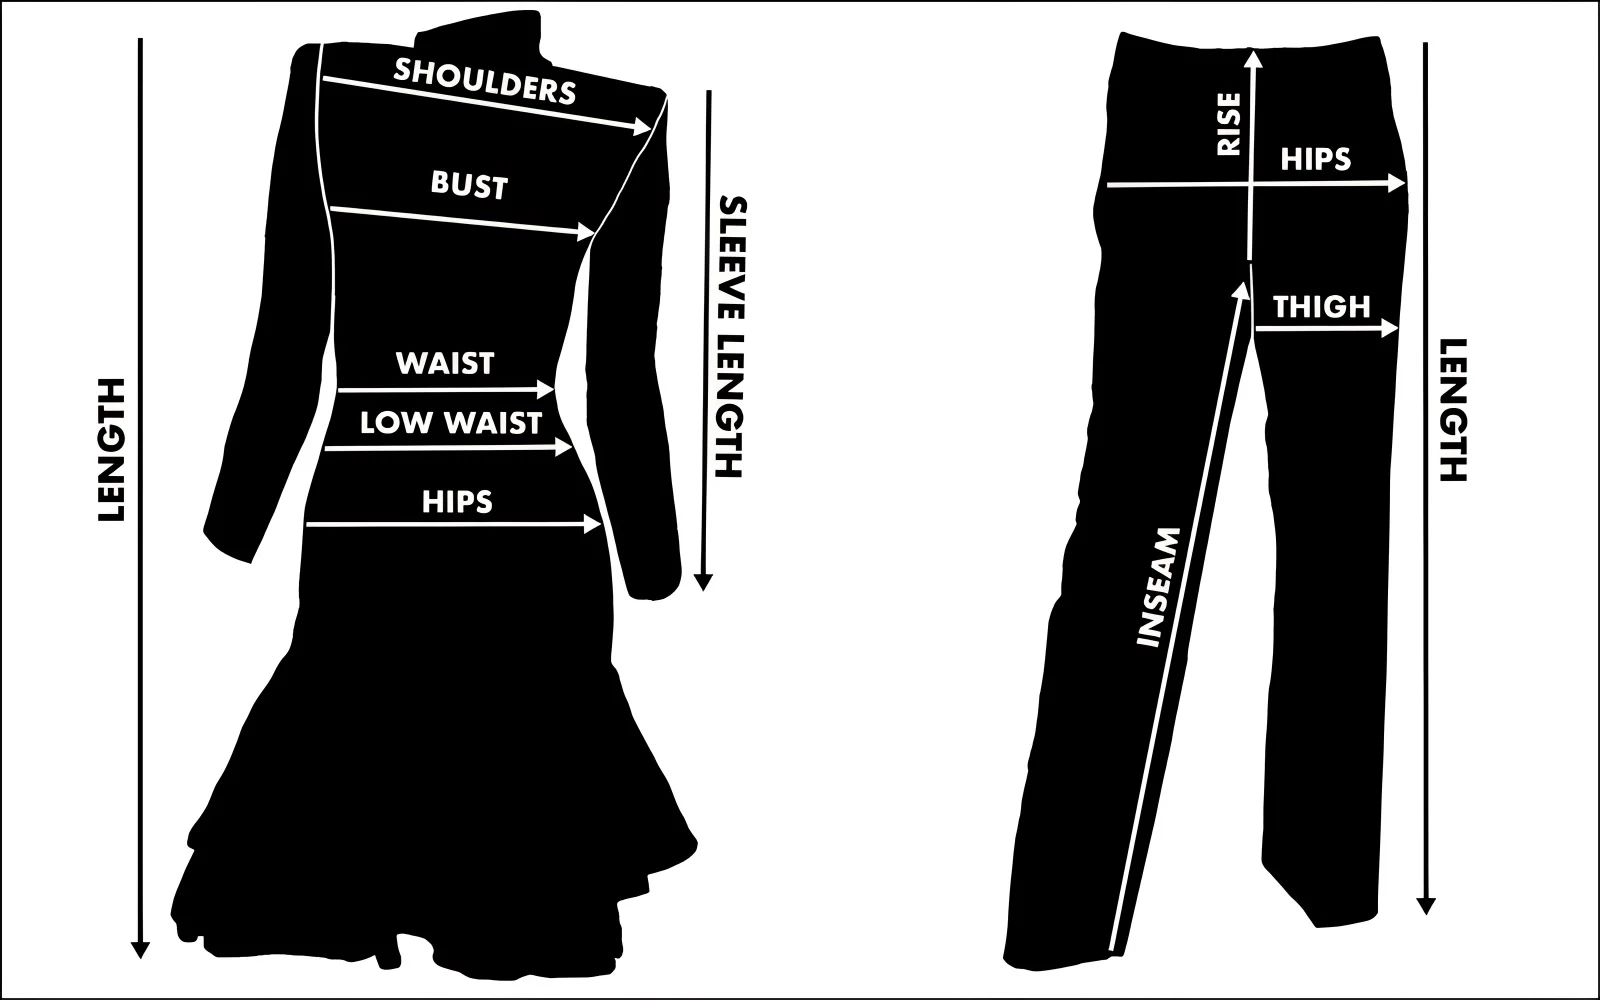
Garment length refers to the primary vertical dimension of an article of clothing when it is laid flat. This measurement is taken from a specific starting point, typically near the neck or shoulder, straight down to the very bottom edge, known as the hem. Think of it as the overall height of the garment itself.
Unlike width measurements (which assess how wide a garment is across the chest, waist, or hips), garment length defines how long the item is. This measurement is a crucial product dimension used in design, production, and sizing. Often simply called total length, it quantifies the vertical coverage the garment provides.
1.2 Why it’s different from body length
It’s important to distinguish garment length from body length. Body length is a measurement taken on a person’s actual body, such as from the nape of the neck to the desired point where a garment should end. In contrast, garment measurements assess the dimensions of the finished clothing item itself.
For production specs and online sales size charts, measuring the garment directly is standard practice. This approach provides consistency and removes the variability inherent in measuring individuals (factors like posture or differing measuring techniques).
While the difference between body measurements and garment measurements defines the ‘ease’ and thus affects the fit and comfort, accurately determining the garment length itself is the focus for production and sizing communication.
2. The critical role of accurate garment length measurement
2.1 Ensuring consistent fit and apparel sizing integrity
Achieving a consistent fit across all sizes within a style is paramount for meeting customer expectations. When garment length varies unpredictably, the overall fit becomes unreliable, leading to frustration.
Accurate and uniform length measurements ensure that a size Medium, for example, consistently offers the same vertical coverage, contributing significantly to dependable apparel sizing. This consistency builds customer satisfaction and fosters trust, as shoppers learn they can rely on your brand’s sizing guides for predictable results.
2.2 Reducing returns and exchanges caused by poor fit
Incorrect garment length is a common culprit behind returns and exchanges, particularly in online retail where customers cannot try before buying. A top that’s unexpectedly too short or a dress that’s longer than described often results in a return.
These exchanges incur significant direct and indirect costs: return shipping fees, inspection and restocking labor, and potential loss if the item cannot be resold. Implementing accurate measurement practices for garment length acts as a direct cost-saving measure by minimizing returns related to poor fit.
2.3 Streamlining production: clear product dimensions for tech packs
Precise garment length is a fundamental product dimension required within comprehensive technical packages, commonly known as tech packs. Providing clear size specifications, including the exact garment length specification and the method used to measure it (e.g., HPS or CB), is essential for effective communication with manufacturers.
This clarity minimizes misunderstandings, reduces the need for multiple rounds of sampling, and helps ensure the final production run accurately reflects the intended design. Well-defined measurements streamline the entire manufacturing process.
2.4 Building trust through reliable sizing guides
Detailed and accurate sizing guides are crucial for building trust and customer confidence, especially for an online retailer. When customers see specific garment length measurements listed, and those measurements prove reliable upon receiving the product, it signals professionalism and trustworthiness.
This transparency empowers customers to make informed purchasing decisions, reinforcing your brand’s authoritativeness in providing dependable sizing information and reducing purchase hesitation.
3. Key methods for measuring garment length: HPS vs. CB
3.1 Measuring from the high point shoulder (HPS)
What is HPS? High point shoulder (HPS) refers to the specific location at the very top of the shoulder, typically where the shoulder seam meets the edge of the neck trim or collar seam. Imagine where a perfectly fitted garment would naturally rest at its highest point on the shoulder; that’s the HPS.
This precisely defined spot serves as a critical reference point for taking vertical measurements on many types of apparel.
When to Use HPS: The HPS measurement method is standard for a wide range of garment types, particularly those that drape directly from the shoulders. Common examples include:
- T-shirts
- Blouses
- Sweaters
- Knit tops
- Most styles of dresses
The rationale is that measuring from the HPS accurately reflects how these garments hang on the body, providing a length measurement that corresponds well to the perceived length when worn.
3.2 Measuring from the center back (CB) neck seam
What is CB length? Center back (CB) length, sometimes referred to simply as back length, is a measurement taken vertically down the back of the garment. It starts precisely at the CB neck seam – the point where the collar or neck binding is attached at the exact center of the back neckline – and extends straight down to the bottom hemline. Like HPS, this is another essential reference point for specific garment styles.
When to Use CB Length: Measuring from the center back is often preferred for more structured or tailored garment types, such as:
- Jackets
- Coats
- Blazers
- Some woven shirts (especially traditional men’s dress shirts)
- Most outerwear
The reason CB length is often used for these items is that the center back typically provides a more stable and consistent measurement point, less influenced by variations in shoulder slope or complex pattern shapes common in tailored garments.
3.3 Why choose one over the other?
The decision between using HPS or CB largely depends on garment type specificity and construction. The goal is always to choose the method that yields the most consistent and representative measurement for that particular item’s intended fit/appearance.
Industry conventions often establish the standard method for common garment categories (e.g., HPS for knits, CB for tailored jackets). Observing how a sample hangs on a mannequin can sometimes help confirm which reference point better reflects the perceived length. Adhering to the industry standard for a given garment type generally ensures clarity and consistency.
4. Step-by-step: how to measure garment length like a pro
4.1 Preparation: the first step to accuracy
Before taking any measurements, proper preparation is essential for achieving accuracy. Following these steps establishes a consistent baseline for your measurement method:
- Select a large, hard, flat surface, such as a clean table or cutting mat. Avoid soft or uneven surfaces.
- Lay the garment flat on the surface, facing up unless measuring CB length.
- Gently smooth out any significant wrinkles, creases, or folds, taking care not to stretch or distort the fabric. The garment should lie in its natural, relaxed state.
- For items like t-shirts or sweaters, ensure the front and back layers are aligned smoothly. Close any buttons, zippers, or other fasteners.
4.2 Essential tools: the right measuring tape
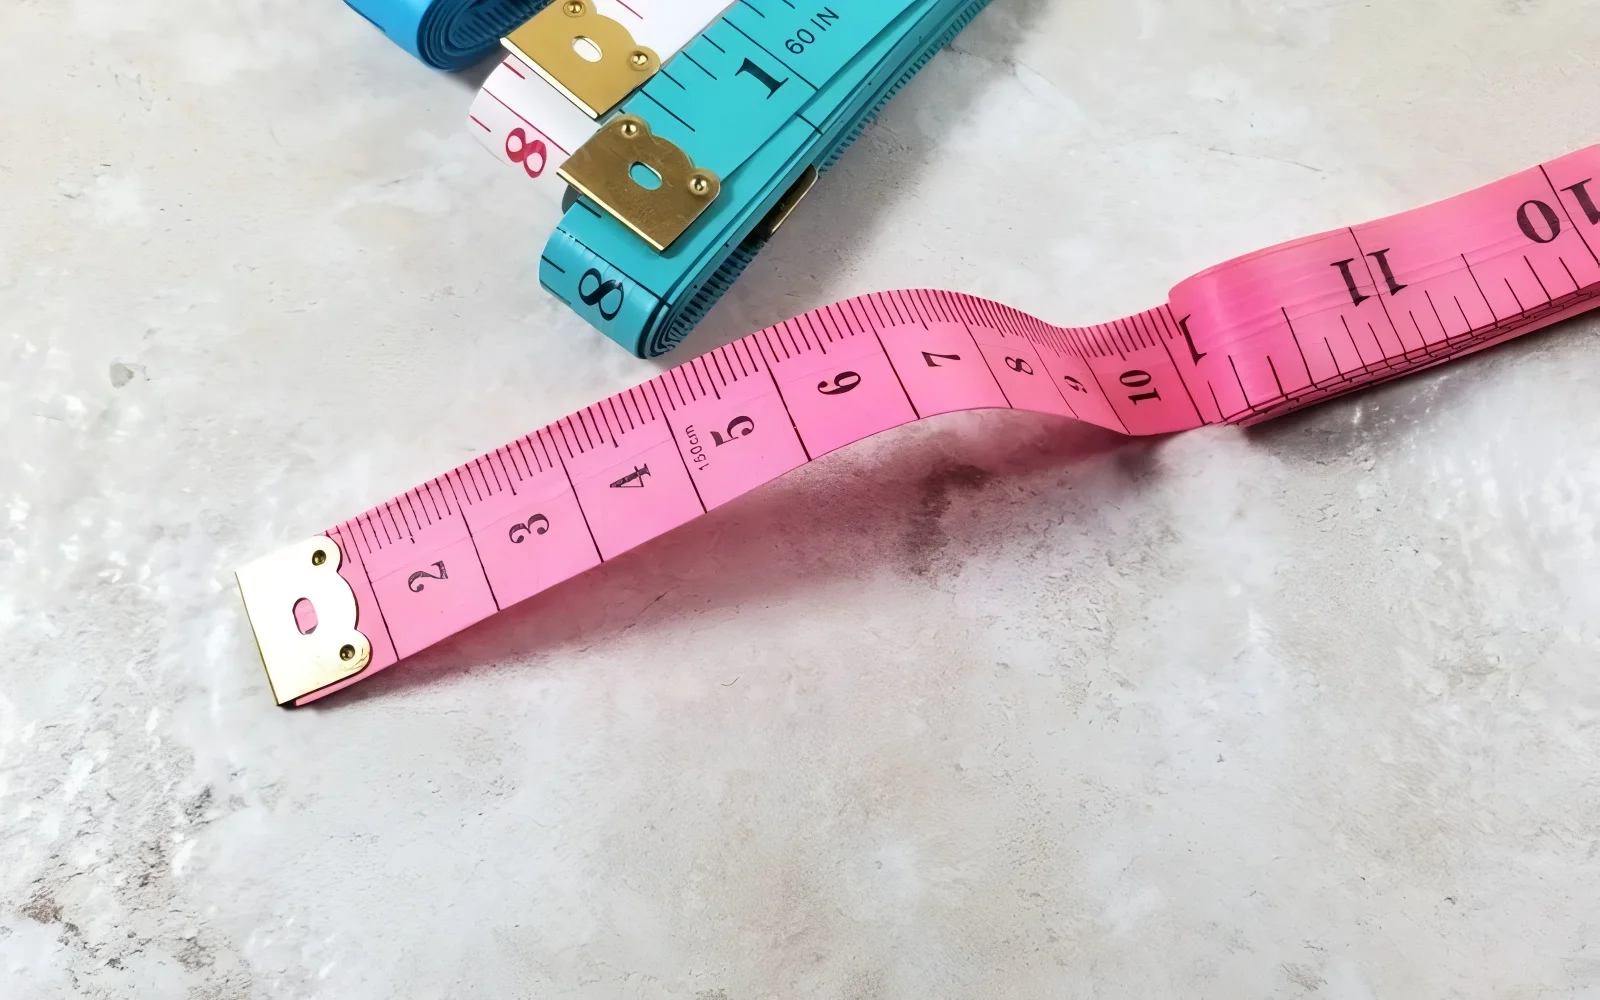
The primary tool for measuring garment length is a flexible measuring tape.
- Use a tailor’s tape measure made of soft cloth or flexible plastic. Avoid using rigid metal measuring tapes, as they cannot easily follow the garment’s contours if needed and can be less precise for this application.
- Ensure your tape measure starts accurately at the ‘0’ mark and is not frayed, kinked, or stretched out from previous use. These are essential tools for reliable results.
- Determine the required measurement unit for your business – typically inches for the US market and centimeters for European and other international markets. Consistently use the chosen unit.
4.3 Measuring a shirt or top
For most shirts and tops, the high point shoulder (HPS) method is standard:
- Carefully identify the HPS point – where the shoulder seam meets the neck seam at its highest point.
- Place the ‘0’ end of the flexible measuring tape precisely on this HPS point.
- Run the tape straight down the front of the garment, keeping it parallel to the center front or side seam (whichever line appears most vertical), towards the bottom hem.
- Read the measurement indicated on the tape exactly where it meets the bottom edge of the front hem.
4.4 Measuring a jacket or coat
For structured garments like jackets and coats, the center back (CB) method is commonly used:
- Lay the jacket or coat face down on the flat surface, smoothing it out.
- Locate the CB neck seam – the exact center point where the collar stand or neck binding attaches to the back panel.
- Place the ‘0’ end of the measuring tape precisely on this center back neck seam point.
- Run the tape straight down along the center back line of the garment to the bottom back hem.
- Read the measurement indicated on the tape exactly where it meets the bottom edge of the back hem.
4.5 Measuring a dress
Most dresses follow the same HPS measurement process as shirts and tops:
- Lay the dress flat, face up.
- Identify the HPS point.
- Place the ‘0’ end of the measuring tape at the HPS.
- Run the tape straight down the front towards the bottom hem.
- Read the measurement at the bottom edge of the front hem.
Note on Variations: Some dress styles require specific considerations. For instance, with an asymmetrical hem length (like a high-low hem), you might need to measure both the shortest and longest points and specify which measurement is being provided. Tech packs for such designs often require both front and back length measurements if they differ significantly.
4.6 Documenting measurements consistently
Taking an accurate measurement is only half the task; consistent documenting is equally crucial.
- Immediately record the measurement value along with the method used (HPS or CB).
- Establish a standard format for recording measurements internally and for use in size charts and tech packs. For example: “Garment Length (HPS): 28 inches” or “Garment Length (CB): 72 cm”.
- This practice prevents confusion and ensures consistent sizing information is used across all platforms and communications.
5. Expert tips for measurement accuracy and consistency
5.1 Use a quality, non-stretched measuring tape
The reliability of your measurements begins with your tools. Always use a flexible measuring tape that is in good condition. Over time, tapes can stretch or become distorted, leading to inaccurate readings. Regularly check your tape against a rigid ruler to ensure its accuracy. Investing in a quality tape is a small but essential step for consistent results.
5.2 Ensure the garment is perfectly flat and relaxed
When laying the garment out, ensure it lies completely flat and in a relaxed state. Avoid any temptation to pull or stretch the fabric taut to smooth wrinkles, as this will artificially lengthen the measurement and compromise measurement accuracy. Gentle smoothing without tension is key, allowing the garment to rest in its natural dimensions.
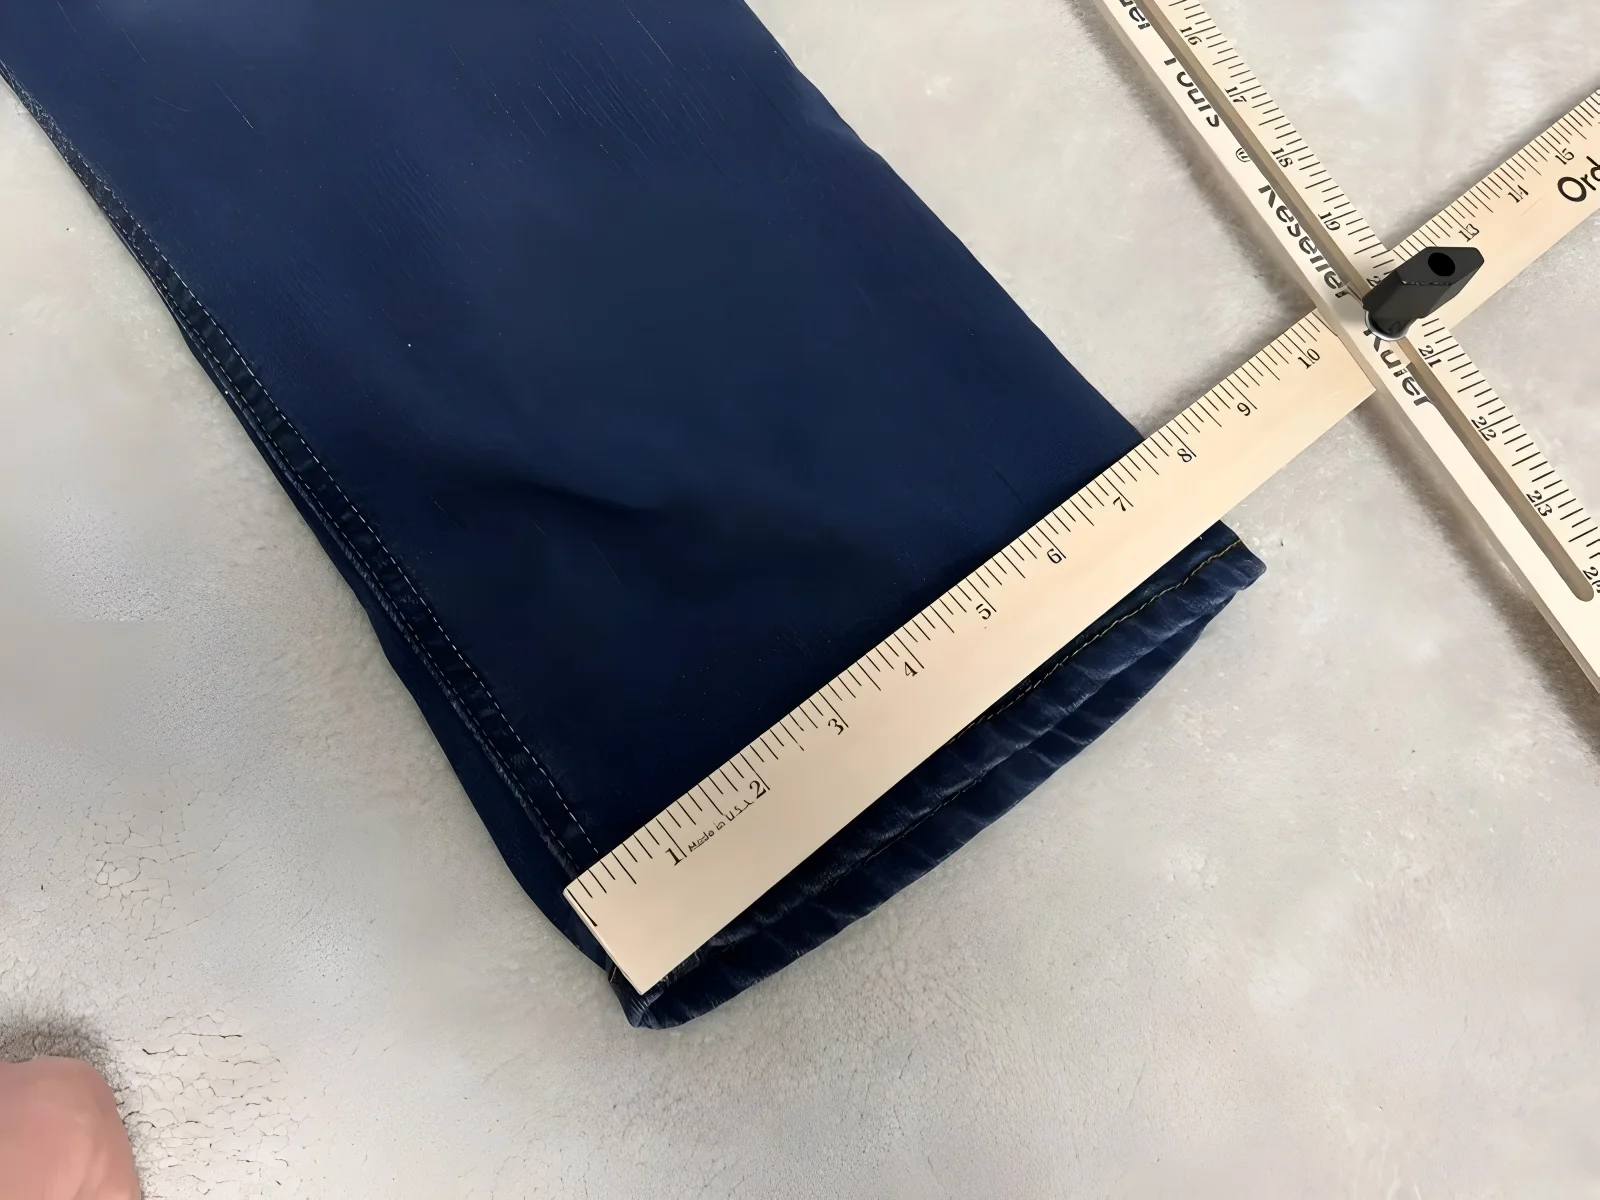
5.3 Measure on a hard, flat surface
Always perform measurements on a hard, flat surface, like a table or cutting mat. Measuring on soft surfaces such as carpets, beds, or even wrinkled fabric layers underneath can cause the garment to sink or bunch slightly, introducing errors and impacting measurement accuracy. A firm, level base prevents these subtle distortions.
5.4 Standardize reference points (HPS/CB) and techniques within your team
For any apparel business, internal consistency is crucial. Ensure that everyone involved in measuring garments uses the exact same reference points (HPS or CB) for specific garment types and follows the identical measuring technique.
Document these standardized procedures clearly. This standardized approach across your team is fundamental for achieving reliable sizing and minimizing discrepancies between samples, production runs, and size charts. Consistency is key.
5.5 Measure twice, record once
Adopt the simple habit of measuring each dimension twice before recording the number. This quick double-check is a fundamental principle of quality control and helps catch potential errors – perhaps the tape slipped slightly, or the reading was initially misjudged. Taking a moment to measure twice significantly improves overall accuracy.
5.6 Consider fabric properties
Be mindful of the fabric type, especially with very stretchy knits or fabrics prone to distortion. Measure these materials gently, allowing them to relax fully. It’s also practical to acknowledge that minor variations can occur in production. For this reason, tech packs often include a length tolerance (e.g., +/- 0.5 inches or +/- 1 cm). This specifies an acceptable range of variation for the finished measurement, accounting for the inherent behavior of certain fabrics during cutting and sewing.
6. Integrating garment length into your business operations
6.1 Creating clear and accurate size charts
Accurately measured garment length becomes a critical data point for effective customer communication via your size charts. When listing this measurement, always specify the method used (HPS or CB) to avoid ambiguity.
For example, label the row clearly as “Garment Length (HPS)” or “Garment Length (CB)”. Equally important is stating the measurement unit used, whether inches, centimeters, or both, catering to your target audience’s preference.
Consistency in presenting this information across all relevant products helps build trust and enables customers to make informed decisions, contributing to accurate sizing expectations.
Example Size Chart Snippet (T-Shirt):
| Feature | Size S | Size M | Size L | Unit |
|---|---|---|---|---|
| Chest Width | 18 | 20 | 22 | Inches |
| Garment Length (HPS) | 27 | 28 | 29 | Inches |
| Sleeve Length | 7.5 | 8 | 8.5 | Inches |
6.2 Developing precise technical packages (tech packs) for manufacturers
Within the detailed specifications sent to manufacturers, known as technical packages (tech packs), the garment length specification is non-negotiable. This specification must be precise, clearly stating the required length, the measurement method (HPS or CB), and any permissible length tolerance (e.g., +/- 0.5 inches).
Including this level of detail for this key product dimension is vital. It provides absolute clarity to the manufacturing team, significantly reducing the risk of misunderstandings and costly production errors. A well-defined garment length specification ensures the final product aligns accurately with the design intent.
7. Related questions
7.1 What’s the difference between high point shoulder (HPS) and center back (CB) length?
The primary difference lies in the starting measurement point. High point shoulder (HPS) length is measured vertically from the highest point where the shoulder seam meets the neck/collar seam, down to the bottom hem. This method is commonly used for garment types like t-shirts, sweaters, and dresses, as it often reflects how the garment drapes from the shoulder.
Center back (CB) length is measured vertically from the exact center of the back neck seam (where the collar or neckband attaches) straight down the back to the bottom hem. This method is typical for more structured items like jackets, coats, and some woven shirts, providing a consistent reference point on garments where shoulder shape might vary or be complex. The choice depends on the garment type and achieving the most representative length measurement.
7.2 How does garment length affect the overall fit of a shirt or dress?
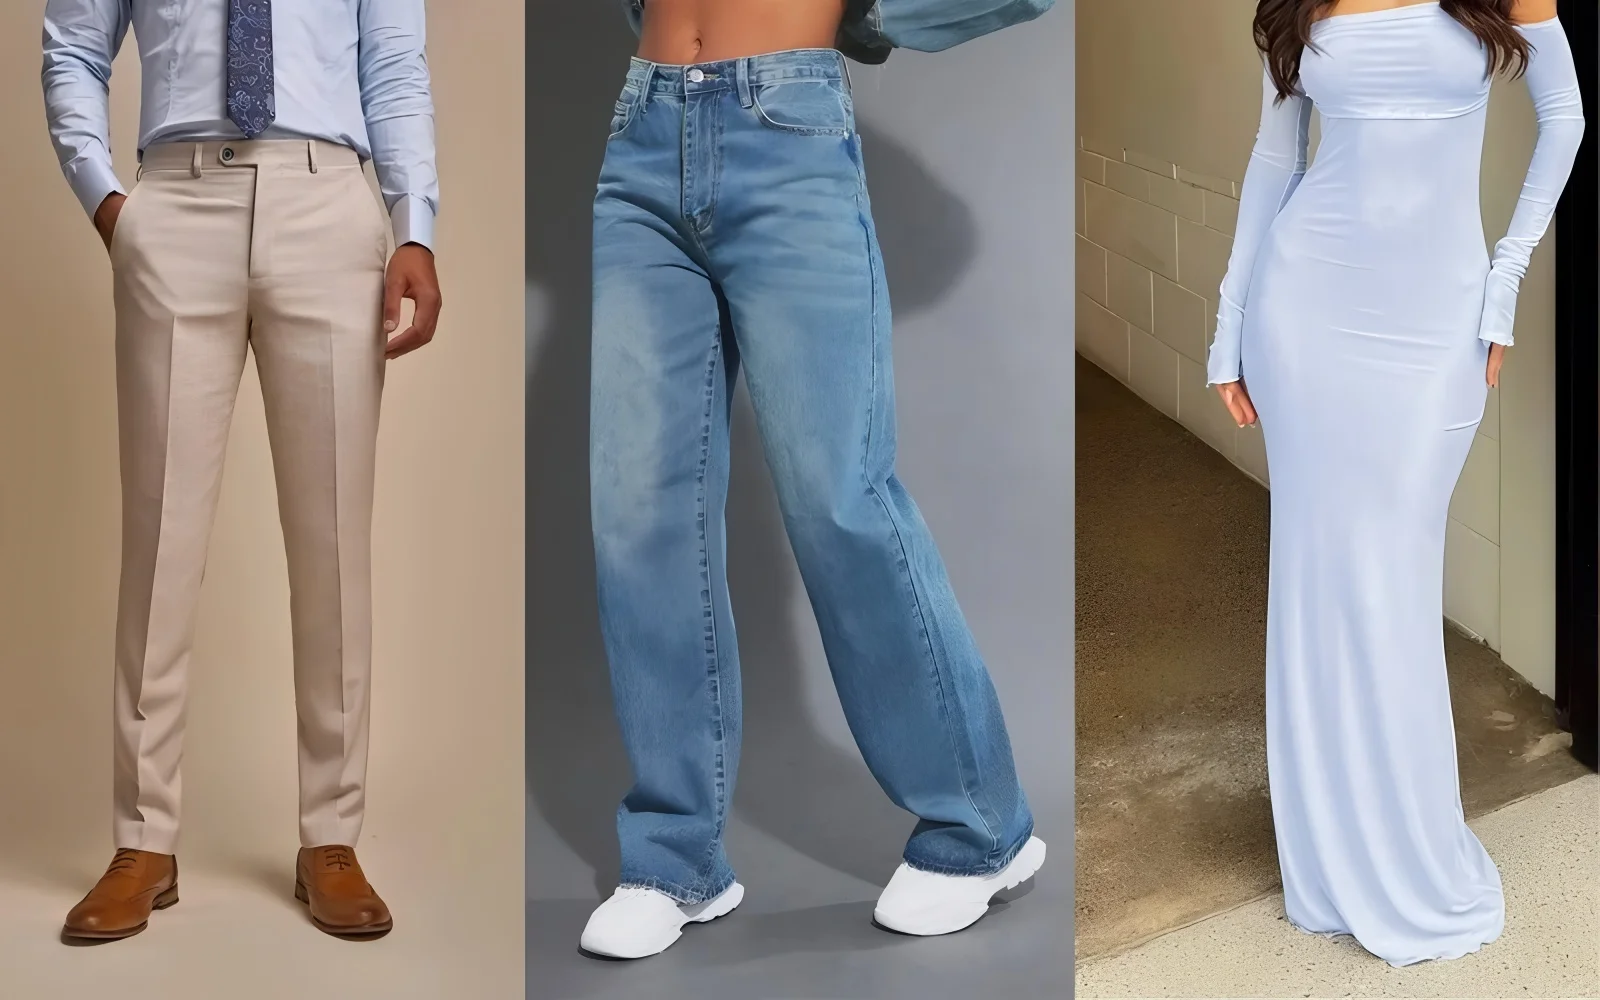
Garment length fundamentally determines where the bottom hem of the shirt or dress falls on the wearer’s body – for example, hitting at the natural waist, the hip, below the hip, or down to the knee or ankle. This placement significantly influences the garment’s overall style and visual proportion.
A shorter length creates a cropped look, while a longer length might define a tunic or maxi dress. Incorrect length, even if other measurements like chest width are correct, can make an otherwise well-sized garment look awkward or ill-fitting, disrupting the intended silhouette and proportions.
7.3 Should I list garment length in inches or centimeters on my size chart?
The best practice depends primarily on your target market. The US market predominantly uses inches. Centimeters are the standard measurement unit in Europe and many other parts of the world. If you cater to a specific region, use their standard unit.
However, for international sellers aiming for broader reach, providing both inches and centimeters on your size chart is highly recommended. Clearly label which unit corresponds to which set of numbers to avoid confusion and serve all potential customers effectively.
7.4 Can garment length change after washing?
Yes, garment length can potentially change after washing and drying, particularly with certain fabric types. Natural fibers like cotton, linen, and rayon, as well as some knit constructions, are more prone to shrinkage (shortening) or occasionally stretching (lengthening).
Manufacturers often consider the difference between pre-wash vs post-wash length during product development and may incorporate expected shrinkage into the initial pattern dimensions. If significant change is anticipated, it’s advisable for businesses to conduct wash tests.
Noting potential shrinkage on care labels or providing post-wash measurement guidance can manage customer expectations. This factor also relates to establishing realistic length tolerance levels in production specifications.
Read more:
Achieving accurate measurement of garment length is more than just a technical detail; it’s a cornerstone of successful apparel businesses. Understanding and consistently applying the correct measurement methods, whether HPS or CB, is fundamental.
This dedication to precision translates directly into better fit, increased customer satisfaction, reduced returns, and smoother production processes. Mastering this essential clothing measurement demonstrates professionalism and builds trust.
By implementing these practices, businesses can improve product consistency and enhance their brand reputation. For tailored advice on creating comprehensive tech packs or optimizing your full sizing strategy, the experts at Packlove are available to assist.


