


Overlocker: Boost Your Clothing Business Quality And Speed


Ready to elevate your clothing brand from ‘handmade’ to ‘high-quality boutique’? If you’re serious about your clothing business, achieving that professional, store-bought finish isn’t just a nice-to-have – it’s essential. That’s where the overlocker (or serger) comes in.
This powerhouse machine is the secret weapon for creating crisp, durable seams while dramatically cutting down your production time. Stop settling for less-than-perfect finishes and slow workflows. Dive in to discover how an overlocker can revolutionize your quality, accelerate production, and ultimately boost your clothing business success!
1. What is an overlock/serger machine and why your clothing business might need one
Navigating the world of garment production involves understanding various specialized tools. One machine frequently discussed is the overlocker, also known as a serger. This article delves into what this machine is, how its unique functions operate, and why incorporating one could significantly benefit a clothing business focused on quality and efficiency.
Understanding its capabilities, from handling tricky fabrics to creating durable, professional finishes, will help determine if this investment aligns with your production needs and quality standards.
Clearing the confusion: overlocker vs. serger
First things first: “overlocker” and “serger” refer to the exact same type of machine. The difference in naming is largely geographical. “Serger” is the term commonly used in North America, while “overlocker” is prevalent in the UK, Australia, and many other parts of the world.
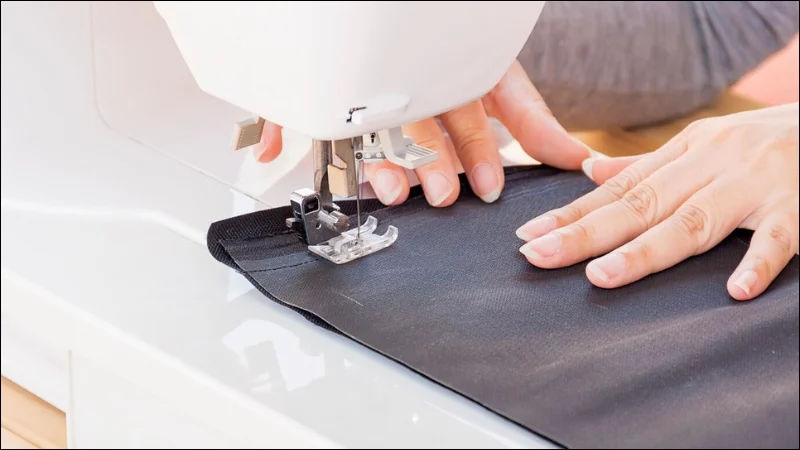
Regardless of the name, this machine is a specialized type of sewing machine designed specifically for finishing fabric edges and constructing seams – often simultaneously. Its primary purpose is distinct from a standard sewing machine.
2. Simultaneous seaming, trimming, and edge finishing
The core function that sets an overlocker/serger apart is its ability to perform three tasks in one pass: stitching a seam, trimming the excess seam allowance (the fabric area between the stitching line and the raw edge) right at the edge using built-in knives/cutters, and encasing the raw fabric edge with thread to prevent fraying.
This machine employs loopers (upper and lower) – distinct mechanisms that form loops of thread – instead of a bobbin found in conventional sewing machines. These loopers are fed by multiple large thread cones, allowing for continuous, high-speed stitching. The interaction between the needles and loopers efficiently creates the characteristic overlock stitch – a formation that wraps around the fabric edge for a clean and secure finish.
2.1 Achieving a professional and durable finish
Why is an overlocked edge so important for a clothing business? The benefits directly impact product quality and perception:
- Prevents fraying: the wrapped stitch securely encases raw fabric edges, stopping them from unraveling during wear and washing. This creates a clean, professional finish inside the garment.
- Enhances brand reputation: neatly finished seams signal higher quality to customers, contributing positively to your brand reputation. Consumers often associate tidy internal construction with better-made garments.
- Creates durable seams: the overlock stitch structure forms strong, yet often flexible, seams that can withstand stress and repeated laundering, increasing the overall durability and lifespan of the clothing.
- Essential for quality garment construction: moving beyond a basic or homemade appearance requires attention to finishing details. Overlocking is a standard step in professional garment construction for achieving retail-ready standards.
2.2 Mastering tricky fabrics like knits
Working with knit fabrics (materials like jersey, interlock, spandex blends common in T-shirts, leggings, and activewear) presents challenges on standard sewing machines due to their inherent stretch. The structure of overlock stitches provides natural elasticity, making the overlocker/serger an ideal tool for these materials.
A key feature for handling knits is the differential feed settings. This mechanism allows adjustment of the speed at which the front set of feed dogs (the mechanisms under the needle plate that move the fabric) pull the fabric compared to the rear set.
By adjusting this feed, you can counteract the tendency of stretchy fabric to become wavy or stretched out during sewing, or conversely, prevent puckering on certain materials. The result is smooth, flat, pucker-free seams. This improved fabric handling also proves beneficial when working with lightweight, sheer, or slippery fabrics that might otherwise shift or gather incorrectly.
3. Overlocker vs. standard sewing machine: complementary tools
It’s crucial to understand that an overlocker/serger and a standard sewing machine serve different, though sometimes overlapping, purposes. A standard sewing machine is the workhorse for diverse garment construction tasks: sewing darts, inserting zippers, topstitching, creating buttonholes, and constructing basic seams using a lockstitch (formed by interlocking a top thread and a bottom bobbin thread).
An overlocker excels at edge finishing, rapidly creating secure seaming (especially on knits where stretch is needed), and producing specialized decorative edges like a narrow rolled hem. Its primary stitch is the overlock stitch. Key mechanical differences include the use of loopers instead of a bobbin and the presence of integrated cutters to trim the fabric edge simultaneously with stitching – a feature absent on standard machines.
Think of them as complementary tools in a workshop. The standard machine handles the primary construction elements, while the overlocker provides professional finishing and excels with specific fabric types and seam requirements. They work best together, rather than one replacing the other. This sewing machine comparison highlights their distinct strengths.
| Feature | Standard Sewing Machine | Overlocker/Serger |
|---|---|---|
| Primary Use | General construction, topstitching, zippers, buttonholes | Edge finishing, seaming (esp. knits), decorative edges |
| Stitch Type | Lockstitch | Overlock stitch |
| Edge Treatment | Requires separate finishing steps | Finishes edge simultaneously |
| Thread System | Needle thread & Bobbin | Multiple needle threads & Loopers |
| Built-in Cutters | No | Yes (trims seam allowance) |
4. Different tools for different finishing tasks
Within the realm of specialized finishing machines, confusion sometimes arises between overlockers and coverstitch machines. Their roles are distinct:
- Overlocker/serger: primarily used for constructing and finishing seams by cutting and enclosing the raw fabric edge. Its main job is preventing fraying on the edge of the fabric. Also used for creating certain edge finishes like a rolled hem.
- Coverstitch machine: specifically designed for hemming garments, especially knits, creating the characteristic two or three parallel lines of stitching on the top and a chain or zig-zag looper stitch on the underside. Also used for applying elastic or binding flat onto the surface of the fabric and for decorative topstitching. This machine works on the surface or folds of the fabric, not primarily on the raw edge itself.
Understanding these different finishing techniques helps select the right tool for specific tasks like sewing the side seams of a T-shirt (overlocker) versus hemming the bottom edge and sleeves of that same T-shirt.
Key mechanical differences
The fundamental mechanical distinction lies in the cutting mechanism:
- Knives: an overlocker/serger possesses built-in knives that trim the fabric edge just before stitching. A coverstitch machine does not have knives; it does not cut the fabric.
- Stitch appearance: the stitch appearance is also different. An overlock stitch wraps threads around the cut edge of the fabric. A coverstitch creates parallel lines of straight stitches on the garment’s right side and interconnected looper threads on the wrong side, providing excellent stretch for hems and attaching trims without enclosing a raw edge in the same way an overlocker does.
Use an overlocker for strong, neatly finished seams and edges. Use a coverstitch machine for flexible, professional-looking hems and surface stitching, particularly on stretch garments.
5. Understanding thread options (stitch types)
Overlockers offer various stitch types, primarily defined by the number of threads used. The most common configurations relevant to clothing production are:
- 3-thread overlock: uses one needle and two loopers. Commonly employed for neatly finishing seam edges on woven fabrics, sewing light seams where strength is not paramount, and creating decorative finishes like narrow rolled hems.
- 4-thread overlock: uses two needles and two loopers. This is a very popular stitch for seaming knit fabrics directly. The second needle adds an additional line of straight stitching (often called a safety stitch) alongside the overlock edge finish, providing greater strength and stretch, making it ideal for construction seams on items like T-shirts, leggings, and sportswear.
While 2-thread (for very fine finishing) and 5-thread (combining a chain stitch and a 3-thread overlock for heavy-duty seams like those on jeans) options exist, the 3-thread and 4-thread stitches cover the vast majority of needs for typical apparel businesses.
5.1 The threading process: demystified
The threading process for an overlocker/serger often has a reputation for being intimidating. This perception stems from managing multiple threads (typically 3 or 4) that must follow specific, sometimes complex, paths through tension discs, guides, and crucially, the upper and lower looper mechanisms.
However, manufacturers provide resources to ease this process. Most machines feature color-coded diagrams directly on the machine body, and the machine manual offers detailed step-by-step instructions. While patience and practice are required initially, threading becomes significantly faster with familiarity.
A widely shared practical tip for changing thread colors is to snip the old threads near the cones, tie the new threads securely to the ends of the old ones (using a small, tight knot), and then carefully pull the new threads through the machine’s pathways by operating the machine slowly by hand or gently pulling from the needle/looper end.
This often avoids the need for a complete rethreading from scratch. For those seeking ultimate convenience, some higher-end models feature air threader technology, which uses puffs of air to automatically guide the threads through the looper paths, simplifying the process considerably.
5.2 Adjusting tension and differential feed
Achieving a perfect overlock stitch requires balancing the tension of each thread. The tension discs (dials usually numbered for each thread path) often need adjustment based on the fabric type, its thickness (e.g., denim vs. satin requires different settings), and the specific thread being used.
There’s no single “correct” setting; fine-tuning is essential. Before sewing on the actual garment, always perform test stitching on scraps of the exact same fabric. Examine the test stitch: threads should meet neatly at the fabric edge without pulling or looping too loosely. Adjust the dials incrementally until the stitch looks balanced.
Similarly, the differential feed setting, which controls how the fabric is fed to prevent stretching or puckering, needs adjustment based on fabric weights and properties. Lighter fabrics might require a higher differential feed setting (faster front feed) to prevent waving, while very stretchy fabrics might need a setting below neutral to control stretching.
Testing on scraps is also crucial for determining the optimal differential feed setting for each specific fabric.
5.3 Is an overlocker a necessary investment for your clothing business?
Deciding whether to invest in an overlocker/serger depends on several factors specific to your business:
- Garment type: if your primary focus is on knitwear (like T-shirts, sweaters, activewear, leggings), an overlocker is practically essential for constructing seams that stretch with the fabric and have a professional finish. For woven garments, while not strictly mandatory for basic construction, an overlocker significantly elevates the internal finish, creating professional, durable seams and hems that prevent fraying and add perceived value.
- Quality standard: for businesses aiming to produce retail-ready garments that compete in the market, the clean finish and seam durability provided by an overlocker are often considered indispensable for meeting customer expectations.
- Production volume: sergers are fast. They seam, trim, and finish in one step, dramatically increasing production efficiency compared to constructing seams and then finishing the edges separately on a standard sewing machine. Higher volume benefits more significantly from this speed.
- Alternatives: combo machines exist that combine overlock and coverstitch functions in one unit. These can save space and initial cost but often require time-consuming conversion between modes and may sometimes compromise slightly on specialized performance or the ease-of-use found in dedicated machines. Assess if the convenience of separate machines outweighs the space/cost savings of a combo unit.
- Scale: for businesses moving into higher volume production, industrial sergers offer significantly greater speed, power, and durability compared to domestic models designed for home use. Evaluate your current and projected production levels.
Ultimately, view the acquisition of an overlocker as a strategic small business investment that can enhance product quality, increase production speed, and improve overall professionalism.
6. Related questions
6.1 What kind of thread should I use in my serger/overlocker?
The standard recommendation is polyester serger thread, typically sold on large cones which are economical for the higher thread consumption of these machines. The weight of the thread should generally correspond to the fabric weight (lighter thread for lighter fabrics).
Using good quality thread specifically designed for sergers helps prevent breakage at high speeds and reduces lint buildup in the machine. Standard sewing machine spools are generally unsuitable as they run out very quickly and may not feed smoothly under the specific tension requirements.
6.2 How often do the cutting knives need changing?
There isn’t a fixed schedule for changing the cutting knives. Frequency depends heavily on how much the machine is used and the types of fabric being cut – thick, dense, or abrasive fabrics will dull the blades faster. Signs that the knives need replacement include the fabric edge appearing ragged or chewed instead of cleanly cut, skipped stitches near the trimmed edge, or the machine sounding strained and making excessive noise during cutting.
When replacement is needed, it’s generally recommended to change both the upper and lower knives together for optimal performance. Refer to your specific machine’s manual for instructions on maintenance and knife replacement.
6.3 Can I do a rolled hem on any overlocker?
Most modern overlockers capable of sewing with 3 or 4 threads can create a rolled hem. This technique produces a very narrow, decorative edge finish often used on light- to medium-weight fabrics, scarves, and formalwear.
Achieving a rolled hem typically involves specific machine setting adjustments: removing or retracting the stitch finger (a small metal prong on the needle plate that helps determine stitch width), setting the cutting width to its narrowest option, significantly increasing the tension on the lower looper thread (to make it pull the fabric edge under), and possibly adjusting the differential feed.
The exact procedure varies between models, making consultation of the machine manual essential.
6.4 What’s the difference between a 3-thread and 4-thread overlock stitch?
The primary difference between these common stitch types lies in the number of needles and threads used. A 3-thread overlock uses one needle and two loopers (upper and lower). This stitch is excellent for neatly finishing raw edges, creating decorative rolled hems, and sewing very light seams, particularly on woven fabrics where stretch isn’t a major factor. A 4-thread overlock utilizes two needles and two loopers.
The addition of the second needle creates an extra line of straight stitching running parallel to the overlocked edge, forming what’s often called a “safety stitch.” This results in a wider, stronger seam with more inherent stretch, making the 4-thread stitch ideal for garment construction, especially on knit fabrics.
Read more:
In summary, overlockers/sergers represent a valuable asset for clothing businesses striving for efficiency and quality. These machines deliver speed, enhanced seam durability, and crucial fabric edge treatment. This results in the professional finish customers increasingly expect, especially when working with challenging materials like knits.
While mastering the threading process involves a learning curve, the significant upgrade in garment quality and production efficiency often justifies the effort. Investing in the right tools and sewing techniques is fundamental to successful garment manufacturing.
For businesses seeking tailored advice on integrating these machines or selecting appropriate equipment, dedicated resources supporting apparel production can provide valuable guidance.


