


Heat Transfer Printing: Basics for Apparel Businesses


Heat Transfer Printing (HTP) is a cornerstone technology in garment customization, offering apparel businesses a flexible and often cost-effective way to apply graphics, logos, and text onto a wide range of textiles. The process involves transferring a design from a carrier material (like paper or film) to the fabric using a heat press.
Why should your apparel business pay attention? HTP excels in handling complex multi-color designs, managing small-to-medium batch orders efficiently, and working with various fabric types. This guide provides a clear overview of the heat transfer printing basics, covering the process, materials, advantages, and limitations to help you make informed decisions for your brand.
1. Understanding the Basics: What Does Heat Transfer Printing Involve?
Heat transfer printing is a versatile apparel decoration technique used to apply graphics, logos, or designs onto various materials. Fundamentally, this process is an indirect printing method. Instead of applying ink directly onto the final surface, a design is first created digitally or through other means and then printed onto a special carrier medium, typically transfer paper or film.
This pre-made design is then placed onto the target surface, known as the substrate (such as fabric, a blank label, or a bag). The transfer occurs when controlled heat and pressure are applied, usually with a heat press machine. This combination causes the ink or graphic layer on the carrier to release and permanently bond to the substrate.
This approach contrasts sharply with direct printing methods like traditional screen printing or hand-painting, where the ink is applied straight onto the garment. Heat transfer printing encompasses various specific techniques, bridging the gap between digital printing capabilities and physical apparel decoration.
2. The Magic Behind the Press: How Heat Transfer Actually Works
The success of heat transfer printing hinges on the precise interplay of three critical factors: Temperature, Time, and Pressure. Think of these as the essential settings on your heat press that orchestrate the transfer.
First, temperature is the catalyst. The heat applied by the press activates the specialized ink or adhesive layer on the transfer medium. This activation process makes the design ready to release from its carrier and bond with the substrate. Different transfer types (like vinyl, sublimation ink, or plastisol) activate at specific temperature ranges.
Next, pressure ensures intimate contact. The force exerted by the heat press pushes the transfer medium firmly against the substrate. This consistent pressure is vital for achieving strong adhesion, ensuring the entire design makes complete contact and minimizing gaps where the transfer might fail. Depending on the transfer type and fabric, pressure helps embed the design into the fibers, contributing to its feel and longevity.
Finally, time dictates the duration of this heat and pressure application. This element is crucial for achieving a complete and durable bond. If the time is too short, the ink activation and adhesion process may be incomplete, leading to poor bonding and potential peeling later. Conversely, applying heat and pressure for too long can damage the transfer itself or even scorch the substrate.
Mastering the correct combination of temperature, time, and pressure for each specific transfer type and substrate is key to achieving a high-quality, durable print that looks professional and lasts well. The goal is to heat the ink sufficiently so its physical properties change, allowing it to soften, flow, and bond with the fabric, ensure it fully adheres under pressure, and do so for just the right amount of time to create a permanent bond without causing damage.
3. Exploring Your Options: Common Types of Heat Transfers for Clothing & Tags
Heat transfer printing isn’t a monolithic technique; rather, it encompasses several distinct types, each with its own process, materials, and ideal applications.
own methodology, advantages, and ideal applications. For apparel businesses, understanding these options is key to making informed decisions. The best choice for your specific needs will depend on factors like the fabric composition (cotton, polyester, blends), the complexity and colors of your design, the desired feel on the garment, required durability, and your anticipated production volume.
Let’s explore the most common types of heat transfer you’ll encounter: Heat Transfer Vinyl (HTV), Sublimation transfers, Direct-to-Film (DTF) transfers, Screen Printed Transfers, and basic Inkjet/Laser transfers. Each offers unique capabilities suitable for different kinds of clothing and tags.
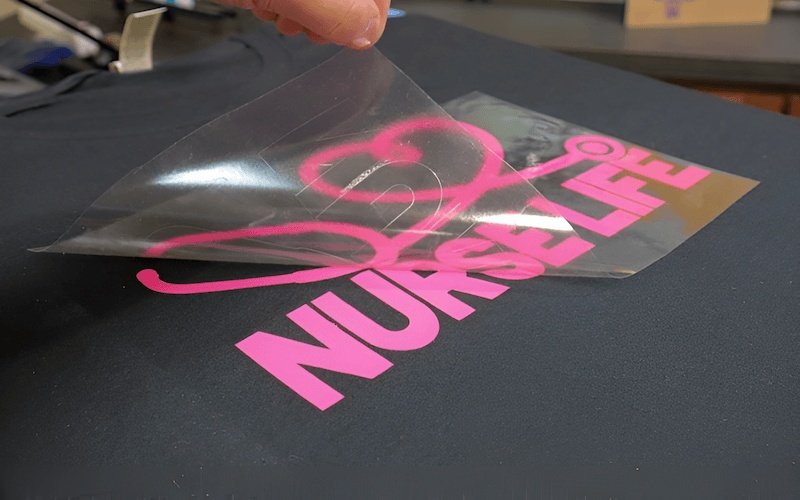
3.1 Heat Transfer Vinyl (HTV): Ideal for Bold Graphics & Text
Heat Transfer Vinyl, commonly known as HTV, is essentially a sheet of polyurethane (PU) material adhered to a clear carrier sheet. The process involves creating your design digitally, then using a vinyl cutter (also called a plotter) to precisely cut the design out of the vinyl sheet.
The next crucial step is weeding – carefully removing the excess vinyl around and inside your cut design, leaving only what you want to transfer. Once weeded, the design (still on its carrier sheet) is placed onto the garment or substrate, and a heat press applies the necessary heat and pressure to bond the vinyl permanently.
- Best Uses: HTV excels at single-color logos, text elements like names and numbers on jerseys, and simpler multi-color graphics where each color can be cut and applied as a separate layer. Its robustness makes it a popular choice for sportswear.
- Common Substrates: Performs well on cotton, polyester, and various blends.
- Characteristics: HTV typically has a noticeable, slightly raised feel on the fabric. One of its strengths is the vast array of available colors and special finishes, including glitter, flock (fuzzy texture), metallic, holographic, and reflective options.
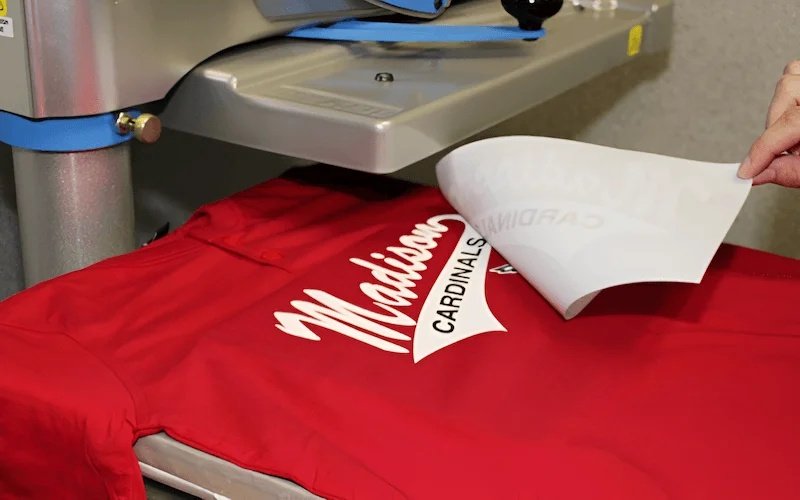
3.2 Sublimation Transfers: Vibrant Prints That Become Part of the Fabric
Sublimation transfers, often referred to as dye sublimation, utilize a unique scientific process. A design is first printed onto special sublimation paper using dedicated sublimation ink. When heat and pressure are applied via a heat press, the magic happens: the solid sublimation ink turns directly into a gas (sublimates), bypassing the liquid phase. This gas then permeates the fibers of polyester fabric. As the fabric cools, the ink solidifies within the polyester fibers themselves.
The result is remarkably vibrant, full-color prints with exceptional detail, capable of achieving true photographic quality. Because the ink becomes part of the fabric rather than sitting on top, the print has virtually no texture or ‘hand’ (feel) and offers excellent durability and resistance to fading or cracking during washing.
However, there’s a critical limitation: pure sublimation only works effectively on white or very light-colored 100% polyester fabrics or items specifically treated with a polyester coating (like some specialized tags, mugs, or phone cases). The process relies on the polyester fibers opening up to receive the ink gas; it does not bond with natural fibers like untreated cotton.
Best Uses: Ideal for all-over prints on apparel, intricate photographic designs, performance wear (which is often polyester), and creating full-color polyester tags or labels where a smooth feel is desired.
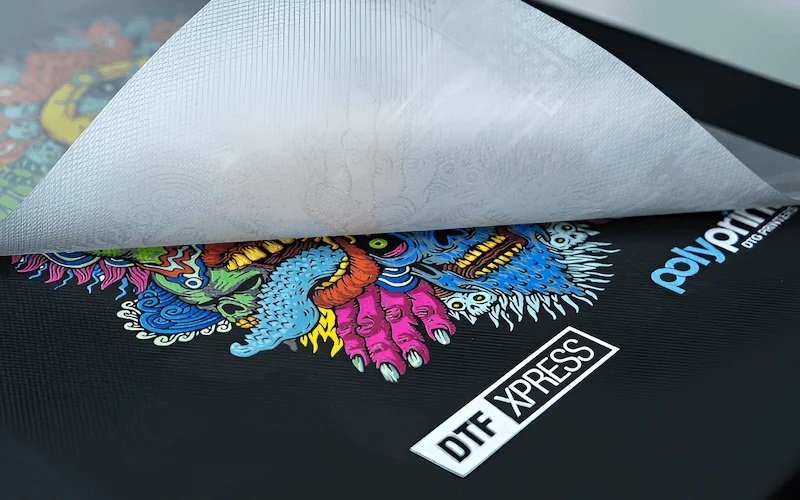
3.3 Direct-to-Film (DTF) Transfers: Versatility Across Fabrics
Direct-to-Film, or DTF, is a rapidly growing heat transfer technology known for its flexibility. The process starts by printing a design using specialized aqueous DTF ink onto a clear transfer film. DTF printers typically use a CMYK color setup, crucially adding a layer of white ink underneath the color layer.
While the ink is still wet on the film, a powdered adhesive is sprinkled over the print, sticking only to the inked areas. This adhesive powder is then cured (melted slightly) using heat, creating a ready-to-press transfer. The film is then placed on the garment, and a heat press bonds the ink and adhesive layer to the fabric. Finally, the transfer film is peeled away.
Key Advantages:
- Fabric Versatility: Works exceptionally well on a wide range of materials, including cotton, polyester, various blends, nylon, and even treated leather, in both light and dark fabrics (thanks to the white ink underbase).
- No Weeding: Unlike HTV, intricate designs don’t require manual weeding, saving significant labor time.
- Detail & Color: Handles fine details, gradients, and full-color photographic images effectively.
- Performance: Offers good stretch and rebound, along with impressive durability and washability.
- Feel: Generally provides a softer feel than traditional plastisol transfers or thicker HTV.
Best Uses: Excellent for complex, multi-color designs, logos with fine lines or gradients, photographic prints, and applying graphics to a wide variety of garment types and colors. DTF is often chosen as an alternative to complex multi-layer HTV jobs or when sublimation isn’t viable due to fabric type.
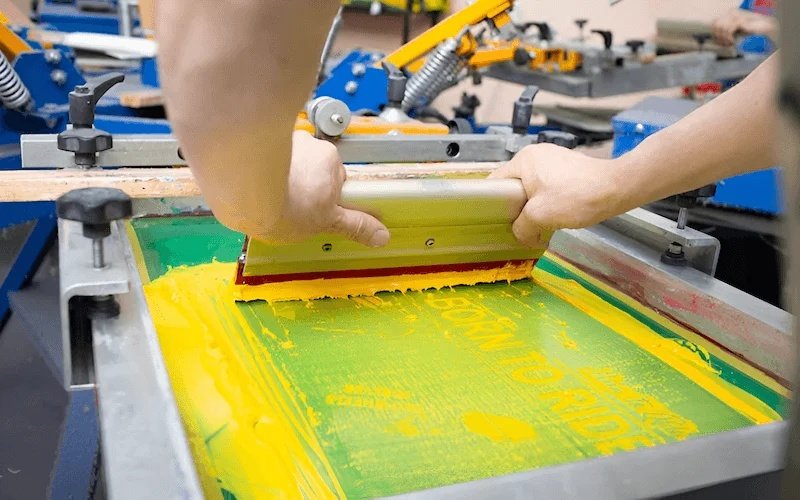
3.4 Screen Printed Plastisol Transfers: Screen Print Quality, Transfer Convenience
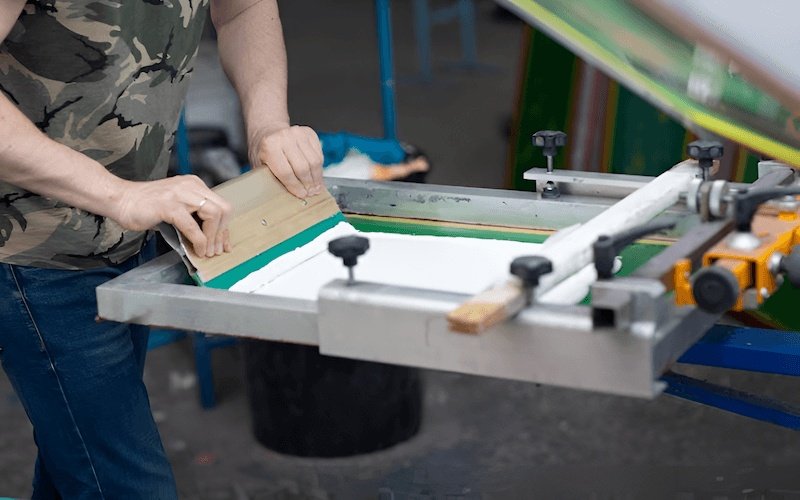
Screen printed transfers offer a hybrid approach, combining the ink system of traditional screen printing with the application ease of heat transfer. In this method, the design is screen printed using plastisol ink – the same standard ink used for direct screen printing – onto a special release paper or film carrier.
Typically, each color in the design is printed as a separate layer and partially cured (gelled). Businesses often order these pre-made transfers from specialized suppliers. When ready to apply, the transfer is simply placed on the garment and applied using a heat press.
Best Uses: Ideal for achieving the look, feel, and durability associated with direct screen printing, but with the flexibility to apply the design on demand. Often cost-effective for larger runs (e.g., dozens or hundreds) of the same design that will be applied over time or to various garments. Very popular for brand logos, graphics requiring specific Pantone color matches, and designs where the classic screen print feel is desired.
Common Substrates: Works effectively on cotton, polyester blends, and other fabrics compatible with standard plastisol ink.
3.5 Inkjet/Laser Transfers: Accessible DIY & Prototyping
This category involves using standard desktop inkjet or laser printers to print a design onto specially coated transfer paper. Once printed, the paper is trimmed, placed onto the garment, and heat is applied to transfer the image. While manufacturers often suggest a home iron can be used for DIY projects, achieving consistent results requires caution; a heat press is strongly recommended for better quality and durability.
Key Considerations: There’s a significant difference between transfer papers designed for light fabrics and those for dark fabrics. Dark fabric papers usually have an opaque white background layer, which can make the transfer thicker and more noticeable around the edges.
The durability, washability, and feel of these transfers can vary widely depending on the quality of the transfer paper and the precision of the application (heat, pressure, time). Generally, they are considered less durable than professional methods like HTV, DTF, Sublimation, or Screen Printed Transfers.
Best Uses: Best suited for small-scale home crafting, personalized one-off items, creating quick visual prototypes or concept samples where professional longevity isn’t the primary concern. For businesses, their main value lies in low-cost prototyping rather than production runs.
4. Gearing Up: Essential Equipment and Materials for Heat Transfer Printing
Achieving professional-quality heat transfer results consistently requires more than just understanding the process; having the right equipment and materials is fundamental to both quality and operational efficiency. Success in heat transfer printing relies on a combination of core machinery, design resources, specific consumables tailored to your chosen method, and essential accessories.
The main categories you’ll need to consider include the cornerstone heat press machine, design tools like a computer and design software, specialized tools for creating the transfers themselves (like a printer or vinyl cutter with appropriate ink or media), the transfer paper or film acting as the medium, helpful accessories like Teflon sheets, and of course, the blank substrates you intend to print on.
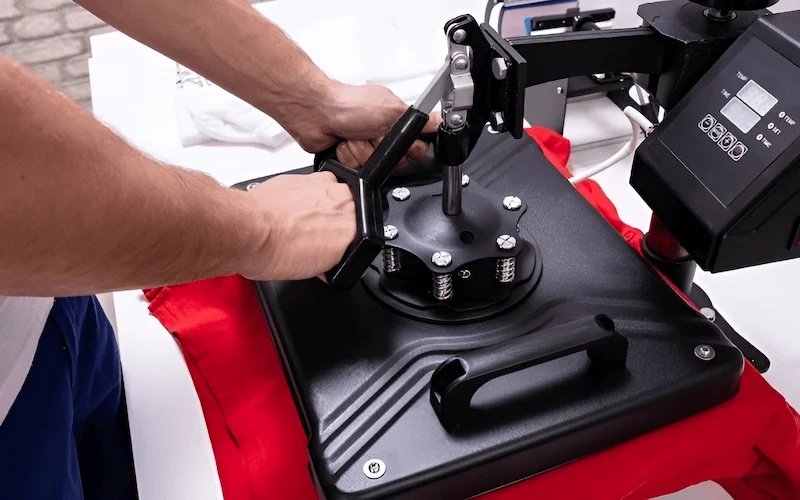
4.1 The Heat Press Machine: Your Most Crucial Investment
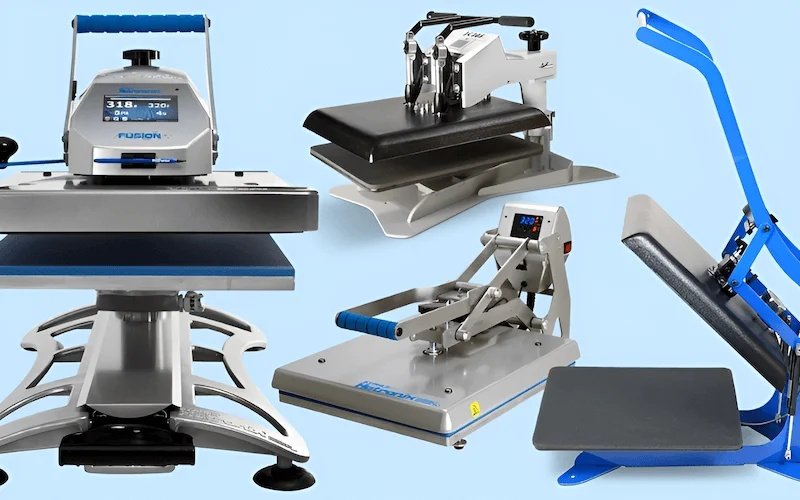
The heat press is arguably the single most important piece of equipment in any serious heat transfer setup. Unlike a household iron, a dedicated heat press machine provides the uniform consistent temperature across its heating element (platen) and the precisely controlled, even pressure settings required for durable, professional-looking transfers. Investing in a quality press is fundamental. Common types include:
Clamshell press: Features a top platen that hinges up like a clamshell. These are often more compact and budget-friendly, making them popular for beginners or businesses with limited space. Simple to operate.
Swing-away press: The top platen pivots horizontally away from the lower platen. This design provides completely unobstructed access to the lower platen for easier garment layout and positioning, especially useful for thicker items. Some users also find the heat element being further away during layout enhances safety.
Draw press: Combines features of the others; the lower platen slides out like a drawer, offering easy layout access similar to a swing-away, but often within a slightly smaller footprint.
When selecting a heat press, key considerations are:
- Platen size: Choose a size adequate for the largest transfers and garments you anticipate working with regularly. Common sizes range from 9″x12″ up to 16″x20″ or larger.
- Quality: Look for quality construction that ensures even heat distribution across the platen (no cold spots), accurate temperature control (digital displays are standard), and consistent, adjustable pressure. Reliability and durability are crucial for business use.
- Budget: Presses range from entry-level models suitable for light use to heavy-duty industrial machines. Balance cost with the features, quality, and volume capacity you need.
4.2 Design Tools: Computer & Graphic Software
Nearly all heat transfer processes begin with a digital design. Therefore, a reliable computer is essential for creating, editing, storing, and managing your artwork. Alongside the hardware, appropriate graphic design software is necessary for design preparation.
Vector Graphics Software: Programs like Adobe Illustrator, CorelDRAW, or Affinity Designer work with mathematical paths to create images. Vector graphics are ideal for logos, text, and illustrations because they can be scaled infinitely larger or smaller without losing sharpness or becoming pixelated. File formats like AI, EPS, and SVG are common.
Raster Graphics Software: Programs like Adobe Photoshop or GIMP work with pixels. These are best suited for photographic images or complex textures. Ensure your image resolution is high enough (e.g., 300 DPI) at the intended print size. Common file formats include PNG (especially for transparency), JPG, and TIFF.
Understanding basic concepts like resolution and color modes (CMYK is often preferred for print workflows, while RGB is screen-based) is important for achieving accurate print results. The software is where you finalize sizing and, crucially for many transfer types, mirror the image before printing.
4.3 Transfer Creation: Printers, Inks, and Cutters
The specific equipment needed to produce the actual transfer depends entirely on the transfer method(s) you plan to use. There isn’t a one-size-fits-all solution:
- For Sublimation: You need a dedicated sublimation printer. While some standard inkjet printers can be converted, using a printer designed for sublimation (like those from Sawgrass or specific Epson models) loaded with special sublimation inks is generally recommended for optimal results. Standard inkjet ink will not work for sublimation.
- For Heat Transfer Vinyl (HTV): The primary tool is a vinyl cutter or plotter. This machine precisely cuts your design from rolls or sheets of HTV material. No specialized printer or ink is required unless you are using specific “printable HTV” media, which would then typically require an inkjet printer with solvent or eco-solvent inks.
- For Direct-to-Film (DTF): This requires a specialized DTF printer designed to handle DTF inks (including white ink for dark garments) and print onto the specific film. Additionally, you need equipment for applying and curing the adhesive powder (often integrated or separate shaker/dryer units).
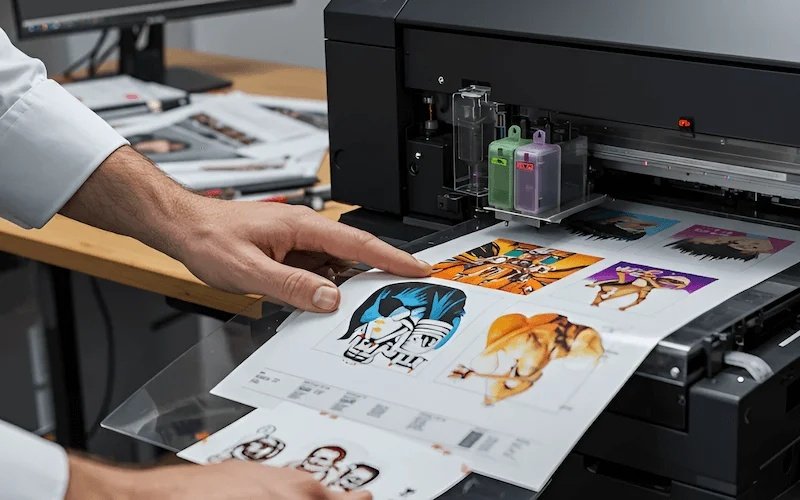
- For Inkjet/Laser Transfers: A standard desktop inkjet printer (using pigment ink often yields better washability than dye-based) or laser printer (using standard toner) is sufficient, along with the correct type of transfer paper for your printer type and fabric color.
- For Screen Printed Transfers: Creating these in-house necessitates a full screen printing setup (screens, emulsion, exposure unit, inks, squeegees, dryer). Many businesses choose to outsource the production of these transfers due to the equipment and skill involved.
4.4 The Medium: Transfer Paper or Film
This is the crucial carrier sheet that holds your design after printing or cutting and before it’s applied to the substrate. Using the correct medium for your chosen process is non-negotiable; they are not interchangeable.
- Sublimation paper: Specifically designed to release sublimation ink effectively as a gas under heat.
- DTF film: A specialized PET film engineered to accept DTF inks and the adhesive powder, providing a clean release after pressing.
- Release paper (or film): Used for screen printed transfers, designed to hold plastisol ink until heated application.
- Inkjet transfer paper or Laser transfer paper: These come in many varieties, crucially different types for light fabrics versus dark fabrics. Quality varies significantly, affecting feel, durability, and ease of use.
- HTV: Comes pre-applied to its own clear plastic carrier sheet, which holds the cut vinyl pieces in place during application and is peeled off afterward.
The quality of the transfer paper or film impacts not only the final print quality but also how cleanly the design releases from the carrier during peeling.
4.5 Essential Accessories: Teflon Sheets, Heat Pads, Heat Tape
Beyond the main equipment, several small accessories play vital roles in achieving consistent, high-quality results and protecting your investment:
Teflon Sheet (or Heat Resistant Sheeting / Parchment Paper): A reusable sheet placed between the hot upper platen of the heat press and the transfer/garment.
- Purpose: Protects the platen from any ink or adhesive residue, prevents direct contact that could cause scorching on sensitive fabrics, and helps ensure smooth, even heat distribution. Some transfer types require a cover sheet, while others don’t. Always check instructions.
Heat Pad (or Silicone Pad): This is the resilient pad usually fitted to the lower platen of the heat press.
- Purpose: Provides a firm yet slightly forgiving surface, ensuring even pressure across the garment. Additional, smaller pads or specialized “heat pillows” can be inserted inside garments to lift the printing area over seams, zippers, or buttons, ensuring even pressure on uneven surfaces.
Heat Tape (Heat Resistant Tape): A special adhesive tape that can withstand high temperatures.
- Purpose: Used to securely tape the edges of the transfer paper or film to the substrate before pressing. This prevents the transfer from shifting or sliding during the process, which is crucial for accurate alignment, especially with methods like sublimation where any movement can cause ghosting (a faint double image).
4.6 Your Canvas: Suitable Substrates (Garments, Labels, Bags)
The substrate is simply the item you are printing onto. For apparel businesses, common substrates include:
- Garments: T-shirts, hoodies, sweatshirts, polos, tank tops, sportswear.
- Labels: Custom brand labels, care instruction labels (often polyester for sublimation or suitable for DTF/HTV).
- Tags: Hang tags (if suitable material), woven tags (sometimes pre-treated for printability).
- Bags: Tote bags, drawstring bags, cosmetic pouches.
Material compatibility is paramount:
- Cotton & Cotton Blends: Work well with HTV, DTF, Screen Printed Transfers, and Inkjet/Laser transfers. Not suitable for direct sublimation.
- Polyester: The essential requirement for Sublimation. Also excellent for HTV and DTF. Performance wear is often polyester.
- Other Materials: Depending on the transfer type, you might also print on nylon (DTF, some HTVs), canvas, or even specially coated hard goods like mugs or metal plates (primarily with Sublimation if they have a polyester coating).
Always ensure the chosen transfer type is compatible with the substrate material and follow recommended application settings for that specific combination.
5. From Design to Product: The Heat Transfer Printing Process Step-by-Step
While specific techniques vary, the core heat transfer printing process follows a general sequence. Understanding these fundamental stages helps ensure consistency and quality, regardless of the specific transfer type you’re using. Here’s a general step-by-step guide, highlighting key considerations along the way:
5.1 Step 1: Finalize and Prepare Your Design
Before anything else, ensure your digital design file is ready. This involves checking that the design is set to the correct physical size for the final print and has sufficient resolution (e.g., 300 DPI for raster images) to avoid pixelation. Crucially: For many transfer types (including most HTV, sublimation, and inkjet/laser papers), you must mirror the image horizontally within your design preparation software before printing.
This ensures the design reads correctly when transferred onto the substrate. Always double-check if mirroring is required for your specific transfer paper or film, as some workflows (like certain DTF setups) might handle this automatically or require the image not to be mirrored.
5.2 Step 2: Print (or Cut) Your Transfer
Using the appropriate equipment for your chosen method, create the physical transfer. This means: Loading the correct transfer paper or film into your printer and using the recommended print settings (e.g., media type, quality settings, correct ink profile). Or, for HTV, loading the vinyl into your cutter and sending the mirrored design file to be cut using the appropriate blade depth and force settings. Remember to weed the excess vinyl after cutting.
5.3 Step 3: Get Your Substrate Ready
Prepare the item you’ll be printing on. Ensure the substrate (e.g., garment, label, bag) is clean and free from lint or debris – a quick pass with a lint roller is often helpful. Next, perform pre-pressing. Place the item flat on the lower platen of your heat press and press it for about 3-5 seconds using the settings intended for the transfer (or slightly lower temperature). This removes any residual moisture and wrinkles from the fabric, creating a perfectly flat, dry surface which is essential for optimal transfer adhesion.
5.4 Step 4: Configure Your Heat Press Settings
Set the correct Time, Temperature, and Pressure on your heat press. This step is critical. The required heat press settings vary significantly depending on:
- The specific transfer type being used (e.g., HTV brand/type, sublimation paper, DTF film, screen printed transfer).
- The substrate material (cotton, polyester, blend, etc.).
Always consult and strictly follow the manufacturer’s instructions provided with the specific transfer product you are using. Using incorrect settings is a primary cause of failed transfers.
5.5 Step 5: Position the Transfer Accurately
Carefully place the printed or cut transfer onto the pre-pressed substrate in the desired location. For most transfers (transfer paper or film), the design side should face down against the fabric. Take care with alignment to ensure the graphic is straight and centered as intended. For precise placement or methods prone to shifting (like sublimation), use small pieces of heat tape to secure the corners of the transfer paper to the substrate.
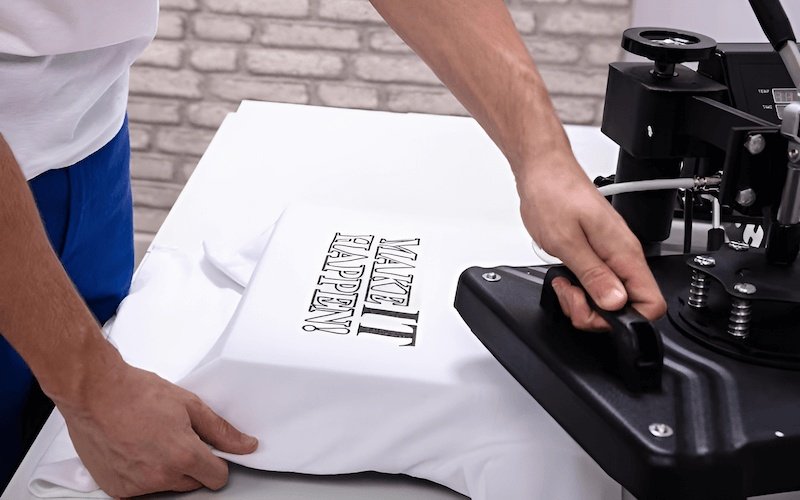
5.6 Step 6: Apply Heat and Pressure
Cover the transfer and substrate area with a protective sheet (like a Teflon sheet) if recommended for your transfer type. Carefully close the heat press, ensuring the handle locks down properly to engage the set pressure. The machine’s timer will begin counting down the predetermined application time. Avoid moving the garment or the press during this cycle.
5.7 Step 7: Peel the Carrier
Once the timer indicates the cycle is complete, carefully open the heat press. Now comes another crucial step: peeling away the carrier sheet (transfer paper or film). Follow the manufacturer’s instructions precisely regarding peel temperature.
- Hot Peel: Requires removing the carrier immediately after opening the press while everything is still very hot.
- Warm Peel: Requires waiting a few seconds (typically 5-15) before peeling.
- Cold Peel: Requires waiting until the transfer and garment have cooled down completely (sometimes 30 seconds to several minutes) before removing the carrier.
Peeling at the wrong temperature is a common mistake that can ruin the transfer, causing incomplete adhesion, cracking, or a poor finish. Always verify the correct peel method for your specific transfer product.
6. Weighing the Benefits: Why Heat Transfer Printing is Popular
Heat transfer printing methods have gained significant traction, especially among startups and established apparel businesses, for several compelling reasons. Understanding these advantages helps clarify why it might be a suitable decoration technique for your brand:
- Versatility: This is a major strength. Various heat transfer types allow printing on a wide array of substrates, including natural fibers like cotton, synthetics like polyester, numerous blends, and even some specially coated hard goods. Furthermore, methods like DTF and sublimation excel at reproducing intricate designs, smooth gradients, and full-color photographic images with relative ease compared to the setup needed for screen printing similar complexity.
- Cost-Effectiveness for Smaller Runs: Heat transfer generally involves lower initial setup costs compared to direct screen printing or embroidery machines. This makes it highly accessible for businesses launching or operating on smaller budgets. It’s particularly economical for small orders, one-offs, and personalized items, as you typically pay per transfer created, avoiding the screen preparation costs inherent in screen printing which are only economical at higher volumes.
- Efficiency and Turnaround: Once the design is prepared and the equipment is set up, the actual application process using a heat press is relatively fast per item. This can lead to quick turnaround times, especially for on-demand production or fulfilling smaller, urgent orders.
- Customization and Personalization: The technology is perfectly suited for customization options. Printing unique names, numbers, individual graphics, or tailored designs on demand is straightforward, making it ideal for personalized apparel, team wear, and small-batch custom runs without significant overhead per variation.
- Full-Color Capability: Achieving multi-color and photorealistic prints is often simpler and requires less complex setup than traditional methods like multi-screen screen printing. Techniques like sublimation and DTF inherently support full-color printing from a digital file.
7. Knowing the Limitations: Potential Challenges and Considerations
While heat transfer printing offers many benefits, it’s important to be aware of potential challenges and limitations to make informed decisions and troubleshoot effectively. Understanding these aspects contributes to managing expectations and ensuring quality:
Durability/Washability: This is perhaps the most variable factor. While high-quality transfers (like well-applied sublimation, DTF, or premium HTV) offer good durability, the overall longevity can vary based on the transfer type, the quality of materials used, and critically, the accuracy of the application (heat, pressure, time). Improperly applied transfers are prone to cracking, peeling, or premature fading after repeated washing. Following correct wash care instructions (e.g., inside out, cold water, gentle cycle, low heat/hang dry) is vital to maximize lifespan. Even good transfers may not always match the absolute longevity of traditional direct screen printing or embroidery under harsh conditions.
Print Feel (“Hand”): Some heat transfer methods result in a noticeable layer on the surface of the fabric. This “hand” can affect the garment’s drape and breathability. Older inkjet/laser transfers, thick plastisol transfers, and some types of HTV can feel heavier or stiffer. However, technologies are constantly improving; sublimation has virtually no feel as the ink dyes the fiber, while modern DTF and thinner HTV options offer a significantly softer hand than previous generations.
Substrate Limitations: Certain methods have specific fabric requirements. The most notable is sublimation, which requires high polyester content for vibrancy and permanence. While methods like DTF are very versatile, results can still vary slightly between different fabric types and colors. Some transfers work better on light fabrics versus dark fabrics without a white underbase.
Potential for Errors: Achieving consistent, professional results requires careful attention to detail. Incorrect heat press settings (heat, pressure, time), improper peeling technique, poor alignment, or inadequate pre-pressing can lead to issues like poor adhesion, scorching the garment, ghosting, or uneven application. There’s a learning curve involved in mastering the process for different transfer types and substrates.
Troubleshooting Tips:
- Poor adhesion: Double-check pressure settings (often needs to be firm), verify correct temperature and time according to manufacturer specs, ensure thorough pre-pressing to remove moisture, and check for obstructions like thick seams or buttons that might cause uneven pressure.
- Cracking/Peeling: Often due to insufficient heat, time, or pressure during application (under-curing). Can also happen if the garment is stretched excessively soon after pressing. Using quality materials is key.
- Fading: Could be low-quality inks/transfer media, insufficient cure, or improper washing/drying (too high heat). UV exposure can also cause fading over time.
- Color Accuracy: Ensure monitor is calibrated, use correct color profiles (e.g., specific ICC profiles for sublimation inks/paper), print test swatches on actual substrate/transfer material before production runs.
Understanding these potential drawbacks allows businesses to select the right methods, invest in quality materials and equipment, and refine their processes to mitigate issues, ultimately building trustworthiness through consistent product quality.
8. Heat Transfer vs. The Alternatives: A Quick Comparison
Choosing the right decoration method depends heavily on your specific needs regarding design complexity, order volume, fabric type, desired feel, and budget. Here’s a brief comparison of heat transfer (as a broad category) against other common apparel decoration techniques:
Screen Printing:
- Best For: High volume runs (hundreds or thousands) of the same design due to setup costs being amortized. Simple, bold graphics with a limited number of solid colors. Achieving specific Pantone color matches.
- Key Differentiators: Excellent durability, especially for spot color designs. Can produce very vibrant colors. Generally has a thicker ink feel (plastisol). Higher setup cost per design (screens, films). Less economical for small orders or high-color counts. Primarily suited for cotton and blends, though specialized inks exist for polyester.
Direct-to-Garment (DTG):
- Best For: Highly detailed, full-color photographic images or intricate graphics directly onto cotton garments (especially light colors, though white ink enables dark garment printing). Achieving a very soft feel, as the ink soaks into the fibers. Small orders or one-offs requiring complex prints.
- Key Differentiators: Prints directly onto the garment like an inkjet printer. Requires pre-treatment for dark garments. Relatively slower print time per item compared to applying a transfer. Equipment investment can be significant. Primarily designed for cotton or high-cotton blends; less effective on polyester. Cost per item can be higher than transfers or screen printing (at volume). Excellent detail reproduction.
Embroidery:
- Best For: Creating a textured, high-perceived-value look often used for logos on polos, hats, jackets. Designs where extreme durability is paramount.
- Key Differentiators: Uses thread stitched into the fabric. Very durable. Pricing based on stitch count, not number of colors. Not suitable for photographic detail or large solid areas of color. Can pucker on very thin fabrics. Setup involves digitizing the design (converting artwork to stitches).
Simple Comparison Table:
| Feature | Heat Transfer (General) | Screen Printing | Direct-to-Garment (DTG) | Embroidery |
|---|---|---|---|---|
| Best for Volume | Low to Medium | High | Low | Low to High (stitch count) |
| Best for Detail | Good to Excellent (DTF, Sublimation) | Fair (spot colors best) | Excellent | Fair (limited by thread) |
| Cost/Item Low Vol | Low to Medium | High | Medium to High | Medium (depends on size) |
| Durability | Fair to Excellent (method dependent) | Very Good to Excellent | Good (with proper care) | Excellent |
| Print Feel | Varies (None to Slight Layer) | Slight to Medium Layer (Ink) | Very Soft (Inked Fibers) | Textured (Stitches) |
| Fabric Suitability | Very Wide (Cotton, Poly, Blends, etc.) | Primarily Cotton/Blends | Primarily Cotton/Blends | Most Fabrics |
This table provides a quick overview; the best choice often involves considering the specific type of heat transfer (e.g., DTF vs. HTV) against the other methods based on the project’s unique requirements.
9. Related questions
Here are answers to some frequently asked questions about heat transfer printing:
9.1 How long do heat transfer prints typically last?
The durability of a heat transfer print varies significantly based on several factors. Key among these are the transfer type used (e.g., high-quality sublimation on polyester is extremely durable, quality HTV and DTF also offer good longevity) and the precision of the application process – correct heat, pressure, and time are essential for a strong bond.
Following proper wash instructions dramatically impacts lifespan: turning the garment inside out, washing in cold water on a gentle cycle, and tumble drying on low heat or hanging to dry are generally recommended. When applied correctly using professional materials, many heat transfers can last for dozens of washes, often enduring for the reasonable life of the garment itself.
However, low-quality transfers (often DIY types) or prints applied with incorrect settings are much more susceptible to cracking, peeling, or fading relatively quickly.
9.2 What’s the best type of heat transfer for cotton t-shirts?
There isn’t one single “best” heat transfer method for cotton, as the ideal choice depends heavily on the specific design and desired outcome. For basic text, numbers, or bold single-color logos on cotton, Heat Transfer Vinyl (HTV) is a very popular and effective option.
For complex, multi-color graphics, detailed illustrations, or photographic images on any color of cotton (light or dark), Direct-to-Film (DTF) transfers are an excellent, versatile choice offering good durability and feel. Screen Printed Transfers are also great for cotton if you want to replicate the look and feel of traditional screen printing, especially if ordering the same design in larger quantities to apply later.
Remember, Sublimation does not work directly on untreated cotton. While Inkjet or Laser transfers can be used on cotton, they are often less durable and might be better suited for promotional items or prototypes rather than retail apparel.
9.3 Can I use a regular iron for heat transfer printing?
While some DIY-grade inkjet or laser transfer papers found in craft stores might claim usability with a standard household iron, it is strongly discouraged for any professional application or if durability is a concern, especially for a business. The fundamental problem is inconsistency: irons lack uniform temperature distribution across their soleplate (often having hot and cool spots) and cannot provide the consistent, measurable pressure that a heat press delivers evenly across the entire transfer area.
This lack of control frequently leads to poor adhesion, uneven transfer results, and prints that peel, crack, or fade very quickly after washing. Investing in even an entry-level heat press provides vastly superior results and is considered essential equipment for quality heat transfer printing.
9.4 What are the basic startup costs for heat transfer printing?
Startup costs for setting up a heat transfer printing operation can vary dramatically depending on the specific transfer methods you want to offer and the quality/scale of the equipment you choose. The most significant mandatory investment is usually the Heat Press Machine, which can range from around $300 for a basic entry-level model to several thousand dollars for professional-grade, large-format presses. Beyond the press, costs depend on your chosen path:
Computer & Design Software: You likely need a computer; design software costs vary (some free options exist, professional software is often subscription-based).
Transfer Creation:
- HTV: Requires a Vinyl Cutter (plotter), prices range from a few hundred to several thousand dollars.
- Sublimation: Requires a dedicated Sublimation Printer and inks (investment often starts around $500-$1000+).
- DTF: Requires a specialized DTF Printer, powder shaker/dryer unit – this currently represents a higher initial investment, often several thousand dollars.
- Inkjet/Laser: Uses standard printers, relatively low cost if you already own one.
- Screen Printed Transfers: Often outsourced, avoiding equipment costs but involving per-transfer purchase cost.
Consumables: Ongoing costs include ink, transfer paper/film/vinyl, protective sheets, tape, and blank garments/substrates.
A basic setup focusing only on HTV using an entry-level cutter and press might have the lowest barrier to entry, potentially starting under $1000, while a versatile setup including DTF or sublimation capabilities will require a significantly larger initial investment.
Read more:
Heat transfer printing stands out as a remarkably versatile and accessible apparel decoration technique, particularly well-suited for small businesses, startups, and brands focused on personalization. Its core strength lies in enabling cost-effective customization, handling small runs efficiently, and producing items with intricate, multi-color designs, including branded labels and tags.
With a diverse range of methods available – from the bold graphics of HTV, the fabric-fusing vibrancy of Sublimation, to the broad fabric type compatibility of DTF – businesses can select options that align with their aesthetic goals, product range (garments, accessories), and budget.
However, achieving professional, durable results hinges on selecting the appropriate method for the job and mastering the application process. Correct settings, quality materials, and attention to detail are paramount. If your brand values flexibility, needs to produce customized items or smaller batches, or wants to incorporate detailed graphics onto various fabric types, heat transfer printing offers compelling advantages.
Should you require tailored guidance on choosing the best label material, optimizing the process for specific garments, or navigating the various technology options to ensure they meet your quality standards. Contact Packlove today to discuss your specific HTP needs.


