


How to Address Poly Mailers for USPS, UPS; FedEx (Correctly)


Shipping items via poly mailers is a convenient and cost-effective method, but improper addressing can lead to significant headaches. This guide provides clear, actionable steps and best practices to avoid common addressing pitfalls like smudged ink. By following these simple guidelines, you can build confidence in your shipping process, save time and protect your bottom line. Click to see!
1. How to Correctly Address a Poly Mailer for USPS
1.1 Domestic Shipping Guidelines
Before addressing your poly mailer, understand USPS regulations regarding size, weight and thickness. USPS provides detailed guidelines on their website outlining size and weight limits for each mail class. Exceeding these limits will result in higher postage or rejection of your package.
For both handwritten and printed addresses, ensure complete clarity and visibility. The delivery address should be prominently displayed on the largest surface of the poly mailer. The return address should be placed in the upper left corner of the package. Using a contrasting color ink on a lighter-colored poly mailer enhances readability.
1.2 Using Shipping Labels
Printing shipping labels directly from your computer offers numerous benefits including clear, professional-looking addresses and automatic tracking number generation. You can do these steps:
- Step 1: Use online postage services like USPS Click-N-Ship and then integrate them with your e-commerce platform if possible. This allows you to generate labels with a tracking number, calculate postage, and print directly from your computer.
- Step 2: Select the appropriate label size based on your poly mailer dimensions. Standard shipping label sizes are widely available.
- Step 3: Inkjet, laser and thermal printers are all compatible but thermal printers offer superior results for poly mailers due to the use of specialized heat-sensitive labels.
- Step 4: Ensure your printer settings are correct for the chosen paper type.
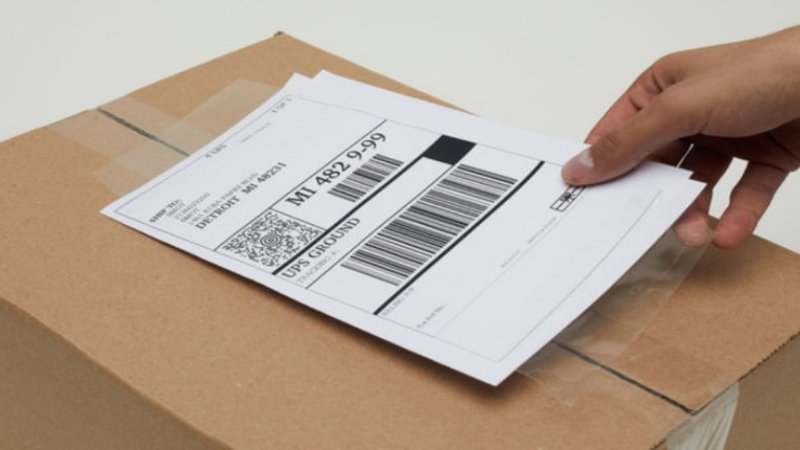
- Step 5: Carefully peel off the backing and adhere the label firmly to the poly mailer, avoiding wrinkles or air bubbles. Press down firmly on the label, especially around the edges.
- Step 6: For added security, consider using a label protector sleeve or clear packing tape over the label to prevent damage during transit.
1.3 Handwriting Addresses
If you must handwrite the address, you can use a permanent marker with waterproof and smudge-proof ink specifically designed for use on plastic. Avoid ballpoint pens or felt-tip markers, as the ink may smudge or not adhere properly. Recommended brands often include Sharpie permanent markers or similar. Tips for legible handwriting:
- Use block letters: Avoid cursive handwriting, as it is less legible.
- Print clearly: Ensure your letters are distinct and well-formed.
- Double-check your work: Verify the accuracy of all information before mailing the package.
- Use contrasting ink: Choose a marker with dark, vibrant ink that stands out against the poly mailer color.

2. Addressing Poly Mailers for Other Couriers
While the fundamental principles of clear and accurate addressing remain consistent across all courier services, UPS and FedEx have their own specific guidelines that must be followed. These guidelines may differ slightly from USPS regulations, particularly regarding address formatting and label requirements. It’s crucial to consult the official websites for the most up-to-date information:
Address Formatting: Both UPS and FedEx generally require a similar address format to USPS, emphasizing clarity and completeness. However, subtle differences may exist, such as preferred abbreviations or the order of address components. Always refer to the official courier’s guidelines for precise formatting instructions.
| Feature | UPS | FedEx | Notes |
| Label Size & Placement | Specific size requirements (check online tools); Affix securely to largest surface area of package; Avoid wrinkles/obstructions. | Specific size requirements (check online tools); Affix securely to largest surface area of package; Avoid wrinkles/obstructions. | Use online shipping tools to generate correctly sized labels. |
| Label Generation | Use UPS online shipping tools. | Use FedEx online shipping tools. | Highly recommended to avoid manual errors and ensure compliance. |
| International Shipping | Requires customs forms & potentially commercial invoices. | Requires customs forms & potentially commercial invoices. | Correct completion and affixing of all paperwork is crucial. Failure to comply leads to delays or return of shipment. |
| Shipping Accounts | Recommended for frequent shippers; access to online tools, shipping history, tracking, and discounted rates. | Recommended for frequent shippers; access to online tools, shipping history, tracking, and discounted rates. | Streamlines shipping process; automated label generation reduces errors. |
3. Addressing Poly Mailers for International Shipping
International shipping requires meticulous attention to detail, especially regarding customs declarations. Incorrect or incomplete customs forms can lead to significant delays, penalties, and even the return of your shipment. The specific forms required vary based on the value and type of goods, as well as the destination country. Two commonly used forms are the CN22 and the commercial invoice.
- CN22 (Customs Declaration for Non-Commercial Shipments): This form is typically used for shipments with a value under a certain threshold. This threshold varies by country; check with the destination country’s postal service for details.
- Commercial Invoice (for Commercial Shipments): For shipments with a higher value or commercial nature, a commercial invoice is typically required. This detailed document includes more information than the CN22 including detailed item descriptions, unit price, total value, terms of sale and payment information.

4. Related Questions
4.1 Can you use a regular pen on a poly mailer?
No, you should avoid regular pens on poly mailers. The ink from regular pens including gel pens is prone to smudging, fading and becoming illegible, compromising delivery. Use a permanent marker for durability and to ensure the address is clearly scannable by shipping carriers.
4.2 Where do I put the return address on a poly mailer?
Place the return address, your sender’s address, in the top left corner of the poly mailer. This is standard practice and ensures the package can be returned to you if undeliverable. A clear return address is crucial for successful delivery and handling of any issues.
4.3 What happens if my poly mailer is addressed incorrectly?
Incorrectly addressing a poly mailer can lead to delays, the package being returned to the sender or it becoming lost. You may also incur additional postage-due charges if the package is returned. Use address verification tools to minimize these risks.
Accurate addressing is paramount for the successful and efficient delivery of your poly mailers. Following the guidelines outlined ensures a smoother shipping experience. Remember the importance of clear, visible addresses, correct address formats for each carrier and the inclusion of necessary customs documentation for international shipments. If you want to learn more, you can read at My Pack Love!


