


What Do Iron-On Patches Look Like? A Visual Guide


Iron-on patches offer a versatile and affordable way to personalize clothing, add branding, or even repair damaged garments. However, navigating the world of iron-on patches can be tricky. Choosing the right patch for your project, understanding the different materials and application methods, and ensuring a successful outcome requires careful consideration. This guide will equip you with the knowledge needed to confidently select and apply iron-on patches, avoiding costly mistakes and achieving beautiful, durable results. We’ll explore the different types, materials, and application methods so you can make informed choices for your specific needs.
1. Understanding the Basics: What Sets Iron-On Patches Apart?
1.1 The Tell-Tale Sign: Examining the Adhesive Backing
The most distinctive feature of an iron-on patch is its adhesive backing. This is typically a glossy or smooth, filmy layer positioned on the reverse side of the patch. The texture can sometimes feel slightly tacky to the touch. This adhesive is heat-activated; it’s designed to melt and bond with the fabric when exposed to heat from an iron.
This crucial characteristic differentiates iron-on patches from sew-on patches, which require a separate stitching process to adhere to the garment. This heat-activated adhesive is the key to the patch’s application process.
1.2 Front and Center: Exploring the diverse designs of Iron-On patches
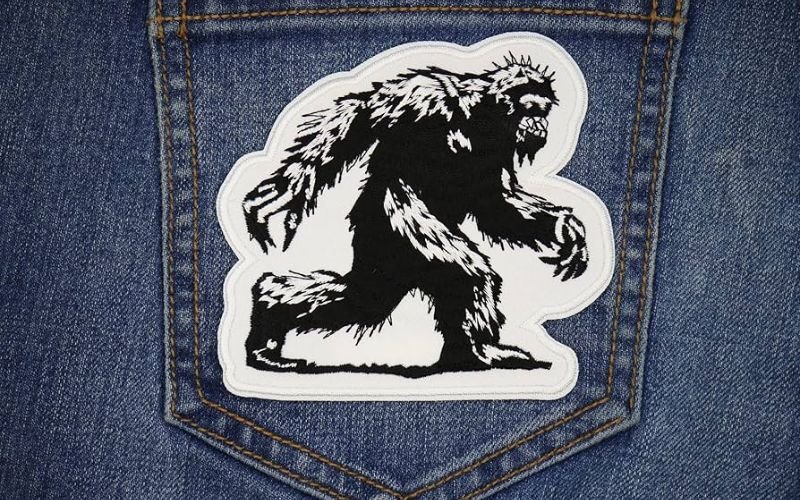
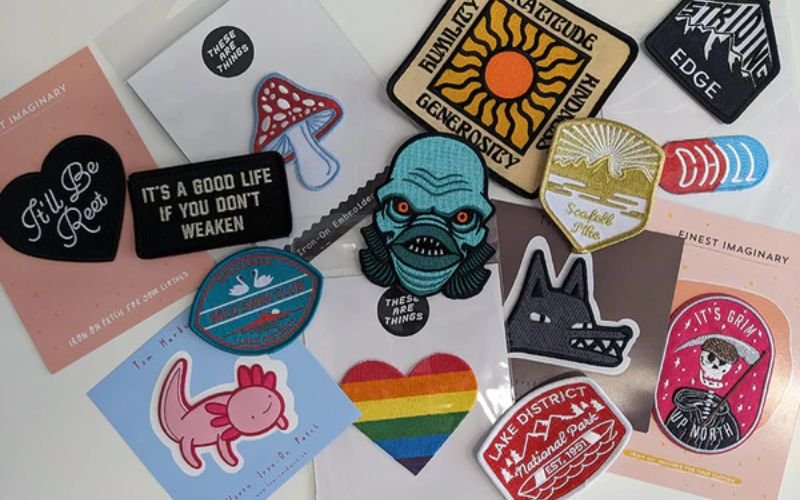
Beyond the adhesive backing, the face of an iron-on patch is where the artistry and purpose truly shine. The array of designs is vast and caters to a wide range of tastes and applications. From whimsical animals like an axolotl or bear to evocative nature scenes like a sun or Scafell, there’s a design to suit every preference.
Simple phrases like “Good Boy” or “Fun Police” add a personalized touch, while more elaborate designs like a Grim or Big Foot bring a unique character to your projects. Whether you prefer the minimalist elegance of a single letter or the intricate details of a large, embroidered patch, the choices are plentiful.
These patches are available in different styles, such as vintage, modern, or minimalist, allowing for a wide spectrum of personalization options, fitting any aesthetic. The sheer diversity of designs available makes it easy to find the perfect patch for your needs.
2. Beyond the surface: Materials and textures of Iron-On patches
2.1 Common materials used in Iron-On patches
The materials used in iron-on patches play a significant role in determining the patch’s durability, flexibility, and aesthetic appeal. A patch’s base material, which forms the foundation of the design, often dictates its overall look and feel.
Common base materials include sturdy cotton, durable twill, soft felt, or versatile polyester. Each material contributes a different characteristic. Cotton, for example, often provides a comfortable and breathable feel, while twill offers a more robust and structured look. Felt provides a soft, pliable surface ideal for intricate designs, and polyester offers a blend of durability and flexibility, making it suitable for various projects.
The materials used to create the design itself can further enhance the patch’s longevity and resistance to wear and tear. Embroidered patches showcase intricate designs created with embroidery thread, adding depth and texture. PVC, a durable plastic, forms the basis of rubberized or rubber-coated patches, providing excellent resistance to wear and tear.
Similarly, chenille patches, known for their plush texture, are created using chenille yarn. The choice of material for the design directly affects the patch’s resilience to everyday wear and tear, as well as its aesthetic qualities. Other materials like leather, felt, or even glittery or reflective fabrics can further diversify the options available, allowing for a wide range of effects and functionalities.
2.2 A Touch of Texture: Understanding different patch textures
The texture of an iron-on patch adds a crucial dimension to its visual appeal. Beyond the design itself, the tactile quality of the patch significantly influences its overall aesthetic and feel. Printed patches, for instance, often boast a smooth, flat surface.
This simplicity complements designs that rely on sharp lines and bold colors. In contrast, woven patches often exhibit a textured surface, adding a sense of depth and craftsmanship to the design. The raised, three-dimensional quality of embroidered or chenille patches creates a plush feel, bringing a tactile element to the patch.
The raised threads or yarn add a sense of dimension and tactile interest to the project. These variations in texture contribute significantly to the overall visual and sensory experience of the patch. The choice of texture—smooth, textured, raised, or 3D—becomes an integral part of the patch’s identity.
3. Applying Iron-On patches: A step-by-step guide
3.1 Essential tools for Iron-On patch application
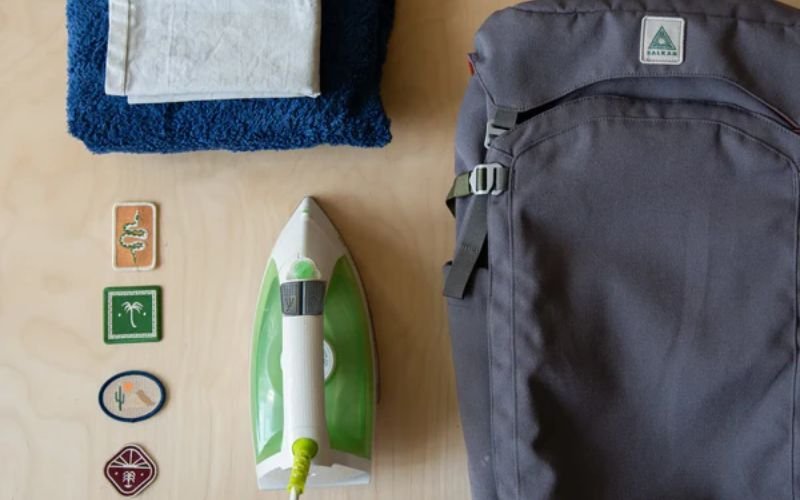
Successful iron-on patch application requires a few key tools and preparations. A household iron with adjustable heat settings is essential, though a heat press provides more precise control for larger projects or multiple patches.
A stable ironing board or a flat, hard surface covered with a heat-resistant cloth is needed. Always place a thin, protective fabric, like a cotton cloth or clean dish towel, between the iron and the patch to prevent scorching and protect the fabric. Finally, ensure the fabric you’re working with is clean and wrinkle-free to guarantee a strong adhesive bond.
3.2 The heat is on: Applying your Iron-On patch
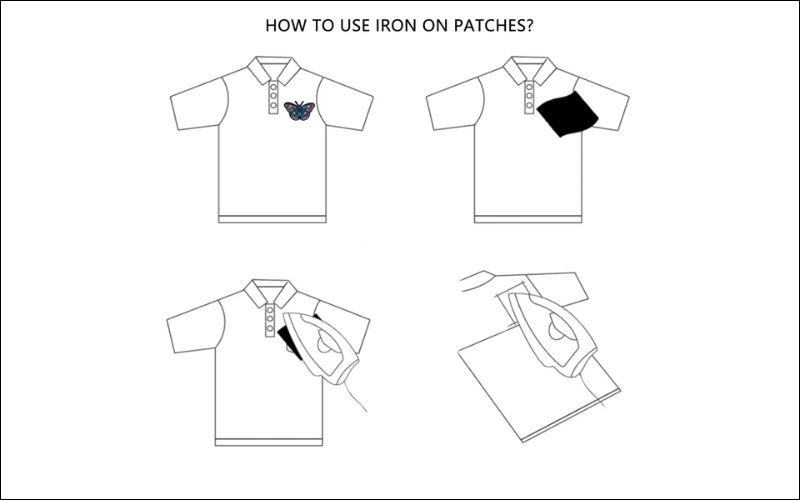
Step 1: Preheat your iron to the appropriate temperature setting, usually the cotton or linen setting. This is crucial; the wrong temperature can damage the patch or fabric. Always check the instructions on the patch packaging for the exact temperature recommendation.
Step 2: Place the garment on the ironing board and carefully position the patch exactly where you want it. Ensure the fabric is smooth and wrinkle-free in the area where the patch will be applied. This is key for a good bond.
Step 3: Cover the entire patch with a pressing cloth, a thin, protective fabric like a clean cotton towel. This prevents scorching and protects the patch and garment.
Step 4: Press the iron firmly onto the pressing cloth over the patch for the recommended time, usually 10-20 seconds. The exact time is stated on the patch packaging, and adhering to this time is essential for proper adhesion. Use consistent and even pressure throughout the entire application.
Step 5: Remove the iron and allow the patch to cool completely. Do not lift the pressing cloth until the patch has cooled completely. This allows the adhesive to fully set. Then, gently check the patch’s adhesion. If the patch is not securely bonded, repeat the pressing step from the back of the garment.
Step 6: For extra assurance, if the patch wasn’t perfectly adhered on the first try, repeat the pressing process from the back of the garment. This provides additional pressure for a secure, final bond. Always follow the patch manufacturer’s instructions; they are designed to ensure optimal results and prevent potential damage.
4. Choosing the Right Iron-On Patch for Your Needs
4.1 Considering fabric type and garment use
Iron-on patches don’t adhere to all fabrics the same way. Fabric type significantly impacts the patch’s success and longevity. Cotton and denim, for example, are generally very receptive to heat and adhesive, making them ideal for most iron-on applications.
However, delicate synthetics like silk or rayon, or heavily textured fabrics like velvet or corduroy, might require lower heat settings or could even be unsuitable for iron-on patches altogether. Improper heat application to these sensitive materials can lead to scorching, warping, or the adhesive not bonding properly. Always check the patch manufacturer’s instructions for fabric compatibility.
The intended use of the garment is also a crucial factor. A patch on a frequently washed item, such as a work shirt or tote bag, needs a more durable, high-quality patch to withstand multiple washings. In contrast, a decorative patch on a special occasion garment might prioritize aesthetics and a delicate feel over sheer durability.
Consider the garment’s intended use and the level of wear and tear to select a patch with appropriate resistance. Look for patches explicitly designed for heavy-duty or high-impact use if your garment will experience high levels of activity or repeated washing. This preemptive consideration ensures that your patch will last as long as the garment.
4.2 Design and customization: Expressing your style
Iron-on patches are more than just functional additions; they’re powerful tools for personal expression and branding. From simple, minimalist designs to elaborate, intricate creations, patches offer a wide spectrum of design options, allowing individuals and businesses to personalize items and communicate their style.
The size of the patch, its color palette, and the complexity of the design all contribute to the overall aesthetic impact. A small, subtly colored patch might enhance a casual outfit, while a large, detailed patch could become a statement piece on a jacket.
Think carefully about how the patch will complement the garment’s existing design and color scheme. Will it be a subtle accent or a bold focal point? Will it reflect your personal style or enhance your brand’s identity? These design considerations will guide you to the perfect patch for your needs and vision. For truly unique designs, exploring custom patch makers or design software can unlock a world of possibilities.
5. FAQs about Iron-On Patches
5.1 Can I iron a patch onto any type of fabric?
No, not all fabrics are suitable for iron-on patches. Delicate fabrics like silk or lace can be damaged by the heat. Always check the garment’s care label and test a small, inconspicuous area first. Consider sew-on patches for delicate fabrics.
5.2 How can I tell if my iron-on patch is high quality?
High-quality patches typically have a tightly woven base, vibrant colors, and a strong adhesive backing. The design should be well-defined and free of loose threads or imperfections.
5.3 What are the different types of iron-on patch backings?
The most common type is a heat-activated adhesive film. Some patches may have a paper backing that needs to be peeled off before application. Other variations exist and will be listed on the product.
5.4 How long do iron-on patches last?
With proper application and care, iron-on patches can last for many washes. However, factors like fabric type, washing frequency, and patch quality can affect their longevity.
5.5 Can I remove an iron-on patch?
Yes, iron-on patches can often be removed by reheating the adhesive and carefully peeling the patch away. However, some adhesive residue may remain, and the process may not work for all patches or fabrics.
6. Packlove – Providing service for custom Iron-On patches
Packlove is your one-stop shop for custom packaging and branding solutions, and we’re particularly passionate about providing high-quality, custom iron-on patches. Whether you’re a crafter looking to personalize your creations, a small business aiming for unique product packaging, or a fashion designer seeking a distinctive way to brand your apparel, we offer a wide array of options to fit your needs.
Create patches in diverse shapes, sizes, and materials, from vibrant embroidery to sleek printed designs. Beyond iron-on patches, explore our range of Value Booster Kits, Woven Labels, Heat Transfer Labels, Rubber Labels, and Zipper Bags, and Poly Mailers for a complete branding strategy.
Our user-friendly online ordering system, coupled with dedicated design support, makes the entire process straightforward and seamless. We’re committed to exceeding your expectations and ensuring your complete satisfaction. Visit us at https://mypacklove.com/ or email us at [email protected] to begin your design journey.
Read more:
Iron-on patches offer a dynamic and versatile approach to personalization and creative expression. Their unique heat-activated adhesive backing allows for easy application, while a vast array of designs and materials cater to a wide range of tastes and projects. Proper application, considering fabric type and intended use, is crucial for ensuring durability and a polished final product. Explore the possibilities of iron-on patches for your next crafting or branding project; you’ll discover a world of creative potential.


