


How to Iron on Embroidered Patches: A Step-by-Step Guide


Embroidered patches are a fantastic way to customize your wardrobe but ironing them on can feel daunting. This article breaks down the process into simple, easy-to-follow steps, so you can confidently apply your patches, ensuring a strong, lasting bond without damaging your fabric or the patch itself. Let’s unlock your creativity, one patch at a time!
1. Preparing to Iron on Your Embroidered Patch
1.1 Gathering Your Materials
First, ensure you have an iron-on patch with a heat-activated adhesive backing. Not all embroidered patches come with a heat-activated adhesive; some are meant to be sewn on. This special backing is crucial for iron-on application.
You’ll also need a reliable clothing iron, a sturdy ironing board and a protective cloth, which could be a thin towel or a scrap piece of fabric. This cloth acts as a barrier, preventing scorching. Finally, have your chosen garment ready whether it’s a t-shirt, jeans, or jacket.
1.2 Choosing the Right Fabric and Patch
The foundation of a successful patch application lies in the careful selection of compatible materials for both your garment and the patch itself. For iron-on patches, it’s generally best to stick with sturdy, heat-resistant fabrics like cotton, denim, and polyester. These materials can handle the heat needed to properly activate the patch’s adhesive backing and ensure a strong, lasting bond.
However, when working with more delicate fabrics such as silk, lace, or certain synthetic materials like rayon, it’s wise to steer clear of iron-on patches altogether. These sensitive materials are prone to heat damage, and ironing could easily ruin them.
In these cases, opting for a sew-on patch is the much safer and recommended approach. While wool is also considered a delicate fabric, it can sometimes withstand the heat required for iron-on patches, but proceed with caution. It’s always a smart idea to test the iron-on method on an inconspicuous area of the wool garment first to be sure.
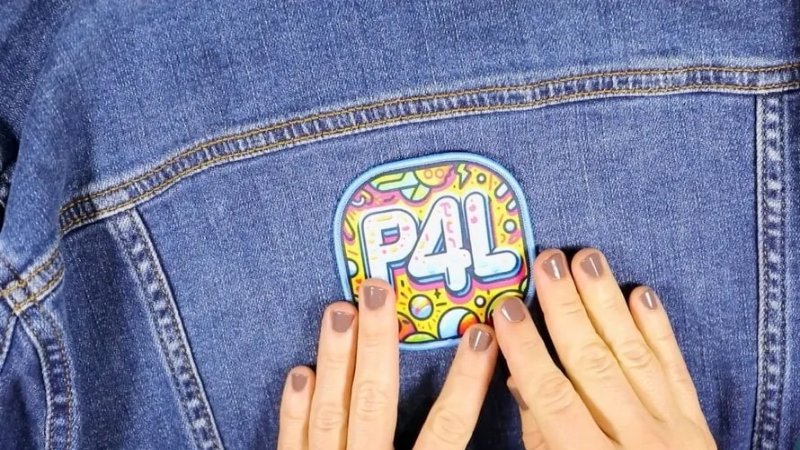
Beyond fabric type, patch placement is another key consideration. Before you commit to applying the patch, lay it out on the garment in your desired location. Take a moment to assess the size and ensure the patch fits appropriately within the chosen area and complements the garment’s design.
And speaking of testing, it’s always a best practice to conduct a patch test on a hidden part of the fabric. This involves ironing a small piece of similar material using your intended settings and technique. This simple step can save you from potential headaches by confirming that your ironing process won’t damage the main garment.
2. Ironing on Your Embroidered Patch: Step-by-Step Guide
2.1 Preparing the Garment and Patch
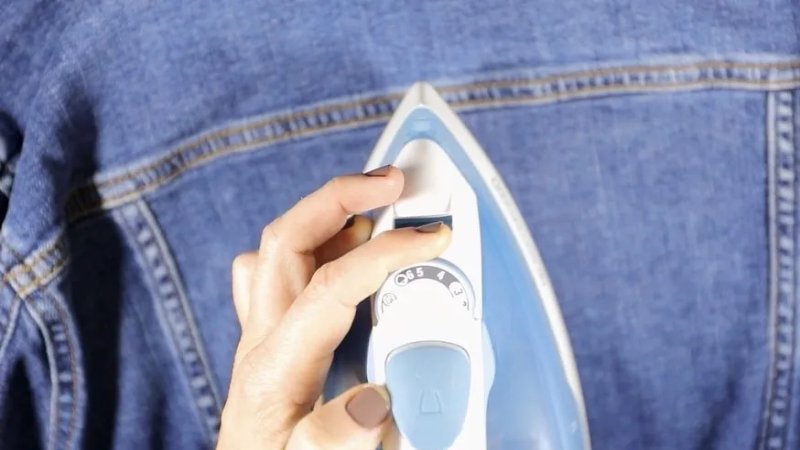
Begin by pre-heating your iron to the appropriate temperature, typically a medium to high setting. Ensure your iron is set to a dry heat setting. Do not use steam, as moisture can interfere with the proper bonding of the heat-activated adhesive.
While the iron heats up, prepare your garment by laying it flat on a stable ironing surface. Ensure the area where you’ll be placing the patch is completely wrinkle-free as wrinkles can prevent the patch from adhering properly and affect the garment stability.
2.2 Applying the Patch: Front Side
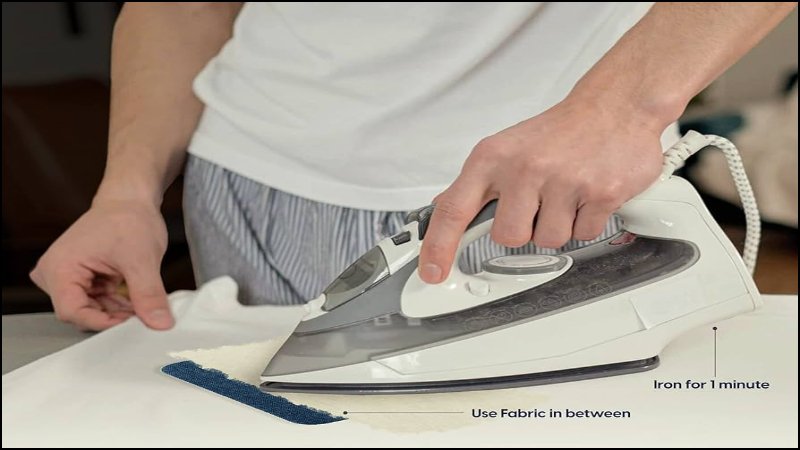
Carefully position your embroidered patch on the desired location of your garment. Double-check the patch placement to ensure it’s exactly where you want it. Once you’re satisfied with the position, place your protective cloth over the patch.
Now, apply firm pressure with the heated iron directly on top of the protective cloth. Use slow, circular motions or back-and-forth movements, ensuring even heat distribution. Maintain this pressure for approximately 30 seconds. This allows the heat to activate the adhesive.
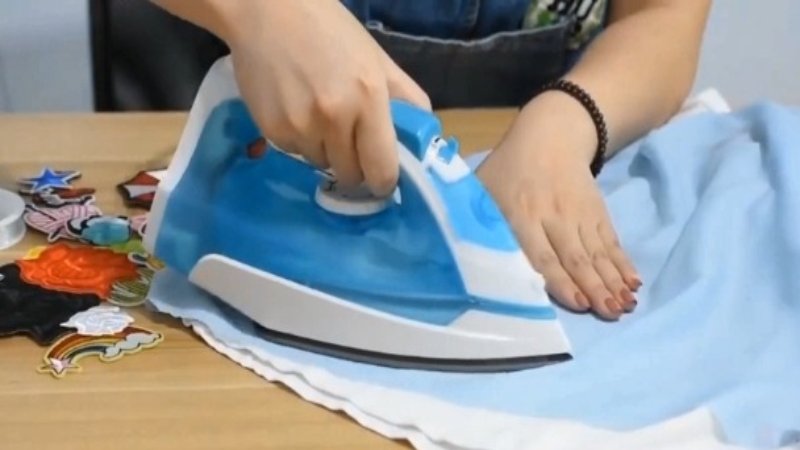
2.3 Securing the Bond: Inside Out
To further strengthen the bond, turn your garment inside out, exposing the back of the patch area. For this step, you can remove the protective cloth. Apply your heated iron directly to the fabric behind the patch. This direct ironing method ensures the heat-activated adhesive melts completely and creates a strong bonding process. Apply firm pressure for another 30 seconds to form a permanent bond.
3. Caring for Your Ironed-on Patch
3.1 Washing and Drying
Once your iron-on patch is securely applied, proper care during washing and drying is essential to maintain its appearance and longevity. Generally, machine washing garments with iron-on patches is perfectly acceptable, but it’s best to use cold water and select a gentle cycle.
Cold water is kinder to the adhesive, helping to prevent it from breaking down prematurely. Furthermore, it minimizes the risk of the patch shrinking or becoming misshapen during the wash. Hand washing is also an excellent, gentler alternative, especially for more delicate garments or patches.
When choosing laundry products, it’s wise to avoid harsh detergents or any cleaning agents containing bleach. These aggressive chemicals can not only damage the fibers of the patch itself, potentially causing fading or fraying, but they can also weaken the adhesive bond over time, leading to the patch peeling away.
As for drying, air drying is undoubtedly the most patch-friendly method. Allowing the garment to air dry naturally eliminates any risk of heat damage to the patch. If using a dryer is unavoidable, make sure to choose the tumble dry low setting. High heat in a dryer is a significant threat to iron-on patches. Excessive heat can actually melt the adhesive, which can result in the patch detaching from the fabric or shifting out of place.
3.2 Long-Term Care and Maintenance
Avoid dry cleaning your garment as the harsh chemicals and high temperatures used in this process can damage the patch and weaken the adhesive. For minor stains, stain removal by spot cleaning is recommended. Gently dab the affected area with a mild detergent solution, being careful not to rub too vigorously.
If you notice any loose threads around the edges of the patch after washing, carefully trim them with small, sharp scissors. Avoid pulling on the threads, as this can further unravel the patch. If the patch begins to peel or lifting at the edges, you may be able to reattach it by carefully re-ironing. Place a protective cloth over the patch and apply heat for a short period, checking frequently to avoid scorching.
4. FAQs about Ironing on Embroidered Patches
4.1 Can I iron on a patch to any fabric?
While iron-on patches are versatile, they’re not suitable for every type of fabric. As discussed in the “Choosing the Right Fabric and Patch” section, sturdy materials like cotton, denim and polyester are ideal. These fabrics can withstand the heat needed to activate the adhesive without getting damaged.
4.2 What if my patch isn’t sticking?
If you’re having trouble getting your patch to adhere properly, there are a few common culprits. First, make sure your iron is set to the correct temperature – typically a medium to high setting without steam. Insufficient heat will prevent the adhesive from melting completely. Second, ensure you’re applying firm, even pressure throughout the ironing process. Uneven pressure can result in some areas of the patch not bonding correctly.
Finally, double-check that your patch actually has a heat-activated adhesive backing. Some patches are designed to be sewn on and won’t adhere with an iron. If you’ve checked all these factors and are still having issues, you may need to apply heat for a longer period or consider using a sew-on method instead.
4.3 Can I remove an ironed-on patch?
Removing an ironed-on patch can be tricky but it is sometimes possible. One method involves reheating the patch with an iron to soften the adhesive, then carefully peeling it off. Another approach uses specialized adhesive solvents to dissolve the glue.
However, it’s important to note that removing a patch can potentially damage the fabric underneath. The adhesive may leave a residue, or the fabric may be stretched or torn during the removal process.
4.4 How long will an ironed-on patch last?
The lifespan of an ironed-on patch depends on several factors, including the quality of the patch, the type of fabric it’s applied to and how well it’s cared for. A properly applied patch on a durable fabric, following the care instructions can last for a long time. High heat from a dryer can also affect the patch’s longevity. Additionally, the application quality plays a role. A patch that wasn’t applied with sufficient heat or pressure may be more prone to peeling or lifting.
4.5 What kind of iron should I use?
Most standard household irons are perfectly suitable for applying iron-on patches. Travel irons can also work as long as they can reach the required temperature. The most crucial factor is the iron’s ability to provide consistent adjustable heat.
Read more:
Remember these key steps for a successful iron-on patch application: properly prepare your iron and garment, carefully position the patch, use a protective cloth, apply even pressure with slow, circular motions for about 30 seconds and repeat on the inside for another 30 seconds. Embrace your inner crafter and explore the limitless possibilities of customizing your wardrobe and belongings with patches. Visit Packlove today for high-quality patches, labels, and packaging solutions to support your creative projects!


