


Sew a Perfect Buttonhole: Step-by-Step Guide (Hand and Machine)


Do buttonholes feel like the trickiest part of sewing? Many sewists, from beginners to small business owners, struggle to create neat, professional buttonholes. Poorly sewn buttonholes can ruin a garment, and the fear of mistakes is real. But mastering buttonholes is achievable and essential for polished, functional garments.
Well-made buttonholes elevate your sewing, adding a professional touch. This guide demystifies buttonholes! You’ll learn step-by-step methods for machine and hand sewing, plus expert tips for perfect results every time. Gain confidence, troubleshoot problems, and create buttonholes that enhance your projects. Get ready to master this key sewing skill!
Buttonholes are more than just openings for button attachment; they are crucial for both the functionality and the garment finishing of your sewn creations. In clothing construction, a well-sewn buttonhole ensures secure closure and comfortable wear.
Beyond practicality, buttonholes significantly impact the overall look of your garment sewing projects. Neat, even buttonholes are a hallmark of quality, instantly elevating the perceived value of your work. For small businesses selling clothing, this attention to detail is especially important. Professional-looking buttonholes signal craftsmanship and care, enhancing customer appeal and brand reputation.
Having the right tools and materials is key to successful buttonhole creation, whether you prefer hand sewing or using a sewing machine. For machine buttonholes, a buttonhole foot is essential. To prevent fabric distortion, especially on delicate fabrics, use a fabric stabilizer like fusible interfacing.
Accurate marking is crucial, so gather marking tools such as tailor’s chalk or fabric pens. A seam ripper is a must-have for correcting mistakes, and sharp fabric scissors are needed for clean cuts. You’ll also need a needle appropriate for your fabric and quality sewing thread. For opening buttonholes precisely, a buttonhole cutter is ideal, though small, sharp scissors can also work carefully. For hand-sewn buttonholes, a hand needle and strong thread are necessary.
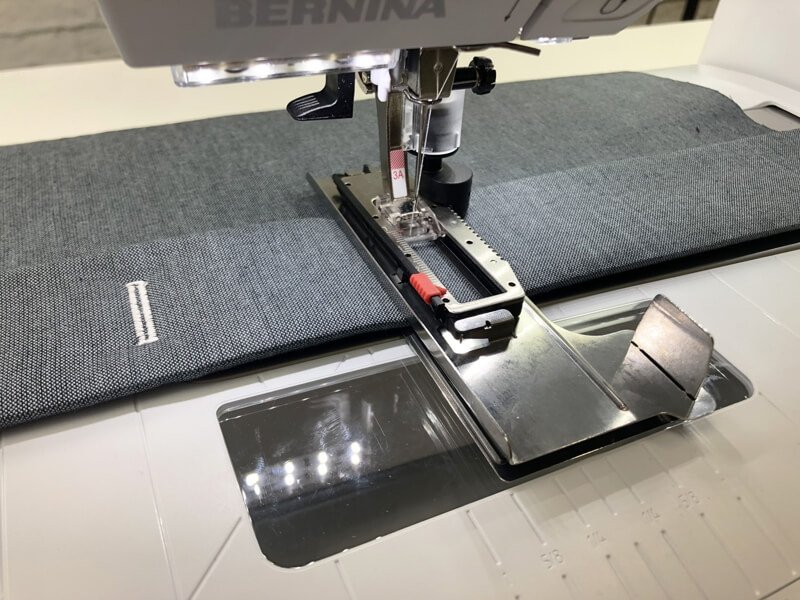
Modern sewing machines make buttonholes incredibly easy with the buttonhole foot. This foot, paired with the buttonhole stitch setting, creates automatic buttonholes in just one step. Simply attach the buttonhole foot, often by snapping it into place. Insert your button into the back of the foot – this ensures the buttonhole is the correct size. Select the buttonhole stitch on your machine and lower the buttonhole foot lever. Press the foot pedal, and the sewing machine will stitch a perfectly sized buttonhole automatically. Refer to your machine’s manual for specific details on using your machine buttonhole feature.
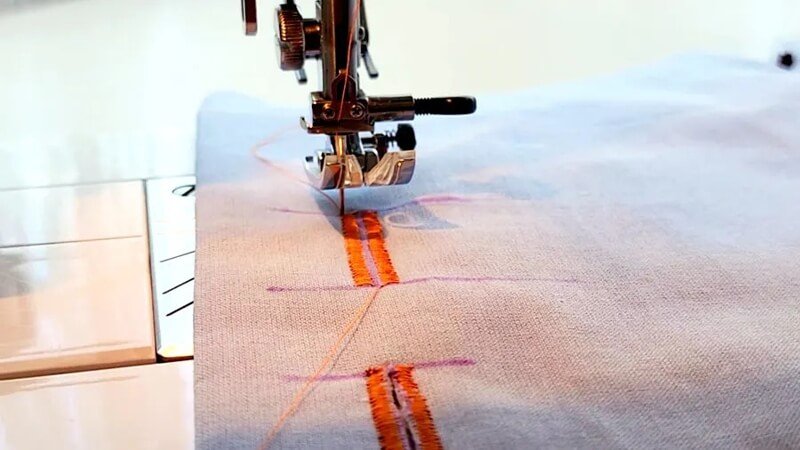
For more control or with simpler machines, manual buttonholes are a valuable skill. Using straight stitch and zigzag stitch settings, you can create a freehand buttonhole. First, mark your buttonhole length. Then, using a straight stitch, sew a rectangle around the marked area, about 1mm outside the lines. Next, switch to a narrow zigzag stitch and sew along one long side of the rectangle. At the short end, widen the zigzag and sew across. Pivot, and sew a narrow zigzag down the other long side. Finally, widen the zigzag again to sew across the remaining short end, completing the manual buttonhole. This sewing technique offers flexibility and is great for older machines.
For delicate fabrics, couture details, or a vintage aesthetic, consider hand-sewn buttonholes. This traditional sewing method, while slower, yields beautiful and durable results. Start by marking your buttonhole and stitching a box around it by hand or machine for stability. Carefully cut open the buttonhole. Using a hand needle and strong thread, begin the buttonhole stitch (blanket stitch). Bring the needle up at a corner, loop the thread under the needle point, and pull through to create a secure stitch along the edge. Continue these close hand sewing stitches around the buttonhole, fanning stitches at the rounded ends for a neat finish. Hand-sewn buttonholes are a mark of fine craftsmanship.
If you own a vintage sewing machine, a vintage buttonhole attachment can create unique buttonholes. These specialized attachments often use templates to guide the stitching. To use a vintage buttonhole attachment, first ensure it’s compatible with your machine. Attach it according to the attachment’s instructions. Select the appropriate metal template for your button size and insert it into the attachment. The sewing machine attachment then moves the fabric to create the buttonhole as you stitch. Vintage buttonholes made this way can add a special, heirloom touch to your projects.
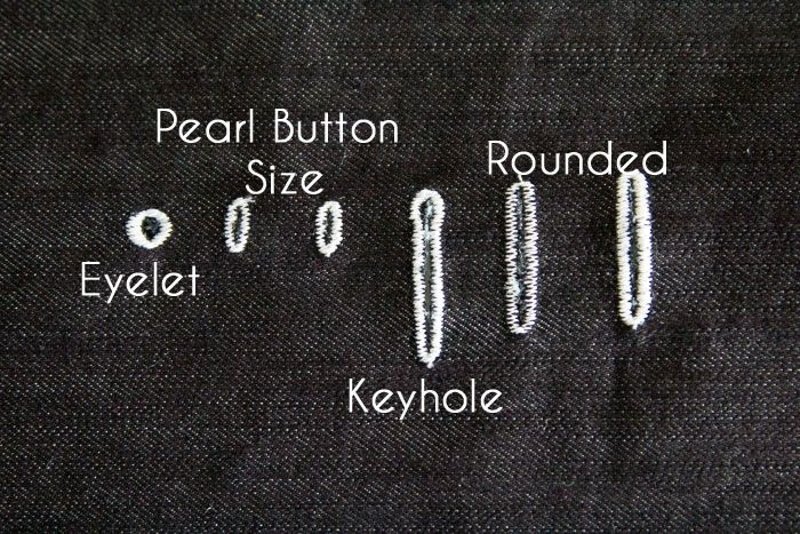
Buttonhole types vary in shape and purpose. The rectangular buttonhole, with straight sides and bar tacks at the ends, is a standard, versatile choice for shirts and blouses. Rounded buttonholes, similar to rectangular but with rounded ends, offer a softer look. Keyhole buttonholes feature a rounded eyelet at one end, providing extra room for thicker button shanks, making them ideal for heavier fabrics like coats and jackets. Eyelet buttonholes, which are small, round holes, are often used for delicate fabrics or decorative closures with ribbons or cords. Pearl button sized buttonholes are tiny and specifically designed for small, delicate pearl buttons. For stretchy fabrics, stretch buttonholes are designed to move with the fabric, preventing distortion and gaping.
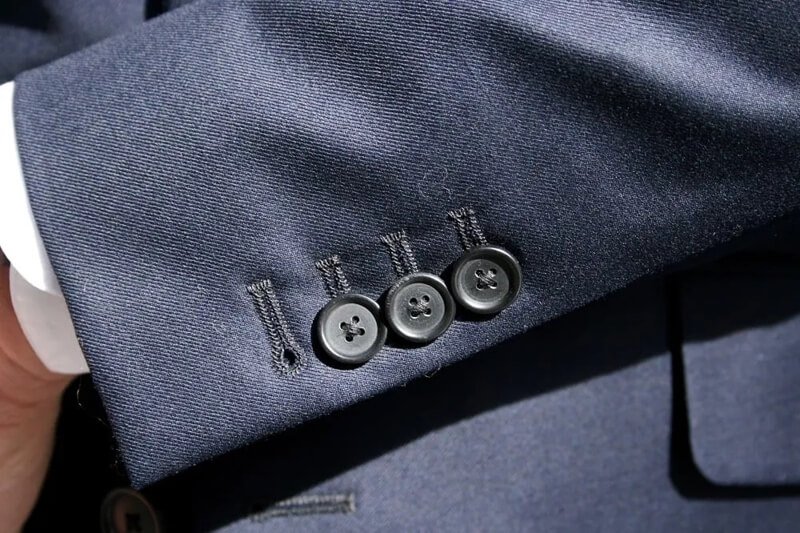
Buttonhole placement and orientation are key design decisions. Horizontal buttonholes are typically used on center front closures of shirts, blouses, and jackets. Their horizontal orientation helps to bear stress and prevent gaping when the garment is worn. Vertical buttonholes are often found on plackets, cuffs, and sometimes as a design element on center fronts, especially for dresses or decorative closures. The “fan” or keyhole end detail, often seen on keyhole buttonholes, adds a stylistic touch and reinforces the buttonhole end. Consider both garment design and clothing style when deciding between horizontal buttonholes and vertical buttonholes.
Interfacing is key to buttonhole stability, especially on lighter or loosely woven fabrics. This fabric stabilizer prevents puckering and distortion around the buttonhole, resulting in a cleaner, more professional look. For best results, choose a lightweight interfacing that is compatible with your main fabric’s weight. Sewing tips for applying interfacing include fusing it to the wrong side of the fabric in the buttonhole area before marking and sewing. This added layer of support is non-negotiable for achieving truly professional-looking buttonholes.
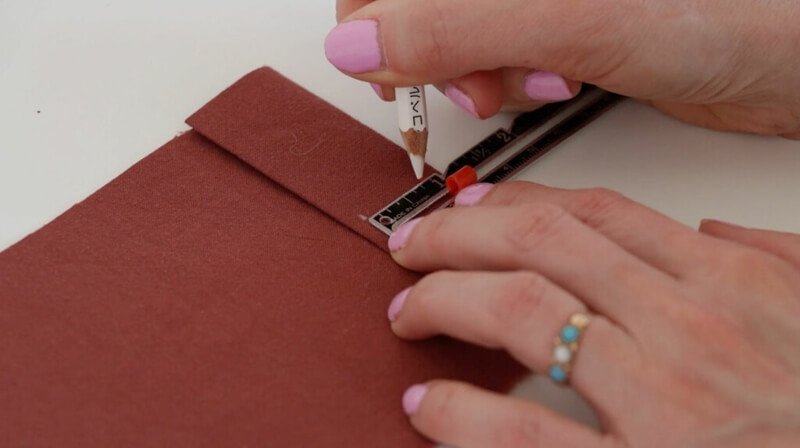
Precise buttonhole placement begins with accurate marking. Use reliable marking tools like a ruler and tailor’s chalk or a fabric marker to indicate the exact position and length of each buttonhole. Measuring buttonholes carefully ensures they are correctly sized for your buttons and consistently spaced. Before sewing, always double-check your measurements and button size. Accurate sewing relies on accurate marking; consistent placement is a hallmark of professional garment construction.
The moment of truth – cutting buttonholes open! For a clean cut, use a sharp seam ripper or a specialized buttonhole cutter. To prevent fraying and accidental over-cutting, insert pins horizontally at both ends of the buttonhole stitching line as stoppers. When cutting buttonholes, work carefully from the center outwards, always directing the blade away from the buttonhole stitching. This technique minimizes the risk of sewing mistakes and ensures a crisp, clean opening.
Before sewing buttonholes on your final garment, always practice sewing them on scrap fabric. Use a piece of fabric that is identical to your project fabric, and be sure to include a layer of interfacing just as you would on your garment. This sewing test allows you to refine your buttonhole practice, adjust your sewing machine settings for stitch density and length, and confirm that the buttonhole size is correct for your button. Investing time in buttonhole practice on scraps is essential for building sewing skills and avoiding costly mistakes on your finished project.
Buttonhole puckering or buttonhole distortion are frustrating sewing problems. Often, the culprit is a lack of fabric stabilizer. Without interfacing, especially on lightweight or unstable fabrics, the fabric can pull and pucker during stitching. Another cause can be incorrect sewing machine tension; if the tension is too tight, it can draw the fabric in and create puckers. Delicate fabrics are also more prone to puckering. To solve troubleshooting sewing issues like puckering, always use interfacing to stabilize the buttonhole area. Check your sewing machine tension and slightly loosen it if needed. For very delicate fabrics, consider hand-sewing buttonholes or using a finer needle and thread.
5.2 Buttonhole stitching is uneven or skipped
Uneven buttonhole stitching or skipped stitches can detract from the finish. Common causes include needle problems. A dull, bent, or incorrect needle type can struggle to penetrate the fabric consistently. Thread issues, such as using the wrong type or poor quality thread, can also lead to skipped stitches.
Basic sewing machine maintenance is also important; a dirty or poorly maintained machine may have stitching irregularities. To fix uneven buttonhole stitching, start by changing to a fresh, new needle of the correct type and size for your fabric. Re-thread your machine carefully with quality thread. Ensure your machine is clean and oiled according to the manufacturer’s instructions. Regular machine maintenance prevents many stitching problems.
A buttonhole size that’s incorrect is a common sewing mistake. This usually stems from inaccurate button measurement. Always measure both the diameter and thickness of your button to determine the correct buttonhole length. When using a buttonhole foot, double-check that the button is properly placed in the foot’s button holder.
To adjust buttonhole size after sewing, if the buttonhole is slightly too small, you can carefully extend it by hand using small, neat stitches. However, if the buttonhole is significantly too large or too small, the best solution is often to use your seam ripper to remove the incorrect buttonhole and re-sew a new one – highlighting the importance of practicing on scrap fabric first!
For most buttonholes, a good quality all-purpose sewing thread made of polyester or cotton-wrapped polyester is ideal. These thread types offer good strength and durability. For heavier fabrics like coat weight wool, consider using a slightly heavier buttonhole thread for added strength and a more defined buttonhole.
Yes, you can sew buttonholes on knit fabric! The key is to use stretch buttonholes if your machine offers them, as these are designed to move with the fabric’s stretch. Crucially, always use a buttonhole stabilizer like fusible interfacing on knit fabrics to prevent distortion and ensure a stable, well-shaped buttonhole. Sewing knits requires this extra step for buttonhole success.
If you don’t have a buttonhole foot, you can still sew buttonholes using the manual buttonhole method. Utilize your sewing machine’s zigzag and straight stitch settings to create a buttonhole step-by-step. This manual buttonhole method requires practice but is a versatile alternative when a buttonhole foot isn’t available.
While technically possible on very stable, tightly woven fabrics as a last resort, it’s strongly advised against sewing buttonholes without interfacing. Interfacing or another buttonhole stabilizer is essential for most fabrics to prevent puckering and distortion. If you absolutely must, you could try using a small, tightly woven fabric scrap as an interfacing alternative for stable fabrics only, but interfacing is highly recommended for best results.
If you’ve made a sewing mistake and accidentally cut a buttonhole too far, don’t panic! You can often repair buttonholes by carefully reinforcing the overcut area with hand stitching. Use a buttonhole stitch or blanket stitch around the raw edge to prevent further fraying and to close the gap slightly. This mending buttonholes technique can salvage minor overcuts.
7. Packlove – Providing expert garment labeling and finishing services
For clothing businesses focused on presenting a polished and professional brand, attention to detail matters – right down to perfectly sewn buttonholes and expertly applied garment labels. At Packlove, we understand this importance firsthand.
With over 8 years of experience in the garment industry, specializing in garment labeling and finishing services, we’ve seen how crucial every element is to the final product. Our expertise in processing labels and tags for clothes gives us a deep appreciation for quality garment finishing, and we know that well-executed details like buttonholes contribute significantly to a garment’s overall appeal.
If you’re looking for professional finishing touches for your clothing line, Packlove offers a range of services, including custom labels, tags, zipper bags, and poly mailers, designed to elevate your brand presentation. Let us help you create garments that are not only beautifully made but also impeccably branded.
Read more:
Sewing perfect buttonholes is a skill that is absolutely within your reach. With practice, patience, and the right techniques – from choosing the correct tools and understanding fabric preparation to mastering different sewing methods – you can confidently create buttonholes that enhance your garments.
Remember, well-sewn buttonholes are more than just functional closures; they are a mark of quality and contribute significantly to the professional finish of your creations. So, take the time to practice, experiment with different methods, and elevate your sewing projects with flawless buttonholes.
And for businesses seeking to add those final, professional touches to their clothing lines, remember that Packlove is here to support you with expert garment labeling and finishing services, ensuring every detail of your brand presentation is perfect.


