


Iron-On Stickers: The Ultimate Guide to Application and Care


Want to personalize your clothes, create unique gifts or add custom branding to fabric items? Iron-on stickers, transfers and patches offer a fantastic, accessible solution! Whether you’re a seasoned crafter, a DIY enthusiast, a parent customizing children’s clothing or a small business owner looking for a cost-effective way to create promotional items, iron-ons provide a world of creative possibilities.
But achieving professional-looking, long-lasting results requires understanding the different types of iron-ons, choosing the right materials and mastering the application process. Incorrect application can lead to frustration, wasted materials and ruined garments.
This comprehensive guide is your go-to resource for everything you need to know about iron-on stickers, transfers and patches. You’ll learn about the various types available, discover which fabrics are best suited for iron-ons and master the step-by-step application process.
1. The magic of iron-on stickers, transfers and patches
Iron-on stickers, transfers and patches provide a remarkably versatile and convenient way to personalize clothing, accessories and other fabric items. Unlike sewing, which requires specialized skills and equipment, iron-ons offer a relatively simple and accessible method for adding custom designs, text, logos or pre-made embellishments to fabric. They open up a wide range of possibilities for:
- Personalizing clothing: creating unique t-shirts, hoodies, jackets and more.
- Customizing accessories: adding flair to bags, hats, backpacks and other items.
- Making personalized gifts: creating one-of-a-kind presents for friends and family.
- Creating promotional items: branding merchandise for small businesses or events.
- Repairing or upcycling clothing: covering holes or stains with decorative patches.
The ease of use and the vast array of design options make iron-ons a popular choice for both beginners and experienced crafters.
2. Understanding the different types of iron-ons
Before diving into the application process, it’s important to understand the different types of iron-on products available, as each has its own characteristics and uses.
2.1 Iron-on stickers (transfers): the versatile design option
The term “iron-on sticker” often refers to a design that is either:
- Printed on special transfer paper: these are typically used with inkjet or laser printers, allowing you to print your own designs at home.
- Cut from heat transfer vinyl (HTV): HTV is a special type of vinyl with a heat-activated adhesive backing. It’s used with cutting machines to create custom designs.
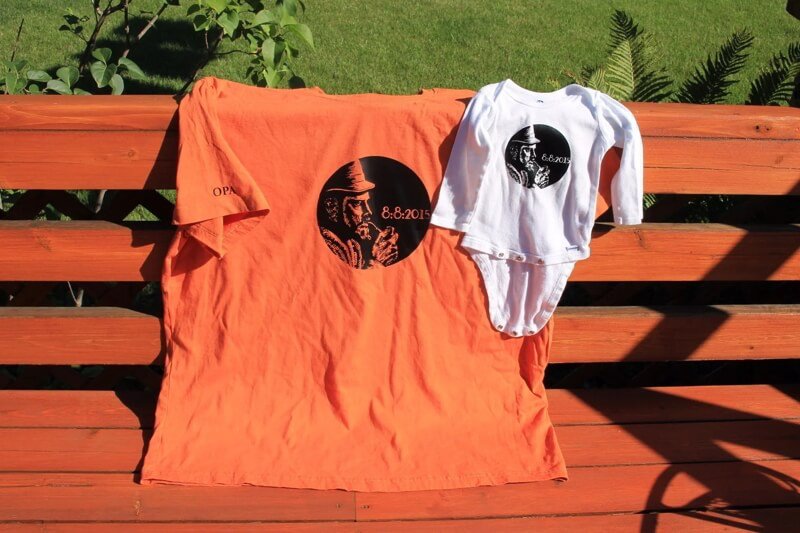
Both types of iron-on stickers/transfers are used to transfer images, text or patterns onto fabric. Common uses include:
- Custom t-shirts: creating personalized designs, logos or slogans.
- Tote bags: adding unique graphics or text to plain tote bags.
- Personalized gifts: making custom items like pillowcases, aprons or baby onesies.
- Home decor items: decorating fabric banners, wall hangings or cushion covers.
2.2 Iron-on patches: pre-made designs for easy application
Iron-on patches are pre-made designs, typically embroidered or made from fabric, that have a heat-activated adhesive backing. They offer a quick and easy way to add decorative elements to clothing and accessories. Common uses include:
- Decorating jackets, backpacks and jeans: adding a personal touch or a trendy look.
- Covering holes or tears in clothing: providing a stylish and functional repair.
- Adding flair to hats, bags and other items.
Iron-on patches are incredibly easy to apply, making them a great option for beginners.
2.3 Iron-on labels: for marking and branding
Iron-on labels are specifically designed for labeling clothing and accessories. They are often used for:
- Adding name tags to children’s clothing: preventing lost items at school or camp.
- Creating custom brand labels for handmade or small-batch clothing items.
- Adding care instructions or size information to garments.
- Creating custom labels for many other things as accessories, water bottles, lip balms, jars, wine, beer, honey, kids’ items and packaging.
Iron-on labels are typically made from a durable, washable material and can be customized with text, logos or simple designs.
2.4 DTF (direct to film) transfers: professional, no-background look
DTF (direct to film) transfers are a newer technology that offers a professional-looking result with no background. The design is printed onto a special film and then transferred to the fabric using heat and a special adhesive powder. This creates a durable, vibrant print that feels softer than some traditional iron-on transfers. DTF transfers are a great option for:
- Creating high-quality, detailed designs on clothing.
- Achieving a “no-background” look, where only the design itself is transferred.
- Printing on a wide variety of fabrics.
3. Choosing the right fabric: compatibility is key
Not all fabrics are created equal when it comes to iron-on application. Choosing the right fabric is essential for ensuring a successful transfer and preventing damage to your garment.
3.1 Best fabrics for iron-ons: cotton, polyester and blends
The best fabrics for iron-on application are those that can withstand the heat required to activate the adhesive and provide a good surface for the transfer to bond to. These include:
- Cotton: 100% cotton is generally the easiest fabric to work with for iron-ons. It’s smooth, durable and can withstand high heat.
- Polyester: polyester is another good option, as it’s also heat-resistant and provides a good surface for adhesion.
- Poly-cotton blends: blends of cotton and polyester combine the benefits of both fibers, offering good heat resistance and a comfortable feel.
- Denim, wool, linen.
3.2 Fabrics to avoid (or use with caution): delicate and heat-sensitive materials
Avoid using iron-ons on delicate fabrics or materials that are sensitive to heat. These include:
- Silk: silk is a very delicate fabric that can easily be scorched or damaged by high heat.
- Rayon: rayon can also be sensitive to heat and may shrink or distort.
- Leather: leather should never be ironed, as the heat can cause permanent damage.
- Some synthetics: certain synthetic fabrics, like nylon, satin and acetate, can melt or scorch easily at high temperatures.
Always test a small, inconspicuous area of your fabric with the iron (without the transfer) to check for heat sensitivity before applying the full design. If the fabric shows any signs of damage (scorching, melting, discoloration), choose a different method for decorating the garment, such as sewing, fabric glue or professional printing.
4. The iron-on application process: a step-by-step guide
Applying iron-on stickers, transfers and patches is a relatively straightforward process, but following these steps carefully is crucial for achieving a professional-looking and long-lasting result.
4.1 Preparing your materials and workspace
Gather your supplies: you’ll need:
- Your iron-on sticker, transfer or patch.
- The garment or fabric item you’re applying it to.
- A household iron (or a heat press, if you have one).
- A pressing cloth (a thin, clean cotton cloth, like a pillowcase or tea towel) or parchment paper (not wax paper!).
- A hard, flat, heat-resistant surface (an ironing board is ideal, but a sturdy table covered with a thick towel can also work).
- Optional: weeding tools (if you’re using Heat Transfer Vinyl).
Clean the garment: it’s essential to apply iron-ons to a clean, dry garment. Pre-wash and dry the garment without using fabric softener. Dirt, oil or fabric softener residue can interfere with the adhesive bond, preventing the iron-on from sticking properly.
Preheat the garment: iron the area where you’ll be applying the design for a few seconds (without the iron-on). This removes any wrinkles and moisture, creating a smooth, warm surface that will help the adhesive bond more effectively.
4.2 Setting your iron: temperature and steam
- High heat, NO steam: this is crucial! Set your iron to the highest heat setting that your fabric can tolerate (usually the “Cotton” or “Linen” setting). Steam will prevent the adhesive from bonding properly and can ruin the transfer.
- Empty the iron: make absolutely sure your iron is completely empty of water. Any moisture can interfere with the adhesion process.
- Delicate fabrics: if working with more delicate fibers, use the lower heat for those fibers.
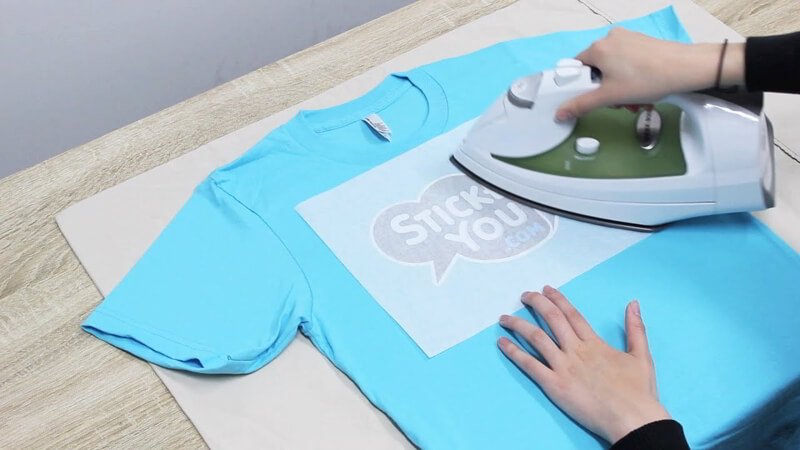
4.3 Positioning and protecting your design
- Placement: carefully position the iron-on design on your garment. Make sure it’s straight, centered and in the exact location you want it. For Heat Transfer Vinyl (HTV): if you’re using HTV, remember to mirror (reverse) your design before cutting it. Place the HTV on the fabric with the shiny side (carrier sheet) facing up and the matte side (vinyl) facing down against the fabric.
- Covering: place a pressing cloth (a thin, clean cotton cloth, like a pillowcase or tea towel) or a sheet of parchment paper (not wax paper!) over the design. This is absolutely essential to protect the iron-on material from direct heat, prevent scorching and ensure even heat distribution.
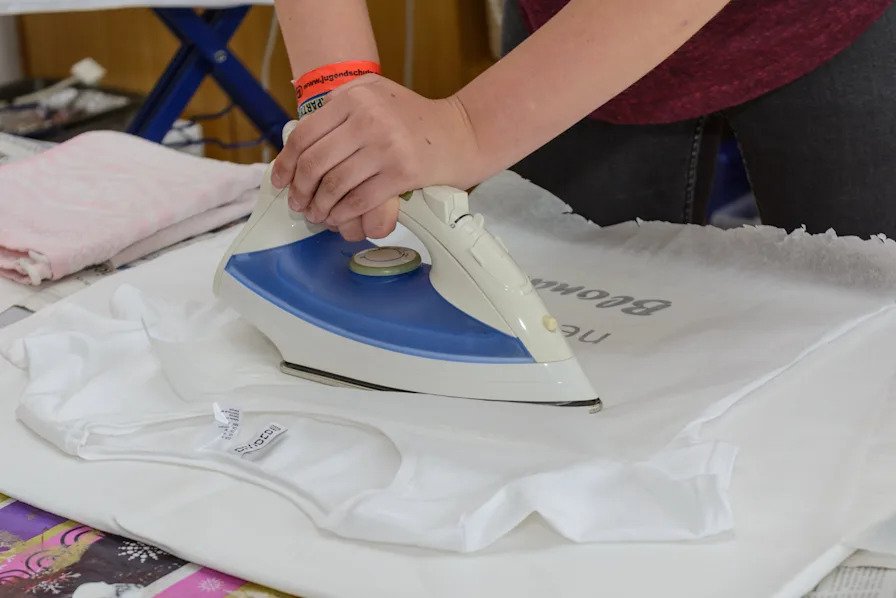
4.4 Applying heat and pressure: the key to bonding
- Firm, even pressure: press down firmly with the heated iron, applying even pressure across the entire design. Don’t just use the tip of the iron; use the whole surface. Use your body weight to apply as much pressure as possible.
- Pressing time: the amount of time you need to press depends on the specific iron-on product you’re using. A general guideline is 15-30 seconds, but always check the manufacturer’s instructions for the recommended pressing time. Some materials require longer pressing times than others.
Don’t be afraid to put your weight into it! Firm, consistent pressure is essential for a strong bond. Think of it like you’re trying to fuse the design into the fabric, not just lightly iron it on.
4.5 Cooling and checking adhesion
Cooling time: after pressing, allow the design to cool completely before attempting to remove the carrier sheet (for HTV) or the backing paper (for some patches). This cooling period is crucial for the adhesive to set properly. The required cooling time can vary, so check the instructions for your specific product.
- Cold peel: most iron-on transfers, especially HTV, require a cold peel. This means you must wait until the design and fabric are completely cool to the touch before removing the carrier sheet.
- Hot peel: some iron-on products are designed for a hot peel, meaning you can remove the carrier sheet immediately after pressing. However, these are less common.
Checking adhesion: once the design is cool, carefully check if it has fully adhered to the fabric. Gently try to lift a corner of the carrier sheet or backing paper. If the design is still sticking to the carrier sheet and not the fabric, re-cover it with the pressing cloth or parchment paper and re-press for a few more seconds, applying firm pressure.
4.6 Using a hair straightener (with cautions)
In a pinch, a hair straightener can be used to apply small iron-on designs, if it gets hot enough to melt the adhesive. However, this method is not recommended for several reasons:
- Difficult to maneuver: hair straighteners are small and not designed for applying even pressure over a large area.
- Potential for fabric damage: the concentrated heat can easily scorch or damage delicate fabrics.
- Uneven heating: it’s difficult to achieve consistent heat distribution with a hair straightener.
- Risk of soiling: the adhesive from the iron-on could transfer to the straightener plates.
A household iron or, ideally, a heat press is always the preferred method for applying iron-ons.
5. Troubleshooting common iron-on problems
Even with careful application, things can sometimes go wrong. Here’s how to troubleshoot some common issues:
5.1 Sticker not sticking?
If your iron-on design isn’t sticking to the fabric, try these solutions:
- Increase iron temperature: make sure your iron is set to the highest appropriate setting for your fabric (usually “Cotton” or “Linen”).
- Increase pressing time: apply heat for a longer duration, checking the manufacturer’s instructions for the recommended time.
- Ensure firm, even pressure: apply more pressure, using your body weight if necessary. Make sure you’re pressing down evenly across the entire design.
- Check fabric compatibility: double-check that the fabric you’re using is suitable for iron-ons (see “choosing the right fabric”).
- Make sure the garment is clean and dry: ensure the fabric is free of any dirt, oil, fabric softener residue or moisture.
- Try ironing from the back of the garment (with a pressing cloth): sometimes, applying heat from the back of the fabric can help the adhesive melt and bond more effectively. Always use a pressing cloth between the iron and the fabric.
5.2 Design peeling or lifting after application?
If you notice the design peeling or lifting after you’ve applied it:
- Re-press with a pressing cloth: carefully re-cover the design with parchment paper or a pressing cloth and re-apply heat and pressure, focusing on the areas that are lifting.
- Consider using fabric glue (for small areas, as a last resort): if a small corner or edge is lifting, a tiny amount of fabric glue might help secure it. However, this is not an ideal solution, as it could affect the appearance and washability of the design.
5.3 Scorching or melting the fabric?
If you accidentally scorch or melt the fabric:
- Use a lower iron temperature: immediately reduce the heat setting on your iron.
- Reduce pressing time: shorten the amount of time you apply heat.
- Always use a pressing cloth: make sure you’re using a pressing cloth or parchment paper between the iron and the design to protect the fabric.
- Test on an inconspicuous area first: in the future, always test the iron on a hidden part of the garment (like an inside seam or hem) before applying the iron-on to the main area.
6. Caring for your iron-on creations: making them last
Proper care is essential for ensuring the longevity of your iron-on designs.
6.1 Washing instructions: gentle care is key
- Wait 24 hours: wait at least 24 hours after applying the iron-on before washing the garment. This allows the adhesive to fully cure and bond to the fabric.
- Turn inside out: turn the garment inside out before washing. This protects the design from abrasion against other items in the washing machine.
- Cold water wash: wash the garment in cold water. Hot water can soften the adhesive and cause the design to fade or peel.
- Gentle cycle: use a gentle or delicate wash cycle to minimize wear and tear on the design.
- Avoid harsh detergents and bleach: do not use chlorine bleach or harsh detergents, as these can damage the adhesive and fade the colors of the design.
6.2 Drying instructions: air drying is best
- Avoid the dryer (if possible): air drying (line drying or laying flat) is the best option for preserving iron-on designs. Heat from the dryer can cause the adhesive to weaken, leading to cracking, peeling or fading.
- Low heat (if necessary): if using a dryer is unavoidable, use the lowest heat setting possible and remove the garment promptly as soon as it’s dry. Avoid over-drying, as this can damage the design.
6.3 Ironing instructions: protect the design
- Iron inside out: always iron the garment inside out, avoiding direct contact between the iron and the design.
- Low heat: use a low heat setting on your iron.
- Pressing cloth (optional but recommended): even when ironing inside out, using a pressing cloth provides an extra layer of protection for the design.
7. Exploring heat transfer vinyl (HTV): a popular choice
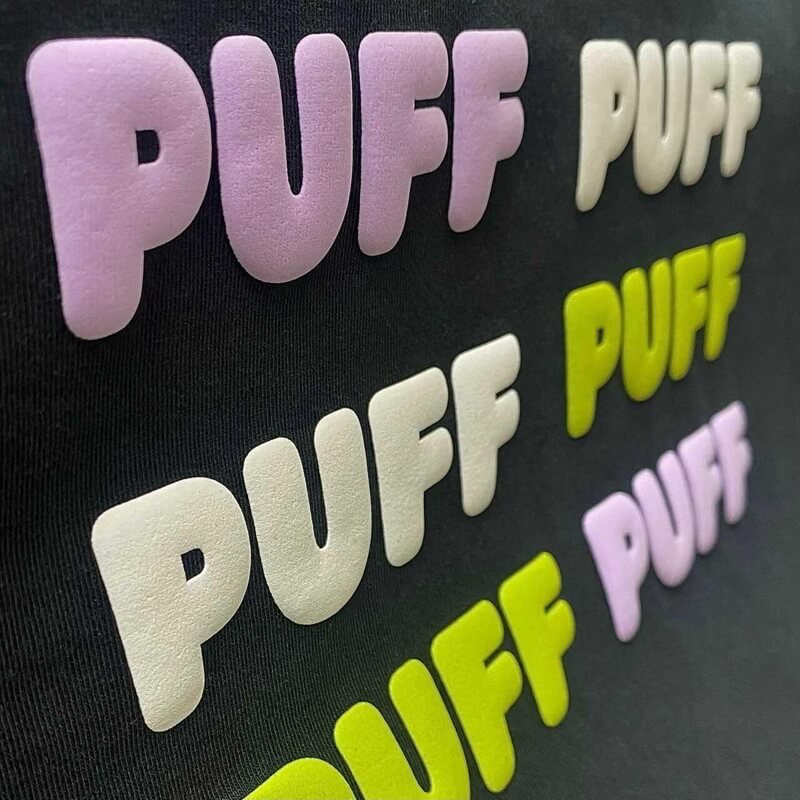
Heat transfer vinyl (HTV) is a particularly popular material for creating custom iron-on designs, especially for clothing. It’s a type of vinyl with a heat-activated adhesive backing that comes in a wide variety of colors, finishes (matte, glossy, glitter, flock, etc.) and even patterns.
7.1 Key considerations for HTV
- Mirroring: when using HTV, it’s essential to mirror (reverse) your design before cutting it. This is because you’re cutting the design from the back of the vinyl and it needs to be flipped when applied to the fabric.
- Loading: when loading HTV onto a cutting mat for use with an electronic cutting machine, place the shiny side (carrier sheet) down on the mat and the matte side (vinyl) up.
- Weeding: after cutting the design, you’ll need to “weed” it. This means removing the excess vinyl from around the design, leaving only the desired image on the carrier sheet. Weeding tools (which look like small, hooked picks) are used for this process.
7.2 Heat press vs. household iron
While a household iron can be used to apply HTV (and other iron-on materials), a heat press machine offers several advantages:
- Consistent temperature: heat presses maintain a consistent temperature across the entire heating plate, ensuring even heat distribution.
- Even pressure: heat presses allow you to apply firm, even pressure across the entire design, which is crucial for a strong bond.
- Larger surface area: heat presses typically have a larger surface area than household irons, making it easier to apply larger designs.
- Precise temperature and time control: heat presses allow for precise control over temperature and pressing time, which is important for achieving optimal results with different types of HTV.
While a heat press is a worthwhile investment for serious crafters or small businesses, a household iron can be used effectively if you follow the instructions carefully and apply firm, even pressure.
7.3 Layering HTV
HTV can be layered to create multi-colored designs. When layering, it’s important to:
- “Tack” down initial layers: use shorter pressing times (just a few seconds) to tack down the initial layers of vinyl.
- Full press for the final layer: apply the full recommended pressing time for the final layer to ensure all layers are securely bonded.
- Limit the number of layers: most HTV manufacturers recommend limiting the number of layers to 3-4 to avoid creating a design that’s too thick or stiff.
8. FAQs about iron-on stickers, transfers and patches
8.1 Can I use iron-on stickers on any type of fabric?
No. Some fabrics are not suitable for iron-ons due to their heat sensitivity. Avoid delicate fabrics like silk, rayon and materials that can melt or scorch easily (leather, some synthetics like nylon, satin and acetate). Always test a hidden area first.
8.2 How long do iron-on stickers last?
The lifespan of an iron-on sticker depends on:
- The quality of the materials: high-quality iron-on transfers and HTV will generally last longer.
- The application method: proper application with sufficient heat and pressure is crucial.
- Care instructions: following the recommended washing and drying instructions will maximize the lifespan.
With proper application and care, a good-quality iron-on can last for many washes (potentially dozens), but it’s generally not as permanent as screen printing.
8.3 Can I remove an iron-on sticker?
Removing an iron-on sticker is difficult and often not completely successful. It can potentially damage the fabric. There are methods that involve reheating the design and using specialized adhesive removers, but results vary greatly. It’s best to consider iron-ons as a relatively permanent application.
8.4 What’s the difference between a heat press and a household iron?
A heat press is a specialized machine designed specifically for applying heat transfers. It provides:
- Consistent temperature: the entire heating plate maintains a uniform temperature.
- Even pressure: allows for firm, even pressure across the entire design.
- Larger surface area: easier to apply larger designs.
- Precise control: offers precise control over temperature and pressing time.
A household iron can be used, but it requires more care and attention to ensure even heat and pressure. It’s more difficult to achieve consistent results, especially with larger designs.
8.5 My iron-on design is wrinkled after washing. What can I do?
Try re-pressing the design with a pressing cloth, but this time from the back of the garment (turn it inside out). Use a low to medium heat setting and firm pressure. This can sometimes help smooth out wrinkles, but it may not always be completely effective, especially if the wrinkling is severe.
Prevention is key: proper application and following care instructions will minimize wrinkling.
While iron-ons are a fantastic way to personalize garments, professional labeling is key for clothing businesses. Packlove specializes in providing high-quality, custom labels and tags for clothing brands.
With over 8 years of experience in the garment industry, particularly in processing labels and tags, we understand the importance of branding and providing clear care instructions. We also offer zipper bags and poly mailers. We can advise on label types, materials and design to create a professional and cohesive brand image.
Visit Packlove to explore our services and contact us for a quote or consultation.
Read more:
Iron-on stickers, transfers and patches offer a versatile, accessible and fun way to customize fabric items, allowing you to express your creativity and personalize your belongings. From creating custom t-shirts and tote bags to adding unique embellishments to clothing and accessories, the possibilities are endless.
By choosing the right type of iron-on for your project, selecting compatible fabrics, following the application instructions carefully and practicing proper care, you can achieve professional-looking, long-lasting results. So, gather your supplies, unleash your creativity and start transforming ordinary fabrics into personalized masterpieces!


