DIY Labels: Simple, Durable Labels for Everything!
Have you ever experienced the frustration of a child’s favorite jacket mysteriously vanishing at school or a daycare? Or maybe you’re starting a small clothing business and are looking for an edge. That’s where this article might be of assistance. Within these lines, readers will discover effective solutions for labeling belongings, starting with easy DIY name labels.
This guide is specifically tailored for busy parents, crafters, and small business owners. For parents it will show you the benefit of using cost-effective, environmentally friendly, and personalized solutions to keep belongings clearly identified. For the small business owners, it will help you with getting started and adding a personal touch to your products.
1. The budget-friendly benefits of homemade labels
One of the most appealing aspects of making your own name labels is the potential for significant cost savings. Pre-made labels, especially personalized or iron-on varieties, can quickly become expensive, particularly if you need a large quantity. For instance, a pack of 50 pre-made, customized iron-on labels might cost anywhere from $15 to $25, and even generic labels can add up.
In contrast, the DIY approach offers a far more budget-friendly alternative. A single sheet of transfer paper, which can be purchased for around $8 to $12, can yield a surprisingly large number of labels – often well over 100, depending on the size. Even using basic materials like paper and tape can be dramatically cheaper. A roll of tape and a ream of paper, costing less than $10 combined, can produce hundreds, if not thousands, of simple labels.
Here’s a quick comparison to illustrate the point:
| Material | Pre-made Cost (approximate) | DIY Cost (approximate) |
| 50 Iron-on Labels | $15 – $25 | $1 – $3 |
| 100 Sticker Labels | $10 – $20 | $2 – $5 |
| Basic Paper Labels | $5 – $10 | Under $1 |
The DIY method allows crafters to allocate those saved funds to other important needs, whether it’s school supplies, crafting materials, or even just treating themselves.
2. Unleash your creativity with custom designs
Beyond just saving money, making your own labels unlocks a world of creativity and personalization that pre-made options simply can’t match. When you’re in control of the design process, you’re not limited to generic templates or pre-selected fonts.
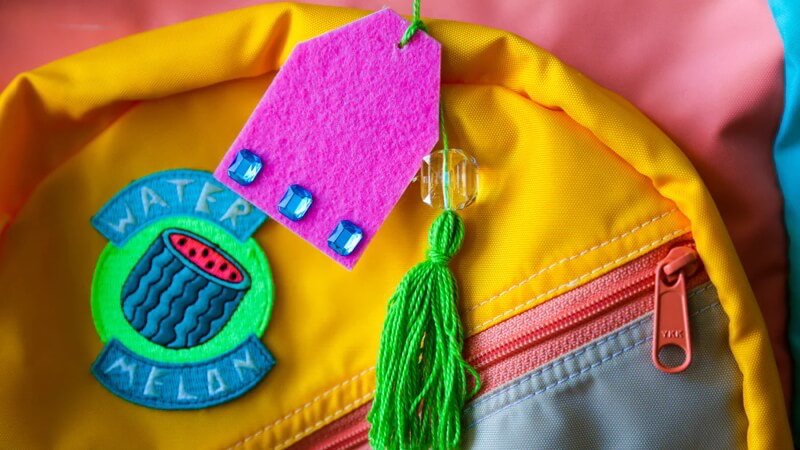
This is where DIY name labels truly shine. You have the freedom to create labels that perfectly reflect the personality and style of the person or product they’re intended for. Imagine adding a child’s favorite cartoon character, a whimsical pattern, or a unique font that captures their individuality. For a small clothing business, this means crafting labels that align perfectly with your brand aesthetic, using your specific color palette, logo, and typography.
Here are just a few ideas to spark your imagination:
For kids:
- Include their favorite animal, superhero, or video game character.
- Use bright, bold colors and playful fonts.
- Add a small icon representing their hobbies or interests (a soccer ball, a paintbrush, a musical note).
For businesses:
- Incorporate your logo and brand colors.
- Choose fonts that reflect your brand’s personality (elegant, modern, rustic, etc.).
- Add a tagline or a short message.
General:
- Use a monogram.
- Choose the shape of the label.
The ability to tailor every detail ensures that the labels are not just functional, but also visually appealing and meaningful. This level of personalization adds a special touch that enhances the overall experience, whether it’s a child proudly displaying their uniquely labeled backpack or a customer admiring the thoughtful branding on a handmade garment.
3. Go green with eco-friendly upcycled labels
In today’s world, environmental consciousness is more important than ever. Making your own labels provides a fantastic opportunity to embrace eco-friendly practices by upcycling (creatively reusing discarded objects or materials to create a product of higher quality or value than the original) materials you might already have around the house.
Instead of purchasing new materials, consider repurposing old fabrics for your labels. A worn-out pillowcase, a faded bedsheet, or even remnants from past sewing projects can be transformed into beautiful and unique fabric labels. This not only reduces waste but also adds a touch of character and history to your creations.
Think about it: that old, soft cotton pillowcase that’s seen better days? Perfect for creating gentle, comfortable labels for children’s clothing. Or that patterned bedsheet that no longer fits your decor? Ideal for adding a pop of color and personality to your handmade items.
By choosing to upcycle, you’re actively participating in reducing textile waste, one of the largest contributors to landfills. You’re also minimizing the demand for new resources, conserving energy, and reducing pollution associated with manufacturing and transportation. It’s a small but meaningful step towards a more sustainable lifestyle, and it sends a positive message to others, whether it’s your children, your customers, or your community.
4. Choose your materials for perfect durability
When you create your own name labels, you have complete control over the materials you use, and this translates directly into controlling the durability and suitability of the labels for their intended purpose. This is a significant advantage over pre-made labels, where you’re often limited to the options available.
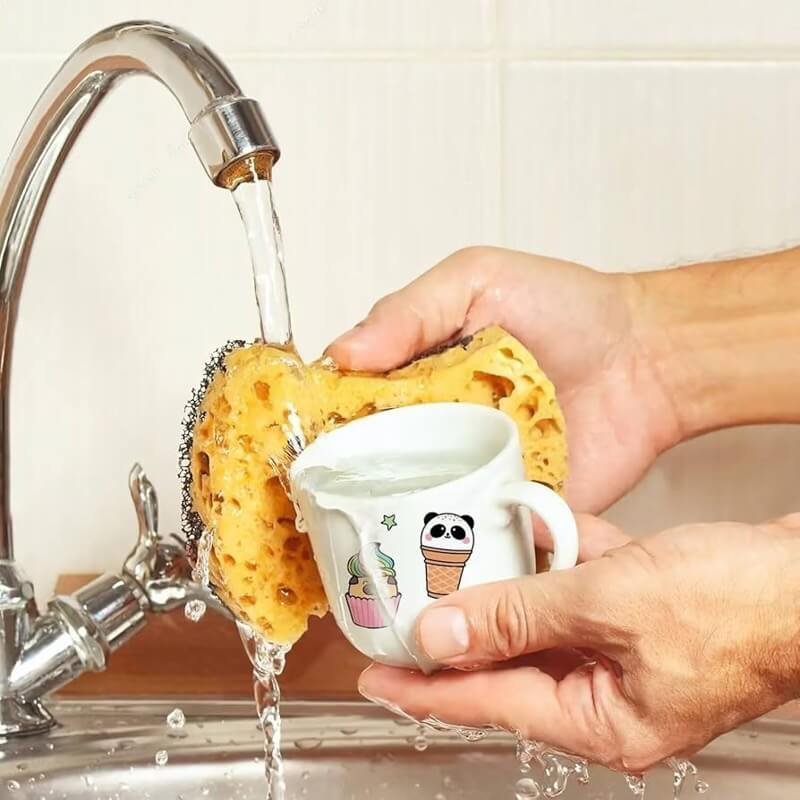
For instance, if you need waterproof (resistant to water damage) labels for items that will be exposed to moisture, such as lunchboxes or swimwear, you can choose specific materials designed for that purpose. You might opt for waterproof sticker paper or a special type of iron-on transfer paper that can withstand repeated washing and exposure to the elements.
On the other hand, if you’re creating labels for delicate clothing items, you might prefer a softer, more flexible material like cotton fabric. This ensures that the label won’t irritate sensitive skin or damage the garment.
And if longevity is your primary concern, you can select durable (able to withstand wear, pressure, or damage) materials like heavy-duty vinyl or robust iron-on transfers that are designed to withstand years of use. You can even add extra layers of protection, such as lamination or sealant sprays, to further enhance their resilience.
Here are some examples on materials:
- Paper and tape: These labels are not typically waterproof.
- Printable vinyl: Water-resistant, but not entirely waterproof.
- Waterproof sticker paper: Designed to be waterproof.
- Iron-on transfer: When used with a sealant it can be very durable.
By carefully considering the intended use of the labels and selecting the appropriate materials, you can ensure that your creations are not only beautiful but also practical and long-lasting (existing or being used for a long time without becoming damaged). This level of control is simply not possible with pre-made labels.
5. Getting started: Supplies you already have at home
Creating simple, effective name labels doesn’t require a trip to a specialized craft store. In fact, you likely already have most, if not all, of the necessary supplies right in your home. This makes the process incredibly accessible and convenient, especially for quick labeling needs. Here’s a breakdown of the basic supplies:
- Paper: Standard printer paper is perfectly suitable for creating basic labels. You can use white paper for a clean look, or colored paper to add a bit of visual interest. Even scrap paper can be repurposed for this purpose, making it an eco-friendly option.
- Scissors: A regular pair of scissors is all you need to cut out your labels. Precision isn’t crucial for simple paper labels, so any household scissors will do.
- Paper trimmer (optional): While not strictly necessary, a paper trimmer can be helpful for creating perfectly straight cuts, especially if you’re making a large number of labels. This is more about aesthetics than functionality.
- Clear tape: Ordinary, transparent tape is the key to attaching and protecting your paper labels. It acts as a simple laminating layer, providing some resistance to moisture and wear. Look for a tape that is clear and has good adhesion.
- Permanent markers: For handwritten labels, permanent markers are essential. Choose markers with fine tips for clear, legible writing. Black ink is the most versatile, but you can also use colored markers to match your labels or add a decorative touch. Ensure the markers are truly permanent and won’t smudge or fade easily.
These readily available materials make it easy to create functional labels in a pinch, without any special equipment or expertise. It’s a testament to the fact that sometimes, the simplest solutions are the most effective.
6. Essential supplies for printable labels
If you want to create more polished or intricate labels, using a printer opens up a world of possibilities. However, it’s important to understand the different types of printers and materials available to achieve the best results. Here’s what you’ll need:
Printer: You’ll need either an inkjet or a laser printer.
- Inkjet printers: These printers use liquid ink, which is sprayed onto the paper. They are generally better for printing vibrant colors and images, making them a good choice for labels with graphics or photos. However, inkjet ink can sometimes smudge if it gets wet, unless you use special waterproof paper or apply a sealant.
- Laser printers: These printers use toner, a dry powder that is fused to the paper with heat. Laser prints are typically more water-resistant and durable than inkjet prints, making them a good choice for labels that need to withstand wear and tear. However, laser printers may not be as good at printing very fine details or complex color gradients.
The impact on durability is significant. Inkjet prints on regular paper will smudge if wet. Laser prints on regular paper are more resistant to water but not waterproof.
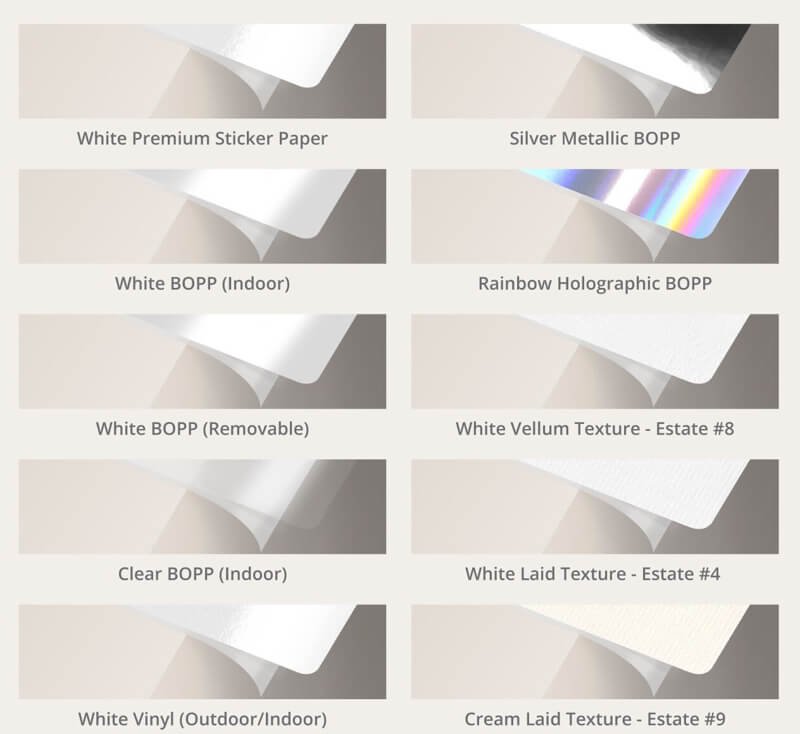
Printable sticker paper: This is a special type of paper with an adhesive backing, allowing you to create stickers directly. It comes in various finishes:
- Matte: A non-glossy finish that’s good for a subtle, understated look.
- Glossy: A shiny finish that makes colors pop and adds a professional touch.
- Clear: A transparent material that’s ideal for creating labels that blend seamlessly with the surface they’re applied to.
- Waterproof: Specifically designed to resist water damage, essential for labels that will be exposed to moisture.
Transfer paper: This is used for creating iron-on labels, which are applied to fabric using heat. There are two main types:
- For light fabrics: Designed for use on white or light-colored fabrics.
- For dark fabrics: Designed for use on darker fabrics, as it has a white backing that prevents the fabric color from showing through the design.
Iron-on: The process of applying the label with heat, typically using a household iron.
Understanding the differences between these options will help you choose the right materials for your specific needs and ensure that your printed labels are both beautiful and durable.
7. Must-have supplies for creating fabric labels
Creating fabric labels adds a professional and durable touch, especially suitable for clothing and other textile items. This method often offers a softer feel and greater longevity compared to paper or sticker labels. Here’s a breakdown of the essential supplies:
- Fabric scraps: These are the foundation of your fabric labels. Ideally, use tightly woven, light-colored fabrics like cotton, linen, or a cotton-poly blend. You can upcycle old pillowcases, sheets, or clothing items, making it an eco-friendly option.
- Scissors: Sharp fabric scissors are best for precise cutting of fabric.
- Iron and ironing board: A standard household iron and ironing board are essential for applying heat-transfer designs or fusing interfacing to the fabric. The heat helps to bond the design to the fabric and create a permanent label.
- Parchment paper/silicon paper: The parchment paper or silicon paper, will be used to prevent direct contact with the iron plate.
8. Level up your labels with these optional tools
While basic supplies are sufficient for creating simple labels, certain optional tools can significantly enhance the process and the final result, especially if you’re aiming for a more professional or polished look. These tools can improve precision, efficiency, and creative possibilities.
8.1. Achieve precision cuts with a cutting machine
A cutting machine is a powerful tool that allows you to cut intricate designs and shapes with extreme precision. It’s particularly useful for creating labels with detailed logos, graphics, or unusual shapes. These machines connect to your computer and use specialized software to guide the cutting blade.
- Benefits: Precise cuts, intricate designs, saves time when making multiple labels.
- Considerations: Requires an initial investment, learning curve for the software.
8.2. Create professional designs with software
While basic labels can be designed using word processing software, dedicated design software offers more advanced features and flexibility. These programs allow you to create custom graphics, manipulate fonts, and precisely arrange elements.
- Benefits: Greater design control, professional-looking results, access to templates and design elements.
- Considerations: Some software may have a cost or require a subscription.
8.3. Simplify your process with weeding tools
If you’re using a cutting machine to cut vinyl or iron-on labels, weeding tools are essential for removing the excess material around your design. These tools have sharp, pointed tips that help you lift and separate the unwanted pieces.
- Benefits: Makes weeding faster and easier, prevents damage to the design.
- Considerations: Not necessary for paper or printed labels.
8.4. Ensure clean edges with Fray Check
This is a liquid sealant that prevents fabric edges from fraying. It’s particularly useful for fabric labels, ensuring a clean and professional finish.
- Benefits: Prevents fraying, extends the life of fabric labels.
- Considerations: Not necessary for paper or sticker labels.
These optional tools represent an upgrade in terms of capabilities and convenience.
9. How to make labels with paper and tape: a step-by-step guide
This is the simplest and most accessible method for creating name labels, requiring only materials commonly found in most households. It’s perfect for quick labeling needs and doesn’t require any special equipment.
Instructions:
- Write: Using a permanent marker, clearly write the desired name or text on a piece of paper. Consider the size of the item you’re labeling and adjust the size of your writing accordingly. If you want to add some style, you could experiment with a fun font.
- Cut: Carefully cut out the label around the written text. You can create a simple rectangular shape, or get creative with rounded corners or other shapes. Precision isn’t crucial, but try to make the cuts as neat as possible.
- Size: Make sure that the label can fit in the area that you want to use.
- Apply tape: Cut a piece of clear tape that is slightly larger than the paper label. Place the label face down on the sticky side of the tape, ensuring it’s centered.
- Trim: Trim the excess tape around the edges of the label, leaving a small border of tape to create a seal. This will help protect the paper from moisture and wear.
- Attach: Carefully apply the label to the desired item, pressing firmly to ensure good adhesion. Smooth out any air bubbles to create a clean finish.
That’s it! You’ve created a simple, functional name label using just paper and tape. It’s a quick, easy, and cost-effective solution for labeling a variety of belongings.
10. Paper and tape method: Is it right for you?
Like any method, the paper and tape approach has its advantages and disadvantages. Understanding these will help you determine if it’s the right choice for your specific needs.
| Feature | Pros | Cons |
| Simplicity | Easiest method, minimal skill required. | Lowest durability, susceptible to tearing and moisture. |
| Speed | Very quick to create. | Not waterproof, ink may smudge. |
| Cost | Extremely inexpensive. | Less visually appealing, may look homemade. |
| Accessibility | Materials readily available. | Best for temporary use. |
In summary, the paper and tape method is a great option for quick, temporary labeling when cost and convenience are the primary concerns. However, if durability, water resistance, or aesthetics are important, other methods should be considered.
11. A guide to choosing the perfect sticker paper
Printable sticker paper offers a significant upgrade in terms of aesthetics and durability compared to the paper and tape method. However, with various types of sticker paper available, choosing the right one for your project is crucial. Here’s a guide to help you make the best decision:
Matte sticker paper:
- Description: Has a non-glossy, smooth finish.
- Best for: Labels where a subtle, understated look is desired. It’s also good for labels that will be written on, as the surface is more receptive to ink.
- Considerations: Colors may appear slightly less vibrant than on glossy paper.
Glossy sticker paper:
- Description: Has a shiny, reflective finish.
- Best for: Labels where you want colors to pop and a professional look is desired. It’s great for labels with photos or vibrant graphics.
- Considerations: Can be more prone to showing fingerprints and scratches.
Waterproof sticker paper:
- Description: Specifically designed to resist water damage.
- Best for: Labels that will be exposed to moisture, such as those on lunchboxes, water bottles, or outdoor items.
- Considerations: Make suse to use an inkjet printer. Usually more expensive than standard sticker paper.
Clear sticker paper:
- Description: Transparent sticker paper that allows the surface beneath to show through.
- Best for: Creating labels that blend seamlessly with the background, or for use on colored surfaces where you don’t want a white border.
- Considerations: Text and graphics need to be dark enough to be visible against the background.
Durability considerations:
- General durability: Even standard sticker paper is generally more durable than plain paper.
- Water resistance: Only waterproof sticker paper is truly waterproof. Other types may offer some water resistance, but prolonged exposure to moisture can still cause damage.
- Scratch resistance: Glossy sticker paper is generally more scratch-resistant than matte, but it can also show scratches more readily.
By carefully considering the finish, water resistance, and durability requirements of your project, you can select the sticker paper that will produce the best results.
12. How to design your labels with free and easy tools
Creating visually appealing labels doesn’t require expensive or complex design software. You can easily design effective and personalized labels using readily available tools like Microsoft Word, Google Docs, or Canva. Here’s a brief overview of each:
12.1. Designing labels in Microsoft Word
- Overview: A widely used word processing program that offers basic design capabilities.
- How to design labels: Use the “Mailings” tab and select “Labels”. Then, choose a label template that matches your sticker paper (e.g., Avery 5160). Customize the text, font, size, and color. Insert simple shapes or images.
- Pros: Familiar interface for most users, readily accessible.
- Cons: Limited design features compared to dedicated design software.
- Embedded link suggestion: “How to Create Labels in Microsoft Word”.
12.2. Designing labels in Google Docs
- Overview: A free, web-based word processor that’s part of Google Workspace.
- How to design labels: Use the “Add-ons” menu to find and install a label-making add-on (e.g., Avery Label Merge). Follow the add-on’s instructions to create and customize your labels. Insert text, change fonts, and add simple images.
- Pros: Free, accessible from any device with an internet connection, collaborative features.
- Cons: Requires an internet connection, design features are still relatively basic.
- Embedded link suggestion: “How to Make Labels with Google Docs”.
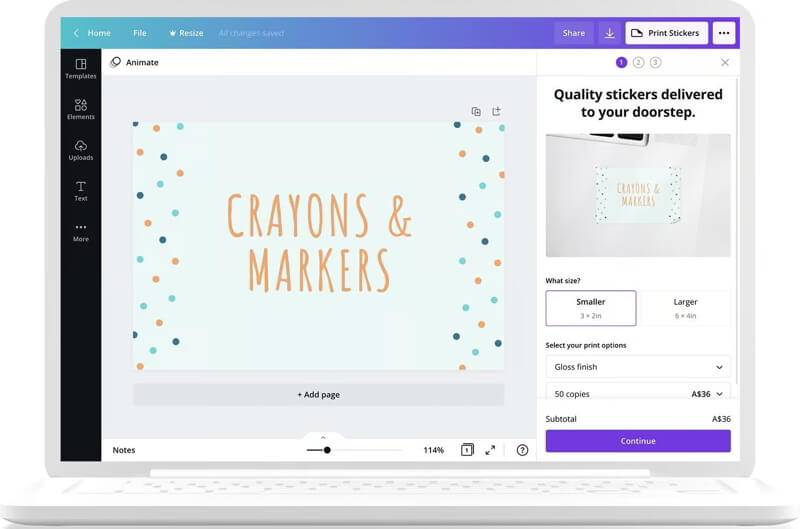
12.3. Designing labels in Canva
- Overview: A free, user-friendly online design tool with a wide range of templates and design elements.
- How to design labels: Search for “label” templates or create a custom-sized design. Then, choose a template or start from scratch. Customize the text, fonts, colors, and images. Add icons, illustrations, or other design elements. Finally, download your design as a PDF or image file for printing.
- Pros: Intuitive interface, vast library of templates and design elements, free version available.
- Cons: Requires an internet connection, some features are only available with a paid subscription.
- Embedded link suggestion: “Canva Label Maker”.
12.4. Essential design tips for standout labels
- Keep it simple: Don’t overcrowd your labels with too much text or graphics.
- Choose legible fonts: Select fonts that are easy to read, even at small sizes.
- Use high-contrast colors: Ensure there’s enough contrast between the text and the background for readability.
- Consider the size: Make sure your design fits within the dimensions of your chosen sticker paper.
- Leave a margin: Avoid placing important elements too close to the edges of the label to prevent them from being cut off during printing.
By following these tips and utilizing the resources available in Word, Google Docs, or Canva, you can create professional-looking labels without any specialized design skills.
13. How to print and apply your sticker labels perfectly
Once you’ve designed your labels and chosen the right sticker paper, the next step is printing and applying them correctly. Here’s a step-by-step guide:
- Load sticker paper: Carefully load the sticker paper into your printer, ensuring it’s oriented correctly. Refer to your printer’s manual for specific instructions, as the loading method may vary depending on the model. Usually, you’ll want to place the sticker paper face down in the paper tray.
- Printer settings: Before printing, adjust your printer settings to match the type of sticker paper you’re using. This is crucial for achieving optimal print quality and preventing smudging or damage to the paper. Paper type: Select “Glossy Photo Paper,” “Matte Photo Paper,” “Labels,” or a similar option, depending on your sticker paper’s finish. Print quality: Choose “Best” or “High Quality” for the sharpest and most vibrant results. Color/grayscale: Select “Color” if your labels have color elements, or “Grayscale” if they are black and white.
- Test print (recommended): Before printing on the sticker paper, do a test print on plain paper. This allows you to check the alignment, colors, and overall appearance of your design. It’s a valuable step to avoid wasting sticker paper.
- Print: Once you’re satisfied with the test print, print your labels on the sticker paper.
- Cut: If your sticker paper doesn’t have pre-cut labels, carefully cut out each label using scissors or a paper trimmer. If using scissors, try to cut as straight as possible. A paper trimmer will provide the most precise results.
- Apply: Peel off the backing of the sticker label and carefully apply it to the desired surface. Start from one corner and slowly smooth the label down, working your way across to avoid air bubbles. Press firmly to ensure good adhesion.
- Smooth: Once the label is applied, use your fingers or a smooth, flat object (like a credit card) to smooth out any remaining air bubbles and ensure the label is completely adhered.
By following these steps, you can ensure that your printed sticker labels are applied cleanly and professionally, enhancing the appearance and functionality of your labeled items.
14. Making your labels last: Tips for waterproof durability
While standard sticker paper offers some level of durability, achieving true water resistance requires specific materials and techniques. Here are some tips for making your sticker labels more durable and waterproof:
- Use waterproof sticker paper: This is the most straightforward approach. Waterproof sticker paper is specifically designed to resist water damage, making it ideal for labels that will be exposed to moisture. Ensure your printer is compatible with waterproof sticker paper (usually inkjet printers).
- Laminate: Applying a layer of clear laminate over your printed labels adds a significant layer of protection. You can use self-adhesive laminating sheets or a laminating machine.
- Use a sealant spray: After printing and cutting your labels, you can apply a clear sealant spray to create a water-resistant barrier. Several types of sealant sprays are available: acrylic Sealant, polyurethane sealant, clear coat spray.
- Important: When using a sealant spray, apply it in a well-ventilated area and follow the manufacturer’s instructions carefully. Multiple thin coats are generally better than one thick coat.
- Test your method: Before applying labels to valuable items, test your chosen method on a scrap piece of sticker paper. Expose it to water and check for smudging, peeling, or other damage.
Read more:
By implementing these techniques, you can significantly enhance the durability and water resistance of your sticker labels, ensuring they remain intact and legible even in challenging conditions. This is particularly important for labels used on items that are frequently washed or exposed to the elements.


