


Custom Iron-On Patches: Design, Create and Apply Guide


Ready to dive into the world of custom iron-on patches? Whether you’re looking to personalize your clothing line, add unique branding elements to your merchandise, or simply add a touch of flair to your gear, creating your own patches is a fantastic way to achieve a professional, customized look.
This comprehensive guide will provide you with everything you need to know, from understanding the basics of iron-on patches and embroidery to mastering the step-by-step creation process. You’ll gain insights into selecting the right materials, designing your patch, using an embroidery machine, and troubleshooting common problems.
1. Understanding iron-on patches and embroidery
1.1 What is an iron-on patch?
An iron-on patch is a decorative piece of fabric with a heat-activated adhesive backing. This adhesive allows the patch to be permanently attached to another fabric surface using heat and pressure, typically from a household iron. The key advantage of iron-on patches lies in their ease of application – no sewing is required! This makes them a popular choice for quickly and easily customizing garments, bags, and other fabric items.
While iron-on patches offer convenience, it’s helpful to understand how they compare to sew-on patches. Sew-on patches, as the name suggests, are attached by stitching them onto the fabric. Iron-on patches offer a balance of ease and durability that works well for many applications, especially for businesses looking to add branding without extensive labor.

1.2 How embroidery machines create patches
Embroidery machines bring patch designs to life with incredible precision and speed. These machines operate using a digitized design, essentially a computer file that instructs the machine where and how to stitch. This digital file, often called a stitch file, contains all the information about thread colors, stitch types, and stitch placement.
The process begins with a designer creating the artwork, which is then “digitized” – converted into a stitch file format that the embroidery machine can understand. The machine then uses this file to automatically control the movement of a needle and thread, creating intricate designs on a piece of fabric.
2. Gathering your materials and tools
2.1 Essential materials
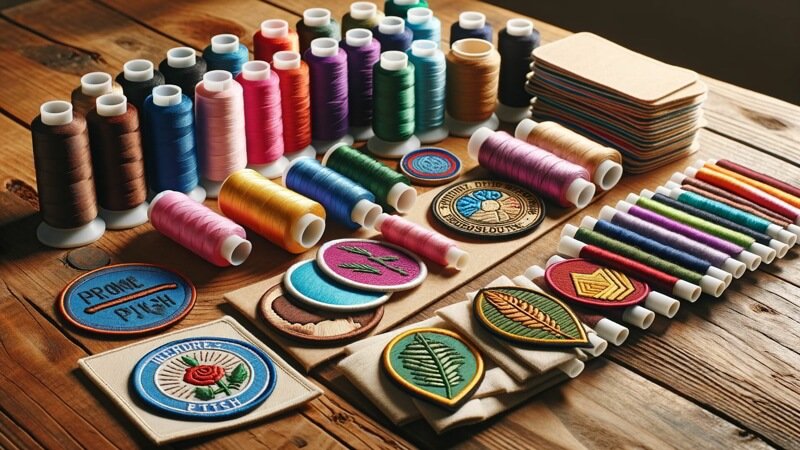
To embark on your iron-on patch-making journey, you’ll need the following essential materials:
- Embroidery Machine: This is the heart of the operation. Different models offer varying capabilities and hoop sizes, so choose one that suits your needs and budget.
- Thread: High-quality polyester thread is the preferred choice for embroidery patches. Polyester is durable, colorfast, and resistant to shrinking or stretching.
- Patch Fabric: The fabric you choose will form the base of your patch. Common material options include twill, felt, and nylon.
- Stabilizer: This is a crucial component that provides support and prevents the fabric from puckering or stretching during the embroidery process. There are several types: water-soluble stabilizer, tear-away stabilizer, cut-away stabilizer.
- Iron-On Backing: This is the heat-activated adhesive material that will allow your patch to be ironed onto a garment. It comes in sheets or rolls and is applied *after* the embroidery is complete.
- Hoops: These hold your fabric taut during the embroidery process.
2.2 Essential tools
In addition to the materials, you’ll need these essential tools:
- Scissors: Sharp embroidery scissors are essential for trimming threads and cutting away excess fabric and stabilizer.
- Embroidery Design Software: This software allows you to create, edit, and digitize your patch designs. Some popular options include Embrilliance, Wilcom, and Hatch.
- Vector Graphics Software: If you’re creating your own designs from scratch, vector graphics software like Adobe Illustrator or Inkscape (a free, open-source alternative) is necessary.
- Iron: A standard household iron is used to apply the iron-on backing to your finished patch.
- Ironing Board: Provides a stable, heat-resistant surface for ironing.
- Parchment Paper: This is placed between the iron and the patch to prevent the adhesive from sticking to the iron and to protect the patch from scorching.
- Hot Knife (Optional, but recommended for polyester fabrics): A hot knife is a tool with a heated blade that melts and seals the edges of polyester fabric, preventing fraying.
2.3 Optional but helpful tools
To achieve a truly polished and professional result, a few optional tools can make a significant difference in precision and ease. A pair of tweezers, for instance, proves invaluable for delicately removing any small, stubborn bits of stabilizer that might remain, ensuring a perfectly clean finish. Additionally, a small ruler is essential for guaranteeing accuracy during the design and placement stages, helping you achieve perfect symmetry and alignment every time.
3. Designing your patch
3.1 Creating your own design
Designing your own patch allows for complete creative control, ensuring that your final product perfectly reflects your brand or vision. If you’re venturing into custom design, vector graphics software is your best friend. Programs like Adobe Illustrator and Inkscape allow you to create designs that are scalable without losing quality.
Here are some key design principles to keep in mind when creating your patch:
- Simplicity: Patches are often small, so overly complex designs can get lost in the embroidery.
- Bold Lines: Thin lines can be difficult to reproduce accurately with embroidery.
- Scaling: Consider the final size of your patch and design accordingly.
- Color Choice: Limited color palettes often work best for patches.
- Text: Use sans-serif fonts for best result.
3.2 Using pre-made designs
If you’re not comfortable creating your own designs from scratch, or if you’re looking for a quicker solution, using pre-made designs is a great option. Numerous online resources offer a vast library of embroidery designs, many of which are specifically created for patches.
- Etsy: A popular marketplace for independent artists and designers.
- Embroidery Design Websites: Many dedicated websites sell a wide variety of digital embroidery files suitable for patches.
When using pre-made designs, it’s important to check the licensing terms. Some designs may be for personal use only, while others may allow for commercial use with certain restrictions.
3.3 Digitizing your design
Digitizing is the process of converting your artwork (whether it’s a vector design you created or a pre-made design) into a stitch file that your embroidery machine can understand. This is a crucial step, as it determines how your design will be stitched onto the fabric.
Embroidery design software plays a key role in digitizing. This software allows you to specify stitch types, stitch density, thread colors, and other parameters that affect the final look of your patch.
Here are some basic digitizing concepts to be aware of:
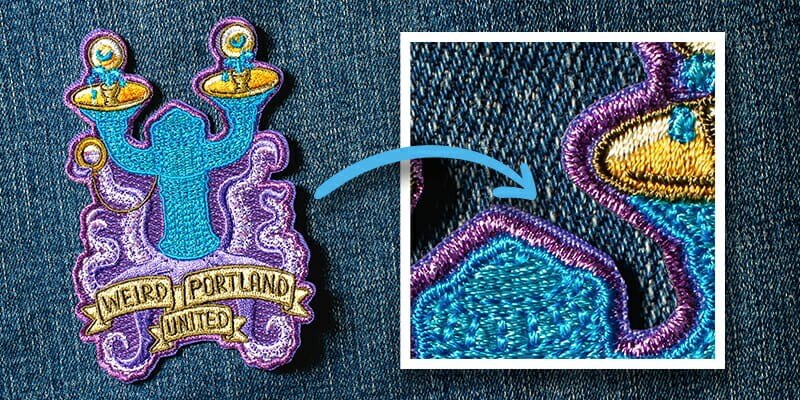
- Fills: These are areas of solid stitching that cover larger areas of the design. Common fill types include satin stitches (smooth, dense fills) and tatami stitches (fills with a textured appearance).
- Satin Stitches: These are closely spaced stitches that create a smooth, lustrous border or fill. Satin stitches are commonly used for outlines and small details.
- Outlines: These define the edges of your design elements. They can be created using satin stitches or other stitch types.
- Underlay Stitching: This is a layer of stitching that is placed underneath the main fill stitches. Underlay stitching helps to stabilize the fabric and prevent the fill stitches from sinking into the fabric.

4. Step-by-step patch creation process
4.1 Step 1- Hooping your fabric and stabilizer
This is the foundation of your embroidery project. Proper hooping ensures that your fabric remains taut and stable during the stitching process, preventing distortion and ensuring a clean, professional result.
- Layering: Place your stabilizer on a flat surface. Then, place your chosen patch fabric on top of the stabilizer, ensuring both are smooth and wrinkle-free.
- Hoop Placement: Separate the inner and outer rings of your embroidery hoop. Place the inner ring *underneath* the stabilizer and fabric.
- Outer Ring: Position the outer ring over the fabric and inner ring, aligning them carefully.
- Secure: Press the outer ring down firmly over the inner ring, sandwiching the fabric and stabilizer between them.
- Tighten: Gradually tighten the screw on the outer ring, ensuring the fabric and stabilizer are held *taut* like a drum.
4.2 Step 2- Preparing your embroidery machine
Getting your embroidery machine ready is like preparing a painter’s palette and canvas. It’s all about setting the stage for a successful creation.
- Load Design: Transfer your digitized design (stitch file) to your embroidery machine.
- Thread the Machine: Select the first thread color indicated in your design and thread your machine according to the manufacturer’s instructions.
- Needle Selection: Choose the appropriate needle for your fabric type. A sharp embroidery needle (usually size 75/11 or 80/12) is generally recommended for patches.
- Machine Settings: Depending on your machine, you may need to adjust settings such as stitch speed and tension. Refer to your machine’s manual for guidance on optimal settings for your specific fabric and thread.
4.3 Step 3- Stitching the design
This is where your design begins to take shape. It’s a process that requires both patience and observation.
- Start the Machine: Once your fabric is hooped, your design is loaded, and your machine is threaded, you’re ready to begin stitching. Press the start button on your machine.
- Monitor the Process: Keep a close eye on the embroidery process, especially during the initial stages. Watch for any thread breaks, skipped stitches, or other issues.
- Thread Changes: Your machine will likely pause and prompt you to change thread colors if your design requires multiple colors.
- Patience is Key: Embroidery can take time, especially for complex designs. Allow the machine to work at its own pace, and avoid rushing the process.
4.4 Step 4- Applying the iron-on backing
This step transforms your embroidered piece into a functional iron-on patch. It’s a crucial step that requires careful attention to detail and safety precautions.
- Prepare the Patch: Once the embroidery is complete, remove the hoop from the machine and carefully remove the fabric from the hoop. Trim any excess stabilizer from around the patch, leaving a small margin.
- Cut Backing: Cut a piece of iron-on backing slightly larger than your patch.
- Placement: Place your patch *face down* on a heat-resistant surface (like an ironing board). Position the iron-on backing, *adhesive side down*, onto the back of the patch, ensuring it covers the entire embroidered area.
- Parchment Paper: Place a sheet of parchment paper over the iron-on backing. This protects both the patch and your iron from the adhesive.
- Ironing: With your iron set to the appropriate temperature (usually medium to high heat, *no steam* – refer to the backing manufacturer’s instructions), press down firmly on the parchment paper. Apply consistent pressure for the recommended time (usually 10-20 seconds).
- Flip and Press (Optional): For a stronger bond, you can flip the patch over (with the parchment paper still in place) and press again from the front for a few seconds.
- Cool Down: Allow the patch to cool completely before handling it. This allows the adhesive to set properly.
4.5 Step 5- Finishing the patch edges
This final step gives your patch a polished, professional look and prevents fraying. You have several options for finishing the edges, depending on your desired aesthetic and the materials you’re using.
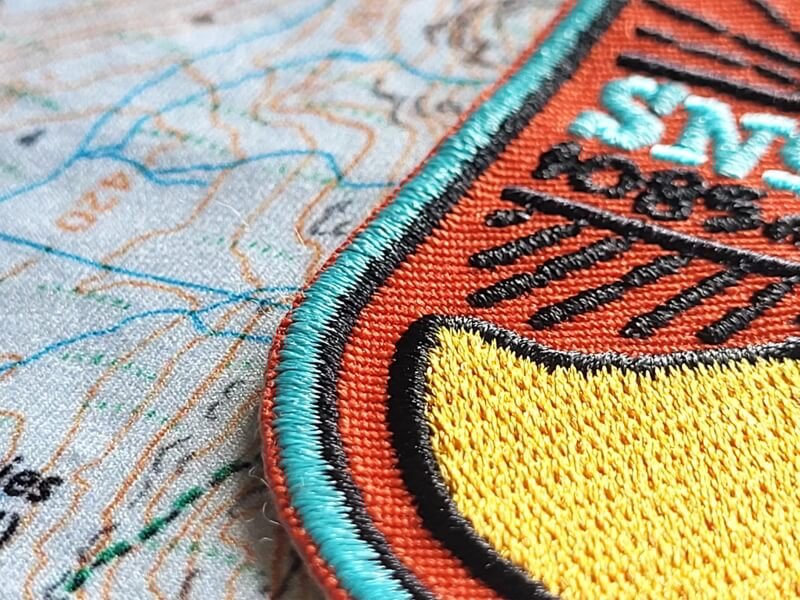
Option 1: Satin stitch border
This is a classic and durable option that creates a clean, raised border around your patch.
- Digitize Border: In your embroidery design software, create a satin stitch outline around the perimeter of your patch design. This outline should be wide enough to cover the raw edges of the fabric (typically 3-5mm).
- Stitch Border: When you stitch your design, the satin stitch border will be the final element to be embroidered.
- Density: Adjust the density of the satin stitch to achieve the desired look. A higher density will create a more solid and pronounced border.
Option 2: Hot knife cutting (polyester only)
This method is ideal for polyester fabrics, as it melts and seals the edges, preventing fraying. *Safety is paramount when using a hot knife.*
- Heat Up: Plug in your hot knife and allow it to heat up fully.
- Stable Surface: Place your patch on a heat-resistant surface, such as a glass cutting mat.
- Cutting: Carefully guide the hot knife along the edge of your patch, using the embroidered outline as a guide. Move slowly and steadily, allowing the heat to melt and seal the fabric.
- Ventilation: Work in a well-ventilated area, as the melting plastic can produce fumes.
- Safety Gear: Consider wearing safety glasses and gloves to protect yourself from the heat and fumes.
- Clean Knife: Use damp paper towels to clean knife.
Option 3: Careful cutting with scissors
Using sharp embroidery scissors, carefully cut along the embroidered border. Work slowly and rotate the patch as you cut to create a smooth, clean edge. The goal is to cut away the excess fabric without nicking the embroidery threads of the border.
5. Troubleshooting common problems
5.1 Stabilizer residue
Problem: After removing water-soluble stabilizer, some residue remains on the patch, making it feel stiff or look cloudy.
Solution:
- More Rinsing: Rinse the patch thoroughly under warm running water, gently agitating it to remove any remaining stabilizer. You may need to repeat this several times.
- Soaking: For stubborn residue, soak the patch in warm water for a longer period (30 minutes to an hour), then rinse again.
- Gentle Scrubbing: If residue persists, you can try gently scrubbing the affected areas with a soft brush (like an old toothbrush) while rinsing.
5.2 Uneven edges
Problem: The edges of the patch are not smooth or uniform, either due to cutting errors or stitching irregularities.
Solution:
- Precise Cutting: If using scissors, cut slowly and carefully, following the embroidered outline as closely as possible. Use sharp scissors for clean cuts.
- Hot Knife Technique: If using a hot knife, maintain a steady hand and consistent speed. Practice on scrap fabric first to get a feel for the tool.
- Satin Stitch Adjustment: If the unevenness is due to the satin stitch border, check your digitizing. Ensure the satin stitch is wide enough and dense enough to cover the raw edges of the fabric.
- Stabilizer Issues: Ensure the fabric and stabilizer are hooped tightly and correctly. Loose hooping can cause the fabric to shift, leading to uneven stitches.
5.3 Patch not adhering
Problem: The iron-on patch does not adhere properly to the target fabric, either peeling off easily or not sticking at all.
Solution:
- Insufficient Heat: Ensure your iron is set to the correct temperature recommended by the iron-on backing manufacturer.
- Insufficient Pressure: Apply firm, even pressure when ironing the patch. Use your body weight to press down on the iron.
- Insufficient Time: Hold the iron in place for the recommended amount of time.
- Incompatible Fabrics: Some fabrics are not suitable for iron-on patches.
- Backing Quality: Use a high-quality iron-on backing from a reputable supplier.
- Improper Surface: Always iron on a hard, flat, heat-resistant surface. A standard padded ironing board is often too soft and can absorb the pressure needed for good adhesion.
5.4 Thread breaks or bunching
Problem: The embroidery thread frequently breaks or bunches up on either the top or bottom of the fabric during stitching.
This common issue can often be resolved by checking the following:
- Thread Quality: Ensure you are using high-quality thread specifically designed for machine embroidery, as lower-quality threads are prone to snapping.
- Needle Condition: A dull, damaged, or incorrect type of needle can snag the thread; switch to a new, sharp embroidery needle appropriate for your fabric.
- Correct Threading: Carefully re-thread the machine, making sure both the upper thread and the bobbin are properly seated in their tension paths.
- Tension Balance: Imbalanced tension is a primary cause of bunching. Adjust the upper thread tension—too tight can cause breaks, while too loose can cause loops underneath.
- Machine Cleanliness: Lint or dust buildup in the bobbin area or tension discs can impede thread flow, so ensure your machine is clean.
- Design Density: If a design is too densely stitched, it puts excessive strain on the thread. Consider using a lighter-density version if possible.
6. Advanced techniques
6.1. Creating multi-layered patches
This technique involves layering different pieces of fabric or embroidery to create a three-dimensional effect.
Method: Applique techniques are often used for multi-layered patches. You can stitch down one piece of fabric, trim it, and then stitch another layer on top, creating overlapping elements.
6.2. Using specialty threads
Experimenting with different types of thread can add unique visual effects to your patches.
Method:
- Metallic Thread: Adds a shimmering, eye-catching element.
- Glow-in-the-Dark Thread: Creates a fun and surprising effect.
- Variegated Thread: Changes color along its length, creating subtle or dramatic color variations.
When using specialty threads, it’s important to adjust your machine settings (needle type, tension) as needed.
6.3. Creating thread-only patches
This technique eliminates the need for a fabric base, creating a patch entirely from thread.
Method: This typically involves using a dense fill stitch pattern with multiple layers of underlay stitching to create a stable, self-supporting structure. Water-soluble stabilizer is often used, and it’s washed away completely after stitching, leaving only the thread.
7. Related questions
7.1 Can I use a regular sewing machine to make iron-on patches?
While a standard sewing machine *can* be used to create patches (by sewing fabric pieces together), it cannot replicate the intricate designs and precise stitching of an embroidery machine.
7.2 What is the best fabric to use for iron-on patches?
Twill is widely considered the best fabric for iron-on patches due to its durability, stability, and professional appearance. Felt and polyester are also good choices.
7.3 How long do iron-on patches last?
The lifespan of an iron-on patch depends on several factors, including the quality of the adhesive, the type of fabric it’s applied to, and how often the item is washed and worn.
7.4 Can iron-on patches be removed?
Iron-on patches are designed to be permanent. While it is possible to remove them, it can be difficult and may damage the underlying fabric. The process usually involves reheating the patch to soften the adhesive and then carefully peeling it off.
Read more:
Creating custom iron-on patches with an embroidery machine opens up a world of possibilities for personalization, branding, and creative expression. This guide has equipped you with the knowledge and skills to embark on your patch-making journey, from understanding the fundamentals to mastering the step-by-step process.
Remember to experiment with different materials, designs, and techniques to discover your unique style. With practice and patience, you’ll be able to create professional-quality, durable, and eye-catching iron-on patches that add a distinctive touch to any garment or accessory.


