


Buttonholes: Choosing Types And Ensuring Garment Quality


For small apparel businesses navigating the complexities of garment production, details like buttonholes can seem minor, yet they significantly impact perceived quality and customer satisfaction. Balancing aesthetics, durability, and cost is a constant challenge.
This guide delves into the practical world of buttonholes, exploring various buttonhole types and construction methods. Readers will gain insights into performing essential quality checks and learn criteria for selecting the most appropriate buttonhole for their specific garments, ultimately enhancing their understanding of garment quality and craftsmanship.
In garment making, a buttonhole is fundamentally a reinforced opening – typically a slit or occasionally a loop – created in fabric to allow a button to pass through, functioning as a fastener. The critical aspect here is reinforcement. This stitching or binding around the opening is essential to prevent the fabric edges from fraying or tearing under the repeated stress of fastening and unfastening.
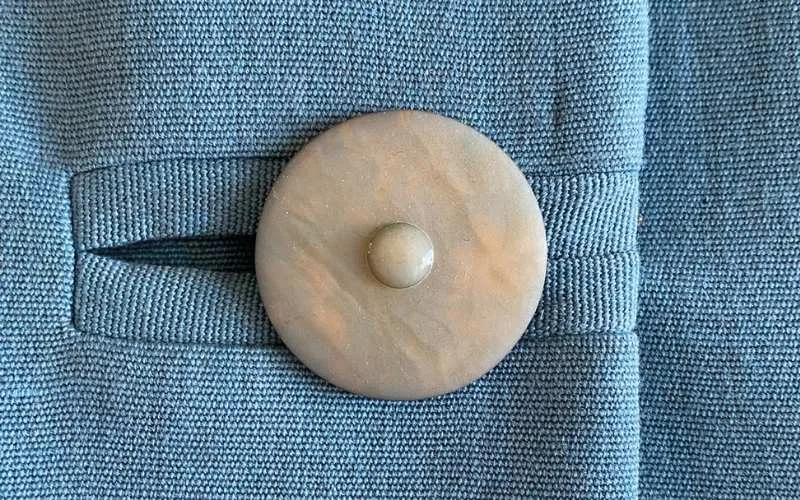
Proper reinforcement ensures the garment closes securely and maintains its integrity over time, contributing significantly to durability. The size and shape of the buttonhole must also match the specific button, including accommodating the button shank (the protrusion on the back of some buttons) where applicable.
The most frequently encountered buttonhole is the standard straight type. Visually, this consists of two parallel lines of dense stitching (often a zig-zag stitch on machine-made versions) connected at each end by bar tacks (short, perpendicular reinforcements). You’ll commonly find this type on shirts, blouses, and casual wear across various textiles.
- Pros: Highly versatile for many garment types; efficient and cost-effective to produce, particularly with sewing machines, speeding up the fastening process during production.
- Cons: Can sometimes appear less refined compared to more elaborate styles; may not be the ideal choice for very bulky fabrics or buttons with thick shanks, as the straight slit offers less room.
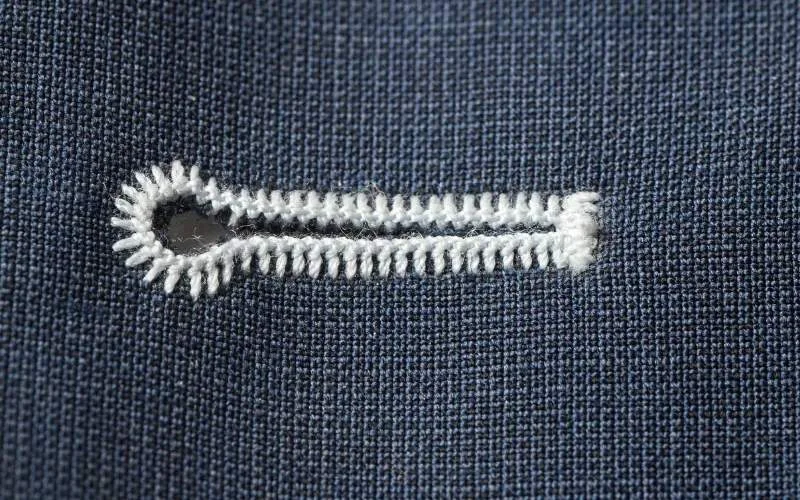
Distinctive for its shape, the keyhole buttonhole features a circular opening at one end which transitions into the straight slit. This design serves a specific function: the rounded “keyhole” provides necessary space for button shanks, reducing direct fabric stress at the point of fastening.
Consequently, this style is particularly well-suited for heavier fabrics and the shank buttons often used on outerwear like jackets and coats. Keyhole buttonholes are almost exclusively machine-made due to the precision required for the shape.
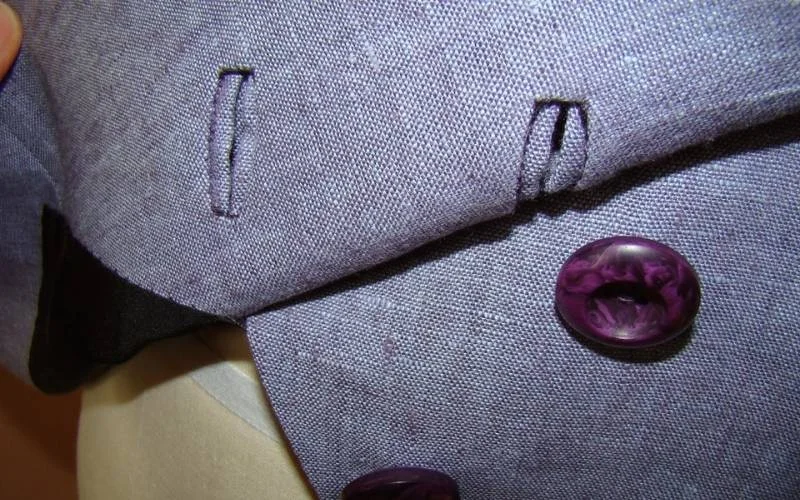
The bound buttonhole represents a different construction approach entirely. Instead of visible stitching finishing the raw edges, narrow strips of fabric, known as welts, are meticulously folded and stitched to enclose the opening. The result offers superior aesthetics – a clean, tailored, and sophisticated look often associated with high quality and bespoke tailoring.
- Common uses: Frequently found on tailored jackets, coats, and other high-end garments where a refined finish is paramount.
- Production considerations: Creating bound buttonholes is labor-intensive, demanding significant skill and time, which increases production costs compared to stitched buttonholes. Businesses must weigh the premium appearance against these cost targets.
1.4. Brief mention: decorative styles & alternatives
Beyond the functional standards, certain buttonhole styles exist primarily for decorative purposes. The Milanese Buttonhole is a prime example; this highly skilled, hand-worked style often incorporates a gimp cord (a thicker filler cord) beneath the stitching for pronounced definition and is considered a hallmark of bespoke tailoring.
Additionally, remember that cut buttonholes aren’t the only closure method. Fabric loops and frog closures (ornamental braid fastenings) offer different visual textures and functionalities, serving as distinct alternatives.
Hand-stitched or hand-worked buttonholes involve a meticulous process. After carefully cutting the slit, the sewer uses dense, precise hand stitches (specifically, the buttonhole stitch) to cover the raw edges. Often, a gimp thread/cord is laid along the edge under the stitches for added structure and durability.
- Pros: Can achieve superior longevity compared to some machine methods if done expertly; offers a unique, bespoke appearance that signals high quality and craftsmanship.
- Cons: Extremely time-consuming production, requiring highly skilled labor; significantly increases cost targets, making this impractical for most businesses producing garments in volume.
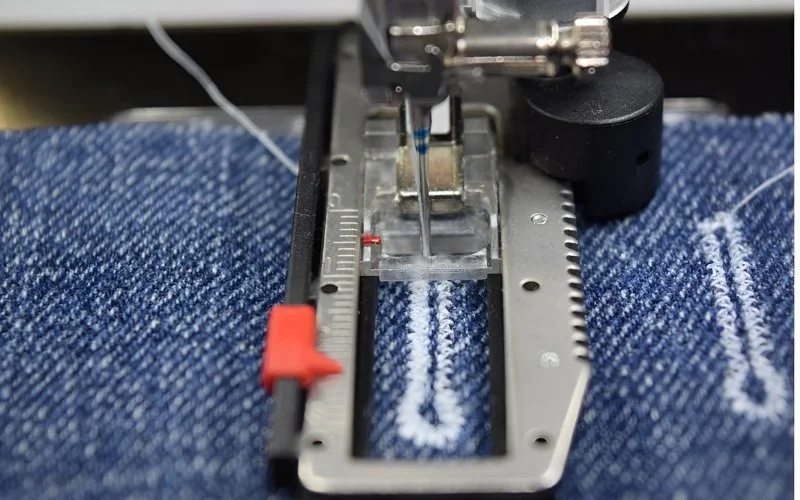
Modern sewing machines offer efficient solutions for creating buttonholes, often utilizing specialized attachments like a buttonhole foot. The process typically involves automated zig-zag stitch patterns to form the sides and bar tacks at the ends.
- Pros: Offers significant advantages in speed, consistency, and cost-effectiveness, making buttonhole creation accessible for businesses of all sizes; provides reliable durability for most applications.
- Cons: While generally high quality, results can vary depending on machine settings, operator skill, and proper use of interfacing (a stabilizing fabric layer); may lack the refined look of hand-worked versions. Meeting specific cost targets is often easier with machine methods.
Assessing buttonhole quality involves looking for specific visual and structural cues. Use this checklist during production or when evaluating samples:
- Even and dense stitching: Stitches should be uniform in length and spacing, covering the raw fabric edge completely.
- No fabric puckering: The fabric around the buttonhole should lie flat, without ripples or gathers caused by overly tight stitching.
- Secure bar tacks: The perpendicular stitches at each end must be robust, anchoring the buttonhole structure and preventing unraveling at stress points.
- Clean slit edges: The cut opening should be neat, with no signs of fraying fabric poking through the stitches.
- Neat, flat welts (for bound buttonholes): The fabric welts should be even in width, lie flat against the garment, and meet neatly at the corners.
- Correct size: The button should pass through smoothly without excessive force but also without leaving a large gap.
- Appropriate placement: Buttonholes should align correctly according to the pattern and be positioned consistently relative to the garment edge.
- Consistency: All buttonholes on a single garment should exhibit the same level of quality and appearance.
Selecting the appropriate buttonhole involves more than just aesthetics; several practical factors come into play. Consider these points when making decisions for your apparel line:
- Fabric compatibility: The weight and type of fabric heavily influence the choice. Heavier materials like denim or coating often benefit from a keyhole buttonhole to accommodate thicker buttons and reduce strain. Delicate or stretch knits may require interfacing or specialized techniques to prevent distortion regardless of the buttonhole style chosen.
- Garment style/aesthetic: The buttonhole should complement the overall design. A bound buttonhole suits tailored pieces demanding a sophisticated finish, while a standard straight buttonhole is generally appropriate for casual shirts or blouses. The chosen style contributes to the garment type’s intended look.
- Production realities: Balance the desired look with practical constraints. Do you have the skilled labor or specific sewing machines needed for complex styles like bound buttonholes? Evaluate the impact on production time and cost targets. Hand-worked options, while beautiful, are often financially prohibitive for larger runs.
- Placement conventions: While traditions evolve, be aware of conventional gendered placement (typically left placket for men’s shirts, right for women’s) if targeting specific markets. Functional placement is also key – consider how the garment hangs and where stress occurs.
- Button choice: The selected button dictates the required buttonhole size. Buttons with a prominent button shank generally necessitate a keyhole or a slightly larger straight buttonhole compared to flat buttons.
Making informed choices requires weighing these factors against your brand identity and operational capabilities.
| Buttonhole Type | Best For (Fabric/Garment) | Key Considerations (Cost/Skill/Look) |
|---|---|---|
| Straight buttonhole | Versatile: Shirts, blouses, dresses, light-medium fabrics | Lower cost, machine-efficient, standard look |
| Keyhole buttonhole | Heavier fabrics, shank buttons: Jackets, coats, trousers | Machine-made, functional for stress points, tailored look |
| Bound buttonhole | Tailored garments, medium-heavy fabrics: Jackets, coats | Higher cost, high skill/time needed, premium aesthetic |
| Hand-worked | Bespoke/Luxury garments, various fabrics | Highest cost, expert skill, artisanal look, durable |
For enhanced durability, using a thread slightly stronger or heavier than the one used for main garment seams is advisable. Options include buttonhole twist (a thicker, glossier thread), topstitching thread, or even using your standard sewing thread doubled.
Aim for a smooth thread that won’t snag. Matching the thread fiber to the fabric (e.g., cotton thread for cotton fabric, polyester for synthetics) generally yields good results. The key characteristic is strength.
To calculate the required buttonhole length, use the following formula: buttonhole length = button diameter + button thickness + 1/8 inch (3mm) for ease. Always test the size on a scrap piece of the actual garment fabric and interfacing before sewing on the final garment.
For placement, follow your pattern guides precisely. If drafting your own, ensure the buttonhole starts far enough from the garment edge (at least half the button diameter plus a little extra). Typically, buttonholes are placed horizontally on waistbands or cuffs and vertically on shirt plackets or center front openings.
Attempting repair on a poorly executed buttonhole is often difficult, and the repair may still be noticeable. Minor fraying can sometimes be controlled temporarily with a liquid seam sealant or an anti-fray solution. Very careful hand-stitching might reinforce a weak area.
However, significant errors like incorrect placement, major puckering, or cuts extending beyond the stitching are usually very difficult to fix without being noticeable. Sometimes, the only options are to strategically cover the flaw (e.g., with trim) or, in severe cases, replace that section of the garment. Prevention through diligent quality control is far more effective.
Read more:
Though small, buttonholes serve as significant indicators of overall garment quality and reflect a brand’s attention to detail. Understanding the different buttonhole types, construction methods, and essential quality checks empowers apparel businesses to make informed decisions that enhance their products.
Applying this knowledge can elevate garment construction and contribute positively to customer perception. This dedication to seemingly small details like buttonholes is what ultimately defines a brand’s commitment to craftsmanship and builds a lasting reputation for quality.


