Easy Zipper Installation Guide: Types, Tools and Pro Sewing Tips
For many, the mere thought of zipper installation conjures up feelings of frustration and fear. Is it really as tricky as it seems? Uneven results, wonky stitching, projects derailed – these are common worries. This expert guide is designed to empower you with the skills and confidence to install zippers flawlessly. We’ll demystify the process, explore different zipper types, equip you with essential tools and preparation techniques, and guide you through step-by-step methods, all while sharing expert tips to ensure your zippers always look and perform their best. Let’s read!
1. Demystifying Zipper Installation: Your Expert Guide
For many who are new to sewing clothing and garments, the thought of sewing zippers can be intimidating. Zippers often carry a reputation for being fiddly and difficult, leading many beginner sewers to shy away from projects that require them. But fear not! Zipper installation is a skill that is absolutely achievable, and with the right guidance, you’ll be inserting zippers like a pro in no time.
Proper zipper installation is not just about functionality; it’s crucial for the overall quality and professional look of your garments. A well-installed zipper ensures smooth operation, garment durability, and a polished finished appearance. This guide is designed to demystify zipper installation, breaking down the process into manageable steps and equipping you with expert tips to achieve flawless results every time.
2. Choosing the Right Zipper: Types and Materials Matter
2.1 Understanding Zipper Types for Different Projects
Navigating the world of zipper types can seem overwhelming at first, but understanding the basic categories will empower you to make informed choices for your sewing projects.
- Coil Zippers: Coil zippers are made from continuous coils of nylon or polyester monofilament, forming the zipper teeth. They are known for their flexibility, lightweight nature, and smooth operation. Coil zippers are excellent all-purpose zippers and are commonly used in clothing, bags, and home décor projects.
- Metal Zippers: Metal zippers feature teeth made from individual pieces of metal, typically brass, nickel, or aluminum. Metal zippers are prized for their robustness and durability, making them ideal for heavy-duty applications like jeans, jackets, workwear, and leather goods. They offer a classic, rugged aesthetic.
- Plastic Molded Zippers: Plastic zippers have teeth that are molded directly onto the zipper tape from plastic. They are a cost-effective and versatile option, available in a wide range of colors and sizes. Plastic zippers are suitable for various clothing items, sportswear, and bags, offering a good balance of durability and affordability.
- Invisible Zippers: The invisible zipper (also known as a concealed zipper) is designed to disappear into the seam, creating a seamless closure. The zipper teeth are hidden behind the zipper tape, making it virtually invisible from the right side of the garment. Invisible zippers are the preferred choice for skirts, dresses, and formal wear where a clean, uninterrupted aesthetic is desired.
- Separating Zippers: Separating zippers are designed to come apart completely at the bottom, like those found on jackets and coats. They consist of two separate tapes that can be fully detached from each other.
- Non-Separating Zippers: Non-separating zippers remain closed at the bottom and are typically used for closures that do not need to fully separate, such as those on bags, pillow covers, or fly fronts on pants.
2.2 Zipper Materials: Durability and Aesthetics
The zipper materials used in construction significantly impact a zipper’s durability, smoothness of operation, and overall appearance. Nylon zipper tapes are typically made from nylon or polyester fabric. Nylon coil zippers are known for their smooth, quiet operation and flexibility. Nylon tape is often more pliable and softer than polyester tape. Polyester zipper tapes are also common, offering good durability and colorfastness. Polyester coil zippers are a robust and versatile choice.
Metal zippers are constructed with metal teeth, typically brass, nickel, or aluminum, attached to cotton, polyester, or blended zipper tape. The metal teeth provide exceptional strength and durability. The zipper slider and pull are also made of metal. The zipper tape is the fabric portion of the zipper to which the teeth are attached. The tape material should be compatible with your fabric types in terms of weight, care requirements, and aesthetics. Zippers are available in a vast array of color options. Choose a zipper color that either matches your fabric for a concealed look or provides a contrasting accent for a more decorative effect. Consider the overall aesthetics of your garment when selecting zipper color and material.
3. Essential Tools and Preparation for Zipper Success
3.1 Gathering Your Zipper Installation Toolkit
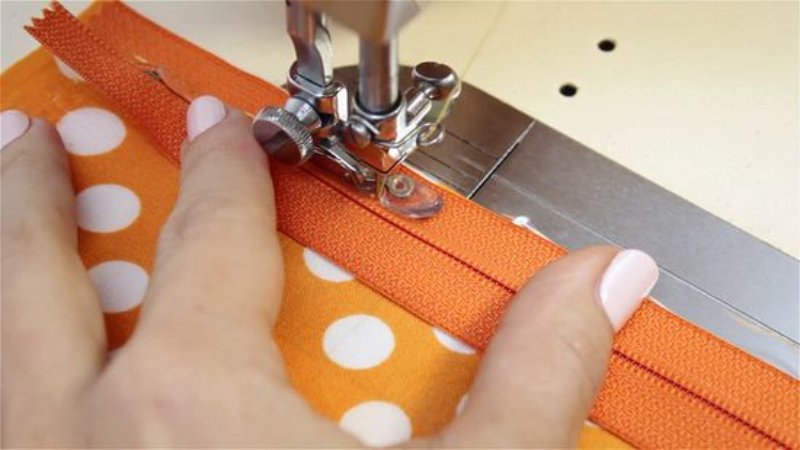
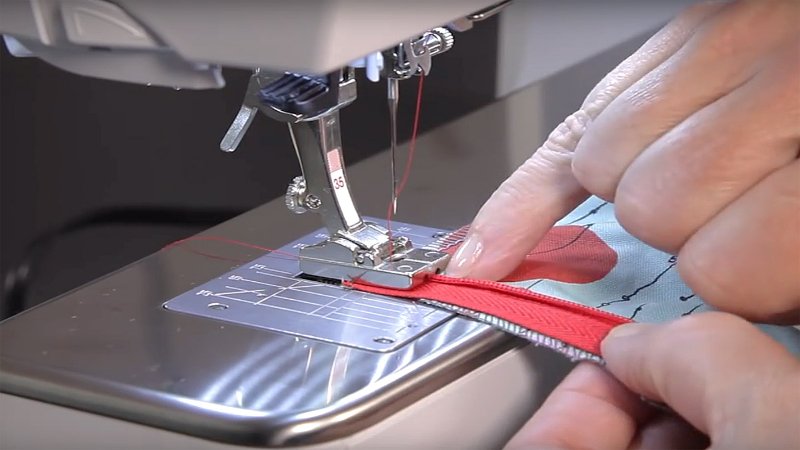
Having the right sewing tools at your fingertips is essential to ensure your zipper installation process is smooth, efficient, and even enjoyable. At the heart of your toolkit is the zipper foot, a specialized presser foot designed for your sewing machine. It allows you to sew precisely alongside zipper teeth, and standard versions are adjustable for sewing on either side. For a truly professional, concealed finish, an invisible zipper foot is indispensable. This specialized foot features unique grooves that cradle invisible zipper coils, enabling incredibly close stitching for a seamless look.
A reliable sewing machine in good working order is fundamental. Ensure yours is properly threaded and set up for a straight stitch for consistent seams. Fine pins are your allies in precision, crucial for accurately positioning and securing your zipper to the fabric before sewing, preventing shifting. Selecting the right needles is also key; choose needles appropriate for your fabric type – universal for many, sharp for fine, and denim/thicker for heavy fabrics.
A seam ripper is indispensable for cleanly correcting any small errors, while sharp scissors are needed for trimming threads and fabric adjustments. Accuracy is paramount, so a measuring tape is essential for precise measurements. Finally, while optional, quilting tape, or wash-away tape, can be remarkably helpful for temporary adhesion, especially with slippery fabrics or for beginners.
3.2 Prepping Your Fabric and Zipper for Sewing
Proper fabric preparation and zipper prep are just as important as having the right tools. Taking these steps beforehand will significantly improve the quality and ease of your zipper installation.
Finish Fabric Edges: Before installing your zipper, it’s crucial to finish the fabric preparation along the edges where the zipper will be inserted. This prevents fraying and creates a clean, professional finish. Methods for finishing edges include using a serged seam with a serger machine or a zig-zag stitch along the raw edge with a regular sewing machine.
Accurate Seam Allowance: Precisely mark and press your seam allowance along the fabric edges where the zipper will be sewn. Accurate seam allowances are essential for ensuring proper zipper placement and a smooth, even closure.
Basting Stitch for Placement: Use basting stitch, which are long, loose stitches, to temporarily secure the zipper to the fabric before final machine stitching. Basting stitch allows you to check the zipper placement, alignment, and ensure everything is positioned correctly before committing to permanent stitches. Basting is especially helpful for beginners and for ensuring accurate zipper application.
Ironing Seams Open: After basting and before final stitching, ironing the seams open along the zipper area is crucial. Ironing seams open creates a flat, smooth surface for zipper installation, reducing bulk and ensuring a professional-looking finish.
Zipper Preparation: While not always necessary, for some zippers, especially metal zippers, you may want to gently press the zipper preparation with a cool iron (avoiding direct heat on plastic or nylon zipper teeth) to ensure it is flat and ready for sewing. Always pre-wash fabric and your zipper together if the garment fabric is washable to account for any potential shrinkage in either material.
4. Step-by-Step Zipper Installation Techniques
4.1 The Basic Centered Zipper: A Classic Approach
The centered zipper is a foundational technique, known for its symmetrical and balanced appearance where the zipper is neatly centered beneath the seam. This classic method is incredibly versatile, frequently used for center back closures in garments like dresses and skirts, and equally suitable for home décor projects such as pillow covers and bags.
To install a centered zipper, begin with prepared fabric and zipper, ensuring finished edges and pressed-open seam allowances. Center the closed zipper face down along the seam opening, aligning the zipper tape edges with the pressed seam allowances. Baste the zipper tape carefully to both sides of the seam allowance, keeping the slider at the top and teeth centered. Switch to a zipper foot on your sewing machine and stitch up the right side of the zipper tape, close to the teeth, stopping near the slider and backstitching. Repeat this process for the left side, mirroring the stitching and overlapping slightly at the top before backstitching again.
4.2 The Lapped Zipper: For Fly Fronts and More
The lapped zipper is a practical and often more concealed zipper installation techniques method, commonly used for fly zipper closures on pants and skirts, as well as for side seam zippers where a less visible zipper is desired. In a lapped zipper, one side of the fabric overlaps the other, concealing the zipper beneath the overlap. This technique requires more precision in fabric manipulation than a centered zipper. Here’s a step-by-step guide for lapped zipper installation in garment sewing, considered one of the advanced zipper techniques:
- Stitch Underlap Side: Attach your zipper foot. Stitch the zipper tape to the underlap side fabric, sewing close to the zipper teeth. Stitch from the bottom upwards, stopping at the top of the zipper. Backstitch to secure.
- Overlap and Pin: Overlap the overlap side fabric edge over the zipper, concealing the zipper teeth. The folded edge of the overlap side should extend just beyond the zipper teeth, creating the lap. Pin the overlap side fabric to the underlap side fabric and zipper tape, ensuring the lap is smooth and even.
- Topstitch Overlap Side: From the right side of the overlap fabric, topstitch along the overlap edge, sewing through all layers (overlap fabric, zipper tape, and underlap fabric). Stitch in a straight line, a consistent distance from the folded edge of the overlap, securing the zipper and creating the lapped effect. Start stitching at the top and sew downwards, stopping at the bottom of the zipper. Backstitch to secure.
- Optional: Bottom Stop Stitch: For added security and a more finished look, you can optionally stitch across the bottom of the zipper, perpendicular to the zipper tape, to create a bottom stop and reinforce the zipper closure.
- Check Zipper Operation: Test the zipper slider to ensure smooth operation and proper lapped closure.
4.3 Mastering the Invisible Zipper: Seamless Closures
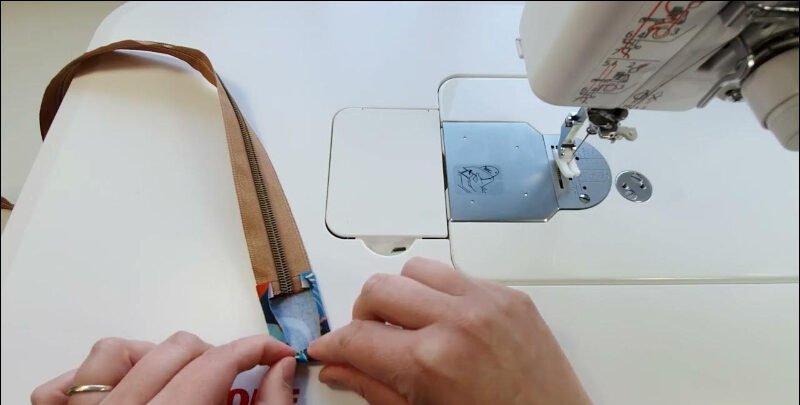
The invisible zipper, also known as a concealed zipper, is the secret to achieving truly seamless closures in garments. When properly installed, the zipper disappears into the seam, leaving only the zipper slider pull visible. This technique is essential for achieving a professional finish on skirts, dresses, and high-end garments. Mastering sewing invisible zippers elevates your sewing skills to a new level. An invisible zipper foot is absolutely essential for this technique.
4.4 Exposed Zippers: Adding Design Detail
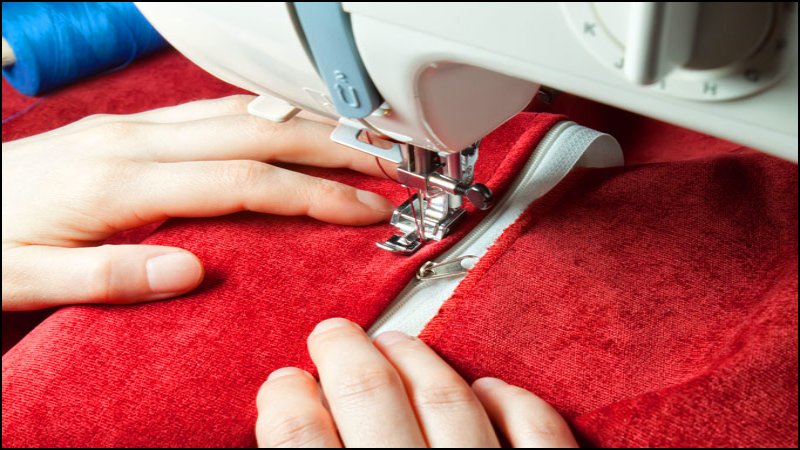
Exposed zippers, also known as decorative zippers or fashion zippers, are intentionally designed to be visible and become a prominent zipper as design element in the garment. Rather than being concealed, the visible zipper and its zipper tape are showcased as a deliberate design feature. Exposed zippers are often used to add a modern, edgy, or industrial touch to clothing and accessories. Installation is similar to a centered zipper, but the focus shifts to neat and even stitching that enhances the zipper’s visual impact.
5. Finishing Touches and Troubleshooting
5.1 Securing Zipper Ends for Durability
Securing zipper ends is a crucial step often overlooked, but it’s vital for preventing the zipper slider from accidentally coming off the zipper tape, especially at the top stop. Reinforcing the zipper ends enhances the durability of zippers and ensures they withstand repeated use. Here are a couple of effective techniques for securing zipper ends:
Bar Tacks: A bar tack is a dense, short, reinforced stitch that creates a strong anchor point. To secure zipper ends with bar tacks, set your sewing machine to a very short stitch length and narrow zigzag stitch (or a dedicated bar tack stitch if your machine has one). Stitch back and forth several times across the zipper tape just above the top zipper stop and just below the bottom zipper stop. This creates a robust barrier that prevents the slider from running off the zipper teeth.
Fabric Tabs: Adding small fabric tabs at the top of the zipper is another effective and decorative way to secure zipper ends. Cut two small rectangles of fabric (matching or contrasting). Fold each rectangle in half lengthwise, right sides together, and stitch across the short end. Turn right side out and press. Insert the raw edges of a fabric tab into the top opening of the zipper tape on each side, encasing the top zipper stops. Stitch across the fabric tab and zipper tape to secure, effectively creating a fabric extension that prevents the slider from going beyond the intended top stop.
Reinforcement Stitching: Even without bar tacks or fabric tabs, simply adding extra reinforcement stitching at the top and bottom of the zipper insertion can significantly improve security. Sew back and forth several times over the zipper tape at the top and bottom stops using a short stitch length to create a denser, more secure stitching line.
5.2 Dealing with Common Zipper Issues
Even with careful installation, you might occasionally encounter zipper problems. Knowing how to troubleshoot zippers and perform basic zipper repair can save you time and frustration.
A common annoyance is the stuck zipper, often caused by fabric or lining caught in the slider. When faced with this, gently wiggle the slider back and forth while carefully inspecting for any obstructions. Avoid forcing it, which can damage the delicate zipper teeth. If fabric is trapped, patiently try to ease it out with a pin or needle, working gently to free the slider. For persistent sticking, lubricating the zipper teeth with a specialized lubricant, a wax crayon, or even a touch of soap can significantly improve its smoothness.
Sometimes, the issue lies with the zipper slider itself. If the slider is damaged, bent, or has become loose over time, it may fail to properly engage the zipper teeth. This can result in a zipper that refuses to close or splits open after closing. While a loose slider can occasionally be tightened with gentle pressure from pliers, often the most effective solution is slider replacement. Fortunately, zipper slider replacement kits are readily available, allowing you to swap out just the slider without the more involved process of replacing the entire zipper.
Finally, zipper teeth problems can also lead to malfunctions. If the teeth are bent, broken, or misaligned, the zipper may become difficult to close or prone to splitting. For metal zippers with minorly bent teeth, careful realignment using pliers is sometimes possible. However, if the damage to the zipper teeth is extensive, including broken or missing teeth, then repair is usually not practical, and replacing the entire zipper becomes the most reliable course of action.
When to Replace vs. Repair: For minor zipper issues like a slightly stuck zipper or a loose slider, zipper repair attempts are often worthwhile. However, if the zipper has significant damage, such as broken or missing teeth, a severely damaged slider, or extensive tape damage, troubleshooting zippers may be futile, and replacement is the more practical and durable solution. Consider the value of the garment and the extent of the damage when deciding whether to repair or replace.
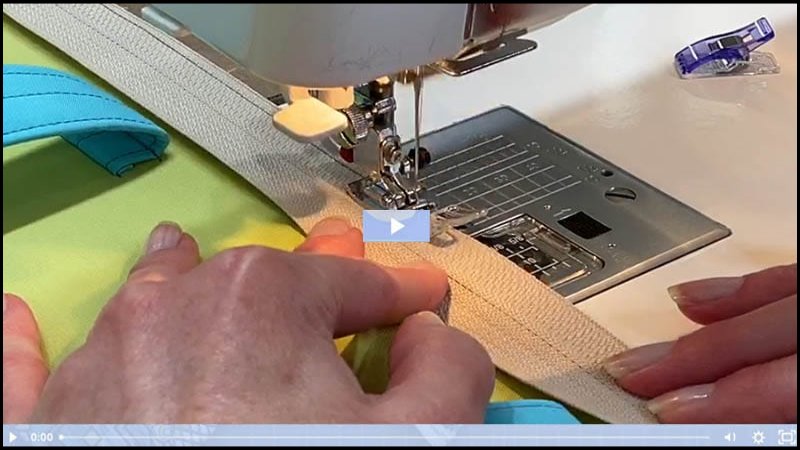
5.3 Shortening a Zipper: When You Have the Wrong Length
Sometimes, you may find yourself with a zipper that is too long for your project. Shortening a zipper is a useful skill that allows you to adapt zippers to your specific needs. The most common method for zipper length adjustment involves using a zig-zag stitch to create a new zipper stop. Here’s a reminder of the process for zipper modification:
Determine Desired Length: Measure and mark the desired finished length of your zipper. Add about 1 inch below this mark for seam allowance and to create space for the new bottom stop.
Create New Bottom Stop (Zig-Zag Stitch): Using a wide, dense zig-zag stitch on your sewing machine, stitch back and forth several times across the zipper tape at your marked desired length point. This creates a new, secure bottom stop that will prevent the zipper slider from going beyond this point. Ensure the zig-zag stitching is very dense and robust.
Cut Off Excess Zipper: Carefully cut off the excess zipper tape and teeth below your newly created zig-zag stitch bottom stop, leaving about ½ to 1 inch of tape below the stitching.
Finish Zipper Tape End: Finish the raw cut edge of the zipper tape with a zig-zag stitch or seam sealant to prevent fraying.
6. FAQs About Zipper Installation
6.1 What type of zipper foot should I use?
The type of zipper foot you should use depends on the type of zipper you are installing and the desired outcome. A standard zipper foot is versatile and suitable for most basic zipper installations, including centered and lapped zippers. It allows you to sew close to either side of the zipper teeth by adjusting the foot position. An invisible zipper foot, on the other hand, is specifically designed for invisible zippers. Its unique grooves cradle the zipper coils, enabling you to stitch extremely close to the coils and achieve the signature concealed finish of an invisible zipper. Using the correct zipper foot is crucial for achieving professional-looking results and ensuring smooth zipper operation.
6.2 How do I prevent my zipper from puckering?
Zipper puckering, that frustrating gathered or wavy appearance of the fabric around the zipper, is a common sewing challenge. However, this can largely be avoided by paying attention to key details throughout the installation process. Firstly, proper fabric preparation is essential; ensure your seam allowances are diligently pressed open and fabric edges are neatly finished to create a smooth and flat foundation for the zipper. Secondly, the often-underestimated step of basting is crucial. By basting the zipper in place before your final stitching, you gain the ability to evenly distribute any slight fullness or ease in the fabric, effectively preventing shifting during machine sewing that can lead to puckering.
Furthermore, always double-check your sewing machine’s tension settings. Incorrect tension, and particularly a top tension that is too tight, is a frequent culprit behind puckered seams. Take the time to test your tension on a fabric scrap and make any necessary adjustments to achieve balanced stitches. Finally, remember to use gentle handling as you sew. Resist the urge to pull or stretch the fabric taut; instead, allow the feed dogs of your sewing machine to guide the fabric naturally. Forcing or stretching the fabric during sewing can easily lead to unwanted puckering and distortion around the zipper.
6.3 Can I install a zipper without a sewing machine?
Yes, it is possible to install a zipper without a sewing machine using hand-sewing techniques. Hand-sewing zipper installation, while more time-consuming and requiring more manual dexterity, can be a viable option, especially for repairs, quick fixes, or when a sewing machine is not accessible. Use a sturdy hand-sewing needle and strong thread. Backstitch frequently for security. However, achieving the same level of precision and speed as machine sewing can be challenging, and hand-sewn zippers may not be as durable as machine-stitched ones for garments that will undergo heavy use.
6.4 What’s the best way to match zipper color to my fabric?
Matching zipper color to your fabric is essential for a cohesive and professional look. Here are some tips:
- Match in Natural Light: Always match zipper colors to your fabric in natural daylight for the most accurate color assessment. Artificial lighting can distort colors.
- Consider Undertones: Pay attention to the undertones of your fabric. Is it a warm or cool tone? Choose a zipper color that complements or matches these undertones.
- Use Fabric Swatches: Bring a fabric swatch with you when shopping for zippers. Comparing the zipper directly to your fabric swatch in the store is the most reliable way to ensure a good color match.
- Slightly Darker is Often Better: If you are unsure and between two shades, opting for a zipper that is slightly darker than your fabric is often a safer choice than one that is slightly lighter, as a slightly darker zipper tends to blend in more seamlessly.
6.5 How do I install a zipper in a curved seam?
Installing a zipper in a curved seam presents a unique challenge, but it is achievable with careful technique:
- Clip Seam Allowances: Before installing the zipper, clip notches into the seam allowance along the curved edge, up to but not through the seamline. Clipping allows the curved seam allowance to spread and lie flat, making it easier to work with.
- Ease the Curve: As you pin and baste the zipper to the curved seam, gently ease the fabric along the curve. You may need to slightly stretch or shrink the fabric edge to make it conform to the curve without puckers or gathers.
- Work Slowly and Carefully: Sew the zipper in place slowly and carefully, following the curve of the seam. You may need to lift the presser foot and reposition the fabric frequently as you navigate the curve to maintain a smooth, even zipper insertion.
7. Packlove – Your Partner for Garment Finishing Touches
At Packlove, we bring 8+ years of experience in the garment industry to every interaction with our customers. Specializing in garment labels, clothing tags, zipper bags, and poly mailers, we have a deep appreciation for the nuances of clothing packaging and branding. With our understanding of garment construction and finishing, we recognize that details like flawlessly installed zippers and professional branding elements are absolutely crucial for the success of your small clothing businesses and your entire clothing line.
Just as a smoothly operating, perfectly inserted zipper enhances the functionality and perceived quality of your garments, so too do high-quality labels and tags elevate your brand identity and create a lasting impression on your customers. Beyond mastering zipper installation, Packlove provides a comprehensive suite of solutions to complete your garments with a truly professional touch. We offer a wide array of custom labels, tags, practical zipper bags for storage and presentation, and durable poly mailers for secure and stylish shipping.
Visit Packlove today to explore our full range of custom labels, tags, and packaging solutions. Let us be your partner in achieving garment finishing excellence, from the smallest detail to the complete brand presentation.
Read more:
- Prevent Sweat Patches on Clothes: Expert Tips and Tricks
- How to Attach Patches to Clothes Without Sewing: Easy Guide
- How to Iron on Embroidered Patches: A Step-by-Step Guide
Congratulations! You’ve now unlocked the secrets to successful zipper installation. From understanding the diverse zipper types and gathering your essential sewing tools, to mastering step-by-step sewing techniques and troubleshooting common issues, you are now equipped to confidently tackle zippers in all your sewing projects. So go ahead, zip up your newfound confidence and embark on exciting new sewing adventures, knowing you have the expertise to conquer any zipper challenge that comes your way!


