Essential Leather Working Tools for Pro Results
There’s a distinct satisfaction in working with leather – its tactile feel, enduring appeal, and the potential to craft something both beautiful and functional. However, translating that potential into a finished product relies heavily on the instruments employed. The quality and suitability of your leather working tools profoundly influence the final item’s appearance, structural integrity, and overall durability.
For small businesses, particularly those crafting goods for retail or wholesale, achieving professional results is paramount. High-quality outcomes build brand reputation and foster customer trust. Furthermore, using appropriate and well-maintained tools enhances efficiency, saving valuable time and resources – critical factors for business success.
This article serves as a practical guide, drawing on experience to help you navigate the selection of essential leather working tools. By understanding these fundamentals, you can establish a solid foundation in leathercraft and equip yourself to produce work you can be proud of, efficiently and effectively.
1. Essential tools for construction
To master leathercraft, it’s crucial to understand tools not just by their individual function but by their role in the workflow. This first section explores the core tool categories required for the construction phases of a project, from the initial cut to the final stitch.
1.1 Cutting & skiving tools- Precision from the first cut
The journey of transforming a piece of leather begins with the cut. Precision at this initial stage is fundamental, as inaccuracies here can compound through subsequent steps. Clean, decisive cuts form the basis of professional-looking work.
Here are the primary cutting tools to consider:
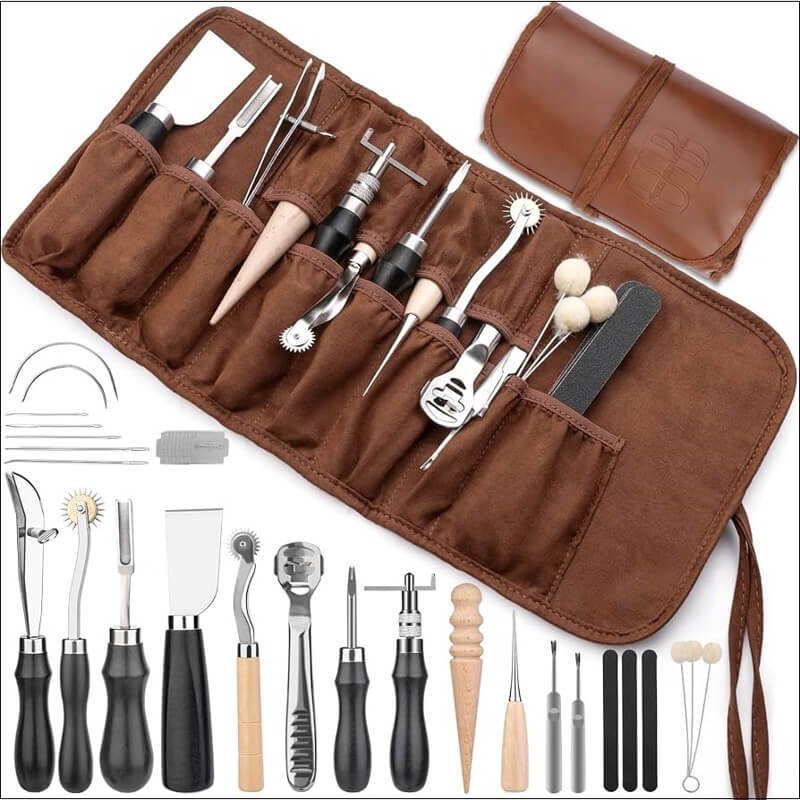
- Utility/craft knife: Highly accessible and versatile, these knives often feature affordable, replaceable blades. This makes them an excellent starting point for beginners, ensuring a sharp edge is always readily available.
- Round knife (optional): A traditional leatherworker’s tool, the round knife (or head knife) is incredibly versatile, capable of cutting curves, straight lines, and even performing skiving (the process of thinning leather, typically along edges where pieces will be joined or folded, to reduce bulk). However, mastering requires significantly more practice and consistent sharpening.
- Skiving knife or safety beveler: Specifically designed for skiving. A dedicated skiving knife often resembles a slanted blade and requires careful control and sharpening. Safety bevelers use replaceable blades (similar to those in a safety razor) and offer a more controlled, albeit sometimes less versatile, way to thin edges.
Function & importance: Accurate cutting ensures pieces fit together correctly. Skiving is crucial for creating less bulky seams, neat folds (like on wallet pockets), and smooth transitions where leather overlaps, contributing significantly to a refined final product.
Selection tips: Regardless of the knife chosen, a sharp blade is non-negotiable. Dull blades require more force, increasing the risk of slips and injuries, and result in ragged cuts. Learning basic sharpening techniques early on is invaluable.
Consider the handle comfort and how it feels in your hand – good ergonomics allow for better control during long cutting sessions. For beginners, starting with a reliable utility knife and adding specialized tools later is a practical approach. If your work involves cutting many long, uniform strips (e.g., for belts or bag handles), investing in a strap cutter can dramatically improve efficiency and consistency.

1.2 Marking & measuring tools- Accuracy is key for professional results
Just as crucial as clean cuts is precise marking and measuring. Accurate layout lines ensure symmetry, guide straight stitching, dictate hardware placement, and contribute significantly to the overall quality and professional appearance of your leatherwork. Consistency starts here.
Essential marking and measuring tools include:
- Scratch awl: A pointed tool used for lightly scratching layout lines onto the leather surface or transferring pattern shapes. The fine point allows for precision without causing excessive damage.
- Wing divider/compass: Used to scribe lines parallel to an edge at a consistent distance. This is invaluable for marking stitch lines, fold lines, or creating decorative borders (a crease line).
- Metal ruler: A non-negotiable tool for measuring and guiding straight cuts. Choose a sturdy ruler with clear, easy-to-read markings (both imperial and metric can be useful). Cork-backed rulers help prevent slipping.
- Stitching groover: This tool cuts a shallow channel along the stitch line. Stitches laid within this groove sit slightly below the leather surface, protecting them from abrasion and wear, enhancing durability and creating a cleaner look.
- Edge creaser: Primarily used to create a decorative line parallel to the edge, adding a refined detail. Depending on the style and heat application (some are electric), a crease line can also help slightly compress the edge or serve as a guide for stitching.
Function & importance: These tools provide the roadmap for construction. They ensure that holes are punched evenly, stitches run straight, and components align correctly, preventing skewed or sloppy results.
Selection tips: Opt for durable tools, particularly metal rulers and dividers, which withstand workshop use better than plastic. Ensure markings are clear and accurate. Adjustable stitching groovers offer more flexibility than fixed ones, allowing you to vary the distance from the edge. Accuracy is the primary goal when selecting these instruments.
1.3 Punching tools- Creating holes for stitching & hardware
Leather’s density and thickness mean you generally can’t sew it directly like fabric. Holes must be created beforehand for stitching thread or attaching hardware like rivets, snaps, or buckles. Punching tools are designed specifically for this purpose.
Key leather punches fall into two main categories:
- Drive hole punches: These create round holes. They come as individual punches (a single size per tool) that are struck with a mallet, or as rotary punches (a rotating wheel with multiple punch sizes). Individual punches often create cleaner holes in thicker leather and are more durable, while rotary punches offer convenience for various sizes but may struggle with very thick material.
- Stitching chisels/pricking irons: These tools feature multiple tines designed to create perfectly spaced openings for hand stitching. They don’t typically remove leather (like a hole punch) but rather create slits or marks. Stitching chisels often have diamond-shaped tines that create angled slits, leading to the characteristic slanted look of hand-stitched leather. Pricking irons create small dots or slits primarily as guides for using an awl during stitching. The spacing between tines, often measured in SPI (stitches per inch) or millimeters, significantly impacts the final aesthetic.
Function & importance: Hole punches enable the attachment of essential hardware and are necessary for certain construction methods. Stitching chisels are fundamental for achieving neat, consistent hand stitching, a hallmark of quality leather goods. The regularity they provide is difficult to replicate by eye alone.
Selection tips: For hole punches, consider the range of sizes you’ll need for typical hardware. For stitching chisels, the SPI choice depends on the project scale and desired look (e.g., finer SPI for wallets, wider SPI for bags). Investing in good quality steel is crucial; cheaper tools dull quickly, break, or create messy holes. Remember that these tools (except rotary punches) require a suitable striking surface (silent poundo board or marble tooling slab) and a dedicated mallet (never a metal hammer) to prevent damage.
1.4 Stitching tools- Bringing your creations together with hand stitching
Hand stitching leather offers unmatched durability and a classic aesthetic that machines often struggle to replicate. While it requires patience, the result is a strong, attractive seam. The saddle stitch, the most common technique, uses two needles simultaneously to create interlocking stitches that won’t unravel easily if one thread breaks.
Essential stitching tools for hand stitching include:
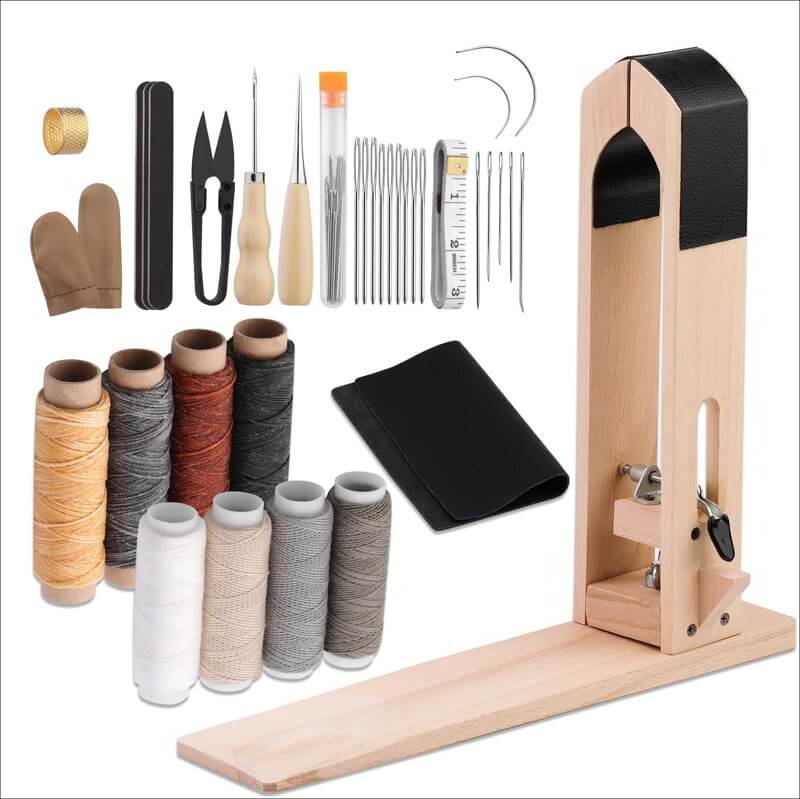
- Harness needles: Unlike sharp sewing needles, harness needles have relatively blunt tips and large eyes. They are designed to follow the holes previously created by your stitching chisels or awl, rather than piercing the leather directly.
- Waxed thread: Leather stitching thread is typically coated in wax. This coating lubricates the thread, making it easier to pull through the leather, helps bind the fibers together for strength, and provides some water resistance. Polyester threads are known for their strength and UV resistance. Traditional linen thread offers a classic look but may be less abrasion-resistant.
- Stitching awl: While stitching chisels create the primary path, an awl can be used to open up the holes further, especially in thicker leather, or as the primary tool for creating holes in some traditional techniques. Diamond-bladed awls are often preferred as they create a hole shape compatible with diamond chisel marks.
- Stitching pony (or stitching clamp): This simple device acts like a third hand, clamping your leather pieces securely upright. This frees both your hands for manipulating the needles and thread, leading to more consistent tension, faster stitching, and better overall assembly quality.
Function & importance: These tools facilitate the core assembly process of joining leather pieces. Proper use ensures strong, neat seams that contribute significantly to the product’s longevity and professional appearance.
Selection tips: Match your needle size to your thread diameter – the needle should create a hole large enough for the thread to pass through without excessive friction, but not so large that the hole looks sloppy. Choose thread based on the project’s demands for durability and the desired visual style. Ensure your awl blade shape (if used for piercing) complements your chisel marks for consistency. While stitching is possible without a stitching pony, investing in one greatly improves efficiency and stitch quality, making it a highly recommended tool, even for beginners.

1.5 Edge finishing & burnishing tools- The professional touch
Raw, cut edges on leather can look unfinished, feel rough, and are prone to fraying or absorbing moisture over time. Edge finishing is a critical step that separates amateur work from professional quality products. It seals the fibers, creates a smooth, pleasing feel, and significantly enhances the overall aesthetics and durability.
Key tools for achieving polished edges include:
- Edge bevelers: These tools have a small cutting edge designed to remove the sharp 90-degree corner from a cut edge, creating a slight chamfer or rounded profile. This prevents the edge from mushrooming or catching and prepares it for burnishing. They come in various sizes (commonly #1 to #5), with smaller sizes suited for thinner leather or finer details, and larger sizes for thicker leather.
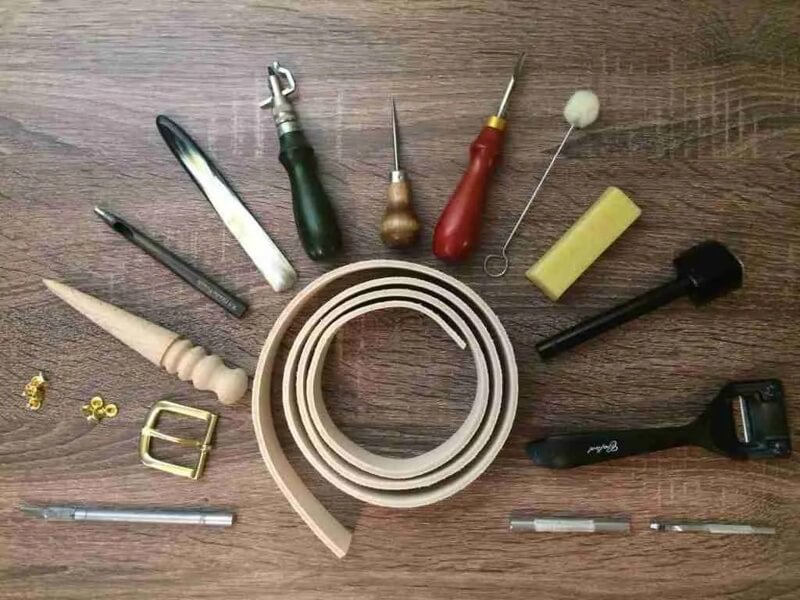
- Hand burnisher: This tool is used to vigorously rub the prepared leather edge, often with the addition of water, beeswax, or a dedicated burnishing gum. The friction and pressure compress the leather fibers, smoothing and sealing them into a dense, often glossy edge. Burnishers are commonly made from wood (like cocobolo or ebony), plastic, or even bone folders can be used effectively.
- Sandpaper/canvas: Fine-grit sandpaper (e.g., 400-800 grit) or a strip of sturdy canvas can be used after beveling to initially smooth the edge and remove any fuzziness before applying water or gum and using the burnisher.
Function & importance: Edge finishing seals the exposed fibers, protecting the edge from wear and tear. A well-burnished edge significantly elevates the look and feel of the finished piece, signaling careful craftsmanship and attention to detail – a true professional touch.
Selection tips: A size #2 or #3 edge beveler is a versatile starting point for medium-weight leathers (e.g., 4-6 oz). The choice of burnisher material often comes down to personal preference; hardwood burnishers are traditional and effective. Remember that achieving a beautifully finished edge is often a multi-step process: bevel, sand (if needed), dampen/apply compound, and burnish thoroughly. Patience here yields significant rewards in the final product’s quality.
1.6 Striking tools- Applying controlled force
Many leathercraft operations, such as using punches, stitching chisels, setters, and decorative stamps, require impact force. Using the wrong type of striking tool can damage your expensive hand tools or even cause injury. Dedicated striking tools are designed to deliver this force effectively and safely.
Essential striking tools include:
- Mallet: The most common striking tool for general leatherwork. Mallets typically have heads made of rawhide, wood (often lignum vitae), or dense poly materials (nylon/plastic). These materials absorb some shock and prevent damage to the metal striking end of your hand tools. Used for setting rivets, snaps, driving punches, and using stitching chisels.
- Maul (optional): Often heavier and bell-shaped, mauls are typically made of nylon or rawhide. Their weight and shape are preferred by some for heavier tooling, stamping, or when significant force is needed, allowing the weight of the tool to do more of the work.
Function & importance: These tools provide the necessary impact force for various tasks without mushrooming (deforming) the struck end of your punches and chisels or cracking wooden handles. Using the correct striking tool ensures tool longevity and efficient force transfer.
Selection tips: Choose a mallet or maul based on the primary tasks you’ll perform. A medium-weight poly or rawhide mallet (e.g., 16-20 oz) is a versatile starting point for most punching and setting tasks. Rawhide provides a traditional feel but can wear or deform over time. Poly heads are highly durable and non-marring. Consider the weight and balance – the tool should feel comfortable and allow for good control. Crucially, never use a metal hammer directly on your leather hand tools as this will rapidly damage them.
2. Decorative & specialty tools
Once you’ve mastered the basic construction techniques, you can explore the tools that personalize and add aesthetic flair to your products.
2.1 Stamping & carving tools
Beyond basic construction, leather offers wonderful opportunities for decoration through stamping and carving. These techniques add unique character and personalization to your work.
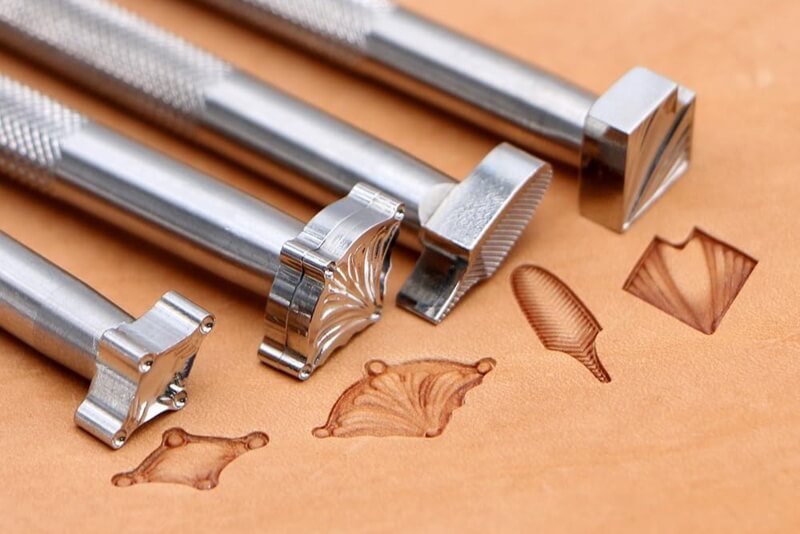
The primary tool for carving intricate lines, figures, and flowing designs into dampened leather is the swivel knife. Its pivoting blade allows for smooth curves and detailed cuts.
Stamp sets involve various metal tools with specific designs on the end (letters, numbers, geometric shapes, basketweave patterns, pictorial elements). These are placed on dampened leather and struck with a mallet or maul to leave a permanent impression.
These tools generally represent a ‘next level’ of leathercraft, often explored after mastering the fundamental construction techniques. They require specific types of leather (typically vegetable-tanned) and additional practice to achieve good results.

2.2 Creasing & specialty tools
Further refining the details of leather goods often involves more specialized tools:
Edge creasers, mentioned earlier for guiding stitches, are also widely used purely for decoration. They create crisp lines parallel to the edge, adding a subtle but sophisticated visual element. Manual creasers are heated over an alcohol lamp or stove, while electric versions offer consistent temperature control.
Specific hardware setters exist for nearly every type of common hardware. A rivet setter ensures rivets are peened over correctly without damage, while a snap setter has specific components to properly install both male and female parts of a snap closure. Using the correct setter is vital for functional and neat hardware installation.
These tools are typically acquired as specific project needs arise or when aiming for particular aesthetic goals, rather than being part of an absolute beginner’s kit.
3. Building your toolkit: Quality and selection
The initial choice of tools can greatly influence the learning curve and the quality of your work. This section provides guidance on investing in your tools wisely.
The allure of inexpensive, all-in-one beginner leathercraft kits found on platforms is understandable. However, caution is advised. Very low-cost kits often contain tools made from inferior materials (tool steel) that are dull out of the box, difficult to sharpen, break easily, and ultimately lead to frustration rather than successful crafting.
Professional-grade tools differ significantly:
- Material: They utilize higher quality tool steel that can achieve and maintain a much sharper edge, enhancing durability and performance.
- Manufacturing: Precision in manufacturing leads to tools that function correctly (e.g., punches cut cleanly, chisels are evenly spaced).
- Ergonomics: Often feature more comfortable and balanced handles, reducing fatigue during longer sessions.
Expert advice: It is generally more beneficial in the long run to invest in fewer, quality essential tools individually from reputable suppliers than to purchase a large kit filled with subpar instruments. Prioritize quality for tools where sharpness and precision matter most: cutting knives, stitching chisels, and edge bevelers. Even mid-range tools from established brands often represent a significant step up from the cheapest kits. Exploring options from well-known suppliers can provide a better understanding of the available range and quality levels.
Comparison example:
| Feature | Typical beginner kit tool (example: stitching chisel) | Typical pro/mid-range tool (example: stitching chisel) |
|---|---|---|
| Material | Low-grade steel, prone to dulling/bending/breaking | Higher carbon steel, holds edge well, durable |
| Sharpness | Often dull or inconsistently sharpened | Typically well-sharpened, ready for use (or easily honed) |
| Precision | Tine spacing or alignment might be inconsistent | Precise manufacturing ensures consistent spacing/alignment |
| Durability | Low; tines may break or deform easily | High; designed for long-term use with proper care |
| Cost | Very low (as part of a kit) | Moderate to high (purchased individually) |
3.2 Building your toolkit- Starting essentials vs. gradual expansion
The key message remains consistent: start with the core essentials and build your toolkit gradually as your skills develop and project needs become clearer. Avoid the temptation to buy everything at once.
Here is a list of the absolute minimum essential tools needed to begin basic leathercraft, based on the categories discussed:
- Cutting: A reliable utility knife with replaceable blades & a cutting mat.
- Marking/measuring: Metal ruler, scratch awl or wing divider.
- Punching: A basic set of drive hole punches (or a rotary punch covering common sizes), one size of stitching chisel appropriate for your initial projects (e.g., 4mm spacing).
- Stitching: A small pack of harness needles, a starter spool of waxed thread, and (highly recommended though technically optional) a stitching pony.
- Finishing: One versatile edge beveler (e.g., size #2 or #3), a basic wood or plastic burnisher.
- Striking: An appropriate mallet (poly or rawhide).
Prioritizing further purchases: As you decide on the specific types of projects you enjoy making, let that guide your gradual expansion.
- Wallet makers: Might prioritize finer SPI stitching chisels, smaller edge bevelers, and perhaps an edge creaser.
- Bag makers: May need heavier-duty hole punches, a wider range of punch sizes for hardware, potentially a strap cutter, and perhaps wider SPI chisels.
- Decorative work: Would lead towards investing in a swivel knife and stamp sets.
Focus your initial investment on quality versions of these essential tools, and add specialty items as your project type dictates.

4. Tool maintenance: Sharpening and care
To ensure the effectiveness and longevity of your tools, proper maintenance is critical. A sharp tool is not only more effective but also safer.
4.1 Sharpening essentials- A sharp tool is a safe tool
One of the most critical skills in leathercraft is learning how to maintain your tools. Sharp tools are not only more effective, producing cleaner cuts and holes, but they are also significantly safer. Dull tools require excessive force, increasing the likelihood of slipping and causing injury. Tool maintenance, particularly sharpening, should be learned early.
Common sharpening methods include:
- Sharpening stones (water stones or oil stones): Used to establish or restore the primary bevel on a cutting edge. They come in various grits, from coarse (for repairing damage or major reshaping) to fine (for refining the edge).
- Strop (leather strip) with honing compound: A strop, usually a flat piece of leather mounted on wood or used loose, is coated with a fine abrasive (honing compound, often green chromium oxide or similar). Stropping realigns the microscopic teeth at the very edge of the blade and polishes it to razor sharpness. This is used frequently for maintenance between full sharpenings.
Tools requiring regular attention: Cutting knives, skiving knives, edge bevelers, awls, and sometimes even stitching chisels benefit from regular sharpening and stropping.
Mastering basic sharpening techniques is fundamental. Regular stropping can significantly extend the time between needing to use stones. Investing time in learning this skill pays dividends in tool performance and safety.
4.2 Cleaning & storage best practices
Proper tool maintenance extends beyond sharpening. Simple cleaning and storage habits help preserve your investment and ensure tools are ready when needed.
- Wipe down: After use, wipe down metal tools with a clean cloth to remove leather debris, dust, and moisture, which can lead to rust.
- Oil lightly: For longer storage, especially in humid climates, apply a very light coat of machine oil or a specialized tool protectant (like camellia oil) to metal surfaces to prevent rust prevention. Wipe off excess before next use.
- Store safely: Protect sharp edges from getting chipped or dulled, and protect yourself from accidental cuts. Options include dedicated tool storage rolls made of canvas or leather, drawers with dividers, magnetic tool holders, or wall-mounted racks. Avoid simply tossing sharp tools together in a box.
These simple practices contribute significantly to the longevity and reliable performance of your leatherworking tools.
5. Related questions
5.1 What is the absolute minimum tool kit needed to start leathercraft?
A basic starter tool kit should include: a reliable utility knife with replaceable blades, a cutting mat, a metal ruler, a scratch awl or wing divider, a basic set of drive hole punches (or a rotary punch), one size of stitching chisel, a pack of harness needles, a spool of waxed thread, an edge beveler, a burnisher, and an appropriate mallet. A stitching pony is also highly recommended for easier and better hand stitching.
5.2 How often do leather tools need to be sharpened?
Sharpening frequency depends heavily on usage and the quality of the tool steel. A good practice is to strop cutting tools (like knives and bevelers) frequently, even briefly during a work session, to maintain the edge. Full sharpening on stones is necessary only when the tool feels noticeably dull, requires more effort to use, or fails to produce clean cuts. Listen to your tools – if they aren’t cutting cleanly, it’s time to sharpen.
5.3 Are expensive leather tool brands always necessary for quality work?
Not necessarily. While high-end leather tool brands often use superior materials and manufacturing processes resulting in excellent performance and durability, good technique is equally, if not more, important. Many mid-range tools offer excellent value and are perfectly capable of producing professional quality results.
Focus initial investment on quality versions of critical tools like knives and chisels, where sharpness and precision are paramount, rather than assuming the most expensive option is always required.
5.4 Can I use regular workshop tools (like wood chisels or standard drills) instead of specialized leather tools?
It is strongly advised against using non-leather tools for leathercraft. Leather tools are specifically designed for the material. For example, stitching chisels have specific tine shapes and spacing for optimal stitching, edge bevelers have precise angles for rounding edges without digging in, and leather punches are designed to cut cleanly through fibrous material. Using substitutes like wood chisels or standard drills will likely damage the leather, produce poor results, and potentially damage the tools themselves.
Read more:
Ultimately, investing the time to understand and select the appropriate leather working tools is a fundamental step for anyone serious about leathercraft. This is particularly true for small businesses where achieving consistent, professional quality directly impacts brand perception and customer satisfaction. The right tools empower your craftsmanship.
Mastering these tools undeniably requires dedication and practice. However, starting with a solid foundation of well-chosen, properly maintained equipment makes the learning process significantly more effective and the creative journey far more rewarding.
If your specific interest lies in creating leather components like tags, patches, or labels for apparel lines, understanding these foundational tools is the essential first step. For further insights tailored specifically to integrating such elements into clothing, exploring resources focused on suitable leather types, sourcing, and specialized application techniques would be a beneficial next phase in refining your craft for that market.


