Fix Inner Thigh Rips: Iron-On Patches for Jeans
We’ve all been there. You’re wearing your favorite pair of jeans, and disaster strikes – a rip appears right in the inner thigh area. It’s a frustratingly common problem, especially with well-loved denim. Before you resign yourself to tossing those jeans or relegating them to the back of your closet, there’s a simple, effective solution: iron-on patches.
This article will guide you through everything you need to know about using iron-on patches to fix those pesky inner thigh rips in your jeans. You’ll learn how to choose the right patch, apply it correctly, and even prevent future damage.
By the end, you’ll have the knowledge and confidence to repair your jeans and extend their life, saving you money and keeping your favorite denim in rotation. This is all about empowering you to take care of your clothes and make them last. Let’s read!
1. Why Choose Iron-On Patches for Inner Thigh Repair?
Dealing with a rip in the inner thigh of your jeans can be a real pain. While there are several ways to address this, like taking them to a tailor or attempting complex sewing repairs, iron-on patches offer a unique blend of convenience and effectiveness. They’re a fantastic option, especially if you’re not particularly handy with a needle and thread.

Benefits of Iron-On Patches:
- Easy Application: No sewing skills are required! The heat-activated adhesive makes the process straightforward and beginner-friendly.
- Speed and Convenience: Repairing your jeans with an iron-on patch is significantly faster than hand-sewing or machine-sewing a patch.
- Affordability: Iron-on patches are a budget-friendly repair option compared to professional tailoring or buying new jeans.
- Durability: When applied correctly, a good quality iron-on patch can provide a surprisingly long-lasting repair.
- Variety of Options: Patches come in various sizes, colors, and even designs, allowing you to choose one that best matches your jeans or adds a touch of personal style.
- Minimal Supplies Needed: You’ll only need a few basic items: the patch, an iron, and a pressing cloth (a thin piece of fabric like a cotton handkerchief or pillowcase).
2. Choosing the Right Iron-On Patch
Selecting the appropriate iron-on patch is crucial for a successful and long-lasting repair. You want a patch that not only fixes the rip but also blends seamlessly with your jeans, ensuring both functionality and aesthetics:
2.1 Material Matters: Denim Patches are Best
For repairing denim jeans, denim patches are the undisputed champion. This isn’t just about aesthetics; it’s about functionality and longevity. Denim is a sturdy, twill-weave fabric, and using a denim patch ensures that the repaired area has similar strength and flexibility to the original jeans.
A non-denim patch might be thinner, weaker, or have a different texture, leading to an uneven feel and potentially causing the patch to fail sooner. A denim patch will blend in better, both visually and texturally.
2.2 Size and Shape Considerations
Before you even look at patches, take a close look at the rip in your jeans. You’ll need to measure it to determine the appropriate patch size. A patch that’s too small won’t adequately cover the damage and provide sufficient reinforcement. A patch that’s too large will be unnecessarily bulky and may be more noticeable.
Aim for a patch that extends at least ½ inch (preferably 1 inch) beyond the edges of the rip in all directions. This ensures that the adhesive has ample contact with undamaged fabric, creating a secure bond. Consider the shape of the rip as well. While most patches are rectangular or square, you can trim them with scissors to better match the shape of the tear, creating a cleaner, less noticeable repair.
2.3 Color Matching
This might seem obvious, but it’s worth emphasizing: accurate color matching is key to a discreet repair. Even a slight difference in shade can make the patch stand out. Hold potential patches against your jeans in good lighting (natural daylight is best) to find the closest match.
Keep in mind that jeans can fade over time, so the color of the denim around the rip might be slightly lighter than the original color of the jeans. If you can’t find an exact match, it’s often better to go slightly darker than slightly lighter.

2.4 Adhesive Quality
All Iron-on patches have a layer of Heat activated adhesive on the back. The quality of this adhesive is paramount. A patch with weak or insufficient adhesive will likely peel off after a few wears or washes, rendering the repair useless. Look for patches that specifically mention “heavy-duty” or “permanent” adhesive.
3. Step-by-Step Guide: Applying the Iron-On Patch
Now that you’ve chosen the perfect patch, it’s time to put it to work. The application process is generally straightforward, but following these steps carefully will ensure a secure and long-lasting repair.
3.1 Step 1: Prepare Your Jeans and Workspace
First, find a clean, flat, and heat-resistant surface to work on. An ironing board is ideal, but a sturdy table covered with a thick towel will also work. Lay your jeans flat, inside out, with the ripped area easily accessible. Make sure you have your iron, the chosen patch, and a pressing cloth (a thin piece of cotton fabric, like a handkerchief or pillowcase) nearby. It is also important that the surface of the jeans is clean before applying the patch.
3.2 Step 2: Trim the Frayed Edges
Before applying the patch, take a close look at the edges of the hole. If there are any loose threads or frayed edges, carefully trim them away with sharp scissors. This is important for two reasons. First, it prevents those frayed edges from poking through the patch or becoming trapped underneath, creating an uneven surface. Second, it ensures that the patch is adhering to solid fabric, not loose threads, resulting in a stronger bond. This step is crucial for a clean and effective repair.
3.3 Step 3: Position the Patch
Carefully position the patch on the inside of the jeans, centering it over the hole. The adhesive side of the patch (usually the shiny or slightly sticky side) should be facing down, against the fabric of the jeans. Double-check to make sure the patch extends beyond the edges of the rip by at least ½ inch (and preferably 1 inch) on all sides. This ensures that the patch has a good grip on the surrounding, undamaged fabric.
3.4 Step 4: Ironing the Patch
This is the critical step where the adhesive is activated and the patch bonds to the jeans. Preheat your iron to the temperature recommended on the patch instructions. Usually, this is a medium-high setting (cotton/linen setting), without steam. Place the pressing cloth over the patch. This protects the patch and the jeans from direct heat, preventing scorching or damage. Apply firm, even pressure with the iron, moving it slowly and steadily across the patch. Hold the iron in place for the duration recommended in the patch instructions (usually 30-60 seconds). Pay particular attention to the edges of the patch, ensuring they are securely bonded. Don’t rush this step – proper adhesion is key to a long-lasting repair.
3.5 Step 5: Let it Cool and Check
Once you’ve finished ironing, remove the pressing cloth and carefully lift the iron. Allow the patch and the surrounding fabric to cool completely. This is important because the adhesive needs time to set and harden. Once it’s cool, gently tug on the edges of the patch to make sure it’s firmly attached. If any areas feel loose or seem to be lifting, repeat the ironing process, focusing on those specific spots.
3.6 Step 6: Reinforce with Stitching
If you really care about your jeans, and want that extra protection, use this method.
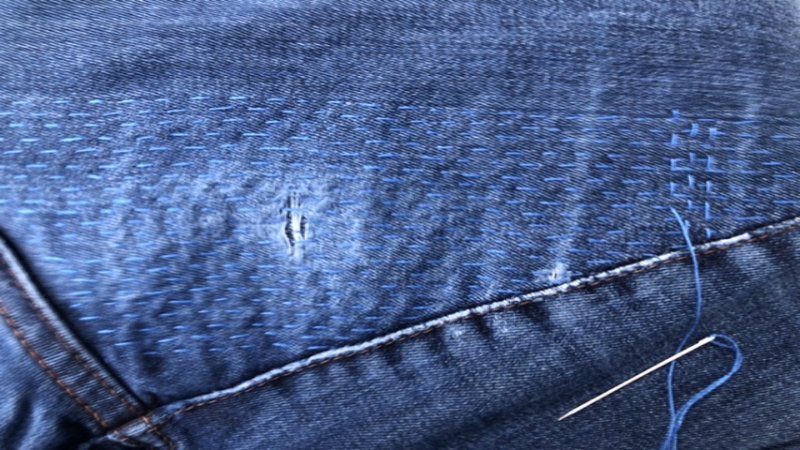
Although iron-on patches are designed to be a no-sew solution, adding a few stitches around the perimeter of the patch can significantly increase its durability, especially in a high-stress area like the inner thigh. This is entirely optional, but it’s a good idea if you want to maximize the lifespan of the repair. A simple running stitch or a whipstitch around the edge of the iron-on patch, using thread that matches the jeans, will provide extra reinforcement and prevent the patch from peeling or lifting over time.
4. Troubleshooting Common Problems
Even with careful application, you might encounter some issues with your iron-on patch. Don’t worry – most problems have simple solutions.
4.1 Patch Not Sticking
If your patch isn’t sticking properly, there are several possible culprits. First, make sure your iron is hot enough. The heat is essential for activating the patch adhesive. Refer to the patch instructions for the recommended temperature setting. Second, ensure you’re applying enough pressure. The iron needs to make firm, even contact with the patch for the adhesive to bond correctly. Third, check the fabric itself. Some fabrics, especially those with a heavy texture or a water-repellent finish, might not be suitable for iron-on patches. Finally, make sure you’re using a pressing cloth. Direct heat from the iron can damage the patch or the jeans.
4.2 Patch Peeling
Patch peeling, especially after washing, is another common problem. This usually indicates that the initial adhesion wasn’t strong enough. It could be due to insufficient heat during application, not enough pressure, or the patch not being allowed to cool completely before being handled. It’s also possible that the adhesive on the patch was simply not strong enough. To fix this, try re-ironing the patch, following the instructions carefully. If that doesn’t work, you might need to remove the patch and apply a new one, possibly choosing a patch with a stronger adhesive.

4.3 Patch Looks Uneven or Bulky
If the patch looks uneven or bulky after application, it could be due to several factors. Perhaps the frayed edges of the rip weren’t trimmed properly, creating an uneven surface underneath the patch. Or, the patch might have been slightly folded or wrinkled during application. If the patch is significantly larger than the hole, the excess material can also contribute to bulkiness. While you can’t easily fix this after the patch is applied, you can try to minimize the appearance by carefully trimming any excess patch material around the edges (if you didn’t do so initially).
5. Preventing Future Inner Thigh Rips
Repairing inner thigh rips is one thing, but preventing them in the first place is even better. Here are some proactive steps you can take to extend the life of your jeans and avoid the dreaded inner thigh blowout.
5.1 Choose the Right Fit
The fit of your jeans plays a significant role in how quickly they wear out in the thigh area. Jeans that are too tight in the thighs will experience more friction and stress with every movement, accelerating wear and tear. Opt for jeans that fit comfortably through the hips and thighs, allowing for a reasonable range of motion without being overly baggy. A proper fit not only prevents rips but also enhances comfort and prolongs the overall lifespan of your jeans.
5.2 Fabric Quality Matters
Not all denim is created equal. The quality of the jeans fabric significantly impacts its durability. Thicker, heavier-weight denim (often measured in ounces per square yard) is generally more resistant to abrasion and tearing than thinner, lighter-weight denim. While heavier denim might be slightly more expensive, it’s a worthwhile investment if you’re looking for longevity. Look for jeans made from 100% cotton denim or a cotton blend with a small percentage of elastane (for stretch) for a good balance of durability and comfort.
5.3 Wash and Dry with Care
The way you wash and dry your jeans can have a major impact on their lifespan. Frequent washing and high heat drying are particularly damaging to denim fibers. Wash your jeans inside out in cold water, and use a gentle cycle. This minimizes friction and fading. Avoid using harsh detergents or bleach, which can weaken the fabric. Most importantly, avoid putting your jeans in the dryer. The high heat breaks down the denim fibers, making them more prone to tearing. Instead, hang your jeans to air dry. This might take longer, but it’s much gentler on the fabric.
5.4 Preemptive Reinforcement
If you know your jeans are prone to inner thigh rips, you can take a preemptive approach by reinforcing the area before a hole develops. Consider applying iron-on patches to the inside of the thighs in the area where they typically rub together. This adds an extra layer of protection and can significantly delay or even prevent the formation of holes. This is a particularly good strategy for jeans that are already showing signs of wear in the inner thigh area. It’s like giving your jeans a little extra armor where they need it most.
6. Safety Considerations
6.1 Iron Safety
Using a hot iron requires caution to prevent burns and other accidents. Always unplug the iron when it’s not in use, and never leave it unattended, especially if there are children or pets around. Place the iron on a stable, heat-resistant surface, and make sure the cord is out of the way to avoid tripping. Allow the iron to cool completely before storing it. Never touch the hot plate of the iron, and be mindful of the steam, which can also cause burns.
6.2 Material Safety
Always double check the materials of your jeans. Some kind of jeans have material that can be damaged because of the heat.
7. Related Questions
Here are some frequently asked questions that address common concerns and provide additional insights beyond the core repair process:
7.1 Can I use iron-on patches on other types of fabric besides denim?
While denim is the most common application, iron-on patches can be used on other fabrics, but with some caveats. The fabric must be able to withstand the heat of the iron (check the garment’s care label). Natural fibers like cotton and linen generally work well. Synthetic fabrics like polyester and rayon are more heat-sensitive and may require a lower iron temperature and a pressing cloth. Avoid using iron-on patches on delicate fabrics like silk, velvet, or leather. Always test a small, inconspicuous area first.
7.2 How long will an iron-on patch repair last?
The lifespan of an iron-on patch repair depends on several factors: the quality of the patch, the thoroughness of the application, the frequency of wear and washing, and the type of fabric. A well-applied, high-quality patch on denim can last for many months, even years, with proper care. However, patches on high-stress areas (like the inner thighs) or on thinner fabrics may have a shorter lifespan. Reinforcing the patch with stitching can significantly extend its durability.
7.3 Can the patch be removed?
Yes, most iron-on patches can be removed, although it can be a bit tricky. The process typically involves reheating the patch to soften the adhesive and then carefully peeling it off. However, some adhesive residue may remain on the fabric. There are also specialized adhesive removers available that can help with this process. Be aware that removing a patch might leave a slight mark or discoloration on the fabric, especially if the patch has been in place for a long time.
7.4 What if I don’t have a pressing cloth?
If you don’t have a pressing cloth, you use other alternative methods. You can use a thin cotton pillowcase, a handkerchief, or a piece of scrap cotton fabric.
7.5 My patch is the wrong color, can I dye it?
Yes, most patches can be dyed to get more accurate color. Please follow the instruction carefully, and use gloves to protect your hands.
Read more:
Dealing with ripped jeans in the inner thigh area is a common annoyance, but it doesn’t have to mean the end of your favorite denim. Iron-on patches offer a simple, effective, and affordable solution to fix this problem and extend the life of your jeans.
By following the steps outlined in this guide, from choosing the right patch to applying it correctly and taking preventative measures, you can confidently repair your jeans and keep them looking great for longer. So, don’t despair over that rip – grab an iron-on patch and get ready to give your jeans a new lease on life!


