How to Iron On Stoney Clover Patches: Easy Step-by-Step Guide
Stoney Clover Lane has taken the world by storm with its vibrant, customizable patches, allowing everyone to add a personal touch to their favorite bags, pouches, jackets, and more. The appeal is undeniable – transforming everyday items into unique expressions of individual style.
However, many people approach the idea of ironing on patches with a bit of trepidation. Common concerns include damaging the item, the patch not sticking properly, or the finished product looking less than professional.
This guide eliminates those worries. It provides a clear, step-by-step process, refined through practical experience, to ensure your Stoney Clover patches adhere perfectly and last beautifully. By following these instructions, you’ll be able to confidently customize your belongings, achieving a polished, durable, and personalized result that truly stands the test of time.
1. What you’ll need: Gathering your supplies
Before diving into the ironing process, it’s essential to gather all the necessary materials. Having everything readily available will streamline the process and contribute to a successful outcome. Here’s a complete list:
- Stoney Clover Patches: This might seem obvious, but it’s the star of the show! Ensure the patches are clean and free of any debris.
- The Item to be Customized: This could be anything from a nylon backpack or a canvas tote to a denim jacket or a cozy sweatshirt. Common materials include nylon, canvas, denim, and cotton blends. Just keep in mind the item’s heat tolerance, which we’ll discuss later.
- An Iron: A standard household iron is perfectly suitable for this task. While a heat press can also be used, it’s not necessary for most applications. If you do happen to have a heat press, it can offer more consistent heat and pressure distribution.
- Ironing Board: A sturdy ironing board provides a stable, heat-resistant surface. If you don’t have one, you can use a flat, hard surface protected by several layers of thick towels. Ensure the surface is heat-resistant.
- Pressing Cloth: This is a crucial item for protecting both the patch and the item you’re customizing. A thin cotton cloth (like a handkerchief or a piece of an old t-shirt), parchment paper, or a Teflon sheet will work perfectly. The pressing cloth acts as a barrier, preventing direct heat from damaging the patch’s adhesive or the fabric of your item.
- Fabric Glue (Optional): For items that will be subjected to frequent washing or heavy use, or for materials that are particularly difficult to adhere to, a small amount of fabric glue can provide extra reinforcement. This is an optional step, but it can significantly enhance the longevity of your patch.
- Tweezers (Optional): Tweezers may be helpful. Use to carefully peel back a corner and gently check if the patch has adhered

2. Preparing for application: Setting the stage for success
Proper preparation is paramount for a successful patch application. Taking the time to prepare your materials and workspace will significantly increase your chances of achieving a flawless, long-lasting result.
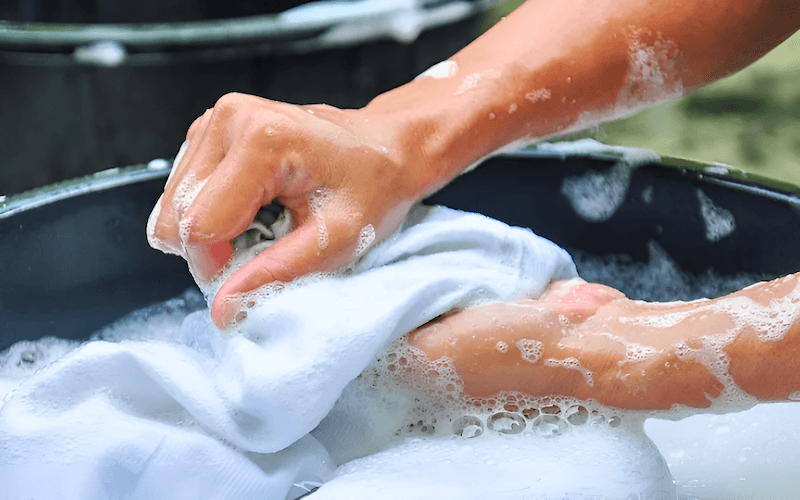
- Pre-wash the Item (If Applicable): If you’re customizing a garment or an item that is washable, it’s generally recommended to pre-wash it. This crucial step prevents the fabric from shrinking after the patch has been applied, which could cause puckering or distortion. However, and this is very important, skip this step if the item you’re customizing cannot be washed, such as certain types of bags or accessories.
- Choose the Right Location: Careful planning and placement are essential. Before you even touch the iron, take some time to decide exactly where you want to position the patch. Consider the overall design and aesthetics of the item. For precise placement, use a ruler or measuring tape to ensure the patch is centered or aligned as desired.
- Prepare the Iron: Set your iron to the appropriate temperature setting. A good general guideline is to use a medium-high setting (often the “cotton” or “linen” setting), but always, always check the care label of the item you’re customizing for specific heat recommendations. If the item is made of a delicate fabric, start with a lower setting and gradually increase the heat if needed. Crucially, ensure the steam function is turned OFF. Steam can interfere with the adhesive and prevent the patch from sticking properly.
- Prepare the Surface: Make sure your ironing board or chosen surface is clean, smooth, and free of any debris. Any bumps or unevenness can affect the application process.

3. The ironing process: Step-by-step instructions
With your materials prepared and your workspace ready, it’s time to apply the patch. Follow these steps carefully for optimal results:
Step 1: Position the Patch: Carefully place the Stoney Clover patch adhesive-side down on the precise location you’ve chosen on your item. Double-check the positioning to ensure it’s exactly where you want it.
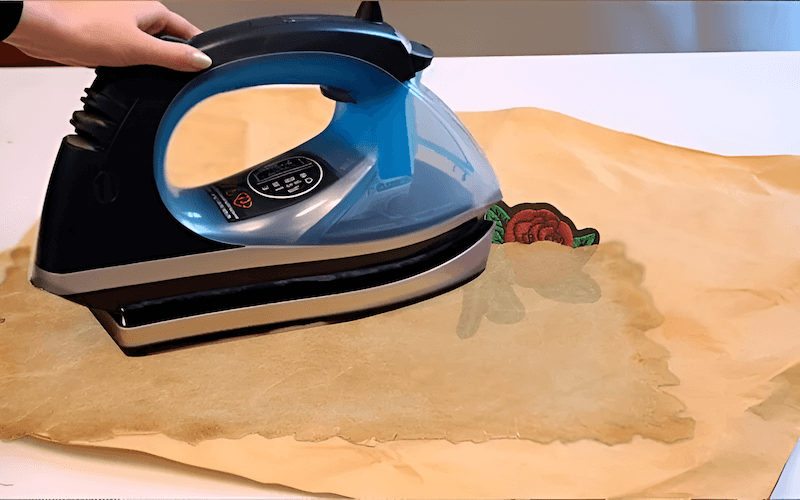
Step 2: Cover with a Pressing Cloth: This step is absolutely crucial. Place your pressing cloth (cotton cloth, parchment paper, or Teflon sheet) over the patch, completely covering it. This barrier protects the patch from direct heat, preventing scorching, melting, or damage to the adhesive.
Step 3: Apply Heat and Pressure:
- With your iron heated to the correct temperature (and steam OFF), place the iron directly onto the pressing cloth over the patch. Apply firm, steady pressure. Avoid a back-and-forth scrubbing motion, as this can shift the patch or damage the fabric Instead, press down firmly and hold the iron in place.
- A general time guideline is to apply heat for about 20-30 seconds per section. However, it’s vital to remember that the ideal time can vary depending on the specific fabric of your item and the adhesive on the patch. Always refer to any instructions that came with the patch or the item’s care label.
- If you’re applying a larger patch, work in sections. Lift the iron, move it to an adjacent section, and repeat the pressing process, ensuring even heat distribution across the entire patch.
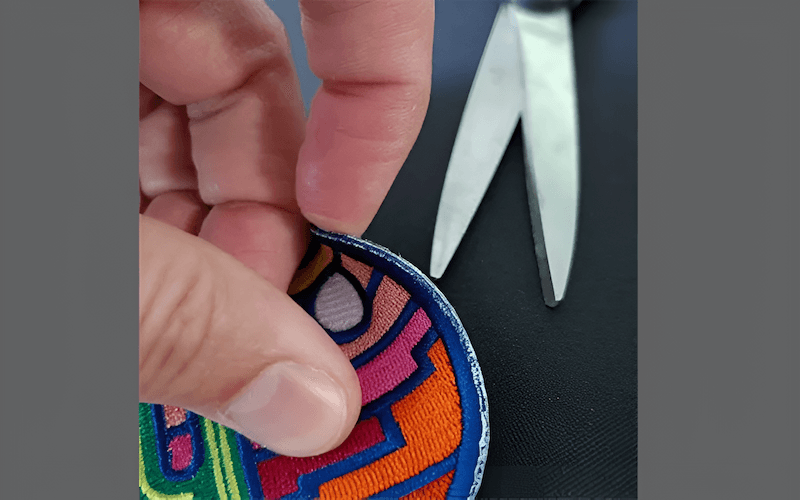
Step 4: Check for Adhesion: After applying heat, carefully peel back a corner of the pressing cloth and gently check if the patch has adhered to the fabric. If it hasn’t fully adhered, replace the pressing cloth and repeat Step 3, applying heat and pressure for a few more seconds. You might find it handy to use tweezers
Step 5: Cool Down Completely: Once the patch is securely adhered, remove the pressing cloth and allow the item to cool down completely before handling or moving it. This is a critical step. The cooling process allows the adhesive to fully set and bond with the fabric, ensuring a strong and durable hold.
Step 6: Reinforce with Fabric Glue (Optional): For extra security, especially on items that will be frequently washed or subjected to heavy wear and tear, you can apply a small amount of fabric glue around the edges of the patch. Use a toothpick or a fine-tipped applicator to apply a thin, even line of glue. This will help prevent the edges from lifting or fraying over time.

4. Troubleshooting: Common problems and solutions
Even with careful preparation and application, you might encounter some challenges. Here’s a guide to troubleshooting common problems and finding effective solutions:
Patch Not Sticking:
- Insufficient Heat or Pressure: If the patch isn’t adhering, the most common culprit is insufficient heat or pressure. Increase the iron temperature slightly (while still respecting the fabric’s limits) and apply firmer, more consistent pressure.
- Incorrect Iron Setting: Double-check that your iron is set to the appropriate temperature for the fabric you’re working with. Refer to the item’s care label for guidance.
- Pressing Cloth Too Thick: A pressing cloth that’s too thick can prevent sufficient heat from reaching the adhesive. Try using a thinner cotton cloth or parchment paper.
- Uneven Surface: Ensure your ironing surface is perfectly flat and stable. Any bumps or unevenness can hinder proper heat transfer and pressure application.

Patch Bubbling or Wrinkling:
- Too Much Heat: Excessive heat can cause the patch’s adhesive to bubble or the fabric to wrinkle. Reduce the iron temperature and try again.
- Steam Was Used: Steam is the enemy of iron-on patches. Make absolutely sure the steam function is turned off.
- Uneven Pressure: Uneven pressure can also contribute to bubbling or wrinkling. Apply firm, consistent pressure across the entire patch.
Scorching or Melting:
- Iron Temperature Too High: This is a clear sign that your iron is too hot. Immediately reduce the temperature and allow the fabric to cool before attempting to reapply the patch (if possible).
- Pressing Cloth Not Used or Too Thin: Always use a pressing cloth, and ensure it’s thick enough to provide adequate protection.
- Direct Contact Between Iron and Patch: Never allow the iron to come into direct contact with the patch. The pressing cloth is essential.
Patch Peeling After Washing:
- Inadequate Initial Adhesion: If the patch wasn’t fully adhered during the initial application, it’s more likely to peel off during washing. Re-apply the patch, ensuring sufficient heat and pressure.
- Washing Too Soon After Application: Allow the adhesive to fully cure for at least 24 hours before washing the item.
- Harsh Washing Conditions: Wash the item inside out, using a gentle cycle, cold water, and a mild detergent. Avoid harsh chemicals or bleach.
By addressing these potential issues proactively, you can increase your success rate and ensure your customized items look their best.
5. Caring for your customized item: Ensuring longevity
Once your Stoney Clover patch is beautifully applied, proper care is essential to maintain its appearance and longevity. Here are some guidelines to keep your customized item looking its best:
- Washing Instructions: When it’s time to wash your item, turn it inside out. This simple step protects the patch from abrasion during the washing cycle. Use a gentle cycle with cold water and a mild detergent. Avoid harsh chemicals, bleach, or fabric softeners, as these can degrade the adhesive or damage the patch.
- Drying Instructions: Air drying is the best option for preserving the patch and the fabriLay the item flat or hang it to dry, avoiding direct sunlight or high heat, which can cause fading or damage. If you must use a tumble dryer, select the lowest heat setting and remove the item promptly once it’s dry. Avoid high heat at all costs.
- Storage: When storing your customized item, avoid folding it directly on the patch, as this can create creases or weaken the adhesive. Store it flat or hang it in a cool, dry place, away from direct sunlight. Proper storage will help prevent damage and keep the patch looking its best for years to come.
6. Heat press vs. iron: Which is right for you?
While a standard household iron is perfectly adequate for applying Stoney Clover patches, a heat press is another option to consider. Understanding the differences between the two can help you decide which tool is best suited for your needs.
Household Iron:
- Pros: Readily available, affordable, easy to use, suitable for small-scale projects.
- Cons: Temperature can fluctuate, pressure application can be uneven, requires more manual control.
Heat Press:
- Pros: Provides consistent, even heat and pressure distribution, offers precise temperature control, ideal for larger projects or frequent use.
- Cons: More expensive than an iron, requires more storage space, may not be necessary for occasional patch application.
Which is Right for You?
If you’re only planning to apply a few patches occasionally, a household iron is likely sufficient. However, using often, a heat press is a worthwhile investment. A heat press provides more even heat and pressure. This can be particularly beneficial for larger patches or when working with delicate fabrics. The consistent results and time-saving efficiency of a heat press can make it a valuable tool.
Read more: Heat Press Instruction
7. Related Questions
To make this guide even more comprehensive, let’s address some frequently asked questions about ironing on Stoney Clover patches:
7.1 Can I iron Stoney Clover patches onto any type of fabric?
While Stoney Clover patches can be applied to a wide variety of fabrics, some materials are more suitable than others. Natural fibers like cotton, denim, and canvas are generally the best choices. Synthetic fabrics like nylon and polyester can also work, but they require lower heat settings and careful monitoring to prevent melting or scorching.
Avoid ironing patches onto delicate fabrics like silk, lace, or leather, as the heat can cause irreversible damage. Always check the care label of the item you’re customizing for specific heat recommendations.
7.2 How long will the patch stay on?
With the right ironing method (temperature, pressing time) combined with optional support from fabric glue, your Stoney Clover patch will have high durability. However, each fabric material will have a different level of adhesion, this needs careful attention.
7.3 Can I remove a Stoney Clover patch after it’s been ironed on?
Removing an iron-on patch can be tricky, and it’s not always possible to do so without leaving some residue or damaging the fabriHowever, if you need to remove a patch, you can try applying heat to the back of the fabric (using a pressing cloth) to soften the adhesive, then gently peeling the patch away. Be aware that this may not work for all fabrics or adhesives, and there’s always a risk of damaging the item.
7.4 What if I don’t have a pressing cloth?
A pressing cloth is essential for protecting both the patch and the fabriIf you don’t have a dedicated pressing cloth, you can use a thin, 100% cotton handkerchief, a piece of an old cotton t-shirt, parchment paper, or a Teflon sheet. The key is to use a material that can withstand heat and won’t transfer any color or residue onto the patch or the item.
7.5 Is it necessary to sew the patch after ironing?
Sewing is not required. However, you can sew around to make sure the patch is attached to your item if you feel it is necessary
Read more:
Customizing with Stoney Clover patches is a fantastic way to add personality and flair to your belongings. As this guide demonstrates, applying these patches successfully is entirely achievable with the right approach. By following the step-by-step instructions, taking necessary precautions, and understanding the troubleshooting tips, you can confidently transform ordinary items into unique, personalized creations.
The key takeaways are simple: prepare your materials, use the correct iron settings (with NO steam), apply firm and even pressure, protect the patch with a pressing cloth, and allow the adhesive to cool completely. With a little patience and attention to detail, you can enjoy beautifully customized items that reflect your individual style. So, gather your supplies, unleash your creativity, and start showcasing your unique creations with pride!
Visit our website https://mypacklove.com/ to explore our product options and request a quote. Contact us today to discuss your specific needs! Let us help you enhance your clothing care and branding efforts.


