How to Patch Torn Clothes: Quick & Easy Fixes
That sinking feeling when you discover a rip or tear in your favorite jeans, a beloved shirt, or your trusty jacket? We’ve all been there. But before you sadly toss that garment aside, there’s a simple, sustainable, and often surprisingly easy solution: patching!
Learning how to patch torn clothes is a valuable skill that can save your wardrobe and your wallet. Whether you’re a sewing novice or just looking for a quick fix, this guide will walk you through various methods – from traditional sewing to no-fuss iron-ons – to get your clothes back in wearable condition.
1. Why Bother Patching? More Than Just Fixing a Hole
Discovering a tear or hole in a favorite garment doesn’t automatically mean a trip to the discard pile. Learning effective patching techniques offers far more than just a simple repair; mastering this skill unlocks benefits for your wardrobe, wallet, and even the planet. For small clothing businesses, proficiency in garment maintenance and apparel restoration can turn potential losses into unique opportunities. Understanding why patching matters provides the motivation to learn how.
- The Sustainable Choice: Patching is a core practice in sustainable fashion. By extending the life of garments through clothing repair, you actively reduce textile waste heading to landfills. This mindful approach conserves the resources—water, energy, raw materials—required to produce new clothing, lessening the environmental impact of the fashion cycle. Embracing mending contributes positively to more sustainable fashion practices.
- Cost Savings: Effective garment maintenance through patching translates directly into financial benefits. For individuals, repairing means avoiding the cost of replacing items. For small businesses dealing in wholesale or retail clothing, learning to patch damaged inventory can salvage stock that might otherwise be written off, protecting profit margins and reducing waste-related expenses.
- Preserving Garments: Many clothing items hold sentimental value or are simply perfectly comfortable, broken-in favorites. Patching allows you to preserve these treasured pieces, keeping specific garments wearable and extending their story. Whether a vintage find, a gift, or just a well-loved staple, mending respects the practical and emotional connection we form with our clothes.
- A Touch of Style: Patching isn’t always about hiding damage. The concept of visible mending transforms apparel restoration into a creative outlet. Deliberate, contrasting, or decorative patches can add unique character and personality to a garment, turning a flaw into a feature and making a style statement.
2. Choosing Your Patching Path: Finding the Right Fabric Repair Method
Selecting the appropriate fabric repair technique is crucial for achieving a successful and lasting mend. Not all patching methods suit every situation; the nature of the damage, the garment’s material, and your desired outcome all play a role in determining the best approach. Considering these factors carefully will guide you to the most effective solution, whether you prioritize invisibility, durability, or speed.
- Assessing the Damage: The type and location of the damage are primary considerations. A clean rip or tear requires a different approach than a ragged hole or a frayed area. Damage in high-stress zones like knees or elbows demands a more durable patching method (often involving sewing) than a tear on a less stressed, flat surface. Consider if the damage involves a seam, which might need separate reinforcement.
- Fabric Matters: The characteristics of the fabric itself heavily influence the choice of mending technique. Heavyweight materials like denim can handle robust sew-on patches, while delicate fabrics require finer needles, threads, and potentially less intrusive methods like careful hand sewing or specific no-sew options. Stretch fabrics (common in athletic wear or knits) need a patching method that allows for movement, such as using a stretch patch fabric and a zig-zag or stretch stitch. Cotton, synthetics, and knits all behave differently, affecting how well adhesives bond or how easily they can be sewn.
- Desired Outcome: Define your goal for the repair. Are you aiming for an invisible mend that blends seamlessly with the original fabric, or are you embracing visible mending as a stylistic choice? Do you need a highly durable, long-lasting fix capable of withstanding frequent washing and wear, or is a quick, possibly temporary, solution acceptable? The answer impacts whether sew-on methods, iron-on patches, or no-sew methods are most suitable.
- Tools, Time & Skill: Be realistic about the resources available. Do you have access to a sewing machine, or only basic hand-sewing supplies? Are you comfortable with needle and thread, or do you prefer no-sew methods? How much time can you dedicate to the repair? Sew-on patches generally offer the most durability but require more time and skill than quicker iron-on or fabric glue options.
- Quick Comparison: To help visualize the trade-offs, consider this comparison of common patching methods:
| Sew-on | Most durable, versatile, works on most fabrics, can be decorative. | Requires sewing skills (hand or sewing machine), can be time-consuming. | High-stress areas, heavyweight fabrics, permanent repairs, visible mending. | High |
| Iron-on | Quick, easy, no sewing initially required, good for reinforcing. | Less durable than sewing (edges can lift), heat may damage some fabrics. | Quick fixes, reinforcing weak spots, decorative pre-made patches. | Medium (Improved if sewn) |
| Glue/Tape | No sewing needed, very fast, good for temporary fixes or hems. | Often temporary, less durable, glue can stiffen fabric, tape not suitable for holes. | Emergencies, temporary holds, hems, materials unsuitable for heat/sewing. | Low to Medium |
| Darning | Re-weaves fabric, minimal bulk, good for knits, reinforces worn areas. | Time-consuming, requires practice, best for small holes/threadbare areas only. | Small holes (especially in knits like socks), reinforcing worn threads. | High (when done well) |
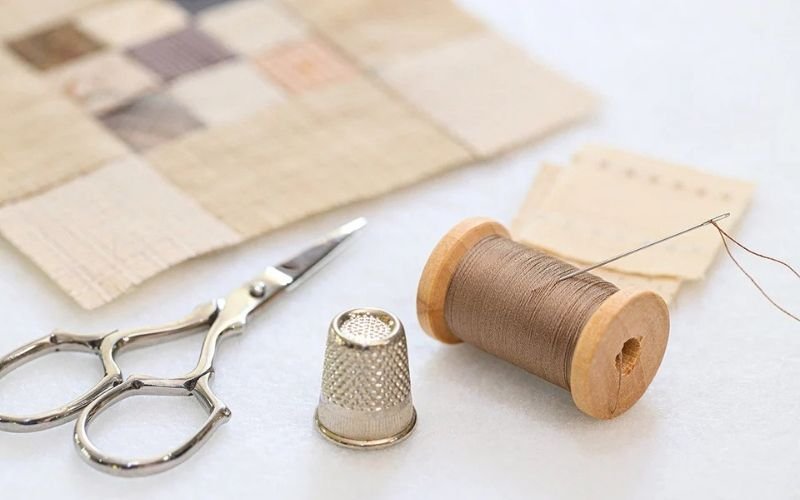
Having the right supplies on hand makes any patching job smoother and more successful. While a basic sewing kit covers many needs, specific mending tasks might require additional items. Here’s a rundown of essential and useful tools for your patchwork endeavors:
- Patch Fabric: Scraps matching or complementing your garment are ideal. Consider weight and type (denim for jeans, cotton for shirts). Keep a small stash of various fabric pieces (part of good haberdashery or craft supplies). For invisible repairs, finding an exact match is key; otherwise, contrasting fabrics can be used for visible mending.
- Needles: A variety pack is best. Use sharp needles for woven fabrics and ballpoint needles for knits. Finer needles are needed for delicate materials, while sturdy needles are required for denim or canvas. Hand sewing needles differ from sewing machine needles.
- Thread: Aim to match the fabric color as closely as possible for invisible repairs, or choose a contrasting color for decorative stitching. All-purpose polyester thread is versatile, but cotton thread or heavy-duty thread may be better for specific fabrics (like denim). Consider embroidery floss for decorative visible mending.
- Scissors: You’ll need at least two pairs: fabric shears (kept sharp and used only for fabric) for cutting patches and trimming garments, and smaller embroidery scissors or snips for precise thread cutting and trimming small frayed edges.
- Pins or Fabric Clips: To hold the patch securely in place while sewing. Pins are traditional; clips are excellent for thicker fabrics or materials you don’t want to pierce unnecessarily.
- Iron and Ironing Board: Essential for pressing seams, preparing fabric, applying iron-on patches, and using fusible interfacing. A clean iron surface is crucial.
- Measuring Tool: A simple ruler or flexible measuring tape is needed for accurately measuring the damaged area and cutting the patch to the correct size (allowing for overlap).
- Fusible Interfacing/Web (Optional): A heat-activated adhesive sheet used for iron-on patches (both DIY and stabilizing pre-made ones). Comes in various weights (lightweight, medium, heavy-duty) and types (single-sided, double-sided like fusible web).
- Fabric Glue (Optional): A specialized adhesive for bonding fabric. Choose washable, flexible fabric glue for best results. Useful for no-sew methods or temporarily securing edges.
- Garment Tape (Optional) : Double-sided adhesive tape designed for fabric. Primarily for temporary fixes like emergency hem repairs, but can sometimes temporarily secure a tear edge before a more permanent fix.
- Seam Ripper (Optional): A small, sharp tool invaluable for removing stitches if you make a mistake or need to undo a seam.
- Tailor’s Chalk or Fabric Marker (Optional): For marking cutting lines on the patch fabric or placement guidelines on the garment. Ensure the marker is removable or disappears with heat/water.
- Darning Egg or Mushroom (Optional): A smooth, curved object placed behind a hole during darning to provide support and maintain fabric shape.
3. Method 1: The Classic Sew-On Patch – Durability Meets Tradition
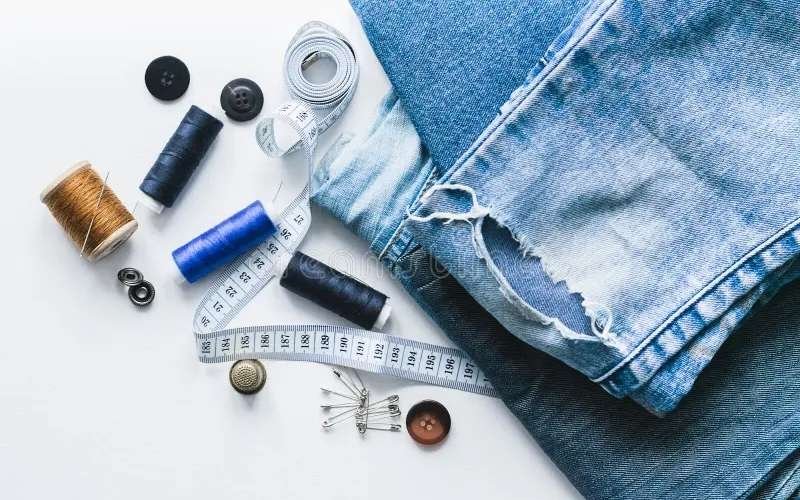
The sew-on patch represents the most traditional and often the most durable method for fabric fixing. This technique involves stitching a piece of fabric over the damaged area, either by hand sewing or using a sewing machine. Its versatility makes it suitable for a wide range of fabrics and types of damage, offering unparalleled strength, especially for areas subject to frequent stress or washing. While requiring some basic stitching techniques, the results provide a long-lasting and reliable repair.
3.1. Preparing the Garment and Patch Fabric
Proper preparation is essential for a neat and durable sew-on patch. Taking these steps ensures the patch adheres well and prevents further damage.
- Clean the Garment: Wash and dry the clothing item first. Repairing clean fabric is easier and prevents trapping dirt under the patch.
- Trim the Damage: Carefully snip away any loose threads or severely frayed edges around the hole or tear on the garment. This creates a cleaner area to work with. Avoid enlarging the hole significantly.
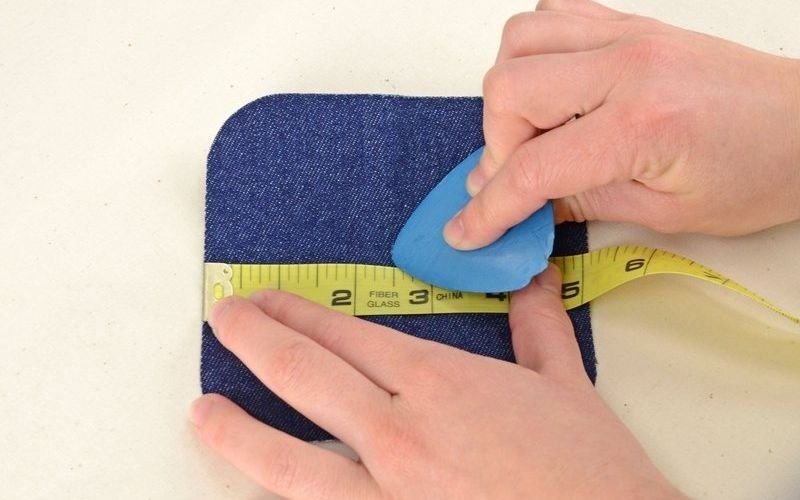
- Measure and Cut the Patch: Measure the damaged area. Your patch fabric needs to be larger, extending at least 1/2 inch (about 1.5 cm) beyond the damage on all sides. For larger holes or high-stress areas, aim for a 3/4 to 1 inch (2-2.5 cm) overlap. Cut the patch squarely or round the corners slightly, which can help prevent them from catching and lifting later. Ensure the grainline (the direction of the fabric threads) of the patch aligns with the grainline of the garment if possible, especially on woven fabrics. Correct patch size is crucial for effectively covering and reinforcing the weakness.
- Finish Patch Edges (Prevent Fraying): The raw edges of the patch fabric can unravel (fraying) over time, weakening the repair. Prevent this by:
- Folding Under: Fold the raw edges of the patch under by about 1/4 inch (0.5 cm) and press them flat with an iron. This creates a clean, finished edge to stitch down.
- Zig-Zag Stitch: If using a sewing machine, sew a zig-zag stitch all around the raw edge of the patch before attaching it.
- Pinking Shears: Cutting the patch with pinking shears (scissors with a serrated blade) can slow down fraying on some tightly woven fabrics, though it’s less secure than folding or stitching.
3.2. Attaching the Patch by Hand (Hand Sewing)
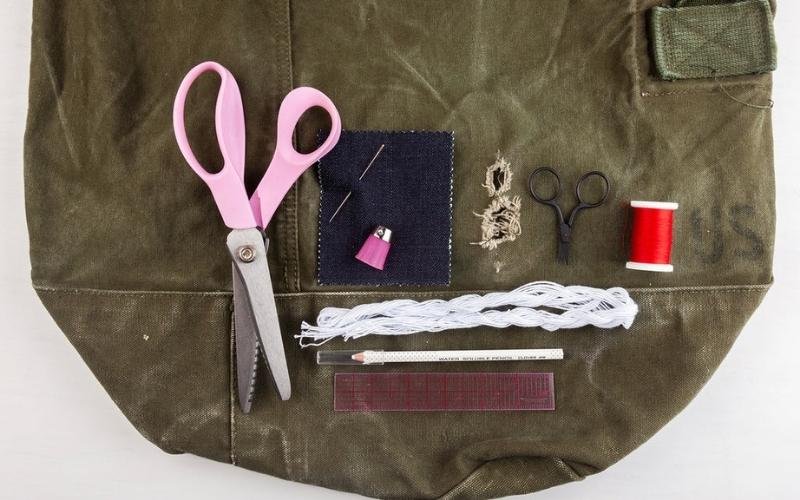
Hand sewing offers precision and control, making it ideal for delicate fabrics or those preferring not to use a machine.
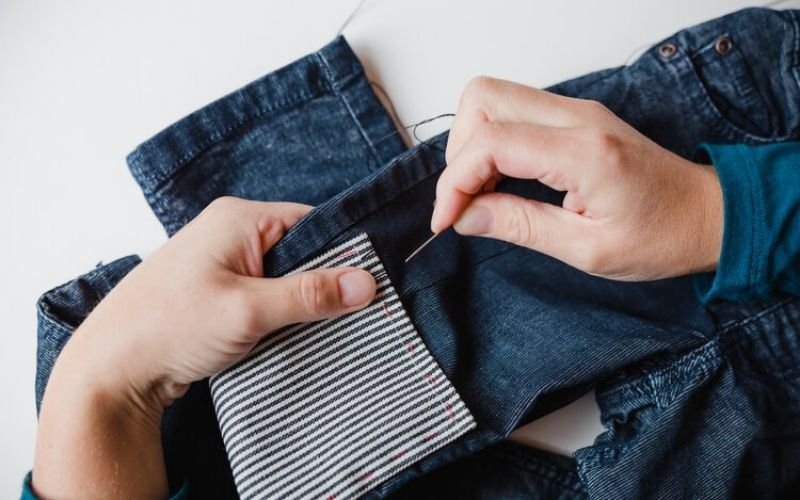
- Position and Secure: Place the prepared patch over the damaged area on the garment (usually on the outside, but sometimes inside for less visibility). Ensure it completely covers the weak spot with adequate overlap. Secure the patch firmly using pins placed perpendicular to the edge, or by hand-basting (long, temporary running stitches) around the perimeter.
- Thread the Needle and Knot: Choose a thread that matches or complements your fabric. Cut a manageable length (about 18-24 inches / 45-60 cm). Thread your hand sewing needle and tie a secure knot at the long end of the thread.
- Choose Your Stitch: Select a suitable hand stitch based on durability and appearance:
- Running Stitch: Simple and quick, good for low-stress areas or basting. Creates a dashed line. Less durable than other options.
- Backstitch: Very strong and resembles machine stitching. Ideal for durable repairs. Each stitch slightly overlaps the previous one, creating a solid line.
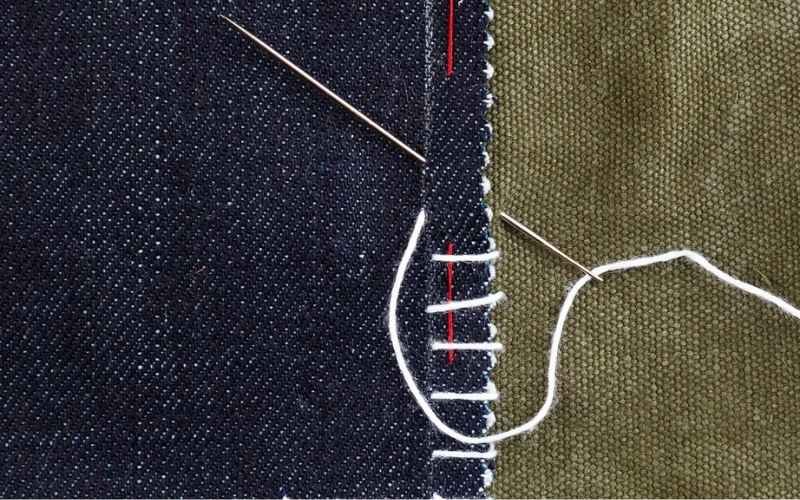
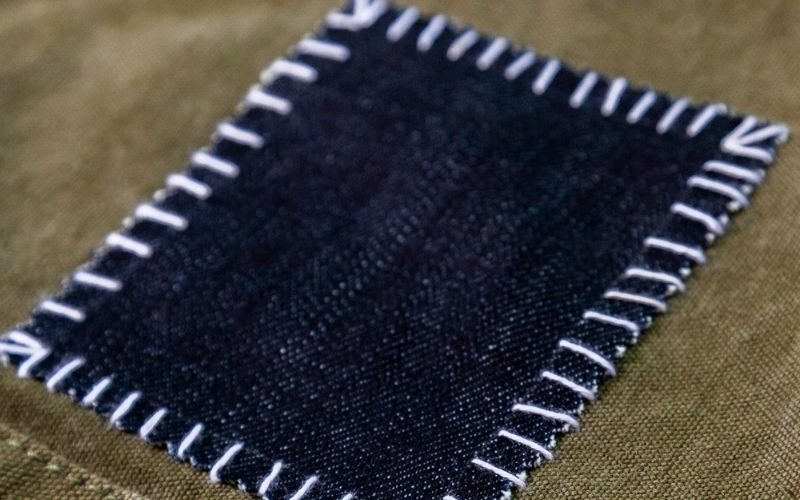
- Whipstitch or Blanket Stitch: Good for securing the folded edge of a patch neatly, especially if applying the patch to the outside. Creates visible stitches along the edge.
- Sew the Patch: Begin sewing from the underside of the garment if possible, hiding the initial knot. Stitch consistently around the entire perimeter of the patch, keeping your stitches small and even for strength and neatness. Sew close to the finished edge of the patch (or the fold line). If using a folded edge, ensure your needle catches both the patch and the garment fabric securely.
- Secure the Thread: When you have stitched all the way around, bring the needle to the underside of the fabric. Make a few small stitches close together or loop the thread under a previous stitch and pull to form a knot. Trim the excess thread close to the knot.
3.3. Using a Sewing Machine for Speed and Strength
A sewing machine offers a faster and often stronger way to attach patches, particularly on sturdy fabrics like denim or canvas.
- Prepare and Position: Prepare the garment and patch as described above (Steps 1-4 in the preparation section). Finishing the patch edge by folding or zig-zagging beforehand is highly recommended. Pin the patch securely in place.
- Set Up the Machine: Thread your sewing machine with appropriate thread. Select either a straight stitch or a zig-zag stitch. A straight stitch is standard, while a narrow zig-zag stitch can provide extra coverage over the patch edge and help prevent fraying, especially if the edge wasn’t pre-finished. Set a medium stitch length.
- Begin Sewing: Position the garment under the machine needle, starting near one edge of the patch. Lower the presser foot. Begin sewing, guiding the fabric gently. Aim to stitch close to the edge of the patch (approx. 1/8 inch or 2-3 mm).
- Reinforce Start and End: When you start sewing, stitch forward a few stitches, then use the reverse/backstitch function to sew backward a few stitches, then continue forward again. This locks the beginning of your stitch line. Do the same when you reach the end, overlapping your first few stitches slightly before backstitching to secure the thread.
- Pivot at Corners: To sew sharp corners, stop with the needle down in the fabric, lift the presser foot, pivot the fabric 90 degrees, lower the presser foot, and continue sewing.
- Optional Second Stitch Line: For maximum durability, especially on high-stress areas, consider sewing a second line of stitching just inside the first one, reinforcing the patch further. Trim any excess threads.
4. Method 2: Iron-On Patches – Quick, Easy Fabric Fixing
For those seeking a faster alternative to sewing, iron-on patches offer a convenient solution for fabric fixing. This approach utilizes heat-activated adhesives, available either as materials like fusible interfacing (a sheet of heat-activated adhesive, sometimes with a fabric backing) or fusible web (adhesive only, often on paper backing) for creating your own patches, or as readily available pre-made decorative or repair patches. While undeniably a quick fix and useful for reinforcing fabric, the durability of purely iron-on methods can be less robust compared to sewing, especially through repeated washing.
4.1. Using Fusible Interfacing (DIY Iron-ons)
Creating your own iron-on patch using fusible interfacing or web allows you to use custom fabrics while benefiting from no-sew application (though sewing is recommended for longevity).
- Prepare Materials: Select your patch fabric and a suitable weight of fusible web or single-sided fusible interfacing. Ensure the garment area is clean and dry.
- Apply Fusible to Patch Fabric: Place the fusible web/interfacing onto the wrong side of your chosen patch fabric, following the manufacturer’s instructions. Typically, this involves placing the adhesive side (often rougher or shinier) against the fabric’s back and pressing with an iron set to the recommended temperature (usually no steam). Press firmly for the specified time. Let cool completely.
- Cut the Patch: Once the fusible is bonded to the fabric, cut out your patch shape to the desired size, ensuring it will adequately cover the damaged area with overlap (refer to sew-on prep for sizing). The fusible backing helps prevent fraying at this stage. Peel off any paper backing if using fusible web.
- Position on Garment: Place the patch onto the garment over the damaged area, adhesive-side down. Ensure the garment fabric is flat and smooth underneath.
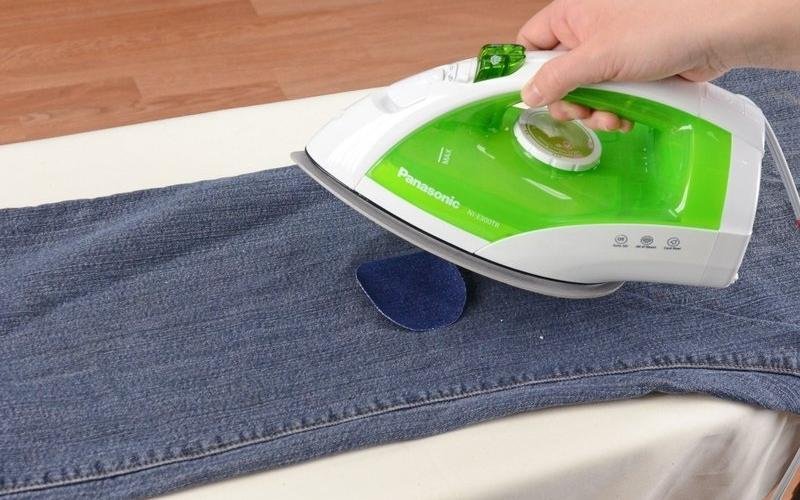
- Iron to Bond: Cover the patch with a pressing cloth (a scrap piece of cotton fabric or parchment paper) to protect your iron and the garment. Press firmly with the iron set to the temperature recommended by the fusible product manufacturer (check compatibility with your garment fabric). Hold the iron in place for the specified duration – do not glide the iron back and forth initially, as this can shift the patch. Lift and press section by section if the patch is large.
- Cool Down: Allow the area to cool completely before moving or handling the garment. This allows the adhesive to set properly.
- Strong Recommendation for Durability: While the patch is now attached, for significantly improved durability and to prevent edges from peeling after washing, it is highly recommended to stitch around the edges of the patch, either by hand (using a backstitch or blanket stitch) or with a sewing machine (using a straight or zig-zag stitch). This secures the patch mechanically, complementing the adhesive bond.
4.2. Applying Pre-Made Commercial Iron-On Patches
Using store-bought iron-on patches is generally straightforward, but careful application enhances their longevity.
- Read Instructions: Always prioritize the specific instructions provided on the patch packaging. Different patches use different adhesives and require varying heat settings, times, and pressure.
- Prepare Garment: Ensure the garment fabric is clean, dry, and wrinkle-free in the application area.
- Position Patch: Place the patch in the desired location.
- Iron According to Directions: Preheat your iron to the recommended temperature (often cotton setting, no steam, but verify). Place a pressing cloth over the patch. Press down firmly with the iron for the duration specified in the instructions. Pay attention to pressure requirements.
- Iron from Reverse Side (Optional but Recommended): If instructions permit and the garment allows, turn the garment inside out and press the area behind the patch for additional bonding time.
- Cool Completely: Let the garment and patch cool thoroughly before wearing or washing. Avoid washing for 24-48 hours if recommended by the manufacturer.
- Consider Edge Stitching: As with DIY iron-ons, adding a line of stitching around the perimeter significantly increases the durability and lifespan of pre-made iron-on patches.
5. Method 3: No-Sew Solutions – When Stitching Isn’t Feasible
When sewing isn’t practical due to lack of time, skill, or appropriate tools, or if the fabric is particularly challenging to stitch, no-sew methods like fabric glue and garment tape offer alternatives. These solutions provide quick clothing repair options, though it’s important to have realistic expectations about their permanence and durability compared to stitched repairs. They are best suited for specific situations, temporary fixes, or materials where needle penetration is undesirable.
5.1. Fabric Glue for Permanent or Temporary Bonds
Fabric glue can create surprisingly strong bonds, offering both permanent and temporary solutions depending on the product chosen.
- Types of Glue: Select a glue specifically designed for fabric. Look for options labeled “permanent,” “washable,” and “flexible” for the most durable and comfortable repairs. Temporary fabric glues also exist, suitable for holding things in place before sewing or for short-term needs. Avoid standard craft glues, which may not withstand washing or remain flexible.
- Application Technique: Clean the fabric surfaces first. Apply a thin, even layer of glue to one surface (usually the patch or along one edge of the tear). Avoid applying too much glue, as it can squeeze out, create stiff spots, or bleed through the fabric. Use the applicator tip or a small tool to spread it precisely. Press the surfaces together firmly.
- Drying and Curing Time: Adhere strictly to the manufacturer’s instructions regarding drying and curing time. Most fabric glues require a period (often 24-72 hours) to fully cure and achieve maximum strength and washability. Rushing this process will compromise the bond.
- Limitations: While effective, glued repairs are generally less durable than sewn ones, especially under high stress or frequent, harsh washing. The glue can sometimes stiffen the fabric slightly, affecting its drape. Test the glue on an inconspicuous area first, particularly on delicate or synthetic fabrics, to check for discoloration or adverse effects. Glued patches may eventually peel at the edges.
5.2. Garment Tape for Emergency Repairs & Hems
Garment tape is essentially a double-sided adhesive tape engineered for fabric, offering an instant but typically temporary fix.
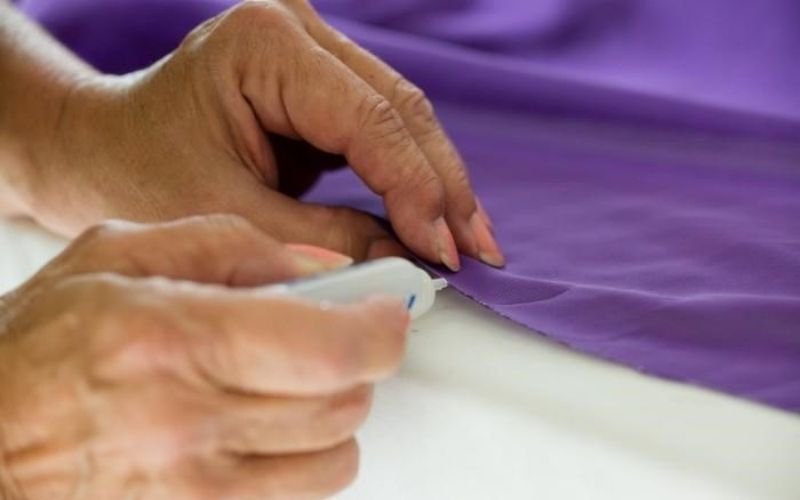
- Description and Use: This tape provides a quick bond without heat or drying time. Its primary strengths lie in emergency situations – temporarily fixing a fallen hem moments before an event, securing a flapping lapel, or holding costume elements in place. It can temporarily hold the edges of a clean, straight tear together from the inside to prevent further ripping until a more permanent repair can be made, but it’s not suitable for patching actual holes.
- Application: Ensure fabric is clean and dry. Cut the tape to the required length, apply it to one fabric surface, peel off the backing paper, and press the other fabric surface firmly onto the tape.
- Temporary Nature: Emphasize that most garment tapes are designed for temporary use. They typically do not withstand washing and will lose adhesion over time or when laundered. While some stronger “hemmming tapes” exist (often requiring heat), standard double-sided garment tape is best viewed as an immediate, short-term solution for clothing repair emergencies, not a substitute for sewing or durable gluing for structural repairs like patching holes.
6. Method 4: Darning – Weaving Magic for Small Holes & Reinforcement
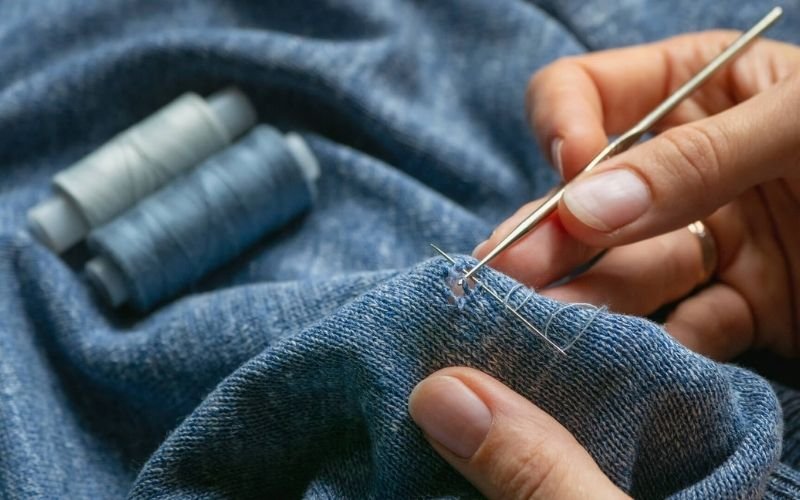
Darning moves beyond simply covering damage; this textile restoration technique involves meticulously reweaving the fabric structure itself. It’s an ideal solution for repairing small holes or strengthening threadbare areas where a patch might add unwanted bulk or feel inappropriate. Darning particularly shines when mending knits, such as socks or sweaters, seamlessly integrating the repair into the existing fabric by creating new interlocking threads.
6.1. When to Choose Darning Over Patching
While patching covers larger areas, darning is the preferred method in specific situations:
- Small Holes: Darning excels at closing up small, contained holes (often less than an inch or 2.5 cm across) where the surrounding fabric is relatively stable.
- Threadbare Spots: Before a hole fully forms, darning can reinforce weakened, worn-thin areas (like sock heels or elbow patches on sweaters), significantly extending the garment’s life.
- Knitted Items: Because darning mimics the looped structure of knitting, it integrates much better visually and structurally into knitwear compared to a woven patch.
- Avoiding Bulk: In areas where a patch would create an uncomfortable lump or spoil the drape of the fabric (e.g., inside a shoe, on fine materials), darning offers a flatter, more integrated repair.
6.2. The Darning Technique Explained
Darning requires patience but results in a strong, integrated repair. The basic principle is to create a new woven ‘patch’ using only needle and thread.
- Prepare the Area: Trim any ragged threads around the edge of the hole. If the fabric is very delicate or stretchy, you might consider basting a lightweight stabilizer fabric temporarily to the back of the area, slightly larger than the hole, to provide support during darning. This stabilizer can often be carefully torn away or trimmed after darning is complete.
- Provide Support: Place a darning egg, darning mushroom, or even a small smooth object like a lightbulb or orange behind the hole. This provides a firm, curved surface to work against and helps maintain the fabric’s shape, preventing puckering. Smooth the fabric gently over the support.
- Create Vertical ‘Warp’ Threads: Thread a needle with thread matching the fabric color and weight (or slightly finer). Starting just outside the hole on one side, bring the needle up from the back. Make a series of straight, parallel stitches running vertically across the hole, extending slightly into the stable fabric on either side. Anchor each stitch securely in the good fabric. These are the ‘warp’ threads. Keep them fairly close together (but not overlapping) and maintain even, but not tight, tension. Do not pull them so tight that the fabric puckers.
- Weave Horizontal ‘Weft’ Threads: Once the vertical threads cover the hole, begin weaving horizontally. Bring the needle up just outside the hole on one side, adjacent to the warp threads. Weave the needle over the first warp thread, under the second, over the third, and so on, across the entire width of the warp threads. Pull the thread through gently. Anchor the stitch in the stable fabric on the other side.
- Continue Weaving: For the next horizontal row, reverse the weaving pattern: go under the first warp thread, over the second, under the third, etc. Anchor this stitch next to the previous one. Continue weaving back and forth, alternating the over/under pattern with each row and pushing the rows gently together with your needle to create a solid weave. Maintain consistent, even tension throughout – neither too tight nor too loose.
- Secure the Threads: Once the hole is completely filled with the newly woven patch, secure the final thread on the underside of the fabric with a few small, close stitches or a knot worked into the existing fabric or previous darning stitches. Trim the thread. Remove the darning support.
7. Tackling Tricky Repairs: Expert Tips for Common Challenges
While many patches are straightforward, some mending clothes situations present unique difficulties. Certain types of tears or fabrics require specific approaches to ensure a strong and neat repair technique. Here’s how to handle some common challenges:
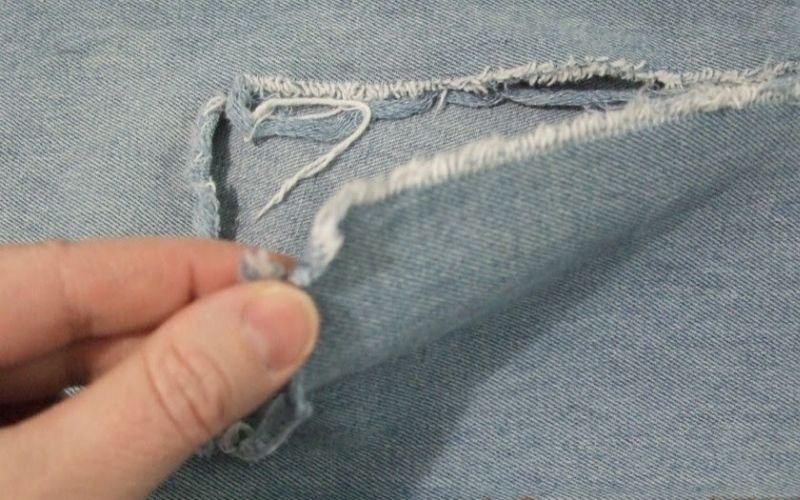
- Patching L-Shaped Tears: These tears have a vulnerable corner prone to further ripping. Before patching, stabilize the area by applying lightweight fusible interfacing to the back of the tear, extending slightly beyond the edges. When patching (preferably with a sew-on patch), pay extra attention to the corner. Stitch carefully around it, perhaps adding a few extra reinforcement stitches right at the pivot point of the L-shaped tear for added strength. A rounded patch can sometimes distribute stress better than a square one over such tears.
- Working Near Seams: If the damage is close to or involves a ripped seam, the repair needs careful consideration. Ensure your patch extends well beyond the original seam allowance, anchoring securely into the main fabric panels on either side. Before applying the patch, inspect the original seam itself – it might also need re-stitching or reinforcement as part of the overall clothing repair process. Integrating the patch smoothly over the bulk of the seam allowance might require careful folding or trimming of the patch edge.
- Handling Stretch Fabrics: Mending stretchy materials like jersey, spandex blends, or knits requires maintaining the fabric’s flexibility. Use a patch fabric with similar stretch properties. When sewing, opt for a thread with some give (like polyester) and use a stitch that allows movement, such as a narrow zig-zag stitch or a specific stretch stitch on a sewing machine. If hand sewing, keep stitches slightly looser than usual. Avoid stretching the fabric while applying the patch, as this can cause puckering once the tension is released. Ballpoint needles are essential for sewing knits to avoid snagging threads.
- Mending Delicate Materials: Fabrics like silk, chiffon, lace, or lightweight rayons demand a gentle touch. Use the finest appropriate needle (sharps or specialized silk needles) and thread (silk or fine polyester) to minimize holes and stress. Hand sewing is often preferable to machine sewing for greater control. Consider applying a patch from the inside (wrong side) of the garment for less visual impact, possibly using a sheer patch fabric. Applying a very lightweight, sheer fusible interfacing behind the tear before patching (from the inside) can provide stability without adding significant bulk. Always test your needle, thread, and chosen method (including glue or interfacing) on a hidden seam allowance or scrap first to ensure compatibility and avoid damaging the delicate fabric.
8. Pro Tips for Neat, Durable Patches (Clothing Maintenance Insights)
Achieving a patch that not only fixes the damage but also looks neat and lasts through wear and washing involves a few extra considerations. Incorporating these insights into your mending routine enhances overall garment care and ensures your repairs are as effective as possible.
- Pre-wash Fabrics: Always pre-wash both the garment and the patch fabric before starting the repair, especially if they are new or made of natural fibers like cotton. Fabrics can shrink differently, and pre-washing prevents puckering around the patch after the first wash post-repair. This step is crucial for a durable patch.
- Pressing is Key: Use your iron frequently throughout the process. Press the damaged area flat before starting. If folding patch edges, press the folds sharply. After applying an iron-on patch (and allowing it to cool), press it again. After sewing, press the finished patch gently. Pressing helps meld stitches, set adhesives, and gives the repair a professional, flat finish – a vital part of good clothing maintenance.
- Strategic Thread Choice: While matching thread color is common for invisibility, consider thread strength. For high-stress areas like jeans knees or workwear, using a heavy-duty or upholstery thread provides extra durability, even if the color isn’t a perfect match (it can be used just on the inside stitch line if desired). For stretch fabrics, polyester thread generally has more give than cotton. Smart thread choice contributes significantly to a durable patch.
- Inside vs. Outside Application: While patches are often applied externally, consider an internal patch for less visibility or on delicate fabrics. An internal patch still provides reinforcement but can be less obtrusive. Sometimes, a combination is best: a structural patch on the inside and a decorative or matching fabric patch on the outside.
- Reinforce Stress Areas: If patching an area prone to repeated stress (elbows, knees, crotch seams), consider adding extra reinforcement. This could mean using a slightly larger or thicker patch, adding a second layer of patch fabric (perhaps just on the inside), or sewing extra lines of stitching around the patch perimeter or even across it (in parallel lines or a grid). Proactive reinforcement is smart garment care.
9. Patching Considerations for Small Clothing Businesses
For small businesses involved in wholesale or retail clothing, dealing with damaged inventory is an operational reality. Implementing effective patching and repair strategies can be more than just damage control; it can become a part of sustainable practices and even a value proposition.
- Repair Assessment: Establish clear criteria for when an item is worth repairing versus when it should be discounted heavily, salvaged for materials, or disposed of responsibly. Consider the extent and location of the damage, the original value of the garment, the time and skill required for a quality repair, and whether the repair can be done invisibly or needs to be presented as a feature (visible mending/upcycling). Cost-effective decision-making is key.
- Efficiency and Skill: Time is money. If repairs are frequent, invest in efficient tools (like a reliable sewing machine) and train staff (or designate a skilled individual) in basic to intermediate mending techniques. Standardizing common repairs can streamline the process. For complex repairs on high-value items, outsourcing to a professional tailor might be more cost-effective than attempting an in-house fix that doesn’t meet quality standards.
- Customer Communication and Transparency: If selling repaired or upcycled items, transparency is crucial. Clearly label the garment as repaired or featuring visible mending. Frame it positively – highlighting the sustainable fashion practices involved or the unique character added. Honesty builds trust and manages customer expectations. Some customers actively seek out unique, visibly mended pieces.
- Value-Add and Upcycling: View repairs not just as fixing flaws but as potential opportunities. Can a simple patch be elevated with decorative stitching? Can a cluster of small damages be turned into an intentional design feature through creative patching or embroidery? Offering repair services for items purchased, or selling DIY mending kits, can also be a value-add that aligns with sustainable fashion practices and customer interest in garment longevity.
10. Related Questions
Here are answers to some common questions about patching specific items and achieving particular results.
10.1. What’s the strongest way to patch jeans?
For maximum durability when patching jeans, especially in high-wear areas like knees or the seat, a sew-on patch applied from the inside and reinforced with machine stitching is generally the strongest method. Use a sturdy denim patch fabric (ideally pre-washed).
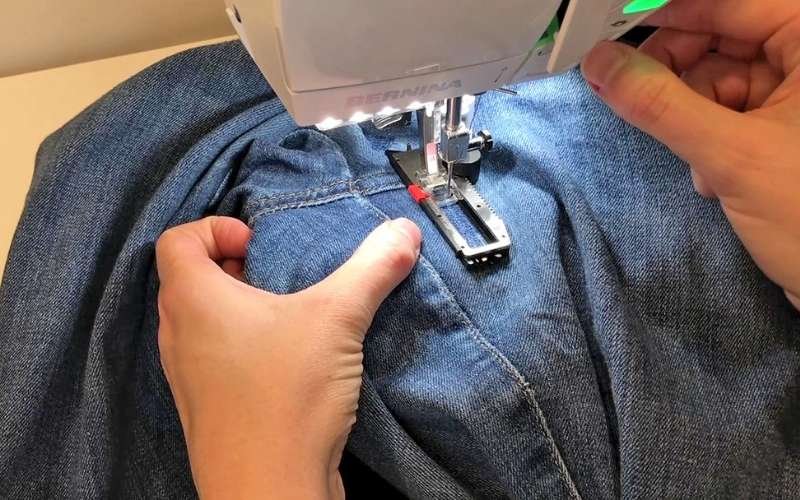
After pinning or basting the patch securely behind the hole, use a sewing machine with a denim needle and heavy-duty thread. Stitch multiple rows back and forth across the damaged area and patch (similar to darning but with machine speed), extending well into the surrounding stable denim.
Then, stitch securely around the perimeter of the patch. Combining internal reinforcement with thorough stitching provides the best defense against future wear and tear.
10.2. Can I make a patch invisible?
Achieving a truly invisible patch is challenging but possible in some circumstances. The key factors are:
- Fabric Match: You need an exact match for the garment fabric in color, weave, and weight. The best source is often fabric taken from an inconspicuous area of the garment itself (like a deep hem, inside facing, or pocket lining) or an identical garment.
- Internal Application: Apply the patch to the inside (wrong side) of the garment.
- Careful Preparation: Trim the hole neatly. Use a lightweight fusible interfacing behind the hole first to stabilize it, cut precisely to the shape of the hole or slightly larger.
- Precise Attachment: Hand sewing with very fine thread (matching color) using tiny, barely visible stitches (like a pick stitch or fell stitch) around the edge of the hole/patch interface offers the most control. Alternatively, very careful application of flexible fabric glue right at the edge might work for some fabrics, but stitching is generally more reliable and less likely to alter the fabric’s drape. Darning with perfectly matched thread can also create a near-invisible repair for small holes, especially in textured fabrics.
10.3. How do you patch delicate fabrics like silk or chiffon?
Patching delicate fabrics requires extreme care to avoid further damage or creating a bulky, obvious repair.
- Use Fine Materials: Select the finest possible needle (a sharp size 60/8 or 70/10) and thread (silk thread or very fine polyester thread) in a matching color.
- Internal Patch Preferred: Apply a patch made of similar or lighter-weight fabric (like silk habotai, organza, or even a specialized sheer fusible patch) to the inside of the garment.
- Stabilize Gently: Consider backing the damaged area internally with a very lightweight, sheer fusible interfacing before patching to prevent stretching or further tearing during handling. Test fusibles on a hidden area first, as heat can damage some silks.
- Hand Sewing Recommended: Hand sewing offers the most control. Use tiny, neat stitches like the fell stitch or slip stitch, catching only a few threads of the main fabric to minimize visibility. Avoid pulling stitches tight, which causes puckering.
- Glue with Caution: If using glue, choose one specifically designed for delicates that dries clear, flexible, and won’t bleed through. Apply sparingly with a fine tool. Test first. Sewing is generally preferable for longevity and drape.
Read more:
Learning to patch torn clothes is more than just acquiring a practical skill; it’s an act of resourcefulness and a step towards more sustainable fashion consumption. Whether you opt for the traditional strength of a sew-on patch, the convenience of an iron-on, the ingenuity of darning, or a quick no-sew fix, you’re actively choosing to extend your garment’s lifespan. Each mend prevents waste, saves resources, and preserves items that hold value, be it sentimental or practical.
For individuals, mastering clothing repair empowers you to care for your wardrobe effectively and even express creativity through visible mending. For small clothing businesses, integrating repair and garment care techniques can salvage inventory, reduce costs, and align operations with the growing demand for sustainable fashion practices.
Don’t view a tear as the end; see it as an opportunity to restore, reinforce, and perhaps even reinvent. By embracing mending, you give your clothes a longer, more interesting story. Continue exploring different textile restoration techniques to further enhance your garment care skills.


