


How to print on fabric: Inkjet, stencils, stamps and more


Are you a crafter, DIY enthusiast, or small business owner looking to personalize textiles and create one-of-a-kind designs? Perhaps you dream of unique clothing, eye-catching home decor, or branded accessories but feel limited by the restricted choices available in stores or the hefty price tag of professional fabric printing.
The inability to truly customize your fabrics can stifle creative expression and make it difficult to achieve your desired aesthetic or build a strong brand identity. Professional printing, while offering quality, can be cost-prohibitive, especially for small projects or experimentation.
This article provides a comprehensive guide to the exciting world of at-home fabric printing, empowering you to transform plain fabric into personalized masterpieces with affordable and convenient techniques. We’ll delve into a range of methods, explore the necessary materials and tools, provide detailed step-by-step instructions, and offer valuable troubleshooting tips to help you unlock your creative potential and bring your unique fabric designs to life.
1. Exploring Different Methods for Printing on Fabric at Home
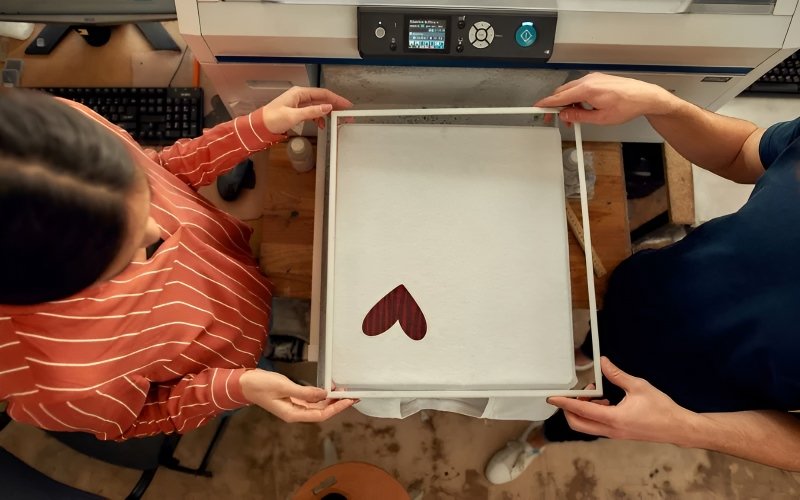
1.1 Inkjet Fabric Printing: A Step-by-Step Guide
Inkjet fabric printing presents a fantastic way to transfer designs onto fabric using a standard home printer. This technique delivers impressive detail and adaptability, making it possible to reproduce photographs, intricate patterns, and even detailed text directly onto fabric.
Before diving in, proper preparation is essential. The choice of fabric plays a significant role in the final outcome. Cotton, silk, and other tightly woven fabrics are excellent choices, as they tend to produce the sharpest prints. Always pre-wash the fabric.
This process removes any sizing, which helps the print adhere correctly. Afterward, thoroughly iron the fabric to remove any wrinkles. For improved handling and a more polished finish, consider using a stabilizer, such as freezer paper or fusible webbing.
The next step involves verifying printer and ink compatibility. Inkjet printers are specifically designed for this method. For the best and most durable results, pigment-based inks are highly recommended due to their superior resistance to fading. Dye-based inks, on the other hand, usually necessitate pre-treatment solutions for optimal performance.
Taking the time to research specific printer models and their corresponding ink compatibility is a worthwhile investment. Models from brands like Epson, Canon, and HP are frequently praised for their user-friendliness and consistent print quality. Another option to explore for home-based printing is using heat transfer labels, such as those offered by Packlove, which can be applied with a standard household iron.
The design and software used are also critical factors. Whether creating an original design or sourcing one, pay close attention to the resolution (DPI). A higher DPI will result in a sharper, clearer print. Photo-editing software programs like Adobe Photoshop or GIMP provide the necessary tools for design creation and manipulation.
When it’s time to print, carefully load the fabric into the printer, making sure it feeds through smoothly. Adjust the printer settings accordingly; selecting “Best Photo” typically delivers optimal print quality. Providing gentle guidance to the fabric as it feeds through the printer, particularly if its a thicker material, and taking care to prevent smudging are highly recommended.
The final steps involve allowing the print to dry completely. Once dry, remove any stabilizer used. If the specific ink type and fabric combination requires it, heat-set the print to ensure permanence. Always check the washing instructions provided by both the ink and fabric manufacturers to maintain the longevity of the print.
Freezer Paper Method:
A common method involves the use of freezer paper as a stabilizer. First, iron your fabric flat. Cut a piece of freezer paper to the standard 8.5″ x 11″ size, and iron the shiny side of the paper onto the fabric. Trim the fabric and freezer paper precisely to 8.5″ x 11″, ensuring no frayed edges or fabric overhang. This combined sheet can then be fed through your printer with the fabric side facing up. Adjust the printer setting to “Best Photo” or similar quality settings. Gently guide the fabric through the printer if necessary, and follow the finishing steps.
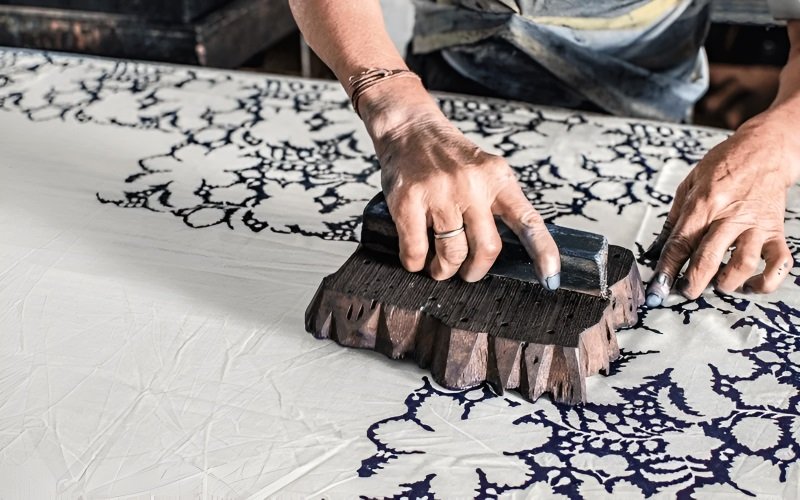
1.2 Stamping on Fabric: Creating Unique Designs with Ease
Stamping provides a wonderfully hands-on and approachable method for producing distinctive fabric designs. This technique allows for the easy translation of hand-drawn artistry onto fabric. The process involves using stamps, which are coated in paint and then pressed onto the fabric, resulting in either repeating patterns or individual designs.
Its simplicity makes it ideal for those new to fabric printing, while still offering ample opportunity for experimentation and achieving refined results.
The initial step involves creating the stamp. Begin with a sketch of the intended design. Simpler designs are generally easier to carve. Transfer this sketch onto a linoleum block, a soft material that lends itself well to carving.
Rubber erasers or wood can also be used, but linoleum offers a good compromise between ease of carving and the ability to capture detail. With a carving knife, carefully remove the areas of the linoleum that are not part of the design, leaving the desired image raised. This raised surface constitutes the stamp.
Choosing the right paint is crucial for achieving durable and vibrant prints. Two main options are available: fabric paint and oil-based paint. Fabric paint is formulated specifically for textiles, providing excellent flexibility, washability, and overall durability.
It’s available in a wide spectrum of colors and is typically water-based, simplifying the cleanup process. Oil-based paint, while also capable of producing beautiful results, requires solvents for cleanup and has extended drying times.
However, it can yield a richer, more intense color and, in some cases, better opacity, especially on darker-colored fabrics. When using oil-based paints, it’s essential to ensure the fabric is thoroughly dry and cured before washing, and a colorfastness test is always recommended.
Applying and printing the stamp requires some practice to achieve uniform results. Before working on the final fabric, it’s advisable to practice on a scrap piece. Apply a thin, even layer of paint to the stamp using a foam brush or a roller.
Avoid applying too much paint, as this can cause smudging and bleeding. Once the stamp is evenly coated, carefully position it on the fabric and press down firmly and evenly. Maintain consistent pressure across the entire stamp surface to ensure a clear and complete transfer of the design. Lift the stamp straight up, avoiding any sideways movement that could distort the image.
Proper drying and setting are critical steps to ensure the stamped design’s permanence. Allow the stamped fabric to dry completely, adhering to the paint manufacturer’s guidelines. This may take several hours or even a full day, depending on the type of paint and the surrounding environment.
After the paint has dried completely, setting the paint is essential for washability. Fabric paints typically require heat-setting with an iron. Consult the specific paint instructions for the correct heat-setting procedure. An optional step involves giving the fabric a vinegar bath to help set the colors. The vinegar acts to neutralize any alkaline residue, which can contribute to color fading.
For a truly professional finish and to enhance creations with a branded element, consider incorporating custom labels. Woven labels and rubber labels, such as those offered by Packlove, are excellent choices for adding a polished look and lasting branding to stamped fabric projects, whether they are garments, home décor items, or accessories.
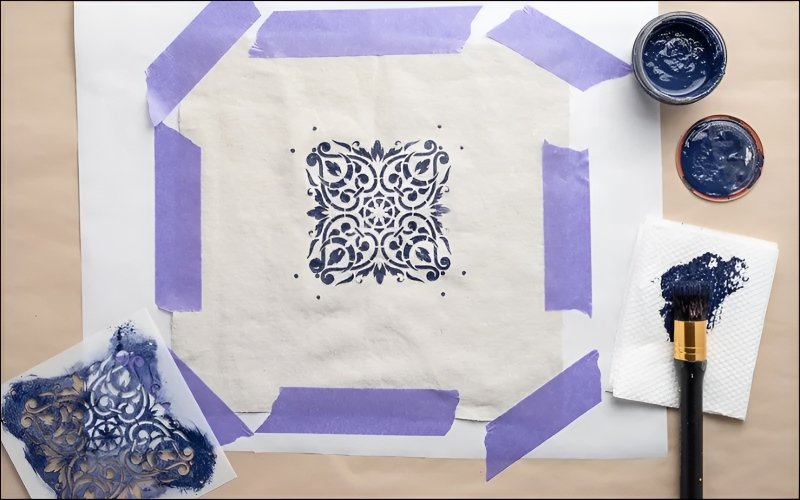
1.3 Stenciling on Fabric: Precision and Versatility
Stenciling offers a precise and versatile method for transferring intricate designs onto fabric, allowing for a high degree of customization and creative layering. This technique involves creating a template, or stencil, and using it to apply paint to the fabric, resulting in clean lines and defined shapes. From simple patterns to complex artwork, stenciling unlocks a range of artistic possibilities.
The stenciling process itself is relatively straightforward. The essential elements are a stencil, fabric, and fabric paint. The stencil acts as a mask, preventing paint from reaching certain areas of the fabric, thus creating the desired design.
The first step is stencil creation. There are two primary approaches: using freezer paper with a cutting machine or hand-cutting. Freezer paper is a particularly popular choice due to its affordability and ease of use. The paper has a shiny, plastic-like coating on one side that adheres to the fabric when ironed.
This makes it an ideal material for temporary stencils. You can create your stencil using a cutting machine, such as a Cricut or Silhouette, by designing your stencil in the machine’s software and cutting it from freezer paper. For more intricate designs or if you don’t have a cutting machine, hand-cutting the stencil with a craft knife is also an option, though it requires patience and a steady hand.
Once the stencil is created, the next step is applying it to the fabric and securing it. If using freezer paper, iron the shiny side of the paper onto the fabric. The heat will activate the adhesive coating, temporarily bonding the stencil to the fabric.
This helps to prevent the stencil from shifting during the painting process and ensures clean lines. For other stencil materials, adhesive spray or stencil adhesive can be used to secure the stencil in place.
Paint application is critical for a successful stencil project. The key is to use the right tools and techniques to prevent paint from bleeding under the stencil edges. A stencil brush, sponge.
When applying paint, use a dabbing motion rather than brushing. This prevents the paint from seeping under the stencil and creating blurry edges. Apply the paint in thin, even layers, allowing each layer to dry slightly before applying the next. Avoid overloading the brush or sponge with paint, as this is a common cause of bleeding.
Stenciling offers numerous opportunities for creativity through layering and reuse. Create multi-layered designs by applying different colors or patterns on top of each other, allowing each layer to dry completely before adding the next.
This creates depth, dimension, and a more intricate final result. The same stencil can be reused multiple times; just be sure to clean the stencil thoroughly after each use, especially if you are using water-based fabric paints. Allow the stencil to dry completely before storing it or using it again.
1.4 Solvent Transfer Printing: A Unique (But Less Durable) Option
Solvent transfer printing offers a unique, albeit less durable, method for transferring images onto fabric. This technique utilizes a solvent to dissolve the toner from a laser-printed image and adhere it to the fabric. The process can yield visually interesting results, making it suitable for projects where absolute durability is less critical, such as art pieces or decorative items.
The core process involves using a solvent to release the toner from a printed image and transferring it to the fabric. The image is essentially “lifted” from the paper and bonded to the fabric fibers.
The materials required for solvent transfer printing are relatively few. You will need a solvent, such as Citrisolv, which is a citrus-based solvent that works effectively with toner. Most importantly, you must have a laser-printed image.
It’s crucial to emphasize that this method requires a laser printer; inkjet prints will not work. The toner used in laser printers is designed to adhere to paper through heat, making it the suitable medium for this transfer process.
The transfer process begins by placing the laser-printed image, toner-side down, onto the fabric. Next, apply the Citrisolv to the back of the paper, ensuring the entire image is saturated. Once the solvent has been applied, gently but firmly begin the transfer process.
This usually involves burnishing or rubbing the back of the paper with a smooth, hard object, such as a spoon or a burnishing tool. The pressure and the solvent work together to release the toner from the paper and transfer it to the fabric. It’s important to maintain consistent pressure and avoid shifting the paper during the process.
After a few minutes of burnishing, carefully lift a corner of the paper to check the transfer. Continue burnishing until the image appears to be fully transferred. Once satisfied, carefully peel away the paper, leaving the image adhered to the fabric.
Because of the nature of the transfer process, the durability of solvent transfer prints tends to be lower compared to other methods. The transferred toner can be prone to fading or cracking over time, especially with washing.
To enhance durability, you can consider reinforcing the transferred image with fabric paint. Applying a thin layer of fabric paint over the transferred image can help to protect it from wear and tear and increase its longevity.
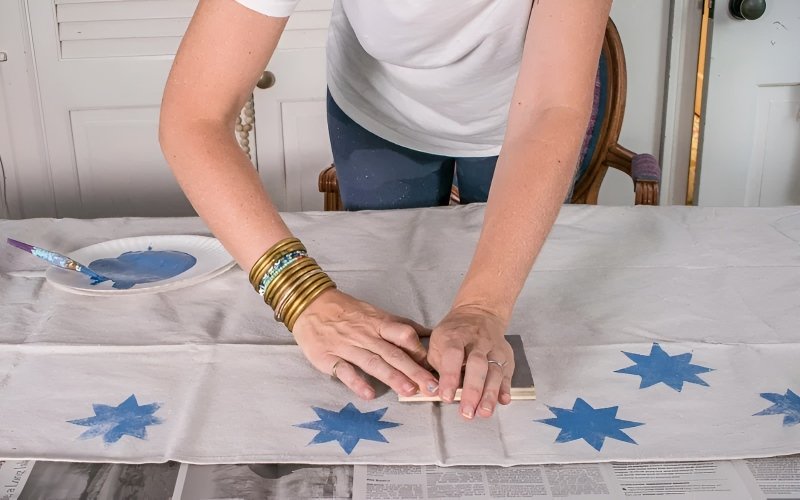
1.5 Block Printing: Simple and Fun for All Ages
Block printing is a wonderfully accessible and craft-focused method of fabric printing that is perfect for all ages, particularly children. It’s a low-barrier-to-entry technique, requiring minimal materials and offering maximum creative freedom, making it ideal for family crafting sessions and introductory fabric art projects. The simplicity of block printing allows even the youngest crafters to participate, fostering their creativity and providing a fun and engaging activity.
Start by gathering your supplies. Potatoes are a classic block printing material. Simply cut a potato in half, creating a flat surface. Then, carve a design into the cut surface using a knife. Cardboard can also be used to create printing blocks.
Cut shapes or designs from cardboard, and then glue them to a flat base, such as another piece of cardboard, to create a raised printing surface. Even pool noodles, cut into various shapes and sizes, can be transformed into unique printing blocks.
Once you have your printing blocks, select your fabric paint. Fabric paint is essential, but even basic craft paints can be used. Pour a small amount of paint onto a plate or palette. Dip the printing block into the paint, ensuring that the raised design is evenly coated. Then, carefully press the painted block onto the fabric, applying even pressure to transfer the design.
Because of its simplicity and safety, block printing is highly kid-friendly. Children can participate in all aspects of the process, from designing and carving their printing blocks to applying the paint and creating their fabric designs.
Supervise children closely during carving, and ensure they are using child-safe art supplies. Block printing is a wonderful way to introduce children to art and crafts, providing them with a sense of accomplishment and encouraging their creativity.
2. Choosing the Right Fabric and Materials
Selecting the right fabric is fundamental to the success of any fabric printing project. Natural fibers like cotton, linen, and silk are generally well-suited for various methods, including inkjet, stamping, and stenciling. Synthetic fibers like polyester can also be used. Cotton is often the easiest to work with. Fabric needs to be pre-washed and pre-treated before use.
| Fabric Type | Recommended Printing Methods | Considerations |
|---|---|---|
| Cotton | Inkjet, Stamping, Stenciling, Block Printing, Solvent Transfer (with pre-treatment) | Excellent absorbency; tight weave is best for detail; pre-wash is essential. |
| Polyester | Heat Transfer methods, some Stamping & Stenciling | Can be less absorbent; requires specific inks/paints; consider pre-treatment for dye adhesion. |
| Silk | Inkjet, Stamping, Stenciling | Luxurious; delicate; requires specialized inks/paints and careful handling. |
| Linen | Inkjet, Stamping, Stenciling | Textured surface; good absorbency; pre-wash is essential. |
| Canvas | Stamping, Stenciling, Block Printing | Durable; texture affects print detail; ensure adequate paint coverage. |
| Other Blends | (Assess Fiber Content) | May require testing to determine best methods and pre-treatment strategies. |
3. Troubleshooting Common Fabric Printing Problems
Even with careful preparation and meticulous execution, fabric printing can occasionally present challenges. Recognizing these common issues and understanding the available solutions is essential to achieving high-quality, durable, and visually appealing results.
Whether it’s smudging, bleeding, fading, uneven prints, or puckering, having a troubleshooting guide at hand will allow you to quickly address the problem and continue with your project confidently.
Addressing smudging involves ensuring the ink has completely dried before handling the printed fabric, and potentially employing a low-heat setting from a hairdryer to facilitate drying. Furthermore, it’s crucial to verify and optimize your printer settings for fabric printing to obtain the best results.
Ensuring even pressure is applied during the transfer process, for instance during stamping or the use of a heat press is key. This will prevent any unwanted distortions. Proper control and guidance of the fabric through the printer can prevent smudging.
Bleeding, which is the undesirable spreading of ink or paint beyond the intended design boundaries, can be remedied using a stencil brush and applying the paint with a dabbing motion. Avoiding over-saturating the brush or sponge with paint is also paramount.
Preventing fading, or the loss of color intensity over time, can be achieved using high-quality pigment ink, renowned for its resistance to fading. Applying heat-set to the print, if applicable, is also crucial, to set the colors, enhancing their durability.
Employing pre-treating techniques on the fabric, before printing can also improve colorfastness, reducing the chances of the colors diminishing when washing. Finally, puckering, characterized by wrinkles or distortions in the fabric, can be avoided using a stabilizer such as freezer paper and ironing the fabric before printing.
4. FAQs about How to Print on Fabric at Home
4.1 Can I use a regular inkjet printer to print on fabric?
Yes, provided you use pigment-based ink for optimal durability. Dye-based inks may require pre-treatment solutions.
4.2 What is the best fabric for at-home printing?
100% cotton with a tight weave is recommended; silk and linen also work well.
4.3 How can I make my fabric prints washable?
Use pigment ink, heat-set the print (if applicable), and follow the manufacturer’s washing instructions.
4.4 Can I print on dark fabrics using these methods?
Inkjet is best suited for light fabrics. For dark fabrics, use opaque transfer paper or screen printing.
4.5 How do I prevent my fabric prints from fading?
Use high-quality pigment ink, heat-set the print (if applicable), wash in cold water, and avoid harsh detergents.
5. Packlove – Providing service for printing and design needs
Beyond the exciting possibilities of at-home fabric printing, there are times when you may need professional support for more complex designs or larger-scale production runs. This is where Packlove steps in, offering a comprehensive range of custom printing and design services to bring your creative vision to life.
Packlove specializes in crafting high-quality custom printed products, including labels, stickers, zipper bags, and poly mailers. We understand the importance of brand identity and product presentation. We’re dedicated to providing expert printing services that meet the highest standards of quality and craftsmanship. Our commitment to quality extends to using premium materials and employing advanced printing technologies.
Whether you need a specific fabric printing solution that requires specialized expertise, require assistance with design, or are scaling up production, Packlove can help. Contact us today for a quote or consultation and let us partner with you to transform your ideas into tangible, high-quality printed products.
Read more:
At-home fabric printing is a rewarding and accessible craft that offers immense creative potential. By embracing these techniques, you can transform plain fabric into personalized works of art. Experimentation is key; don’t be afraid to explore different methods and materials to discover what works best for your unique designs. For complex designs or larger-scale needs, Packlove is here to support your creative vision.


