How to Safely Iron On Sequin Patches: Pro Tips
Sequin patches offer a dazzling way to personalize and elevate any garment, transforming ordinary clothing into unique, eye-catching pieces. However, many people hesitate to use them, fearing the dreaded sequin meltdown or a patch that peels off after just a few wears.
The key to a successful, long-lasting application lies in mastering the correct ironing technique. This guide provides everything needed to know to achieve a professional, durable finish, ensuring sequin patches stay securely in place and the clothing remains undamaged.
Through this article, gain the confidence to apply sequin patches like a pro, avoiding common pitfalls and achieving stunning results that will make your customized creations stand out.
1. Why proper application matters: The importance of getting it right
Applying sequin patches correctly is more than just a matter of aesthetics; it’s crucial for preserving both the garment and the embellishment itself. Incorrect application, often involving excessive heat or insufficient pressure, can lead to a range of undesirable outcomes. Conversely, taking the time to apply a sequin patch properly yields significant benefits.
1.1 Avoiding damage: Protecting your garment and patches
One of the primary concerns when working with heat and embellishments is the potential for damage. Excessive heat is the enemy of both sequins and many fabrics. Sequins, often made of plastic or coated materials, can easily melt, warp, or lose their vibrant color when exposed to high temperatures.
1.2 Long-lasting results: Ensuring durability and preventing peeling
The goal of applying an iron-on patch is to create a permanent bond between the patch’s adhesive and the fabric fibers. Proper application ensures that the adhesive fully melts and penetrates the fabric, creating a strong, secure connection. This prevents the patch from peeling, cracking, or becoming detached during wear or washing.
1.3 Professional finish: Achieving a clean and polished look
A well-applied sequin patch appears seamless, as if it were an integral part of the garment’s original design. There are no visible gaps, lifting edges, or unsightly adhesive residue. This professional finish enhances the overall aesthetic appeal of the clothing.

2. Essential tools and materials
To successfully iron on sequin patches without causing damage, gather the following tools and materials:
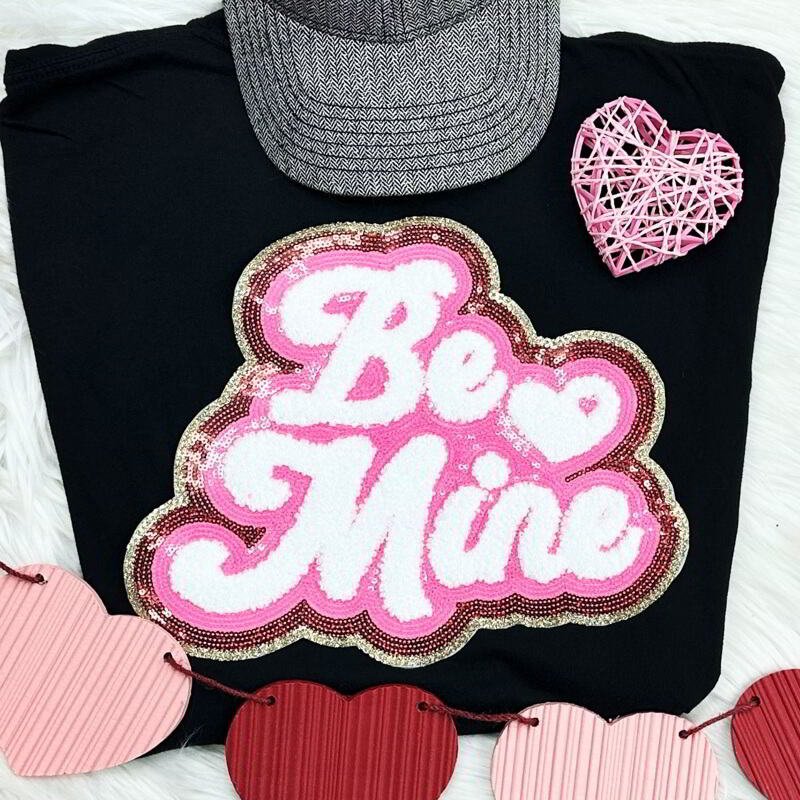
- Sequin patches: Choose the desired size, shape, and color.
- Garment: Select the item of clothing you wish to embellish. Ensure the fabric is compatible with iron-on patches (see Section 6 for detailed guidance).
- Ironing surface: A firm, flat, heat-resistant surface is essential. An ironing board is ideal.
- Iron: A household iron or a heat press can be used.
- Pressing cloth: A thin, clean piece of cotton fabric (e.g., a cotton handkerchief, muslin cloth, or pillowcase) is crucial for protecting the sequins from direct heat.
- Teflon sheet (optional): A Teflon sheet provides an extra layer of protection and helps distribute heat more evenly.
- Pins (optional): Straight pins can help secure the patch in place before ironing.
- Heat-resistant tape (optional): An alternative to pins, heat-resistant tape can hold the patch securely without leaving pinholes.
2.1 Sequin patches
Sequin patches come in a vast array of designs, sizes, shapes, and colors. When choosing a patch, consider not only the aesthetic appeal but also the quality of the materials.
2.2 Your garment
Before beginning, it’s crucial to ensure that the chosen garment’s fabric is suitable for iron-on patches. Some materials are more heat-sensitive than others, and certain fabrics may not provide a strong enough bond for the adhesive. Section 6 provides a comprehensive guide to fabric compatibility.
2.3 Ironing surface
A stable, heat-resistant ironing surface is essential for safe and effective application. An ironing board is specifically designed for this purpose, providing a firm, padded surface that can withstand high temperatures.
2.4 Iron
Both household irons and heat presses can be used to apply sequin patches, but they have distinct differences:
| Feature | Household iron | Heat press |
|---|---|---|
| Temperature control | Less precise; typically uses settings like “cotton,” “linen,” etc. Requires careful monitoring to avoid overheating. | More precise; allows for setting a specific temperature. Offers consistent heat throughout the application. |
| Pressure | Manual pressure; relies on the user to apply consistent force. | Provides even, consistent pressure across the entire patch. |
| Consistency | Can be inconsistent, especially if the iron has hot spots or the user applies uneven pressure. | Offers greater consistency in temperature and pressure, leading to more reliable results. |
| Cost | Generally less expensive. | More expensive, but may be a worthwhile investment for frequent use or professional applications. |
| Convenience | Readily available in most households. | Requires a dedicated space and may take up more room. |
| Best for | Occasional use, smaller patches | Frequent use, large patches, businesses doing professional garment customization |
2.5 Pressing cloth
A pressing cloth is a non-negotiable item when ironing sequin patches. It acts as a barrier between the iron’s hot plate and the delicate sequins, preventing them from melting, discoloring, or becoming damaged.
2.6 Optional: Teflon sheet
While not strictly necessary, a Teflon sheet can provide an extra layer of protection and enhance the application process. Teflon is a non-stick material that can withstand high temperatures.
2.7 Optional: Pins
For larger or more intricate sequin patches, straight pins can be helpful for securing the patch in the desired position before ironing.
2.8 Optional: Heat-resistant tape
Heat-resistant tape provides a valuable alternative to pins for holding a sequin patch in place during the ironing process. Unlike pins, heat-resistant tape won’t leave holes in the fabric, making it a better choice for delicate materials.

3. Preparing your garment and patch
Before applying heat, it’s essential to prepare both the garment and the sequin patch to ensure optimal adhesion and a professional-looking result.
- Pre-washing your garment: Pre-washing the garment is a crucial step, especially if using a new item of clothing. Washing removes any sizing, finishes, or dirt that could interfere with the adhesive bond.
- Choosing the perfect placement: Carefully consider the placement of the sequin patch on the garment. Try on the garment and use a mirror to visualize the final look.
- Securing the patch: Once satisfied with the placement, secure the patch to prevent it from moving during ironing. Straight pins can be used, inserting them through the patch and into the fabric. Alternatively, use heat-resistant tape, applying small strips around the edges of the patch.
- Prepare the application area: Even if the garment has been pre-washed, it’s good practice to clean the specific area where the patch will be applied. Use a clean, damp cloth to wipe away any dust, lint, or oils that may be present.
4. Applying patches with a household iron
These instructions provide a detailed guide to applying sequin patches using a standard household iron. Follow each step carefully for a successful and damage-free application.
4.1 Step 1: Setting up your iron
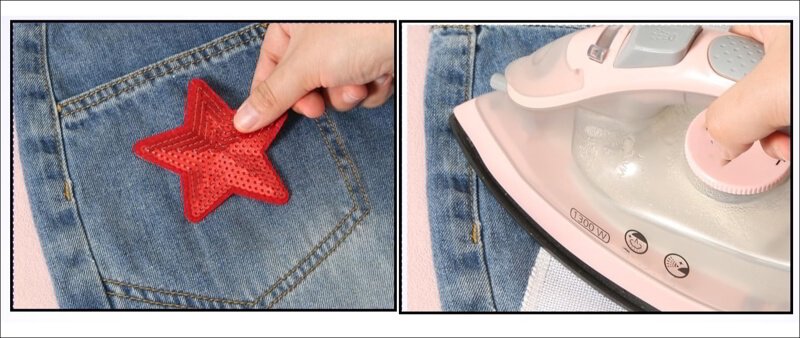
Set the iron to the appropriate temperature for the garment’s fabric type. Generally, a medium to medium-high setting (around the cotton or linen setting) is suitable, but always check the garment’s care label for specific recommendations. Crucially, turn off the steam function.
4.2 Step 2: Positioning the pressing cloth
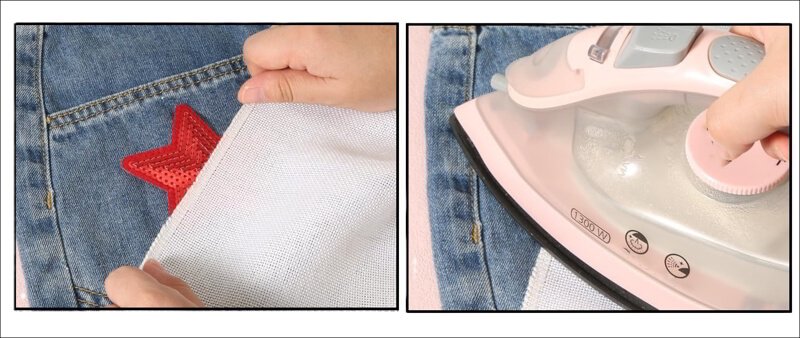
Place the pressing cloth (a thin, clean cotton cloth) over the sequin patch, completely covering it. This protects the sequins from direct contact with the hot iron, preventing melting or discoloration.
4.3 Step 3: Applying heat and pressure
With the pressing cloth in place, firmly press the iron onto the patch area. Avoid sliding the iron back and forth, as this can shift the patch or damage the sequins. Instead, use a steady, even pressure, applying the iron in sections if the patch is large. Maintain pressure for approximately 30-60 seconds per section. Using a circular motion helps with the bond and adhesion, this is a trick that many tailors use.

4.4 Step 4: Checking for adhesion
After applying heat for the recommended time, carefully lift a corner of the pressing cloth and gently check if the patch has adhered to the fabric.
4.5 Step 5: Cooling and final check
Once the patch appears to be fully adhered, remove the iron and allow the patch and garment to cool completely. Once cooled, gently tug on the edges of the patch to ensure a secure bond.
4.6 Repeat the ironing process if necessary
If, after cooling, some areas of the patch are not fully adhered, repeat steps 2-5, focusing on the loose sections.
5. Applying patches with a heat press
Using a heat press provides more consistent temperature and pressure, often leading to a more reliable bond for iron-on patches. These instructions outline the steps for using a heat press:
5.1 Step 1: Setting up your heat press
Set the heat press to the recommended temperature, pressure, and time settings. A general guideline is 350-360°F (177-182°C) with high pressure for 20-30 seconds.
5.2 Step 2: Positioning the garment and patch
Place the garment on the heat press platen, ensuring the area where the patch will be applied is flat and wrinkle-free. Position the sequin patch on the garment, and secure it with heat-resistant tape if needed.
5.3 Step 3: Applying heat and pressure
Close the heat press, ensuring the upper platen makes full contact with the pressing cloth (or Teflon sheet, if using) and the patch. Engage the press mechanism to apply the set pressure and heat for the specified time.
5.4 Step 4: Cooling and peeling
Once the timer goes off, carefully open the heat press. Allow the patch and garment to cool according to the manufacturer’s instructions.
5.5 Step 5: Checking for adhesion
After cooling and peeling (if required), check for any areas that have not adhered properly.
5.6 Repeat the ironing process if necessary
If the patch is not fully adhered, repeat the process, focusing on the affected areas.
6. Fabric compatibility guide
Not all fabrics are suitable for iron-on patches, and using the wrong fabric can result in damage to the garment or a weak bond. This guide provides information on fabric compatibility:
6.1 Best fabrics for sequin patches
Generally, sturdy, heat-resistant fabrics are the best choices for sequin patches. These include:
- Cotton: A natural fiber that can withstand high temperatures.
- Denim: A durable, tightly woven fabric that provides a strong base.
- Polyester blends: Many polyester blends are heat-resistant and offer good adhesion.
- Canvas: Canvas is also a good choice for placing patches
6.2 Fabrics to avoid
Certain fabrics should be avoided due to their sensitivity to heat or their inability to form a strong bond with the adhesive:
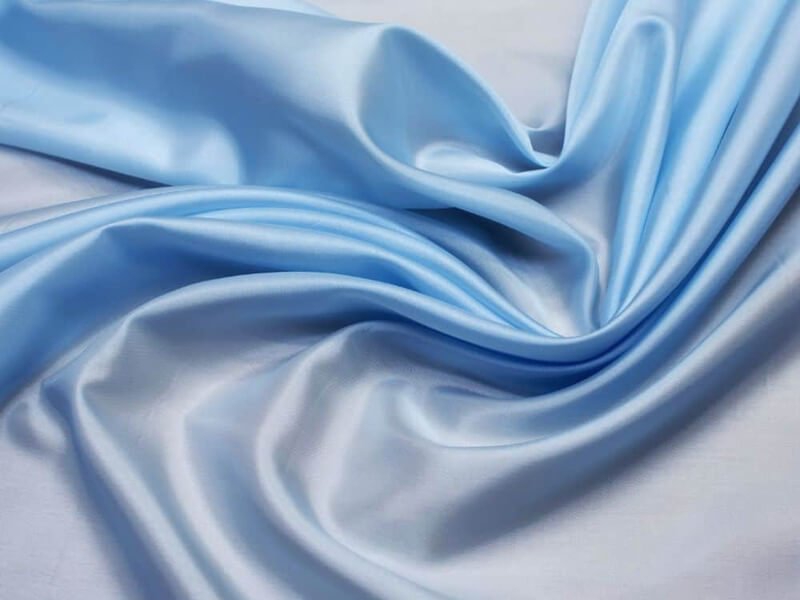
- Delicate fabrics: Silk, lace, satin, and other delicate materials can be easily scorched or damaged by heat.
- Waterproof materials: The coatings on waterproof fabrics can melt or prevent the adhesive from bonding properly.
- Highly elastic fabrics: Fabrics with a high degree of stretch (e.g., spandex, Lycra) may not provide a stable base for the patch.
- Rayon and nylon: These synthetic fabrics can be heat-sensitive and may melt or shrink at high temperatures.
- Wool: High temperatures often damage wool fibers.
- Acrylic fabrics: Acrylic is another type of synthetic fabric that can easily melt.

6.3 Testing on an inconspicuous area
Before applying a sequin patch to a visible area of the garment, it’s always wise to test on an inconspicuous area, such as an inside seam or hem.
Fabric compatibility chart (suitable/unsuitable fabrics).
| Fabric | Suitability for iron-on patches | Notes |
|---|---|---|
| Cotton | Suitable | Can withstand high heat. Provides a good bond. |
| Denim | Suitable | Durable and heat-resistant. |
| Polyester blends | Generally suitable | Check the garment’s care label for specific heat recommendations. |
| Canvas | Suitable | Durable and heat-resistant. |
| Silk | Unsuitable | Delicate; easily scorched or damaged by heat. |
| Lace | Unsuitable | Delicate; easily scorched or damaged by heat. |
| Satin | Unsuitable | Delicate; easily scorched or damaged by heat. |
| Waterproof materials | Unsuitable | Coatings can melt or prevent adhesion. |
| Highly elastic fabrics | Unsuitable | May not provide a stable base for the patch. |
| Rayon | Unsuitable | Heat-sensitive; may melt or shrink. |
| Nylon | Unsuitable | Heat-sensitive; may melt or shrink. |
| Wool | Unsuitable | High temperatures often damage wool fibers. |
| Acrylic | Unsuitable | Synthetic fabric that easily melts. |
7. Troubleshooting common problems
7.1 Patch not sticking
Problem: The patch is not adhering to the fabric, either completely or in certain areas.
Solutions:
- Increase heat: Gradually increase the iron’s temperature.
- Increase pressure: Apply firmer, more consistent pressure while ironing.
- Increase time: Apply heat for a longer duration, checking for adhesion periodically.
- Check fabric: Ensure the fabric is compatible with iron-on patches (refer to Section 6).
7.2 Sequins melting or discoloring
Problem: The sequins are melting, warping, losing their color, or becoming disfigured.
Solutions:
- Reduce heat: Lower the iron’s temperature.
- Use a pressing cloth: Always use a pressing cloth between the iron and the sequins.
- Avoid direct contact: Never place the hot iron directly onto the sequins.
- Thinner pressing cloth: Using too thin a pressing cloth can expose it to too much heat.
7.3 Patch edges lifting
Problem: The edges of the patch are lifting or not fully adhering to the fabric.
Solutions:
- Apply even heat: Ensure that the entire patch, including the edges, receives consistent heat and pressure.
- Increase pressure: Apply firmer pressure, especially around the edges.
- Re-iron: Re-iron the edges, using the pressing cloth and focusing on the areas that are lifting.
7.4 Adhesive residue on garment
Problem: Sticky adhesive residue is left on the garment around the patch.
Solutions:
- Reduce heat: Overheating can cause the adhesive to seep out.
- Use a clean pressing cloth: Ensure your pressing cloth is clean and free of any residue.
- Correct side: Make sure to iron on the correct side of the patch
7.5 Patch shifting during application
Problem: Patch moves out of place while ironing.
Solutions:
- Pins: Use more pins to secure the patch
- Heat-resistant: Apply heat resistant tape all around the edges of the patch.
7.6 What happens if the patch is placed on the wrong spot
Problem: Put the patch in the wrong position.
Solutions:
- Immediate action: If you realize the mistake immediately, quickly and carefully try to peel the patch off while the adhesive is still warm.
- Cooling: If the adhesive has cooled, removal becomes more difficult and carries a higher risk of damaging the fabric.
- Reheating (with caution): You *might* be able to gently reheat the patch *through a pressing cloth* to soften the adhesive, but this is risky and could spread the adhesive or damage the garment.
- Adhesive remover: If reheating fails, consider a specialized adhesive remover designed for fabrics.
- Professional help: For delicate fabrics or expensive garments, it’s best to consult a professional dry cleaner or tailor.
- Cover-up: If the patch cannot be removed without damaging the garment, consider covering it with a larger patch, appliqué, or other embellishment.
8. Caring for your embellished garment
Proper care is essential to maintain the appearance and longevity of garments with ironed-on sequin patches. Follow these guidelines:
8.1 Washing instructions
- Turn inside out: Always turn the garment inside out before washing to protect the sequins from abrasion and snagging.
- Gentle cycle: Use a gentle or delicate wash cycle to minimize agitation.
- Cold water: Wash in cold water to prevent the adhesive from weakening and to protect the sequins’ color.
- Mild detergent: Use a mild detergent designed for delicate fabrics. Avoid harsh chemicals or bleach.
- Avoid overloading: Don’t overload the washing machine, as this can cause excessive friction and damage the patch.
- Hand wash (recommended): For best results, hand wash the item in cold water

8.2 Drying instructions
- Air dry: The best way to dry a garment with sequin patches is to air dry it. Hang it on a hanger or lay it flat on a clean, dry surface, avoiding direct sunlight.
- Low heat (if necessary): If using a tumble dryer, use the lowest heat setting and remove the garment while it’s still slightly damp.
8.3 Ironing after washing
If ironing is needed, turn the garment inside out and use a low heat setting. Never iron directly on the sequin patch. Place a pressing cloth between the iron and the garment to protect the embellishment.
8.4 Storing your garment
- Avoid folding: Avoid folding the garment directly on the sequin patch, as this can create creases or cause the sequins to become dislodged.
- Hang or lay flat: Hang the garment in a closet or lay it flat in a drawer, ensuring that the sequin patch is not pressed against other items.
- Cover (optional): For extra protection, cover the garment with a garment bag or a clean cloth.
9. Related questions
9.1 Can I use a steamer instead of an iron for sequin patches?
No, a steamer is not recommended for applying sequin patches
9.2 How can I remove an iron-on sequin patch if I change my mind?
Removing an iron-on patch can be tricky, and there’s always a risk of damaging the garment. If you need to remove a patch, proceed with caution. You can try gently reheating the patch *through a pressing cloth* to soften the adhesive, then carefully peeling it off
9.3 Are there different types of adhesives for sequin patches?
Yes, there are different types of adhesives, but the most common type for sequin patches is heat-activated adhesive.
9.4 Can I iron sequin patches onto leather or faux leather?
Generally, it’s not recommended to iron sequin patches onto leather or faux leather.
9.5 Where can I buy high-quality sequin patches?
High-quality sequin patches can be found at a variety of retailers, both online and in physical stores. Craft stores, fabric stores, and online marketplaces offer a wide selection of patches.
Read more:
Applying sequin patches is a rewarding way to personalize and enhance clothing, creating unique and eye-catching designs. By following the guidelines in this article, addressing proper preparation, application techniques, and care instructions, achieving success is within reach. Remember the importance of fabric compatibility, using a pressing cloth, applying the correct heat and pressure, and troubleshooting common problems.


