How to Wash Shirts with Iron-On Patches: Keep Them On!
Love personalizing clothes with iron-on patches but hate when they peel off in the wash? Knowing how to wash shirts with iron on patches correctly is crucial for longevity. Improper techniques can weaken adhesive, cause peeling, and even damage your favorite garments.
Don’t let laundry mishaps ruin your unique style! This essential guide provides clear instructions for both machine and hand washing, vital drying methods that protect the bond, and tips to tackle peeling edges. Learn the best practices to maintain patch integrity, preserve vibrant colors, and ensure your customized apparel stays looking great wash after wash.
1. Why proper washing is crucial for your iron-on patch durability
Iron-on patches rely on a heat-activated adhesive to bond with fabric. Think of it like a special glue that melts and secures the patch when you apply heat. However, the very elements involved in routine fabric cleaning can counteract this bond over time.
Repeated exposure to heat (especially from warm or hot water temperature settings), the physical agitation of a washing machine cycle, and certain chemicals found in laundry detergent or fabric softener can gradually weaken this adhesive.
Imagine repeatedly warming and cooling glue – each cycle can make it a bit less sticky. Similarly, the mechanical tumbling and rubbing inside a washer, along with detergents designed to break down substances, put stress on the adhesive holding your patch.
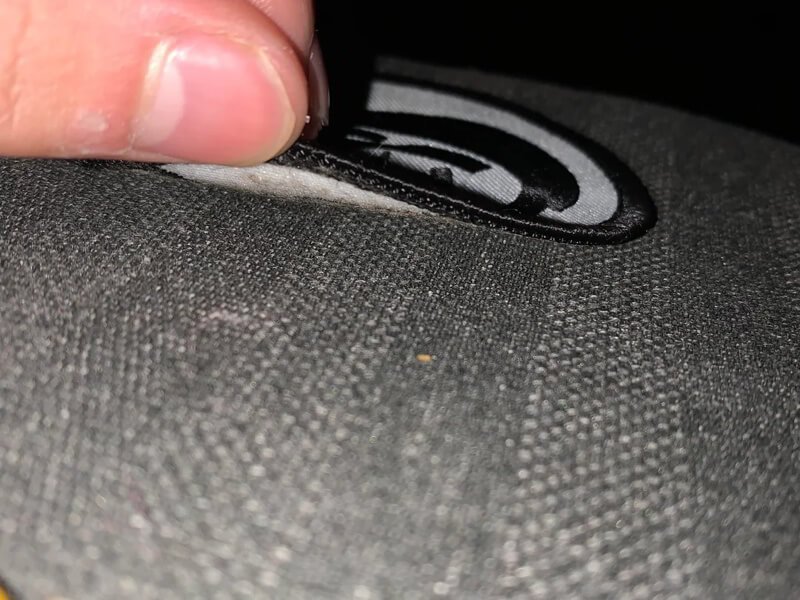
This gradual breakdown is what leads to those frustrating lifted edges, peeling, and eventually, the patch potentially falling off completely. Compromised adhesive longevity directly impacts patch durability.
Therefore, understanding why specific washing practices are recommended is key to patch maintenance and overall garment maintenance. Careful washing, primarily by controlling heat and avoiding harsh chemicals, directly preserves the integrity of the adhesive, ensuring your patch maintains its intended patch appearance and stays securely attached for longer. Proper apparel upkeep for patched items requires this mindful approach to cleaning.

2. Before you wash: Essential patch care preparation
Before your patched garment goes anywhere near water, taking a few preparatory steps is critical for effective patch care and preventing damage during the wash.
2.1 Check the patch adhesion
Take a moment to gently run a fingertip along all edges of each patch. You’re checking the patch condition for any signs of lifting or loose threads at the border. This quick inspection helps prevent peeling by identifying potential problems before washing stresses the adhesion further.
2.2 Read garment care labels
Always consult the garment’s care label first. This is vital because the fabric type dictates the safe washing temperature and handling instructions, which directly impacts the patch’s heat-resistance and fabric compatibility.
For instance, sturdy fabrics like cotton or denim generally tolerate different conditions than more delicate polyester or synthetic blends. If the garment label specifies colder water or a gentler cycle than general patch advice might suggest, always adhere to the garment label’s stricter limitations to protect both the clothing and the patch.
2.3 Pre-treat stains carefully
Address any stains on the garment fabric around the patch before washing the entire item. Apply a small amount of mild detergent or a suitable stain remover directly onto the stained area, using cold water. Gently dab or blot the stain; avoid vigorous scrubbing near the patch, as this can compromise the adhesive.
Be careful not to saturate the patch area itself during this pre-treatment. This targeted approach is a key part of careful fabric care and provides useful laundry tips for maintaining patched items.
2.4 Turn the garment inside out
Always turn the garment inside out before placing it in the wash basin or machine. This simple action provides essential patch protection during the washing cycle. The garment’s fabric acts as a barrier, shielding the patch surface from friction and potential abrasion against other clothes or the machine drum, reducing the risk of snagging and lessening direct exposure to detergents.
2.5 Secure zippers & hooks
Make sure to close all zippers and fasten any hooks or clasps on the garment itself, and ideally on any other items included in the same wash load. Open or loose hardware can easily catch on patch threads during the tumbling action of a wash, especially on detailed embroidered iron-on patches, leading to pulls, damage, or snagging.
3. Washing methods for shirts with iron-on patches
When deciding how to wash your patched garments, you have two primary approaches. Hand washing offers the highest level of protection and is the recommended method for maximizing patch longevity. However, machine washing is possible if performed with specific precautions to safeguard the patch and its adhesive.
3.1 Method 1: Hand washing (recommended for maximum patch longevity)
This gentle cleaning technique minimizes stress on the patch adhesive.
- Prepare the basin: Fill a clean basin or sink with cold water. Avoid warm or hot water, as heat is detrimental to the adhesive.
- Add detergent: Mix in a small amount of mild detergent – choose one formulated for delicates, handwashing, or baby clothes. Avoid harsh chemicals.
- Wash gently: Submerge the inside-out garment completely. Use gentle swishing motions with your hands to agitate the water and clean the fabric. Avoid vigorous scrubbing, especially around the patch area.
- Soak briefly (if needed): For moderately soiled items, allow a brief soak of 5-10 minutes.
- Rinse thoroughly: Drain the soapy water and refill the basin with fresh cold water. Rinse the garment by gently swishing until all detergent residue is gone. Repeat if necessary.
- Remove excess water: Carefully lift the garment and gently squeeze out excess water. Do not wring or twist the garment, as this action puts significant stress on the fabric and the patch adhesive, potentially causing it to lift or detach.
3.2 Method 2: Machine washable? Yes, but carefully
While hand washing is preferred, you can use a washing machine if you strictly adhere to these precautions:
- Select the right cycle: Always choose the gentle or delicate washing cycle. These cycles use lower speeds and less agitation.
- Use cold water only: This is non-negotiable. Warm or hot water can reactivate and weaken the patch adhesive.
- Choose mild detergent: Use a small amount of mild detergent. Avoid heavy-duty formulas or those with harsh additives.
- No fabric softener or bleach: Crucially, do not use fabric softener. Its residue coats fibers and interferes directly with the adhesive bond, causing patches to detach over time. Bleach can damage both the patch colors and the fabric itself.
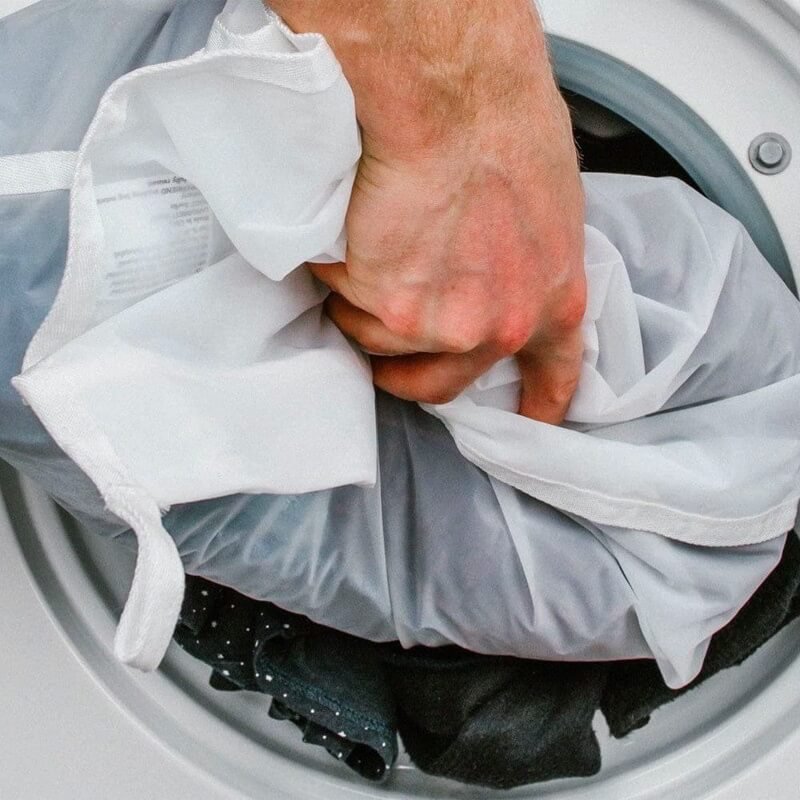
- Consider a laundry bag: Placing the garment inside a mesh laundry bag provides an extra layer of patch protection against snagging and friction.
- Wash with similar items: Include only other soft, lightweight items in the load. Avoid washing with heavy garments like jeans, towels, or items with zippers/hooks that could cause abrasion.
- Don’t overload: Give items room to move freely within the machine drum. Overloading increases friction.

4. Drying patched garments: The make-or-break step for adhesive longevity
How you dry your patched garment is just as critical for adhesive longevity as how you wash the piece; heat remains the primary concern at this stage, potentially weakening the bond achieved during application.
4.1 Air dry patches: The gold standard
Choosing to air dry patches and their garments is overwhelmingly the superior drying method for ensuring patch durability. This approach completely avoids the potential for heat damage to the adhesive. For best results:
- Lay flat: Place the garment flat on a clean, dry towel. The towel helps absorb excess moisture and supports the garment’s shape, preventing stretching. Reshape the garment gently if needed.
- Hang carefully: Alternatively, hang the garment on a padded hanger. Avoid thin wire hangers that can distort the shoulders. Ensure good air circulation around the item.
- Avoid direct sunlight: While air drying is best, position the garment away from direct, intense sunlight, which can cause fading over time on both the patch and the fabric. Indoor drying or a shady outdoor spot is ideal.
4.2 Machine drying (dryer) (high risk – use extreme caution)
Using a machine dryer poses a significant risk to the patch adhesive and is strongly discouraged. The heat damage can progressively weaken the bond with each cycle. If using a dryer is absolutely unavoidable:
- Select only the lowest heat setting available, or preferably, an air fluff / no heat setting.
- Remove the garment immediately when the cycle finishes, even if the clothing feels slightly damp.
- Finish the drying process by laying the item flat or hanging the piece to complete air drying.
- Be explicitly warned: Even occasional use of a dryer, even on a low heat setting, carries a risk and can shorten the lifespan of the patch’s adhesive over time. Air drying remains the safest practice.
5. Troubleshooting: Dealing with peeling or loose iron-on patches
Despite careful washing, sometimes older patches or those not perfectly applied might start to lift at the edges. Here are solutions to address peeling or loose iron-on patches.
5.1 Quick fix: Re-ironing technique
If the original adhesive is still largely intact, re-ironing can often reactivate the bond and improve adhesion.
- Prepare the area: Ensure the patch and surrounding fabric are clean and completely dry.
- Set the iron: Heat your iron to the temperature recommended for your garment’s fabric type. Crucially, ensure the steam setting is turned off. Steam interferes with the adhesive reactivation.
- Use a pressing cloth: Place a thin cotton cloth or parchment paper (pressing cloth) over the patch. This protects the patch embroidery and the fabric from direct heat.
- Press firmly: Position the hot iron over the pressing cloth and apply firm, even pressure directly down onto the patch area for about 10-15 seconds. Do not move the iron around.
- Cool completely: Remove the iron and pressing cloth. Allow the patch and fabric to cool down completely before checking the bond. This cooling period is essential for the adhesive to set properly.
5.2 More secure fixes: Fabric glue or sewing
When re-ironing isn’t enough, or for a more permanent solution, consider adding an adhesive or stitches. Using fabric glue can provide a quick and relatively easy boost to patch security. Select a glue specifically designed for fabrics that dries clear, remains flexible, and is washable. Carefully lift the loose edge of the patch and apply a very small amount of glue underneath, spreading thinly near the edge.
Press the patch down firmly and allow the glue to dry completely according to the manufacturer’s instructions, possibly placing a weight on top. For the highest level of durability and guaranteed patch security, sewing the patch onto the garment is the most reliable method.
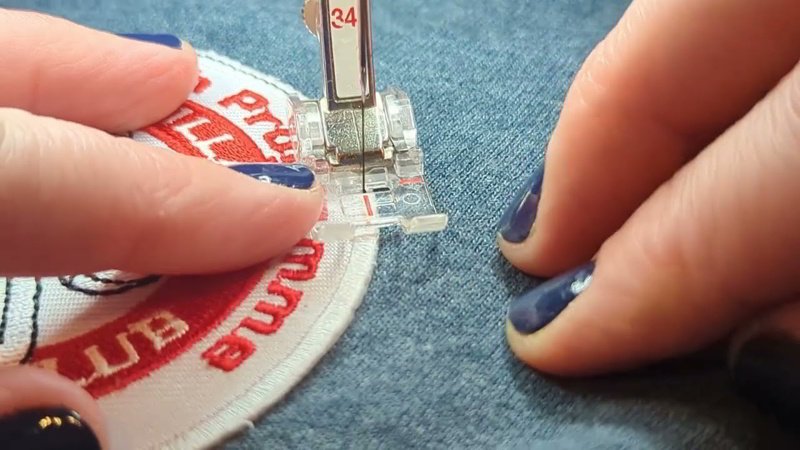
Using a sewing needle and thread that matches either the patch border or the garment fabric, you can add small, neat stitches around the entire perimeter of the patch. Even just tacking down the corners or problematic loose edges with a few stitches (sewing reinforcement) can significantly enhance its longevity and prevent future peeling, providing a mechanical bond independent of the adhesive.

6. Factors affecting how long your iron-on patches last
Several variables influence the overall patch lifespan and how well your iron-on embellishments hold up over time. Understanding these factors can help manage expectations and improve your laundry habits for better results:
- Patch quality: Patches made with superior materials and a stronger adhesive backing inherently last longer. Lower patch quality often means weaker glue that degrades more quickly.
- Application accuracy: How well the patch was initially applied plays a huge role. Insufficient heat, uneven pressure, or not allowing proper cooling during the application accuracy phase results in a weaker bond from the start.
- Fabric type & compatibility: The type of fabric the patch is adhered to matters. Natural fibers like cotton and denim generally offer better surfaces for fabric compatibility and bonding than synthetics or stretchy materials, which may resist the adhesive or be damaged by application heat.
- Wash frequency & method: How often and how aggressively the garment is washed significantly impacts patch lifespan. Frequent washing, especially machine washing (even on gentle), puts more stress on the adhesive than occasional hand washing.
- Drying method: As highlighted previously, the chosen drying method is critical. Consistently using air drying protects the adhesive, while repeated exposure to dryer heat drastically shortens the patch’s life.

7. Related questions
Here are answers to some frequently asked questions regarding the care of garments featuring iron-on patches.
7.1 Can I use fabric softener on clothes with iron-on patches?
No, using fabric softener on clothes adorned with iron-on patches is not recommended. The chemicals and conditioning agents in fabric softeners leave behind a residue on fabric fibers. This residue can interfere with and weaken the patch adhesive (the heat-activated glue holding the patch), causing the patch to peel or detach prematurely. Stick to using only mild detergent for washing these items.
7.2 How many washes can an iron-on patch typically withstand?
There isn’t a definitive number of washes an iron-on patch can endure, as its patch lifespan varies significantly. While some sources suggest a benchmark of around 20-30 washes under ideal conditions (high-quality patch, perfect application, consistent hand washing, and air drying), real-world durability depends heavily on factors like patch quality, application accuracy, fabric type, wash frequency, and washing/drying methods used. Aggressive washing or machine drying will drastically reduce this number. Opting for sewing eliminates the reliance on adhesive longevity through washing.
7.3 Is sewing patches on simply better for durability?
Yes, for maximum long-term durability and washability, sewing patches onto a garment provides a superior bond compared to relying solely on adhesive. Sewing creates a strong mechanical attachment using thread, which isn’t susceptible to weakening from heat, water, or detergents in the same way adhesive is.
While iron-on patches offer convenience in application, sew-on patches (or reinforcing iron-on ones with stitches) guarantee the most secure and wash-resistant attachment. For a practical compromise, consider adding a few stitches around the edges of an iron-on patch after application to enhance its durability.
Read more:
Maintaining the appearance and secure bond of your iron-on patches largely depends on consistent and careful patch care. By implementing a few key practices into your routine, you can significantly extend the life of your customized clothing.
Applying these professional tips makes a substantial difference, ensuring your personalized pieces remain vibrant and securely attached, boosting patch longevity and keeping your unique style looking sharp for as long as possible.


