Reattaching Iron-On Patches: Easy Fix for Clothing
You find the perfect iron-on patch (a decorative piece of fabric with an adhesive backing, applied with heat) to personalize your favorite jacket or backpack. You carefully iron it on, and it looks fantastic… for a while. Then, disaster strikes: the edges start to peel, or the entire patch comes off in the wash. It’s frustrating, and you might think your garment is ruined, or that you have to toss the patch.
But don’t worry! Reattaching an iron-on patch to your clothing is usually possible, and it’s often easier than you might expect. This guide provides the know-how you need to salvage your beloved patches and give them a new lease on life.
Through this article, you’ll discover how to assess whether your patch and garment are suitable for reattachment. We’ll explore two primary methods: re-ironing (reapplying heat to reactivate the existing adhesive) and using fabric glue (a specialized adhesive designed for textiles). You will have the most detailed and effective instructions, helping you restore your beloved item.
Beyond just fixing a detached patch, learning these techniques opens up a world of possibilities. You’re saving money by not replacing patches or clothes, and you’re embracing a more sustainable approach to fashion. Plus, you’re keeping your unique style intact!
1. Understanding why iron-on patches detach
Iron-on patches, while convenient, aren’t invincible. The adhesive (the substance that bonds the patch to the fabric) can weaken over time, leading to detachment. Understanding the common culprits behind this separation is key to a successful repair and, more importantly, can help prevent it from happening again in the future. Several factors can affect the longevity of the adhesive bond (the connection between the patch and the garment created by the adhesive).
Here are the most frequent reasons why your iron-on patches might be letting go:
Improper Initial Application: Sometimes, the initial application wasn’t done correctly. Insufficient heat, uneven pressure, or not ironing for the recommended time can all result in a weak bond from the start.
Washing and Drying: The laundry process is tough on iron-on patches. The combination of water, detergent, and agitation in a washing machine can loosen the adhesive. High heat in a dryer can also degrade (break down) the adhesive, making it less effective.
Fabric Type: Some fabrics are simply better suited for iron-on patches than others. Smooth, tightly woven fabrics like cotton and denim provide a good surface for the adhesive to grip. Loosely woven fabrics, or those with a lot of texture, may not allow for a strong bond.
Wear and Tear: Everyday wear and tear puts stress on the patch and the adhesive. Frequent bending, rubbing, or contact with other surfaces can gradually weaken the bond.
Adhesive Degradation: Even with perfect application and care, the adhesive itself can degrade over time. Exposure to air, light, and heat can all contribute to this natural breakdown process.
2. Assessing your patch and garment
Before you jump into reattaching your patch, take a few minutes to assess both the patch and the clothing. This crucial step will help you determine the best method for reattachment (re-ironing or fabric glue) and whether the patch is even salvageable.
2.1 Patch condition
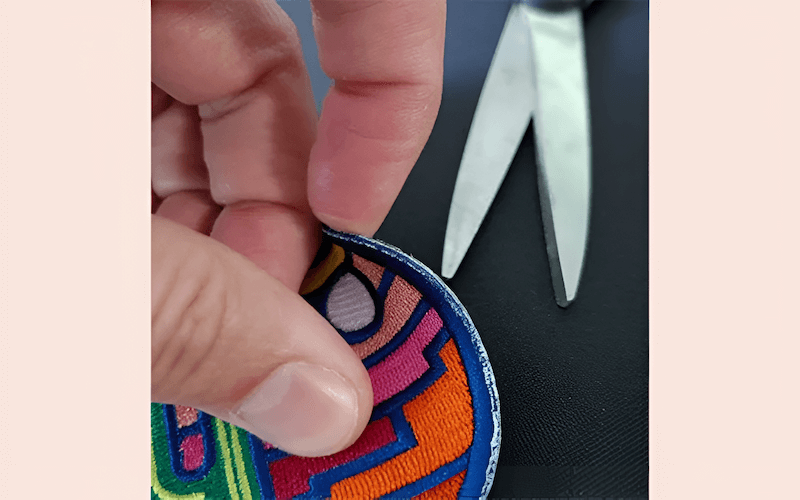
Examine the patch closely. Is it mostly intact, or is it significantly damaged? A patch in good condition, perhaps with just a bit of lifting around the edges, is a prime candidate for re-ironing. If the patch is heavily frayed, torn, or has lost a significant portion of its adhesive residue (the leftover adhesive on the back of the patch), fabric glue might be a better option, or it may be time to replace the patch altogether.
2.2 Fabric compatibility
The type of fabric your garment is made of plays a significant role in how well a patch will re-adhere. Consider the following:
- Cotton and Denim: These sturdy fabrics are generally ideal for both re-ironing and fabric glue. They can withstand the heat required for re-ironing and provide a good surface for glue to bond.
- Polyester: Polyester blends can be tricky. Some can handle heat, while others are more sensitive. Check the garment’s care label for heat restrictions (temperature limits specified on the garment tag). If you’re unsure, fabric glue is often a safer bet.
- Delicate Synthetics (like rayon or silk): These fabrics are usually not suitable for re-ironing due to their heat sensitivity. Fabric glue is the recommended method, but always test it in an inconspicuous area first.
- Leather/Suede: These materials require special adhesives and should never be ironed.
For small business owners starting their clothing lines, understanding this fabric compatibility will greatly assist you in advising customers or selecting the right kind of patch suitable for clothing.
| Fabric Type | Re-Ironing | Fabric Glue |
|---|---|---|
| Cotton | Yes | Yes |
| Denim | Yes | Yes |
| Polyester | Caution | Yes |
| Delicate Synthetics | No | Caution |
| Leather/Suede | No | Yes |
3. Method 1: Re-ironing your patch
If your assessment in the previous step indicates that your patch and garment are suitable for re-ironing, this method is often the quickest and easiest solution. It involves reactivating the existing adhesive on the patch using heat.
3.1 Preparation
Before you begin, gather the necessary materials and prepare your workspace:
- Clean Garment: Ensure the area where the patch was previously attached is clean and free of any lint, dirt, or loose threads. A clean surface ensures better adhesion.
- Gather Your Supplies: You’ll need your iron, ironing board, the detached patch, and a pressing cloth (a thin piece of cotton fabric, like a pillowcase or handkerchief, used to protect the patch and garment from direct heat). Parchment paper can also be used.
3.2 Setting Up
Proper setup is crucial for a successful re-ironing process:
- Ironing Board: Place your garment on the ironing board, ensuring the area where the patch will be reattached is flat and smooth.
- Patch Placement: Carefully position the patch on the garment, making sure it’s aligned correctly and in the desired location.
- Pressing Cloth: Cover the patch with the pressing cloth or parchment paper. This is essential to prevent scorching or damaging the patch and the surrounding fabric.
3.3 Ironing Process
This is the core of the re-ironing method. Follow these steps carefully:
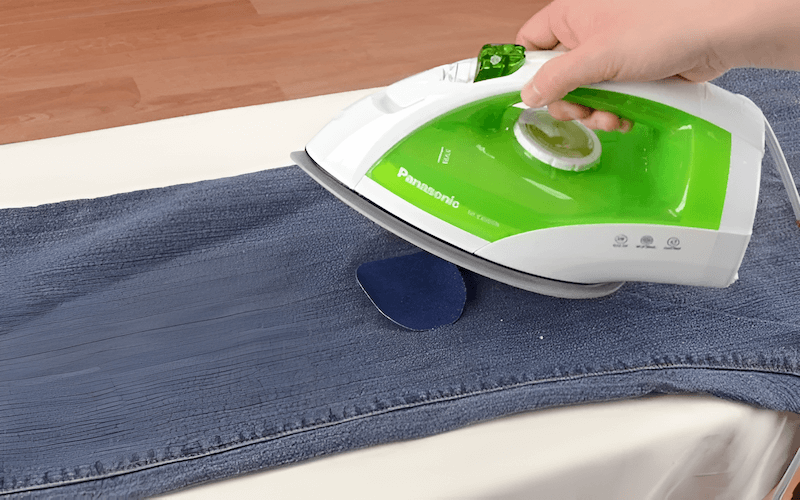
- Heat Setting: Set your iron to the appropriate heat setting for your garment’s fabric (refer to the care label). Crucially, do not use steam. Steam will prevent the adhesive from properly reactivating. A dry iron is essential. Start with a lower heat setting and gradually increase it if needed.
- Apply Pressure: Place the heated iron on top of the pressing cloth, directly over the patch. Apply firm, even pressure. Avoid moving the iron around too much; instead, hold it in place for the recommended time.
- Time: The amount of time you need to apply heat depends on the patch size, fabric type, and iron temperature. Start with 15-20 seconds, then check the patch. If it’s not fully adhered, repeat in 10-second intervals until it is. For larger patches, you may need to work in sections.
- If the patch is larger than the surface of the iron, iron in sections, making sure to apply heat and pressure to the entire patch.
3.4 Cooling and Testing
Allowing the patch to cool completely is essential for a strong bond:
- Cool Down: Remove the iron and pressing cloth. Let the patch and garment cool completely to the touch. This allows the adhesive to fully set.
- Test Adhesion: Once cool, gently tug at the edges of the patch. If it feels secure, you’re done! If any edges are still loose, repeat the ironing process, focusing on those areas.
4. Method 2: Using fabric glue to reattach your patch
If re-ironing isn’t an option (due to fabric sensitivity, patch condition, or lack of an iron), or if you prefer a more permanent solution, fabric glue (a specialized adhesive designed for use on textiles) is an excellent alternative.
4.1 Choosing the right fabric glue
Not all glues are created equal. Selecting the appropriate fabric glue is crucial for a successful and lasting repair:
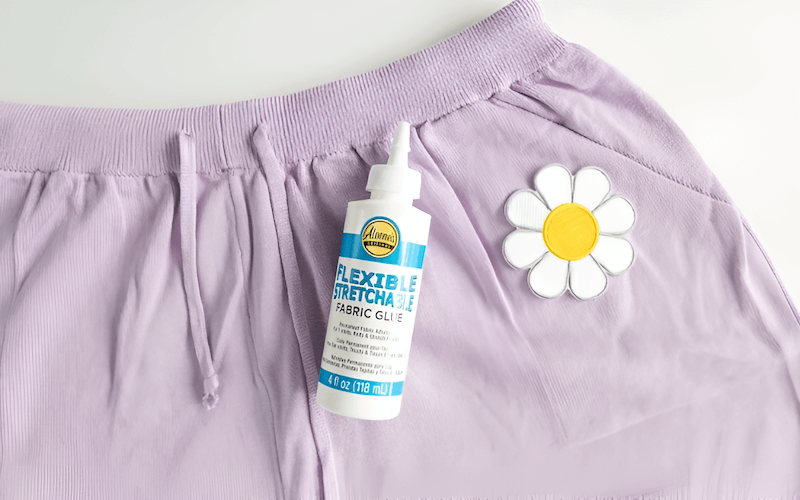
- Washable Fabric Glue: Look for a glue specifically designed for fabrics and labeled as “washable” or “permanent.” This ensures the bond will withstand laundering.
- Clear-Drying: Opt for a glue that dries clear to avoid any visible residue around the patch edges.
- Flexible: A flexible glue will allow the patch to move with the fabric, preventing stiffness and cracking. For example: “Different types of fabric glue are suitable for each type of fabric and patch. Consider factors such as washability, flexibility, and specialized features to choose the right product.”
4.2 Preparation
Proper preparation ensures a clean and effective application:
- Clean Surfaces: Make sure both the back of the patch and the area on the garment where it will be attached are clean and free of any dirt, lint, or old adhesive residue.
- Gather Supplies: You’ll need your chosen fabric glue, a toothpick or small applicator, and something to protect your work surface (like newspaper or cardboard).
4.3 Applying the glue
Precision is key when applying fabric glue:
- Apply Sparingly: Apply a thin layer of glue to the back of the patch. Less is more! Too much glue can seep out from under the edges and create a mess.
- Even Distribution: Use a toothpick or small applicator to spread the glue evenly across the back of the patch, paying particular attention to the edges.
- Avoid Excess: Make sure there are no globs or thick areas of glue.
4.4 Positioning and pressing
Proper placement and pressure are essential for a strong bond:
- Careful Placement: Carefully position the patch on the garment, ensuring it’s aligned correctly.
- Apply Pressure: Press the patch firmly onto the fabric. You can use your fingers, or for a more even distribution of pressure, place a heavy object (like a book) on top of the patch.
- Remove Excess Glue: If any glue squeezes out from under the edges, immediately wipe it away with a damp cloth.
- If the patch is large, consider applying glue in sections to make alignment easier.
4.5 Curing time
Allowing the glue to cure (dry and harden completely) is crucial for a durable bond:
- Follow Instructions: Refer to the fabric glue’s instructions for the recommended curing time. This can range from a few hours to 24 hours or more.
- Avoid Disturbance: Do not wash or wear the garment until the glue has fully cured.
5. Troubleshooting: Common problems and solutions
Even with careful application, you might encounter some issues when reattaching iron-on patches. This section addresses common problems and provides practical solutions.
5.1 Patch still not sticking (After re-ironing)
Problem: The patch doesn’t adhere fully, even after repeated ironing attempts.
Solutions:
- Increase Heat (Gradually): If you started with a low heat setting, try increasing it slightly. Be cautious and avoid scorching the fabric.
- Longer Ironing Time: Hold the iron in place for a longer duration, applying consistent pressure.
- Check for Adhesive Residue: If there’s very little adhesive left on the patch, re-ironing may not be effective. Consider using fabric glue.
- Ensure Proper Contact: Make sure the pressing cloth is thin enough to allow heat to transfer effectively. The iron must make good contact with the entire patch area.
5.2 Patch edges curling (After re-ironing)
Problem: The edges of the patch curl up after ironing.
Solutions:
- Re-Iron Edges: Focus the heat on the curled edges, using the tip of the iron and applying firm pressure.
- Use Fabric Glue: Apply a tiny amount of fabric glue under the curled edges and press them down.
5.3 Adhesive residue on iron or pressing cloth
Problem: Sticky residue from the patch transfers to the iron or pressing cloth.
Solution:
- Clean Iron (When Cool): Once the iron has cooled completely, clean the soleplate with a specialized iron cleaner or a damp cloth.
- Replace the pressing cloth regularly: If you regularly apply patches, replace the pressing cloth regularly to avoid sticky residue.
5.4 Patch fraying excessively
Problem: The edges of the patch are fraying significantly, making reattachment difficult.
Solutions:
- Trim Frayed Edges (Carefully): Use sharp scissors to trim any loose threads or frayed edges, but be careful not to cut into the design of the patch.
- Use Fabric Glue: Fabric glue can help to secure frayed edges and prevent further unraveling.
- Consider a New Patch: If the fraying is severe, the patch may be beyond repair.
5.5 Glue seepage (Fabric glue method)
Problem: Fabric glue seeps out from under the patch edges.
Solution:
- Wipe Away Immediately: Use a damp cloth or cotton swab to remove excess glue as quickly as possible.
- Use Less Glue Next Time: Remember, a thin layer is all that’s needed.
Stiffness After Glue Application
Problem: The patched area is very stiff
Solutions:
- Wash: Sometimes fabric glue stiffness will resolve after washing. Always do a gentle wash.
- Choose a Different Glue Consider a more flexible glue formula for future projects.
6. Aftercare and maintenance
Once you’ve successfully reattached your patch, proper aftercare is essential to ensure its longevity and keep your garment looking its best.
6.1 Washing Instructions
The washing machine can be harsh on patches, so take these precautions:
Turn Garment Inside Out: This protects the patch from direct abrasion during the wash cycle.
Use a Gentle Cycle: Select a delicate or gentle cycle with cold water. Hot water can weaken the adhesive bond.
Use Laundry Bag Use a mesh laundry bag to provide an extra layer of protection.
Mild Detergent: Use a mild detergent, and avoid bleach or harsh chemicals.
6.2 Drying Instructions
Proper drying is just as important as careful washing:
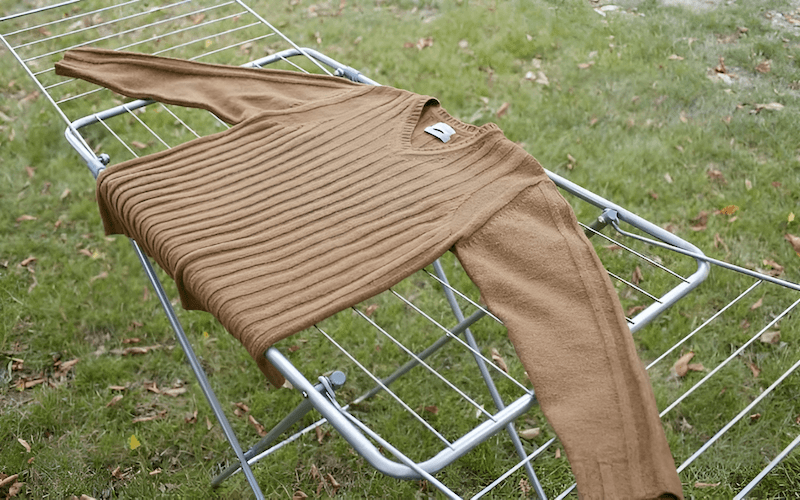
Air Dry is Best: Whenever possible, air dry the garment. Hang it or lay it flat on a clean surface.
Low Heat Tumble Dry (If Necessary): If you must use a dryer, select the lowest heat setting and remove the garment while it’s still slightly damp.
Avoid direct sunlight for extended periods: Constant exposure to strong, direct sunlight can also weaken the adhesive over a long time.
6.3 Long term care
A few additional tips for long-term care:
Avoid Excessive Rubbing: Be mindful of areas where the patch might experience frequent rubbing or friction, such as under a backpack strap.
Regular Inspections: Periodically check the patch for any signs of lifting or damage. Address any issues promptly to prevent further detachment.
Storage: Store the garment properly, avoiding folding directly on the patch if possible.
Ironing: If you need to iron the garment, avoid ironing directly over the patch. Use a pressing cloth and low heat.
8. Related questions
This section addresses common questions related to reattaching iron-on patches, providing concise and informative answers.
8.1 Can I reattach a patch that has completely lost its adhesive backing?
Yes, but re-ironing won’t be effective. You’ll need to use fabric glue. Fabric glue provides a new adhesive bond to secure the patch to the garment. Choose a washable, permanent fabric glue for best results.
8.2 How many times can I re-iron a patch?
There’s no set limit, but the effectiveness of re-ironing decreases with each attempt. Each time you apply heat, the original adhesive degrades a little more. If re-ironing fails after a couple of tries, switch to fabric glue.
8.3 Can I use a regular iron instead of a specialized craft iron?
Yes, a regular household iron works perfectly fine. The key is to control the heat setting (use a low to medium setting, depending on the fabric) and to never use steam. Always use a pressing cloth to protect the patch and garment.
8.4 What if my patch is on a delicate item like a silk scarf?
Re-ironing is generally not recommended for delicate fabrics like silk. Fabric glue is the preferred method. Test the glue on a hidden area of the scarf first to ensure it doesn’t damage the fabric or leave a visible mark.
8.5 Is fabric glue permanent?
Most fabric glues labeled as “permanent” are designed to withstand washing and regular wear. However, the longevity of the bond depends on factors like the type of glue, the fabric, and how the garment is cared for. Follow the glue manufacturer’s instructions for best results.
8.6 How do I remove fabric glue if I make a mistake?
If the glue is still wet, immediately wipe it away with a damp cloth. For dried glue, consult the glue manufacturer’s instructions. Some glues can be removed with specific solvents, while others may require specialized cleaning products. It’s always best to test any removal method on a hidden area first.
Read more:
Reattaching an iron-on patch is a simple and effective way to extend the life of your favorite clothes and accessories. Whether you choose the quick and easy method of re-ironing or the more permanent solution of fabric glue, you’re saving money, reducing waste, and preserving your unique style.
By understanding the reasons why patches detach and following the careful instructions provided in this guide, you can confidently tackle this common clothing repair. Don’t be afraid to experiment and find what works best for you.
So, the next time a beloved patch starts to peel, don’t despair! With a little know-how and the right tools, you can give it a second life. And if you’re looking for a wider selection of patches or high-quality fabric glue, consider exploring reliable suppliers to find options that perfectly match your needs.
Visit our website https://mypacklove.com/ to explore our product options and request a quote. Contact us today to discuss your specific needs! Let us help you enhance your clothing care and branding efforts.


