Sewing Accessories: Essential Tools for Bags, Hats and More
Are you ready to start sewing your own bags and hats, but unsure where to begin? Or are you an experienced sewer seeking to expand your skills? This guide is for beginners and experienced crafters alike. Mastering the right tools and techniques is key to successful sewing. Incorrect methods lead to frustration, while a solid understanding unlocks creative possibilities.
Learn essential tools, basic pattern-making, and step-by-step instructions for custom bags and hats. Discover tips to improve efficiency and achieve professional results. From clothing repairs to crafting unique accessories, this guide empowers you to confidently tackle any sewing project and create stunning, personalized items.
1. Essential sewing accessories for every sewing kit
1.1 Measuring and marking tools- Precision is key
Accurate measurements and markings are the foundation of any successful sewing project. Essential tools include:
- Measuring tape: A flexible measuring tape is indispensable for taking body measurements (crucially, head circumference for hats) and measuring curved pattern pieces.
- Ruler: A clear ruler, preferably made of durable plastic or metal, is used for drawing straight lines, measuring pattern pieces, and making adjustments. It is useful when drafting patterns, especially when making 1/4 scale.
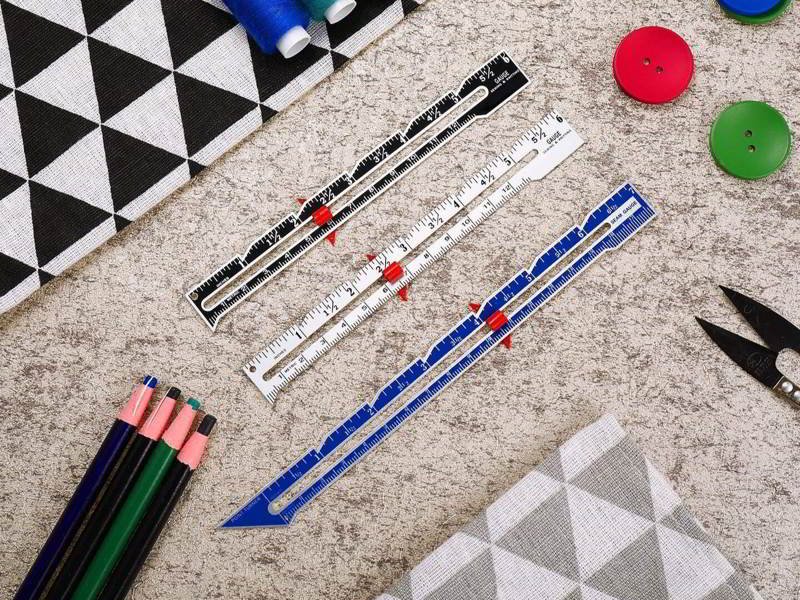
- Seam gauge: This small, specialized ruler helps you accurately measure and mark seam allowances.
- Marking tools: Several options exist, each with pros and cons. Tailor’s chalk is easily removable but can be imprecise. Fabric markers (disappearing ink or water-soluble) offer greater precision but require testing on a scrap first. A tracing wheel and tracing paper can transfer markings from a pattern to fabric. Marking notches (small marks on pattern pieces that help align seams) is essential for accurate assembly.
- Pattern drafting tools: When drafting own patterns, equip with medical exam tissue paper/scratch paper, pen, sharp pencil, rubber eraser.
Invest in a good quality, flexible measuring tape that won’t stretch over time.

1.2 Cutting tools- Sharp and accurate
Precise cutting is essential for accurate sewing. Key cutting tools include:
- Fabric shears: Invest in high-quality fabric shears dedicated solely to cutting fabric.
- Rotary cutter: A rotary cutter, used in conjunction with a cutting mat, is excellent for cutting straight lines and multiple layers of fabric quickly and accurately.
- Small scissors/snips: Keep a pair of small, sharp scissors or snips handy for trimming threads, clipping curves, and making small, precise cuts.
- Seam ripper: An inevitable part of sewing is making mistakes. A sharp seam ripper is essential for quickly and cleanly removing stitches.
Never use your fabric shears on paper or other materials, as this will dull them quickly.
1.3 Needles and pins- The foundation of sewing
Needles and pins are the workhorses of sewing. You’ll need:
- Hand sewing needles: A variety of hand sewing needles in different sizes and types (sharps, betweens, ballpoints) is necessary for different fabrics and tasks.
- Machine needles: Just as important as hand sewing needles, using the right machine needle for your fabric is critical. Options include universal, ballpoint (for knits), stretch (for stretch fabrics), and denim (for heavy fabrics).
- Pins: Use straight pins (glass-head pins are recommended as they won’t melt under an iron) to hold fabric pieces together before sewing. Safety pins can also be useful for various tasks.
- Pincushion/magnetic pin holder: Keep your pins organized and safely stored with a pincushion or a magnetic pin holder.
Change your machine needle frequently – a dull needle can damage your fabric and cause skipped stitches.
1.4 Pressing tools- Achieving a professional finish
Pressing is often overlooked, but it’s absolutely crucial for achieving a professional-looking finish. Essential pressing tools include:
- Iron: A good quality iron with a steam function is a must-have.
- Ironing board: A sturdy and well-padded ironing board provides a stable surface for pressing.
- Press cloth: A press cloth (a piece of cotton or muslin) is used to protect your fabric from direct heat and prevent shine, especially on delicate fabrics.
- Tailor’s ham/sleeve roll: These specialized pressing aids are invaluable for pressing curved seams (like those found in hats and sleeves).
Pressing is just as important as sewing! Always press your seams as you go for a professional, polished look.
2. Sewing accessories and techniques for bag making
2.1 Hardware- Clasps, zippers, and rings
Bag hardware adds functionality and style. Key components include:
- Zippers: Come in various types (coil, metal, invisible) and lengths. Choose a zipper appropriate for the bag’s size and intended use.
- Clasps and closures: Options range from magnetic snaps and buckles to turn locks and more, each offering different levels of security and aesthetics.
- Rings and d-rings: Used for attaching straps and handles to the bag.
- Bag feet: Small metal or plastic pieces attached to the bottom of the bag to protect it from wear and tear.
2.2 Interfacing and stabilizers- Adding structure and support
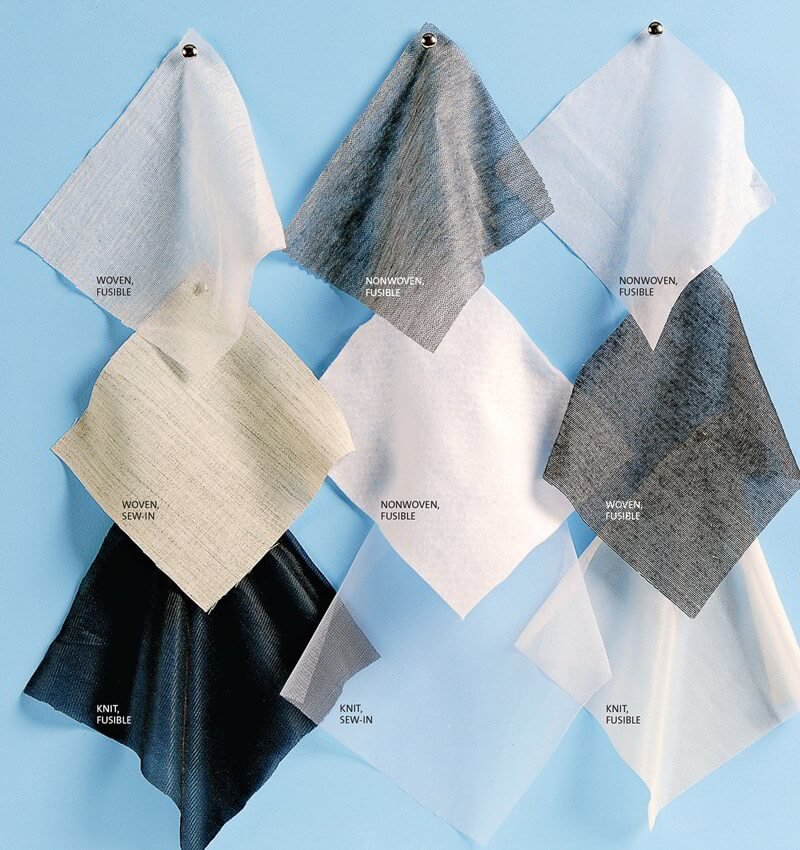
Interfacing and stabilizers are essential for giving bags shape and durability. Interfacing adds stiffness and helps prevent stretching, while stabilizers provide greater support and structure. They come in various types:
- Fusible interfacing: Adheres to fabric with heat.
- Sew-in interfacing: Requires stitching to attach.
- Woven interfacing: Made from woven fabric, offering a more natural drape.
- Non-woven interfacing: Made from bonded fibers, generally more affordable and easier to use.
Choose interfacing and stabilizers based on the desired level of structure and the type of fabric you’re using.

2.3 Specialized tools for bag making
Certain tools are particularly helpful for bag making:
- Awl: Used for making holes in leather or thick fabrics, for example, when attaching hardware.
- Rotary punch: Creates clean, precise holes for attaching hardware like rivets or snaps.
- Edge beveler (for leather): Used to create smooth, rounded edges on leather pieces.
- Bias tape maker: A helpful tool, though not required, can be useful for creating custom bias tape for finishing bag edges.
2.4 Basic bag pattern making- The rectangle is your friend
Creating your own bag patterns is surprisingly accessible. The process often starts with simple rectangles. Here are the basic steps:
- Doodling with a purpose: Start by brainstorming and sketching your bag ideas. Don’t be afraid to be creative! Look at existing bags for inspiration.
- Making a 1/4 scale: Create a small-scale version of your pattern by dividing the desired finished measurements (width and length) by 4. This allows you to visualize the proportions and catch any design flaws early on.
- Adding depth: Incorporate depth into your design by adding side and bottom panels. The depth measurement determines how “thick” the bag will be.
- Creating a paper prototype: Before cutting any fabric, make a paper prototype of your bag using the 1/4 scale pattern. This crucial step allows you to test the design, make adjustments, and ensure everything fits together correctly.
- Enlarging the pattern: Once you’re satisfied with the paper prototype, enlarge the pattern to full size by multiplying the 1/4 scale measurements by 4.
- Adding seam allowance: Add seam allowances to all the edges of the full-size pattern.
Remember, measurements for bags are typically listed as Width x Length x Depth. Don’t be afraid to experiment! Making a paper prototype is a low-stakes way to test your design.
2.5 Step-by-step creating a simple flat bag
Let’s put these principles into practice by creating a simple flat tote bag:
- Create pattern: You need to add a 1/2″ seam allowance to all four sides of each fabric piece. This means you will add a total of 1″ to the overall width (1/2″ for the left + 1/2″ for the right) and 1″ to the overall length (1/2″ for the top + 1/2″ for the bottom). Fabric Dimensions to Cut: (12″ + 1″) x (14″ + 1″) = 13″ x 15″.
- Place the two fabric rectangles right sides together.
- Sew around three sides, leaving one of the short sides open.
- Turn the bag right side out.
- Fold the raw edges of the open side inward and press.
- Topstitch around the top opening to close the bag and create a finished edge.
- Add handles (e.g., webbing or fabric straps) by sewing them securely to the top of the bag.
This project provides a perfect starting point!
3. Sewing accessories and techniques for hat making (millinery)
3.1 Hat blocks and forms- Shaping the crown and brim
Hat blocks are essential tools in traditional millinery. These are solid wooden forms shaped like different hat styles and sizes. They are used to shape and mold felt or straw hats into the desired form. Hat blocks come in a variety of shapes and sizes, including crown blocks (for shaping the top of the hat) and brim blocks (for shaping the brim).
3.2 Millinery wire and stiffeners
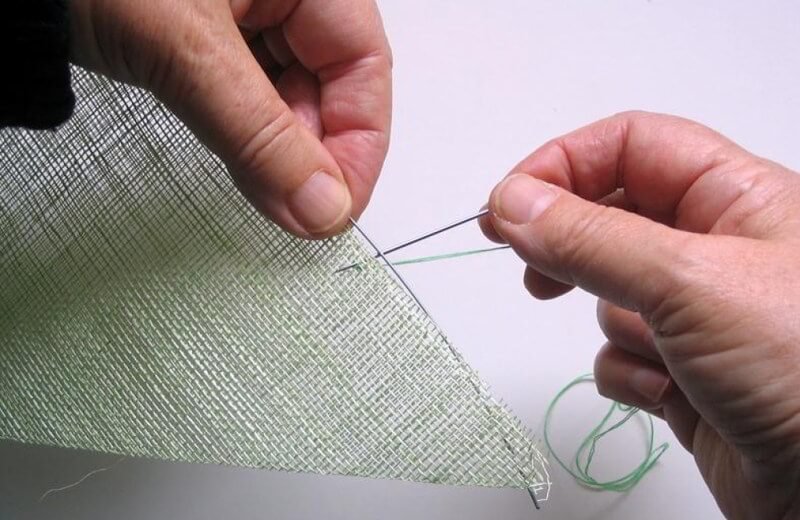
Millinery wire, also known as hat wire, is used to reinforce brims and create structured shapes. It comes in different gauges (thicknesses) and can be covered with fabric or thread. Stiffeners, such as buckram (a stiff, woven fabric) and felt, are used to add structure and support to hat crowns and brims.

3.3 Specialized tools for millinery
Several specialized tools are helpful in millinery:
- Pliers: Used for bending and shaping millinery wire.
- Steamer: A steamer is essential for shaping and blocking hats, using moisture and heat to mold the material.
- Needle-nose pliers: Used for working with wire and attaching hardware.
3.4 Basic hat pattern making- Measuring and drafting
Creating your own hat patterns allows for complete customization. Here are the basic steps:
- Measuring head circumference: Accurate head circumference measurement is crucial for a well-fitting hat. Measure around the head, just above the eyebrows and ears.
- Understanding hat parts: Familiarize yourself with the main parts of a hat: the crown (the top part), the side band (the band that goes around the head), and the brim (the projecting edge).
- Using a crown template: Pre-made templates, such as the DRCOS Cloche pattern, can simplify the pattern-making process, especially for beginners. Choose a template size that corresponds to your head circumference measurement.
- Drafting a simple hat pattern: You can also draft a basic hat pattern from scratch. For a simple bucket hat or cloche, this often involves drawing circles and rectangles based on your head circumference and desired hat dimensions.
Start with a simple hat pattern before tackling more complex designs.
3.5 Step-by-step- Sewing a reversible bucket hat (example project)
Let’s create a reversible bucket hat, a great beginner-friendly project:
- Prepare the pattern, using the provided information to create a bucket hat template based on your measurements.
- Choosing fabrics: Select two coordinating fabrics, such as cotton twill for the main fabric and quilting cotton for the lining.
- Cutting fabric pieces: Use the pattern to cut out the necessary pieces from both the main and lining fabrics. This will typically include a circular crown piece, a rectangular side band, and a circular or oval brim.
- Marking notches: Transfer any notches or markings from the pattern to the fabric pieces. These help align the pieces accurately during sewing.
- Sewing side seams: Sew the short ends of the side band pieces together, creating two loops (one for the main fabric and one for the lining).
- Snipping curves: Snip into the seam allowance of the curved edges (like the top of the side band) to allow the fabric to lie flat when turned.
- Assembling the hat: Attach the crown to the side band, and then attach the brim to the side band. Repeat for both the main fabric and the lining.
- Creating the reversible lining: Place the main hat and the lining hat right sides together, aligning the brim edges. Sew around the brim, leaving a small opening for turning.
- Turning and finishing: Turn the hat right side out through the opening. Hand-stitch the opening closed.
This project provides a solid foundation for understanding hat construction!
4. Sewing accessories for clothing and beyond
4.1 Tools for garment construction
For more advanced garment construction, consider these helpful tools:
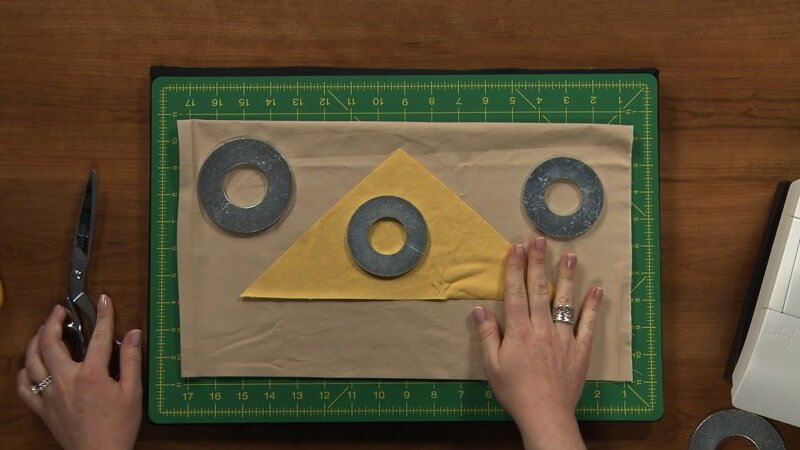
- Pattern weights: These are used to hold pattern pieces in place on fabric without the need for pins, preventing damage to delicate fabrics and speeding up the cutting process.
- French curve/hip curve: These curved rulers are essential for drafting and shaping armholes, necklines, and other curved lines on patterns.
- Tailor’s clapper: This wooden tool is used after pressing a seam to set the seam and create a crisp, flat finish.
- Loop turner: Used for turning a tube of fabric right side out.

4.2 Embellishments and decorations
Adding embellishments is a great way to personalize your sewing projects. Options include:
- Buttons, beads, sequins, ribbons, lace, and appliques: These can be used to add decorative details to garments, bags, hats, and other projects.
- Embroidery floss and needles: For creating hand-embroidered designs.
4.3 Tools for repairing clothes
Have tools for repairing clothes:
- A basic sewing kit: This should include a variety of hand-sewing needles, threads in common colors (like black and white), small scissors, and a seam ripper for easy mending.
5. FAQs about sewing accessories and techniques
5.1 What are the most essential sewing accessories for a beginner?
A well-stocked beginner sewing kit should include:
- High-quality fabric shears (dedicated to fabric only!)
- A flexible measuring tape
- A seam ripper (for those inevitable mistakes)
- Straight pins (glass-head pins are recommended)
- A selection of hand sewing needles
- Marking tools (such as tailor’s chalk or a fabric marker)
These essentials will cover the majority of basic sewing tasks.
5.2 How do I choose the right size needle for my project?
The correct needle size depends on the fabric type and weight.
- Finer needles (size 9-11): Use for delicate fabrics like silk, chiffon, or lace.
- Medium needles (size 11-14): Use for medium-weight fabrics like cotton, linen, or rayon.
- Thicker needles (size 14-18): Use for heavier fabrics like denim, canvas, or upholstery fabric.
Needle type:
- Universal needles: Suitable for most woven fabrics.
- Ballpoint needles: Designed for knit fabrics, as they push the fibers aside rather than piercing them.
- Stretch needles: Specifically for stretchy fabrics like Lycra or spandex.
Always refer to the needle packaging for specific recommendations.
5.3 How do I add seam allowances to a pattern?
Seam allowances are the extra fabric added to the edges of pattern pieces, providing space for stitching the pieces together. They are added to the outside edges of your finished pattern pieces (after any design modifications).
- The standard seam allowance for clothing is often 5/8 inch (1.5 cm), but this can vary depending on the pattern or project. Bag and hat patterns may use smaller seam allowances (e.g., 1/4 inch or 1/2 inch).
- Use a ruler or seam gauge to measure and mark the seam allowance consistently around each pattern piece. Draw a new line outside the original pattern edge, representing the cutting line.
5.4 What is the difference between interfacing and stabilizer?
Both interfacing and stabilizer add structure to fabric, but they have distinct purposes:
- Interfacing: Adds stiffness and shape to specific areas of a garment, such as collars, cuffs, facings, and buttonholes. It helps prevent stretching and provides a crisper finish.
- Stabilizer: Provides support and prevents stretching, often used in bag making, embroidery, or when working with very flimsy fabrics. It provides a more rigid foundation than interfacing.
Interfacing is generally lighter weight than stabilizer.
6. Packlove – Providing support service for the garment industry
While Packlove specializes in providing high-quality custom labels, tags, zipper bags, and poly mailers, and we don’t directly sell sewing accessories, we understand that sourcing the right tools and materials is crucial for success in the garment industry.
With over 8 years of experience in this field, we’ve built strong relationships with trusted suppliers and partners. We’re happy to leverage our industry expertise to connect you with reputable vendors who offer the sewing accessories you need, ensuring you receive high-quality products and reliable service.
Contact Packlove today to discuss your project and let us help you find the right resources for all your garment creation needs.
Read more:
Investing in quality sewing accessories and mastering fundamental techniques, like basic pattern making, is key to unlocking your sewing potential. The right tools, combined with essential skills, empower you to create custom bags, hats, and a wide range of other personalized projects. Embrace the journey, experiment with different techniques, and enjoy the endless creative possibilities that sewing offers! From simple repairs to elaborate creations, the world of sewing is yours to explore.


