Start Hand Embroidery: Easy Guide, Stitches and Beginner Tips
Embroidery is a wonderful and relaxing hobby, perfect for anyone seeking creative expression. If you’re new to this craft, this guide will make your introduction smooth and enjoyable. We’ll cover the essential supplies, basic stitches, and provide expert tips to help you confidently begin your embroidery adventure and create beautiful projects you’re proud of.
1. Unveiling the art of hand embroidery: More than just stitches
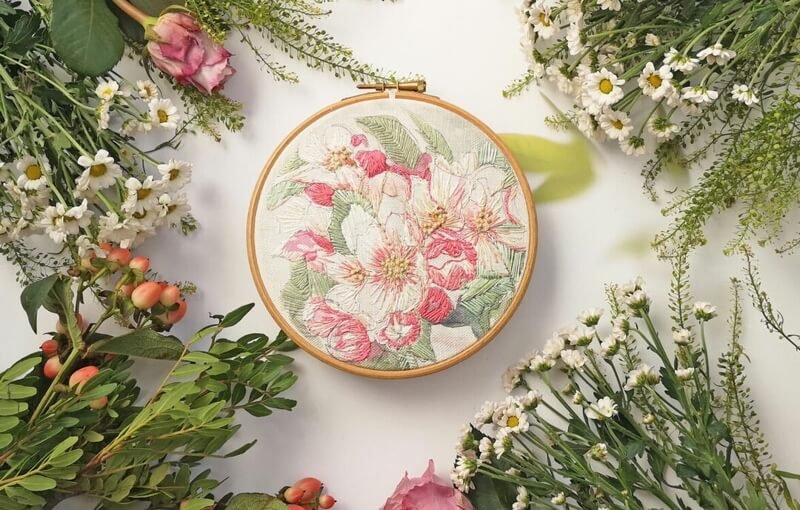
Hand embroidery is truly an art form, going far beyond simply stitching thread onto fabric. It’s a versatile craft brimming with creative potential, allowing you to add unique textures, patterns, and designs to all sorts of projects.
While there are many fascinating branches of embroidery, like needlepoint and crewel embroidery, we’ll be focusing on surface embroidery in this guide – the perfect starting point for beginners. Think of embroidery as a beautiful and accessible part of the wider world of textile arts and DIY crafts, ready for you to explore and make your own.
2. Gathering your essential embroidery supplies: Beginner-friendly toolkit
2.1. Needles: The right eye for the job
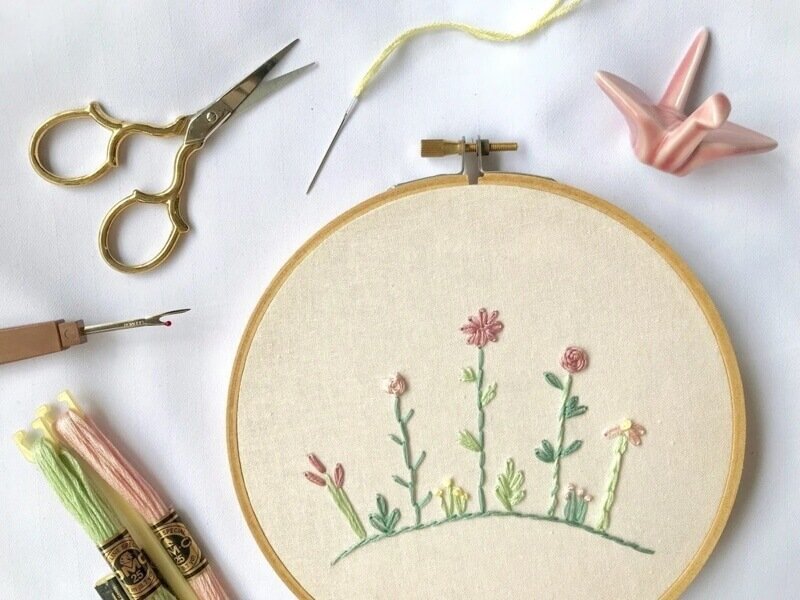
Embroidery needles are specially designed to make your stitching experience smoother. Their key feature is a longer eye, which makes threading much easier, especially when working with multiple strands of embroidery thread. For beginners, size 7 and 9 needles are excellent choices to start with.
2.2. Fabric: Your canvas for creativity
The fabric you choose is your embroidery canvas, and for hand embroidery, closely woven fabrics are ideal. These fabrics provide a stable base for your stitches and prevent them from pulling or distorting the material. Cotton and linen are fantastic choices for beginners because they are easy to work with and readily available.
It’s always a good idea to pre-wash your fabric before you start embroidering. This helps to prevent shrinkage later on when you wash your finished piece. Also, don’t be afraid to use fabric scraps to practice your stitches before starting on your main project – it’s a great way to build confidence!
2.2. Threads: Colors and textures to bring designs to life
Embroidery threads, often called floss, are available in a rainbow of colors and textures, ready to bring your designs to life! Stranded cotton thread is the most common type for hand embroidery. It’s made up of six individual strands that you can separate to adjust the thickness of your stitches. DMC thread is a widely popular and reliable brand known for its quality and vast color range.
When you’re just starting out, it can be helpful to choose a limited color palette for your first project. This makes it less overwhelming and allows you to focus on mastering your stitches.
2.3. Embroidery hoop: Your helping hand for tension
An embroidery hoop might seem simple, but it’s an essential tool! Its main job is to hold your fabric taut while you stitch. This tension is crucial for creating even stitches and preventing puckering. For beginners, a simple wooden embroidery hoop is highly recommended – they are inexpensive and easy to use.
Embroidery hoops come in various sizes. Choose a hoop size that comfortably fits the area you are currently stitching in your design. You don’t want a hoop that’s too large and unwieldy, or too small and requires you to constantly move it.
2.4. Scissors: Precision snipping for clean finishes
Sharp, small scissors are your best friend when it comes to embroidery. They allow you to precisely snip threads close to the fabric, resulting in clean and neat finishes for your work.
It’s a good practice to dedicate a pair of scissors specifically for your embroidery threads and keep them separate from your paper scissors. Cutting paper can dull the blades, making them less effective for snipping threads cleanly.
2.5. Transferring your design: From pattern to fabric
Getting your chosen design onto your fabric is a key step. Tools like water-soluble pens or iron-on transfers are used for this. The method you choose will depend on your fabric’s color and thickness. Always test any transfer method on a scrap of fabric first to ensure the marks remove properly.
3. Optional embroidery tools: Enhancing your stitching experience (but not essential to start)
Once you’ve gathered the essential supplies, you might discover a whole world of optional tools that can further enhance your embroidery journey. These aren’t necessary to begin, but they can certainly make stitching even more enjoyable and organized as you progress. Let’s take a quick look at a few helpful extras:
- Needle threader: While not essential, a needle threader can be a real time-saver and frustration-reducer, especially when working with finer threads or if you find threading needles a bit tricky.
- Thread organizer: As your collection of threads grows, a thread organizer – like bobbins, boxes, or floss organizers – becomes incredibly helpful for keeping everything tidy, preventing tangles, and easily finding the colors you need.
- Lightbox: If you plan to work with more intricate designs or darker fabrics, a lightbox can be a fantastic tool for transferring patterns. It provides a bright, even light source from underneath, making it much easier to see and trace your design onto the fabric.
- Needle minder: This clever little magnetic accessory keeps your needle safely parked when you need to take a break or switch threads. No more losing needles or accidentally sticking yourself!
- Stitching books & patterns: Embroidery books are wonderful sources of inspiration, stitch tutorials, and project ideas. Pattern books offer a variety of designs to practice and stitch.
- Embroidery starter kits: If you prefer to have everything conveniently bundled together, embroidery starter kits are a great option. They typically include essential supplies, patterns, and instructions, making them perfect for absolute beginners.
Remember, these tools are all about making your stitching experience even better. Don’t feel pressured to buy everything at once! Start with the essentials, and as you continue to explore embroidery, you can gradually add these optional tools to your toolkit as you find them helpful.
4. Step-by-step hand embroidery tutorial: From fabric prep to first stitches
4.1. Preparing your fabric: Setting the stage for success
Before you even begin to stitch, taking a moment to prepare your fabric is a worthwhile step. This simple preparation helps prevent the edges of your fabric from fraying as you handle it, keeping your work neat and tidy. There are a few easy ways to achieve this:
- Masking tape: For a quick and simple solution, apply masking tape around all the edges of your fabric. This creates a temporary barrier to prevent fraying.
- Pinking shears: If you have pinking shears (scissors with zigzag blades), trimming the edges of your fabric with these will create a decorative, fray-resistant edge.
- Zigzag stitch: If you have a sewing machine, a quick zigzag stitch around the fabric edges provides a more permanent and durable way to prevent fraying.
Choose the method that works best for you and the project you’re working on.
4.2. Transferring your chosen design: Bringing the pattern to life
Once your fabric is prepared, it’s time to transfer your embroidery design onto it. Embroidery patterns are readily available online or in books, and often come as templates that you can trace.
For light to medium-colored fabrics, a water-soluble pen is ideal. Simply lay your fabric flat over your chosen pattern template and gently trace the design onto the fabric using the pen. If you are using a thicker or darker fabric where tracing is difficult, a lightbox can be very helpful. Place the pattern and fabric on the lightbox, and the light shining through will make the pattern lines visible for easy tracing.
4.2. Hooping your fabric: Achieving the right tension
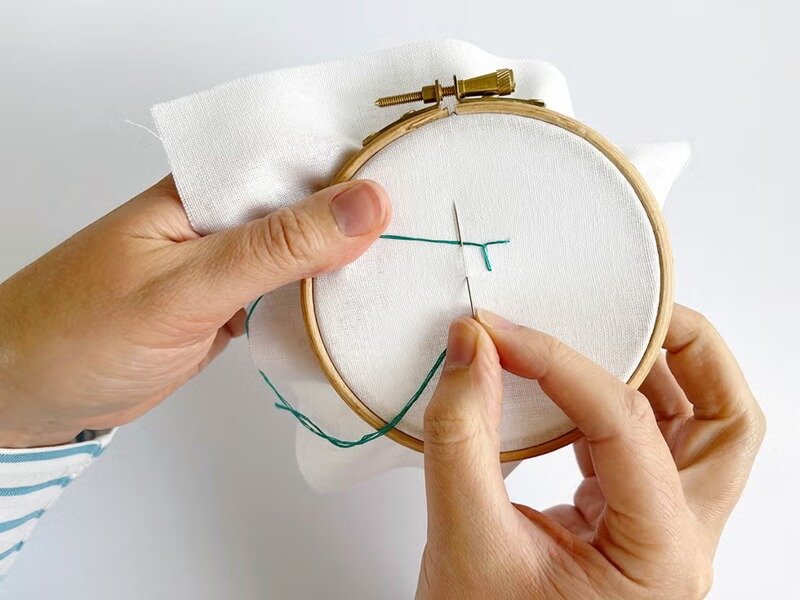
Using an embroidery hoop is key to achieving the right fabric tension for smooth stitching. Here’s how to hoop your fabric:
- Loosen the screw on the outer ring of your embroidery hoop.
- Separate the inner and outer rings.
- Place your fabric evenly over the inner ring.
- Gently press the outer ring down over the fabric and inner ring, sandwiching the fabric between the two rings.
- Tighten the screw on the outer ring until the fabric is taut like a drum. You want the fabric to be held firmly, but not stretched so tightly that it distorts.
Proper tension is important – too loose and your stitches might pucker; too tight and it can be difficult to pull the needle through.
4.3. Starting to stitch: Your first thread and knot
Now for the exciting part – starting to stitch! Let’s begin with a simple knot to secure your thread and the beginner-friendly backstitch.
- Cut a length of embroidery thread – about 12-18 inches is a good starting point to prevent tangling.
- If using stranded cotton floss, separate the strands to your desired thickness (for beginners, using 2 or 3 strands is often a good starting point).
- Thread your needle and make a knot at the end of your thread. A simple loop knot is easy to create: Form a loop at the end of your thread, then pass the needle through the loop and pull to tighten the knot.
- Hold your hooped fabric and bring your needle up from the back of the fabric to the front, right on the starting point of your design outline.
You are now ready to begin your first stitches, starting with the backstitch to outline your design.
4.4. Securing and finishing your thread: Neat endings
When you reach the end of a thread length or finish a section of your stitching, it’s important to secure the thread neatly on the back of your work. This prevents your stitches from unraveling.
To secure and finish your thread:
- Turn your hoop over to the back side of your embroidery.
- Weave your needle and thread under 3-4 existing stitches on the back of your work.
- Gently pull the thread to secure it.
- Snip the thread close to the fabric.
This method creates a secure and almost invisible finish on the back of your embroidery.
5. Mastering basic embroidery stitches: Your foundation for creativity
Embroidery is built upon a wonderful variety of stitches, each creating different textures and effects. Learning a few fundamental stitches is the key to unlocking your creative potential in embroidery. These basic stitches will become your building blocks for countless designs. Let’s explore some essential stitches to get you started:
5.1. Backstitch
The backstitch is a strong, solid stitch that creates a neat, continuous line. It’s perfect for outlining shapes and adding fine details to your embroidery.
How to do a backstitch:
- Bring the needle up through the fabric.
- Move forward a short distance and take the needle down.
- Bring the needle up again a short distance ahead of your first stitch.
- Now, take the needle down into the end point of your previous stitch.
- Repeat steps 3 and 4 to create a line of backstitches. Each new stitch “backs up” to meet the previous one, creating a solid line.
Uses: Outlining shapes, lettering, fine lines, and adding definition to designs.
5.2. Satin stitch
The satin stitch is used to fill in shapes with smooth, solid blocks of color. It creates a beautiful, lustrous surface when stitched closely together.
How to do a satin stitch:
- Bring the needle up on one side of the shape you want to fill.
- Take the needle down on the opposite side of the shape, directly across from where you brought it up.
- Bring the needle up again very close to where your first stitch began, on the first side of the shape.
- Take the needle down again very close to where your first stitch ended, on the opposite side.
- Continue stitching in this way, keeping your stitches close together and parallel to each other, until the entire shape is filled.
Uses: Filling in petals, leaves, solid shapes, and creating smooth areas of color.
5.2. Stem stitch
The stem stitch is a slightly textured line stitch that’s ideal for creating smooth curves and outlines, especially for stems and flowing lines.
How to do a stem stitch:
- Bring the needle up through the fabric.
- Take the needle down a short distance forward along the line you want to stitch.
- Bring the needle up again a short distance behind where you just went down, but make sure the needle comes up beside the previous stitch, not through it. Keep the thread below the needle as you pull it through.
- Repeat steps 2 and 3, always bringing the needle up slightly behind the previous stitch and keeping the thread to one side (either always to the left or always to the right) to maintain consistency.
Uses: Outlining curved shapes, embroidering stems, vines, and flowing lines.
5.3. Lazy daisy stitch
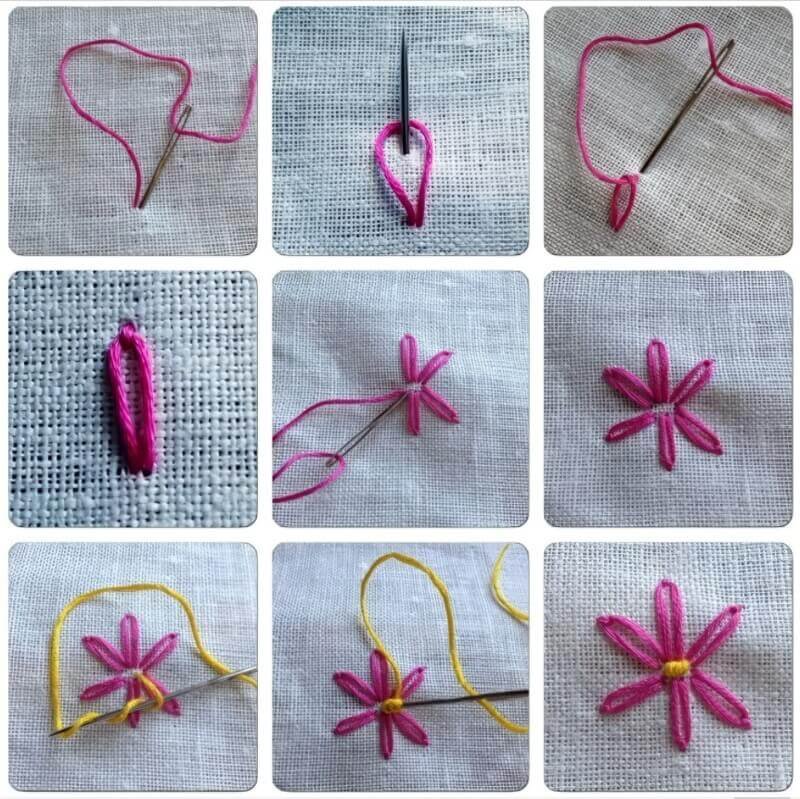
The lazy daisy stitch, also known as a detached chain stitch, is a simple loop stitch that’s perfect for creating petals, leaves, and teardrop shapes.
How to do a lazy daisy stitch:
- Bring the needle up through the fabric.
- Make a loop with your thread on the fabric surface and hold it in place with your thumb.
- Take the needle down again at the same point where you came up, but don’t pull it all the way through.
- Bring the needle tip up again inside the loop you just made.
- Before pulling the needle all the way through, pass the needle tip over the loop of thread.
- Pull the needle through to form a loop stitch.
- To secure the lazy daisy stitch, take the needle down just outside the loop at the tip of the “petal”.
Uses: Flower petals, leaves, individual accents, and creating small, rounded shapes.
5.4. Colonial knots
Colonial knots are small, textured knots that add dimension and detail to your embroidery. They are similar to French knots but are often considered easier to learn.
How to do colonial knots:
- Bring the needle up through the fabric.
- Hold the thread taut with your non-dominant hand.
- Place the needle tip under the thread and rotate the needle around the thread in a figure-eight motion, creating a loop around the needle.
- Reposition the needle tip close to where it emerged from the fabric (but not in the exact same hole).
- Push the needle down through the fabric while still holding the thread taut.
- Gently pull the thread taut as you pull the needle through the fabric, forming a knot on the surface.
Uses: Adding texture, creating flower centers, filling small areas, and adding decorative dots.
5.5. Woven wheel stitch
The woven wheel stitch creates a beautiful, rose-like flower. It’s a slightly more advanced stitch but creates a stunning effect.
How to do a woven wheel stitch:
- First, create a foundation of five straight stitches radiating out from a central point, like spokes of a wheel. Make sure the stitches are an odd number (usually 5 or 7) and evenly spaced.
- Bring the needle up at the center of the straight stitches, close to where they all meet.
- Using a new thread (or the same thread), weave the needle under the first straight stitch, then over the next, then under the next, and so on, going around the circle of straight stitches.
- Continue weaving in this over-under pattern, working your way out from the center and spiraling outwards. Keep the weaving fairly loose to create a rounded shape.
- When the woven wheel is the desired size, take the needle down through the fabric just outside the edge of the woven circle to secure the stitch.
Uses: Embroidering roses, flowers, and creating circular, textured elements.
5.6. Running stitch
The running stitch is the simplest of all embroidery stitches. It’s a basic stitch that creates a dashed line and is useful for quick outlines, gathering fabric, and adding simple details.
How to do a running stitch:
- Bring the needle up through the fabric.
- Move forward a short distance and take the needle down.
- Bring the needle up again a short distance forward from where you just went down.
- Continue bringing the needle up and down through the fabric at regular intervals, creating a dashed line of stitches. Keep the stitch length and spacing relatively consistent for a neat look.
Uses: Simple outlines, borders, basting, gathering fabric, and adding quick, decorative lines.
These basic stitches are your starting point in the world of hand embroidery. Practice each stitch to become comfortable with the movements, and soon you’ll be ready to combine them and create your own beautiful embroidered designs!
6. Finishing touches: From hoop to display-ready art
6.1. Washing and caring for your embroidery
Giving your finished embroidery a gentle wash can really bring your stitches to life and restore the freshness of your fabric, especially if you’ve been handling it a lot during the stitching process.
Here’s how to wash your embroidery:
- Fill a basin with lukewarm water.
- Add a very small amount of mild detergent – something gentle like baby shampoo or a delicate fabric wash works well.
- Gently place your embroidery in the water and let it soak for about 10-15 minutes. Avoid rubbing or scrubbing the embroidery.
- Rinse thoroughly with cool water until all detergent is removed.
- Carefully remove the embroidery from the water and gently squeeze out excess water – avoid wringing or twisting.
- Lay your embroidery flat on a clean towel to air dry. Keep it out of direct sunlight or heat, which can fade colors.
Once dry, your embroidery will look refreshed and ready for the next finishing steps.
6.2. Pressing for a polished look
Pressing your embroidery will give it a crisp, polished finish and remove any wrinkles from the fabric. It’s important to press your embroidery correctly to protect your stitches.
Here’s the best way to press your embroidery:
- Place your embroidery face down on a thick, soft towel. This helps to protect the dimension of your stitches and prevent them from being flattened.
- Cover the back of your embroidery with a thin, clean cotton cloth. This acts as a protective barrier between the iron and your embroidery.
- Use a warm iron (check the care instructions for your fabric type to ensure the temperature is appropriate).
- Gently press the back of the fabric with the iron, using a lifting and pressing motion rather than sliding the iron back and forth.
- Continue pressing until the fabric is smooth and wrinkle-free.
Pressing from the back ensures your stitches remain beautifully raised and textured on the front.
6.2. Framing and displaying your masterpiece
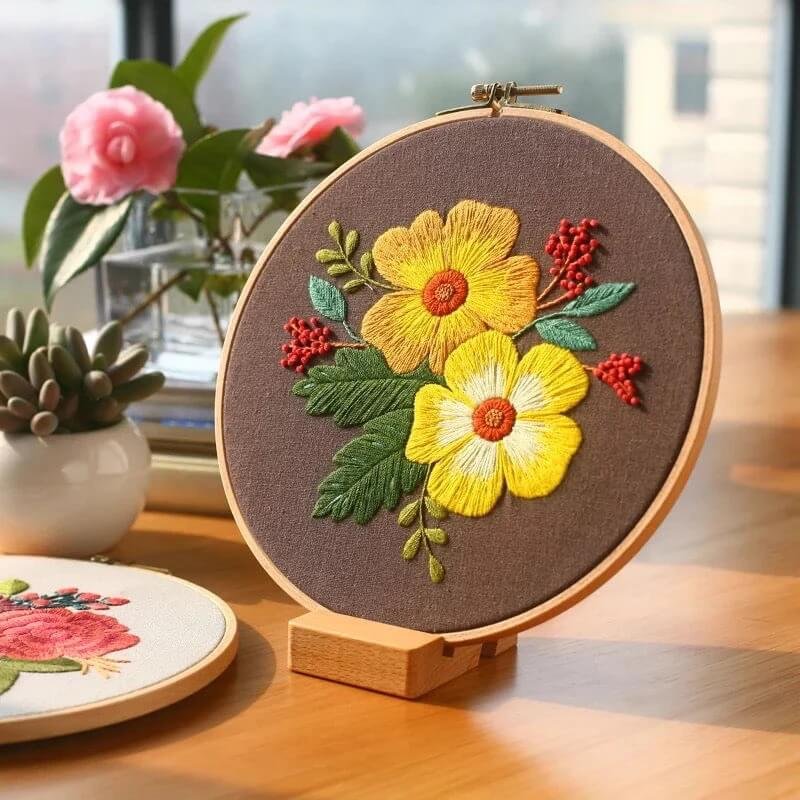
Now it’s time to showcase your embroidery! For a professional back finish, stitch felt to the back, concealing stitches.
Here are simple display ideas:
- Hoop as frame: Trim excess fabric, tuck edges neatly into the back of the hoop, and hang or display as is.
- Picture frame: Remove glass from a picture frame. Mount embroidery on cardstock or foam board cut to fit the frame, secure, and place in the frame.
Choose the display method that suits your style and project. Now proudly show off your embroidered art.
7. Expert tips for hand embroidery beginners: Setting yourself up for success
Starting your embroidery journey is exciting, and a few simple pointers can make your experience even smoother and more rewarding. Keep these thoughts in mind as you begin:
- Begin with simplicity: Choose beginner-friendly projects to start. Simple designs will help you focus on mastering basic stitches without feeling overwhelmed.
- Practice makes progress: Like any skill, embroidery improves with practice. Regular, even short, stitching sessions will steadily build your confidence and skill.
- Embrace the handmade look: Remember that slight imperfections are part of the beauty of handmade items. Don’t strive for machine-like perfection; appreciate the unique character of your handwork.
- Mistakes are learning moments: Don’t be afraid to undo stitches if you make a mistake. It’s all part of the learning process, and easily corrected.
- Stitch in good light: Proper lighting is essential for comfortable and accurate stitching. Ensure you have a well-lit workspace to prevent eye strain and see your stitches clearly.
- Take regular breaks: Embroidery is relaxing, but it’s also important to take breaks. Step away from your work periodically to stretch, rest your eyes, and prevent fatigue.
- Connect with fellow stitchers: Joining online embroidery communities or forums can be incredibly inspiring and helpful. Sharing your work and learning from others is a great way to grow.
- Explore different materials: Once you’re comfortable with the basics, don’t hesitate to experiment with different fabrics and threads. Trying new materials can open up exciting creative possibilities.
- Consider pre-printed patterns: For an even easier start, try using pre-printed embroidery patterns on fabric. These remove the step of transferring designs and let you dive straight into stitching.
By keeping these suggestions in mind, you’ll set yourself up for a successful and enjoyable hand embroidery experience.
8. FAQs about hand embroidery for beginners
8.1. What are the easiest embroidery stitches to learn first?
For your first embroidery projects, focus on mastering a few fundamental stitches. The running stitch is incredibly simple, creating a basic dashed line. The backstitch is another excellent starting point, forming a solid and neat outline.
Finally, the stem stitch is perfect for creating smooth, slightly textured lines, especially for curves and stems. These three stitches are the building blocks for many embroidery designs and are easy to pick up as a beginner.
8.2. What kind of fabric is best for beginner embroidery projects?
When you’re just starting out with embroidery, cotton or linen fabrics are highly recommended. These natural fabrics are easy to handle and have a close weave that provides a stable surface for your stitches. They are also readily available in a wide variety of colors and weights at most craft and fabric stores. Their workability makes the learning process much smoother and more enjoyable for beginners.
8.2. How do I transfer a pattern onto dark fabric?
Transferring patterns to dark fabric can be a bit trickier, but there are effective solutions. Using a white or light-colored transfer pen or chalk will make your traced lines visible against the dark background. A lightbox placed underneath your fabric and pattern can also illuminate the design for easier tracing. For some designs, iron-on transfers designed for dark fabrics can also be a convenient option.
8.3. How do I prevent my embroidery thread from knotting?
Thread knots can be frustrating, but they are often preventable. Using shorter thread lengths, around 18 inches, reduces the chances of tangling. Periodically letting your needle dangle allows the thread to naturally untwist itself as you stitch. While optional for beginners, a thread conditioner can also smooth the thread and minimize friction, further reducing knotting.
8.4. Where can I find free embroidery patterns for beginners?
Finding inspiring patterns is easy! DMC’s website offers a wealth of free embroidery patterns suitable for all skill levels, including beginners. Sublime Stitching is another excellent online resource with unique and modern designs. Don’t forget about Pinterest; a simple search for “free beginner embroidery patterns” will yield countless options to get you started and spark your creativity.
Read more:
Embroidery, as you’ve discovered, is a wonderfully accessible and rewarding craft for beginners. From gathering your simple supplies to mastering basic stitches and adding those final finishing touches, you now have a solid foundation to start your own embroidery adventure.
As you delve into the world of hand embroidery and explore its creative possibilities, remember that the presentation of your finished pieces can be just as important as the stitching itself. That’s where Packlove comes in. With over 8 years of experience in the garment industry, we specialize in providing high-quality accessories to perfectly complement your handmade creations.
From beautifully designed labels and tags to add a professional touch to embroidered clothing or gifts, to practical and stylish zipper bags and poly mailers for packaging and presenting your textile art, Packlove is here to support your entire creative journey. Explore our range at Packlove and discover how our garment accessories can enhance your embroidered masterpieces.


