


What Is A Rotary Cutter? Your Key To Perfect Fabric Cuts


A rotary cutter is a very handy tool. It has a sharp, rolling circular blade. It helps you make exact, clean cuts in materials like fabric, paper, and even thin leather. It works best when you use it with a self-healing mat (a special mat that protects surfaces and “heals” from cuts) and a special ruler.
Many crafters and DIY fans love rotary cutters. They are faster and more accurate for straight lines than scissors. You can also cut several layers of material at once.
1. Introduction: What is a rotary cutter?
1.1. Simple definition
Imagine a pizza cutter, but super sharp. It’s made for materials like fabric or paper. Essentially, that’s a rotary cutter. It’s a handheld cutting tool that uses a rolling, circular blade cutter to make clean and precise cuts. This tool is typically used with a special mat and ruler. This helps you get the best results. Many people new to crafting ask us at Packlove about this tool. So, we wanted to make it simple for you to understand.
1.2. Why this guide?
This guide from Packlove is here to help you. We will walk you through everything you need to know about rotary cutters. You’ll learn what they are and why they’re so useful. We’ll also cover the basics of using one safely and well. We believe that understanding your tools is the first step to great results. We aim to provide clear, easy-to-follow information for everyone. This guide is for you if you’re just starting or need a refresher.
1.3. Who is this for?
So, who might find a rotary cutter useful? The answer is, many people! This guide is for you if you’re into:
- Sewing clothes or items for your home.
- Quilting (it’s a quilter’s best friend!).
- Paper crafts, like making cards or scrapbooks.
- Any DIY cutting tool project that involves cutting fabric, paper, vinyl, or other thin materials.
- Even small businesses creating handmade products.
2. Understanding your rotary cutter: The basics
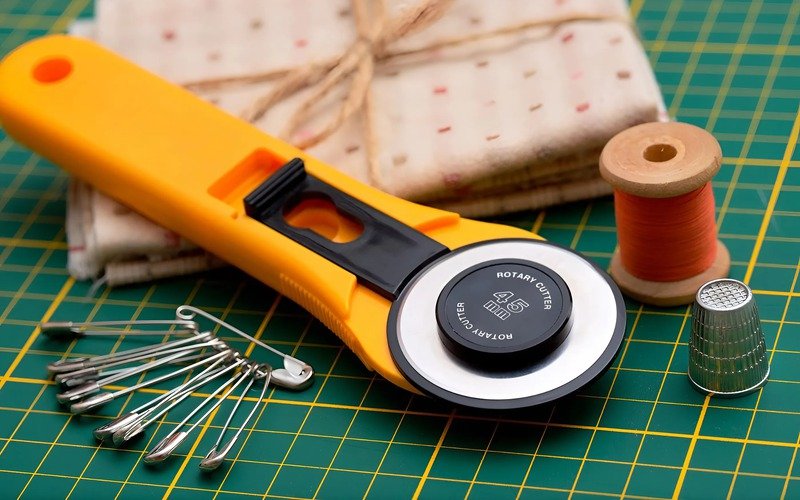
2.1. Key parts
Let’s look at the main parts of a rotary cutter. Knowing these will help you understand how it works and how to use it safely. When helping customers choose, we at Packlove always point out the safety features first.
The blade:
This is the cutting part! It’s a very sharp, circular disc blade, typically made of high-quality steel. It rolls to cut your material. Think of it as a tiny, super-sharp wheel. Blades come in different sizes for different tasks. We’ll talk more about that later. Replaceable blades are available for when your current one becomes dull. A dull rotary blade won’t cut well.
The handle:
This is simply the part you hold. The rotary cutter handle comes in a few styles. Some are straight, like a classic knife handle. Others are curved or have an ergonomic handle design (designed for comfort and efficiency). Ergonomic handles fit your hand more comfortably. This can be beneficial if you’re doing a lot of cutting. The main thing is that it should let you get a good, safe grip.
The safety guard/lock:
This is a critically important safety feature. The blade guard is a cover that slides or pulls back over the sharp blade. You use it when you’re not actively cutting. Some cutters have a button you press. Others have a sliding safety lock mechanism. Always, always, always use this guard! It protects you from accidental cuts. It also protects the blade when the cutter is stored.
2.2. How it works
So how does it cut? It’s different from scissors that snip with two blades. A rotary cutter works when you apply downward pressure on the handle. This makes the sharp circular blade roll across your material, like fabric or paper. As it rolls, it slices through. This rolling cutting action is key.
Think of it like this: scissors make short, snipping cuts. A rotary cutter can make long, continuous cuts. This is especially true when you guide it along a ruler. The continuous cutting motion is what many users love. Its movement is smoother compared to the snipping action of scissors.
3. Why use a rotary cutter? The big benefits
3.1. Clean, straight cuts
One of the biggest pluses is for making very clean and straight cuts. This is true even over long distances. When you use a rotary cutter with a special ruler, the blade runs right along the ruler’s edge. This gives you a perfectly straight line every time.
This precision tool excels at creating clean fabric cuts. It’s fantastic for cutting strips of fabric for quilting. It also works well for making precise squares and rectangles, or getting clean edges on paper projects. Our customers at Packlove who make quilts or need exact fabric strips rave about the precision.
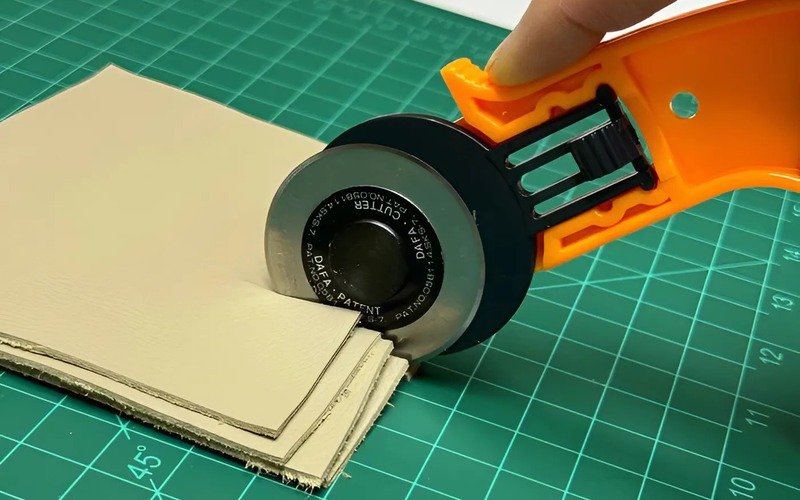
3.2. Cutting multiple layers
This is a huge time-saver! A good, sharp rotary cutter can slice through several layers of fabric or paper at once. Imagine cutting multiple layers of fabric for four identical pattern pieces in one go. That’s much faster than one by one with scissors.
How many layers you can cut depends on a few things. The thickness of your material matters. So does the size of your rotary cutter for layers blade and how sharp it is. But even cutting two or three layers at a time helps save time cutting fabric. For small businesses producing items in batches, this feature alone can greatly boost productivity.
3.3. Speed and efficiency
Using a rotary cutter is generally much faster than using scissors for many tasks. This is because you can make long, continuous cuts. You can also often cut multiple layers. Think about fast fabric cutting for all the pieces for a quilt or a garment. A rotary cutter can make the job go much quicker. It’s a truly efficient cutting tool.
3.4. Less hand strain
If you do a lot of cutting, a rotary cutter can be a game-changer. This is also true if you find the repetitive squeezing motion of scissors tiring. Or if you have conditions like arthritis. An ergonomic rotary cutter can help. Many handles are designed for comfort.
The rolling motion needs a different type of pressure. Some people find this much more comfortable for less hand strain cutting. It’s a cutting tool that’s easy on the hands. We’ve heard from many crafters at Packlove that switching to a rotary cutter has allowed them to enjoy their hobbies for longer without hand fatigue.
3.5. Rotary cutter vs. scissors
So, is a rotary cutter always a better choice than scissors? Not necessarily! They are different tools for different jobs.
A rotary cutter excels at:
- Long, straight cuts.
- Cutting multiple layers at once.
- Speed for repetitive shapes (squares, strips).
- Reducing hand strain for some users.
Scissors are better for:
- Cutting intricate curves and tight corners (though some small rotary blades can do curves).
- Snipping threads or small details.
- Cutting without needing a special mat and ruler (e.g., quick snips).
- Cutting very thick or tough materials where a rotary cutter might struggle or be unsafe.
It’s often best to have both in your toolkit! They complement each other. Most seasoned crafters we know at Packlove use both rotary cutters and scissors. They choose the right tool for the specific task at hand.
4. What you must have to use a rotary cutter
Okay, so you’re interested in using a rotary cutter. Great! But before you start slicing, there are a couple of other items. These are absolutely essential for using it safely and effectively. These aren’t optional extras; they are must-haves.
4.1. Rotary cutter
Well, this one is obvious! You need the rotary cutter itself. We’ve talked about what it is. Later, we’ll discuss different types and blade sizes you might choose from.
4.2. Self-healing cutting mat
This is a special mat made from a unique material. It’s often called a rotary cutting mat. When you cut on it with a rotary cutter, the blade makes a tiny incision. But the material is designed to ‘reseal’ or close back up after the blade passes. While it doesn’t magically heal like skin, its composition allows the surface to remain relatively smooth for future cuts, preventing deep grooves from forming quickly.
Why is a self-healing cutting mat essential?
- Protects your work surface: Without it, you’ll cut right into your table or desk!
- Protects your blade: Cutting on a hard surface will dull your rotary blade very fast. The mat gives the right amount of give.
- Ensures clean cuts: A smooth, consistent surface helps the blade roll evenly.
- Safety: It helps prevent the blade from skipping unexpectedly.
A strong warning: Do not use a rotary cutter without a self-healing cutting mat. Seriously. It’s unsafe. It’s bad for your tool and your furniture. You’ll often hear crafters ask why a cutting mat is needed – these are the reasons.
These mats come in various sizes. You can find small ones for detailed work or large ones for big tables. We at Packlove always stress to customers that the mat is just as important as the cutter. It’s a key part of the system.
4.3. Special ruler
You can’t just use any old school ruler. For a rotary cutter, you need a special ruler for cutting fabric, often called a ‘quilting ruler for rotary cutter’ or ‘acrylic craft ruler.’ These are made from thick, clear acrylic plastic. They are usually at least 1/8 inch or 3mm thick.
Why is this type of ruler (often called a safety or quilting ruler) needed?
- Perfect guide: The rotary cutter blade runs right along the edge of this thick ruler. This ensures a perfectly straight cut.
- Safety barrier: The thickness is crucial. It creates a safe barrier. This helps prevent the super-sharp blade from accidentally jumping over the ruler and cutting your fingers. This is true as long as you hold it correctly! A thin ruler is dangerous.
- Clear visibility & measurement: Most have printed grid lines (inches or centimeters). These let you see your fabric underneath and measure accurately for cutting.
Another warning: Using a thin, flimsy ruler is a recipe for disaster. It won’t guide the blade properly and offers no protection. Like mats, these rulers come in many shapes and sizes. You can find long rectangles, squares, and triangles for different tasks.
Customers sometimes ask Packlove if they can use a metal ruler. We advise against this for rotary cutting, as the blade can chip against metal. Acrylic rulers offer better grip on fabric and clearer visibility of markings for most craft uses.
5. How to use a rotary cutter safely and effectively: Step-by-step
Now for the exciting part – actually using your rotary cutter! It’s easy once you get the hang of it. But following these steps is really important. This is especially true for the safety tips. Let’s go through it step-by-step.
5.1. Preparation
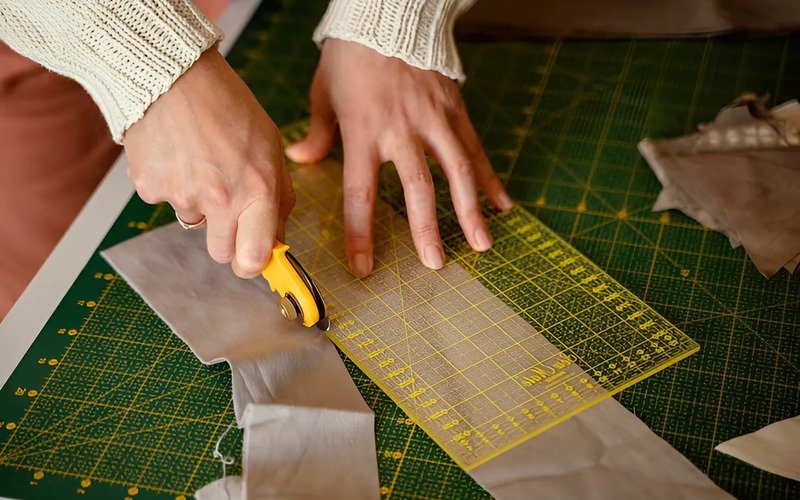
- Flat, stable surface: First, make sure your self-healing cutting mat is on a completely flat and stable surface. A sturdy table or a dedicated cutting table is good. No wobbles! This is key for your rotary cutter setup.
- Good lighting: Good lighting is key so you can see what you’re doing clearly.
- Smooth material: Lay your material (fabric, paper, etc.) smoothly on the mat. Prepare fabric for cutting by removing any wrinkles or bumps. These can cause the blade to skip or cut inaccurately.
- Ruler placement: Position your special acrylic ruler firmly on top of the material. Place it right where you want to make your cut. If your material has a grain (like fabric) or printed lines, use the grid lines on your ruler to align it perfectly.
Taking a moment to ensure your setup is correct prevents most common cutting errors. That’s a tip we share at Packlove.
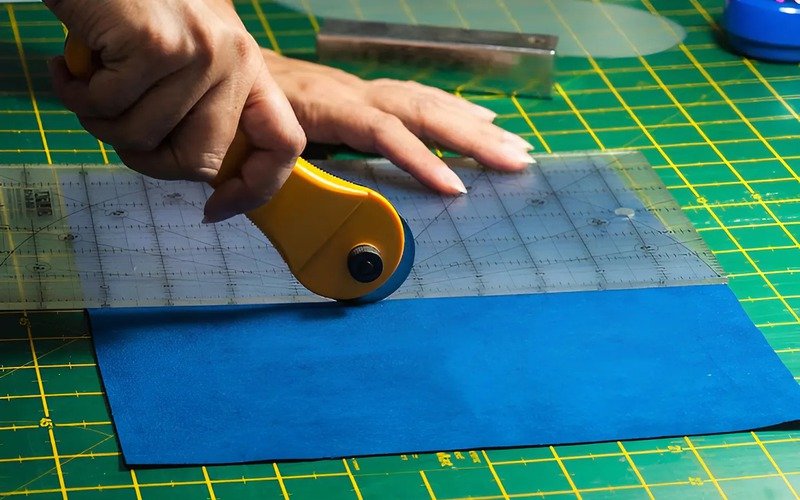
5.2. Holding the rotary cutter
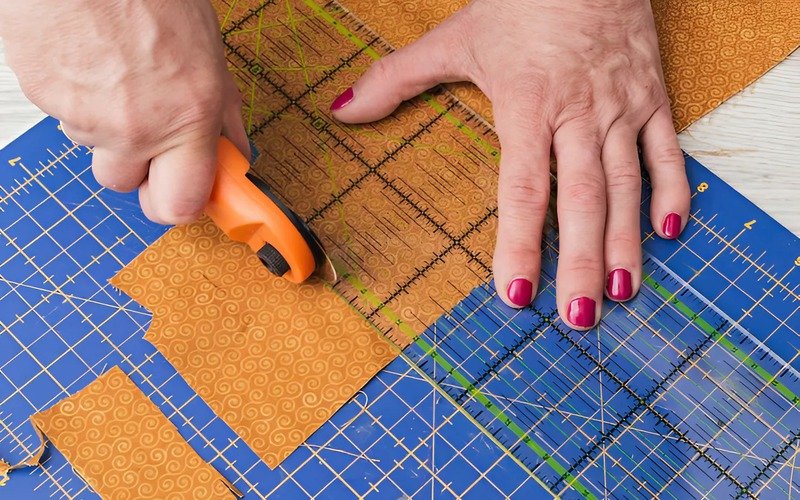
- Cutter grip: Learn how to hold the rotary cutter correctly. Hold it with a firm but comfortable grip. It’s much like you’d hold a knife for chopping, but with the blade pointing down. Your fingers should be on the handle, well away from the blade area.
- Ruler hand (crucial for safety): With your other hand, press down firmly on the ruler. A secure grip on the ruler is important for safe rotary cutting. Spread your fingers out on the ruler to distribute pressure. But keep your fingertips curled up and away from the edge of the ruler where the blade will pass. Never let your fingers hang over that cutting edge. Some rulers have special grips or handles for extra safety.
We at Packlove always demonstrate the ‘fingers up and away’ technique for holding the ruler. It’s the most common point where accidents can happen if care isn’t taken.
5.3. Safety first! Before you cut
Adherence to these rotary cutter safety rules is non-negotiable for safe cutting and accident prevention:
- Blade covered: Always, always keep the blade’s safety guard engaged (closed or retracted). Do this until the very moment you are ready to make the cut. And close it immediately after.
- Fingers clear: Double-check that the fingers of your hand holding the ruler are well away from the ruler’s edge. This is where the blade will travel. Think ‘spider fingers’ up on top of the ruler, not dangling over.
- Cut away: Always cut away from your body. Never pull the rotary cutter towards yourself. If you need to cut a long piece, reposition your body or the material. Don’t pull towards you.
- Stand up (recommended): It’s generally best to stand up when using a rotary cutter. This allows you to apply even pressure from your shoulder, not just your wrist. It also gives you a better view of your work.
- Clear area: Keep small children and pets away from your cutting area when the rotary cutter is out.
These are the golden rules we share at Packlove. Consistent habits are key to safe rotary cutting.
5.4. Making the cut
Here’s how to make a clean cut with a rotary cutter using proper technique:
- Expose blade: Just before you start, disengage the safety guard or expose the blade.
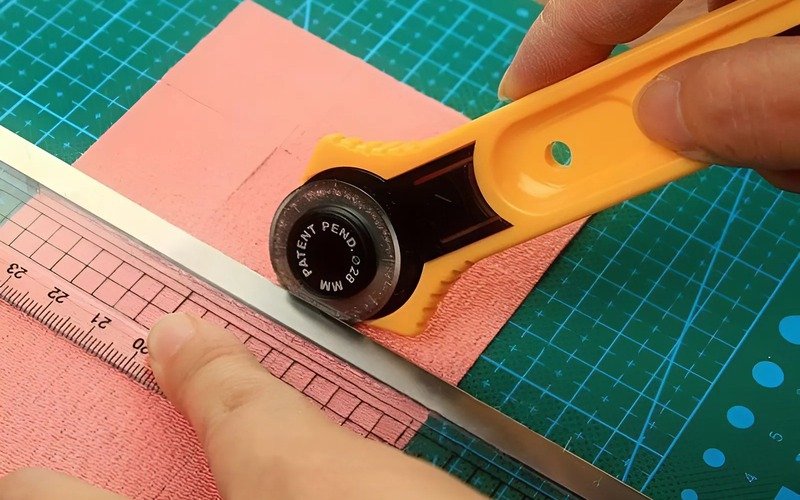
- Position blade: Place the rotary cutter blade against the edge of your ruler. Put it at the starting point of your intended cut. Ensure it’s right against the ruler.
- Apply pressure: Apply firm, even downward pressure on the cutter. The amount of pressure will depend on your material and blade sharpness. Start with moderate pressure; you’ll get a feel for it.
- Roll smoothly: Roll the cutter forward along the ruler’s edge in one smooth, continuous motion. Try not to stop and start in the middle of a cut. This can leave a little nick. Let your arm and shoulder guide the movement, not just your wrist.
- Listen & feel: You should hear and feel the blade cutting cleanly through all layers of your material.
- Complete the cut: Roll the cutter just past the end of the fabric or paper. This ensures the cut is complete all the way through.
- Immediately cover blade: As soon as the cut is finished, immediately engage the safety lock or cover the blade. Make this an automatic reflex. Do this even if you’re just pausing for a second.
The ‘one smooth motion’ and ‘immediate blade cover’ are two habits that dramatically improve both cut quality and safety. It might take a little practice to get the pressure right. Testing on a scrap piece first is a good idea. This is advice we often give at Packlove.
5.5. Cutting different materials
While rotary cutters are most famous for fabric, they’re quite versatile!
- Good for: Rotary cutters can also be used for paper projects. This includes multiple layers of paper or cardstock. They also cut felt, thin vinyl, and even some very thin, soft leathers. So, what materials can a rotary cutter cut? Quite a variety!
- Caution for paper: Keep in mind: cutting vinyl or paper, especially cardstock, tends to dull blades faster than fabric. Some crafters keep separate blades for paper and fabric. This prolongs the life of their fabric blade.
- Test first: If you’re trying a new material, it’s always a good idea to test on a small scrap piece first. See how the cutter handles it and if it gives you the clean cut you want.
We’ve seen customers at Packlove use rotary cutters for creating precise paper inserts for their packaging. They also use them for cutting fabric swatches for sample books. The key is a sharp blade and the right technique for the material.
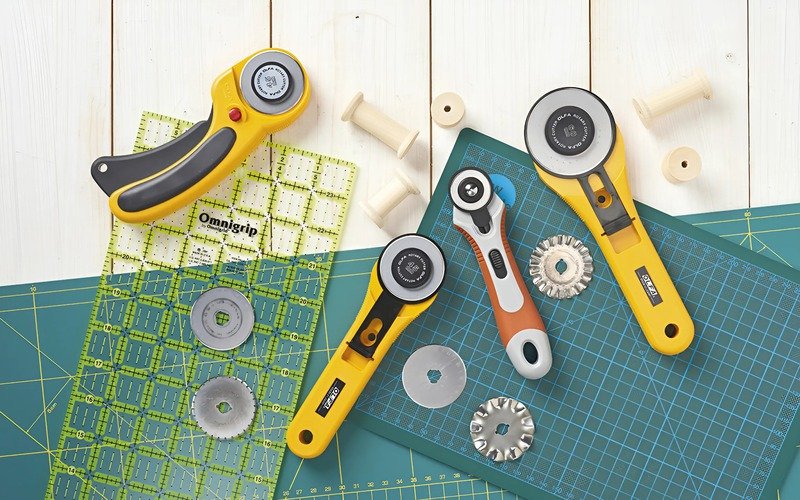
6. Types of rotary cutters and blades
6.1. Common blade sizes
Rotary cutter blade sizes are measured by their diameter. The most common sizes you’ll see are:
18mm / 28mm (Small):
- Description: These are the smaller blades.
- Best for: The 18mm blade is excellent for curves. It’s also good for cutting small appliqué pieces, tight corners, and detailed work. Great for miniatures or when you need a lot of maneuverability.
- Example: Think cutting out small circles or detailed pattern pieces with curves.
45mm (Medium/Standard):
- Description: This is the most popular and versatile blade size. If you’re buying your first rotary cutter, a 45mm is usually a great place to start. Many consider it the best rotary cutter blade for all-around use.
- Best for: General sewing, quilting (cutting strips, squares, triangles), most craft projects. The 45mm rotary blade has many uses. It’s a good all-rounder for straight lines and gentle curves.
- Example: Perfect for cutting out pattern pieces for clothing, quilt blocks, or strips for bag making.
60mm (Large):
- Description: This is the largest of the common blades.
- Best for: the 60mm blade is ideal for thick fabric. Use it for cutting through materials like multiple layers of denim, canvas, fleece, or quilt batting. It also works well for many layers of thinner fabric at once. Excellent for long, straight cuts where you want maximum efficiency.
- Example: Ideal for quickly cutting long strips of fabric for borders or trimming down a large quilt sandwich.
For general crafting and those starting out, we at Packlove usually recommend the 45mm blade. It offers the best balance of versatility and control. Those tackling heavy-duty projects or large volumes often appreciate the power of a 60mm blade.
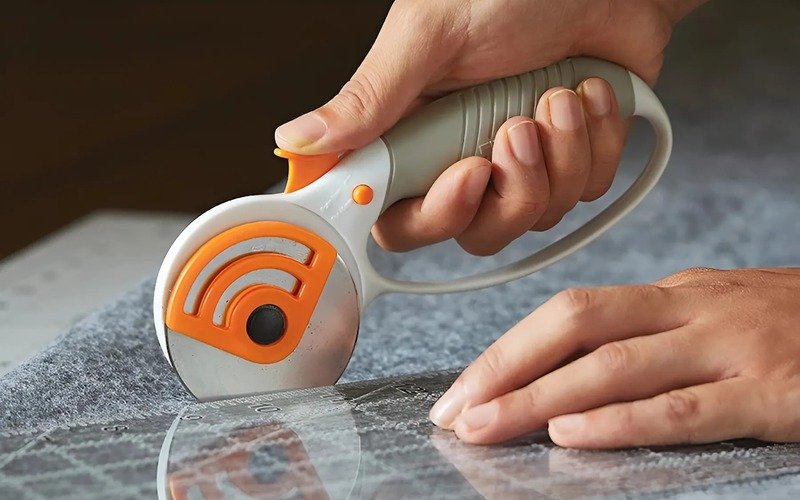
6.2. Handle types
Rotary cutter handles also come in a few variations. These mainly affect comfort and ease of use:
- Straight handles: These are the classic, classic, straight-handled design. They are similar to a traditional knife. Simple and effective.
- Ergonomic handles: The ergonomic rotary cutter handle is shaped to fit the curve of your hand more naturally. They often have softer grips or cushioned areas. The idea is to reduce hand fatigue, especially during long cutting sessions. Many people find these more comfortable.
- Ambidextrous/handedness: Some cutters are designed to be ambidextrous (usable by both left- and right-handed people). Others might have blade assembly that can be switched for left-handed rotary cutter use. If you’re left-handed, check for this feature!
Personal preference plays a big role in handle choice. If possible, try holding a few different types to see what feels best in your hand before buying. That’s a tip from Packlove.
6.3. Specialty blades
Besides the standard straight-cutting blades, you might also see ‘specialty’ or decorative edge rotary blades. These create patterned edges instead of a clean straight cut. Common ones include:
- Pinking blades: A pinking blade rotary cutter creates a zigzag edge (like pinking shears). This can help reduce fabric fraying.
- Wave blades: A wave blade rotary cutter creates a gentle, wavy decorative edge.
- Scallop blades: These create a more pronounced, rounded scallop edge.
These are fun for adding decorative touches to craft projects, fabric edges, or paper crafts. But they aren’t for general everyday cutting.
7. Keeping your rotary cutter working well
Like any good tool, your rotary cutter needs a little care. This keeps it performing at its best and lasting a long time. Here are a few simple maintenance tips:
7.1. Blade sharpness is key
A sharp rotary blade is everything! It makes cutting easier, cleaner, and safer.
Signs of a dull rotary cutter blade:
- It starts skipping threads or not cutting cleanly through all layers.
- You have to press down much harder than usual.
- The blade seems to drag or catch instead of rolling smoothly.
- Edges look ragged or chewed instead of clean.
Knowing when to change the rotary blade is important. Using a dull blade is frustrating. It can damage your material, causing pulls or snags. It’s also more dangerous because you’ll use too much force. This increases the risk of the cutter slipping.
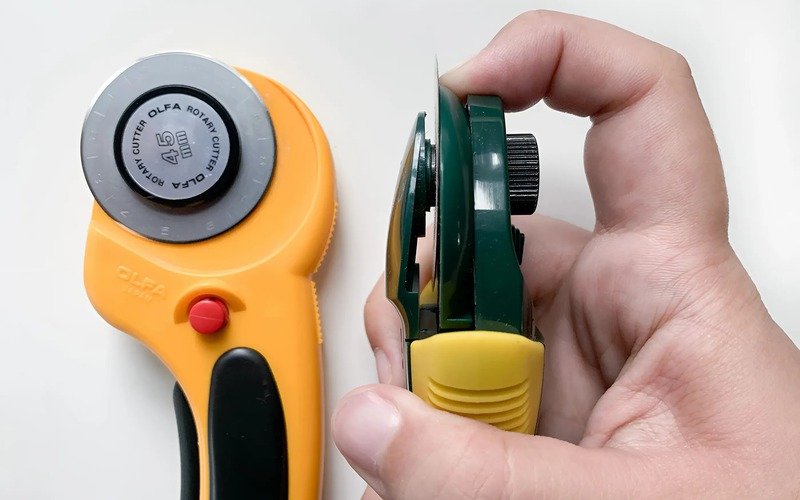
7.2. Changing the blade
The good news is that rotary cutter blades are easy to replace.
- Follow instructions: Always refer to the specific instructions that came with your rotary cutter model. Different cutters have slightly different ways for how to change the rotary cutter blade. It usually involves a screw or nut.
- Safety during change: Be extremely careful when handling both the old dull blade and the new sharp blade. They are very sharp!
- Disposal: Dispose of used rotary blades safely. Don’t just toss them in the trash where they could cut someone. Many people keep an old blade case or a small, sealed container (like a pill bottle or mint tin). Label it clearly ‘Used Blades’ for disposal.
7.3. Storing your cutter
- Safety first: When you’re not using your rotary cutter, always make sure the safety guard is engaged. This is rule number one to store rotary cutter safely.
- Out of reach: Keep it out of reach of children and pets.
- Dry place: Store it in a dry place. This helps prevent any rust on the blade or metal parts.
- Protect the blade: Avoid dropping it or storing it where the blade could get knocked. This could chip or dull it even when covered.
8. Who benefits most from a rotary cutter?
So, to sum up, who really gets the most out of adding a rotary cutter to their toolkit? While anyone cutting fabric or paper can find it useful, it’s especially a star for:
8.1. Sewers & quilters
For those who sew clothing, accessories, or home decor, a rotary cutter is often essential for quilting or sewing. It’s perfect for:
- Accurately cutting out pattern pieces.
- Quickly cutting long strips for bindings or borders.
- Cutting precise squares, rectangles, and other shapes for quilt blocks.
- Trimming down quilt tops to the perfect size.
8.2. Crafters
General crafters working with various materials will also find a rotary cutter super handy for crafts. It’s great as a paper crafting cutting tool for:
- Paper crafts like card making or scrapbooking (for straight edges on multiple sheets).
- Cutting felt shapes.
- Cutting thin craft foam.
- Working with vinyl for decals.
8.3. DIY enthusiasts
Anyone who loves DIY projects often needs to cut materials neatly. If your projects involve fabric (like making cushion covers) or precise paper cutting (like custom party decorations), a rotary cutter can make the job quicker and give more professional results.
8.4. Small businesses
For small business creators of handmade products, efficiency and quality are key. A rotary cutter is a valuable asset for those working with:
- Fabric to create items like bags or clothing.
- Paper or cardstock for custom tags or inserts.
- It helps ensure consistent sizing and clean edges, contributing to a high-quality finished product, and can save significant time when producing items in batches.
Think about creating perfectly cut fabric swatches to attach to your product tags. Or precisely sized card inserts for your custom mailers. A rotary cutter helps achieve that professional touch, something we at Packlove appreciate.
9. Packlove’s commitment to helping you create
9.1. Understanding tools for professional items
At Packlove, we know that great creations start with understanding your tools and techniques. Using the right tool, like a rotary cutter for crisp, precise cuts, is a fundamental step. It leads to items that look professional and show the care you put into them.
9.2. Packlove’s goal: Helpful information for creators
Our goal is to empower you. Whether you’re a hobbyist, a DIY enthusiast, or a growing business, Packlove helps creators. We aim to provide clear, simple creative tools information. This helps you bring your creative visions to life. Understanding tools like the rotary cutter is just one part of that journey.
9.3. Beautiful products deserve beautiful packaging
Perfectly prepared components, often achieved with a trusty rotary cutter, form the basis of beautiful, high-quality products. And when you’re ready to present those amazing creations, Packlove is here. We offer custom packaging solutions to make them shine even brighter. Explore Packlove’s range of custom bags, poly mailers, and labels to find the perfect finish for your projects.
10. Frequently asked questions (FAQs)
10.1 Can I use a rotary cutter without a special mat?
No, we highly advise against it. Using a rotary cutter without a self-healing mat will damage your work surface (like your table). It will dull your blade very quickly. It can also be unsafe as the blade might slip. Always ensure a rotary cutter mat is used.
10.2 Are rotary cutters dangerous?
Rotary cutter blades are extremely sharp. They must be handled with care. However, if you follow rotary cutter safety precautions – like using the safety guard, cutting away from yourself, using a proper mat and ruler, and keeping fingers clear – they are very safe tools. Many ask “are rotary cutters safe?” and the answer is yes, with care.
10.3 How often should I change my rotary cutter blade?
There’s no fixed schedule. You should change your blade when you notice signs of a dull rotary blade. These include: it starts skipping threads, doesn’t cut cleanly, you need to press much harder, or the cut edge looks ragged. The frequency of changing the rotary blade depends on how much you use it and what materials you’re cutting (paper dulls blades faster).
10.4 What’s the best rotary cutter choice for a beginner?
A 45mm rotary cutter is often recommended as the best rotary cutter beginner choice. It’s a very versatile rotary cutter size for starting out for most fabric and craft projects. Look for one with a comfortable handle and a reliable safety mechanism.
10.5 Can I sharpen my rotary cutter blade?
While some sharpeners for rotary blades exist, most users find it more convenient and often safer to simply replace the blade when it becomes dull. Replacement blades are readily available. They ensure you always have a perfectly sharp cutting edge.
Read more:
So there you have it! Rotary cutters are wonderfully versatile tools. They are perfect for achieving clean, straight, and efficient cuts in materials like fabric and paper. They can be a real game-changer for your sewing, quilting, and crafting projects.
Remember the golden rules: always use your rotary cutter with a proper self-healing mat and a thick acrylic ruler. And most importantly, always prioritize safety – keep that blade covered whenever it’s not actively cutting!
We hope this guide has helped you understand what a rotary cutter is all about. If you think it could benefit your projects, why not give one a try? Happy creating! Have more questions about crafting tools or getting your creations ready for packaging? The Packlove team is always happy to help!


