


What Is A Seam Ripper: Uses, Parts And How-To Guide


Hello! Welcome to our easy guide. We are going to talk about a very helpful tool for sewing. It is called a seam ripper. This guide will tell you what a seam ripper is. We will look at its parts. We will learn how to use it. And we will see why it is so useful for anyone who works with fabric. A seam ripper tool can do more than just fix sewing mistakes. Let’s learn all about this stitch remover tool!
1. What exactly is a seam ripper?
A seam ripper is a small tool. It has a pointed end. We use it to cut and take out stitches you don’t want. Some people also call it an ‘unpicker’ or a ‘stitch ripper’. Its main job is to help you undo seams (a line of stitches) or single stitches. It helps you do this without damaging the fabric, if you are careful.
Think of it like a special ‘eraser’ for sewing. If you make a mistake with stitches, the seam ripper helps you remove them. It’s a big help for fixing sewing mistakes. You can also use it to change clothes. You can even use it to take old labels off clothes to put new ones on.
At Packlove, we know that even small sewing tools can make a big difference. A seam ripper is one of those garment care accessories you’ll use more than you think. It is great whether you’re making something new or giving an old item a fresh look with new sewing tools.
2. Why is a seam ripper a must-have tool for sewing?
A seam ripper is not just for taking out stitches. It has many uses. These uses make it a very important tool for anyone who sews or works with clothes.
2.1. Fixing mistakes easily:
Everyone makes mistakes when sewing. Maybe you sew a crooked line of stitches. A seam ripper lets you take out these wrong stitches nice and clean. This means you don’t have to throw away your project. It saves you from feeling upset and helps with mistake correction in sewing.
2.2. Making alterations:
Alterations mean changing clothes. Maybe you want to make pants shorter or a dress wider. This is garment alteration. A seam ripper helps you take out the old seams. Then you can sew new ones. This lets you make clothes fit you perfectly. It also helps clothes last longer because you can change them.
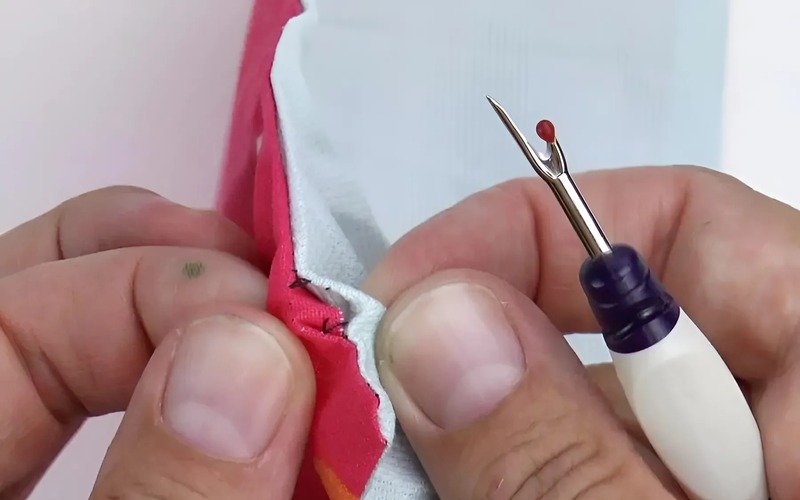
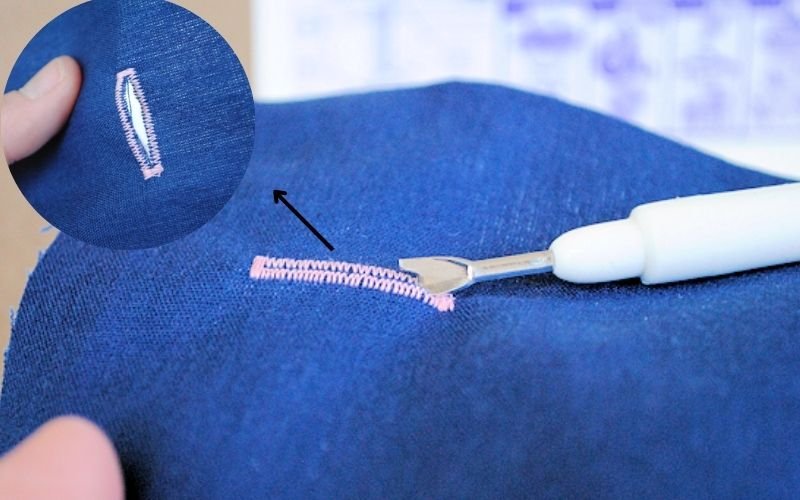
When a sewing machine makes a buttonhole, it sews the stitches around the edge. But the middle part is still closed. You need to carefully cut the fabric open inside these stitches. A seam ripper is the perfect tool for opening buttonholes. This is very important for making shirts, jackets, and other clothes with buttons.
Sometimes you want to take an old label or tag off clothes. Maybe the tag is itchy. Or maybe you want to put your own brand label on. A seam ripper can carefully cut the threads that hold the label. It does this without hurting the cloth. This is useful for making clothes your own.
It is also good if you are a business getting clothes ready for your brand. At Packlove, we often see customers prepare items for new woven labels (a label made by weaving threads together, like on clothing necklines) or logo patches by first removing stitches from old branding. This is a key step in label removal for rebranding.
2.5. General stitch removal:
Sometimes, you just need to remove a few stitches for different reasons, not just big mistakes. Maybe you want to open a pocket that was sewn shut. The seam ripper is perfect for carefully removing stitches.
3. Getting to know your seam ripper: The main parts
Let’s look closely at a seam ripper. If you know its parts of a seam ripper and their functions, you can use it better. Most seam rippers have these common parts.
3.1. The handle
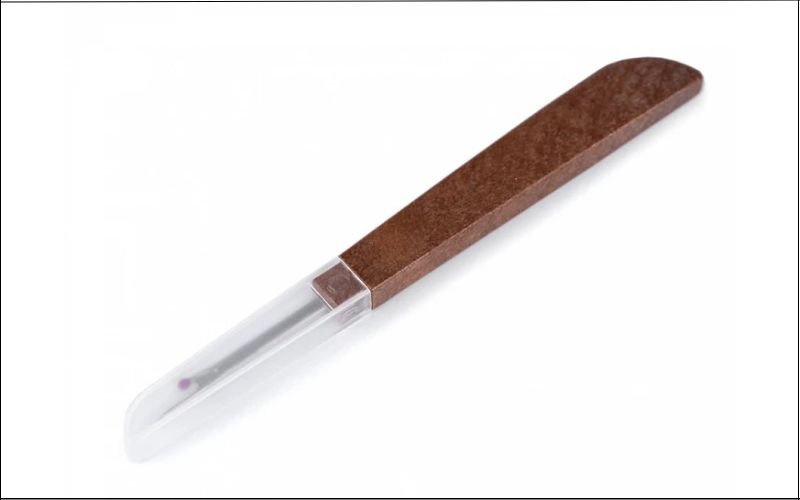
The handle is the part you hold. It is usually made of plastic. Some fancy seam rippers might have handles made of wood or metal. Handles can be round or flat. The handle helps you hold the tool tight and steady. A good grip means you can control the seam ripper well.
Some handles are ergonomic seam ripper handles. This means they are shaped to be very comfortable to hold. This is good if you use the seam ripper for a long time.
3.2. The shaft
The shaft is the metal stick part. It connects the handle to the head (the pointy end). It gives the tool its length and makes it strong.
3.3. The forked head: Where the magic happens
The forked head is the end that does the work. It looks like a small fork and has a few important bits.

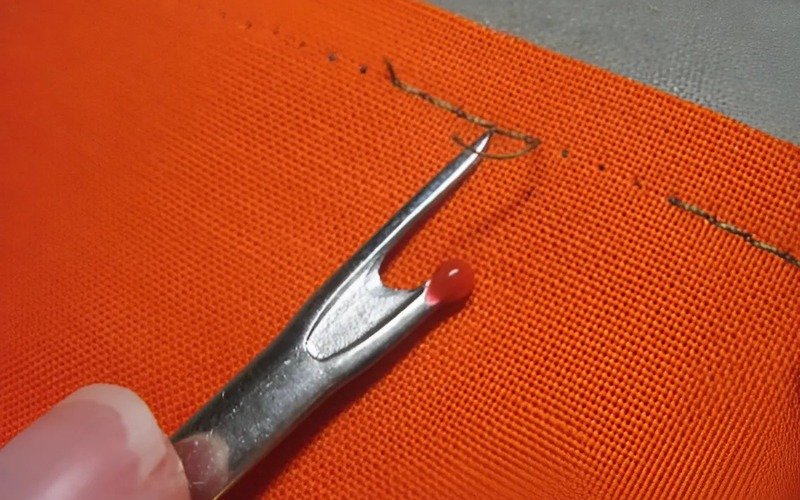
3.4. The long, sharp point
One side of the fork is longer and very sharp at the tip. It looks like a tiny spear. You use this sharp point to pick up one stitch. You slide it under a single thread. It also helps you get into small spaces where stitches are tight. This is key for cutting threads.
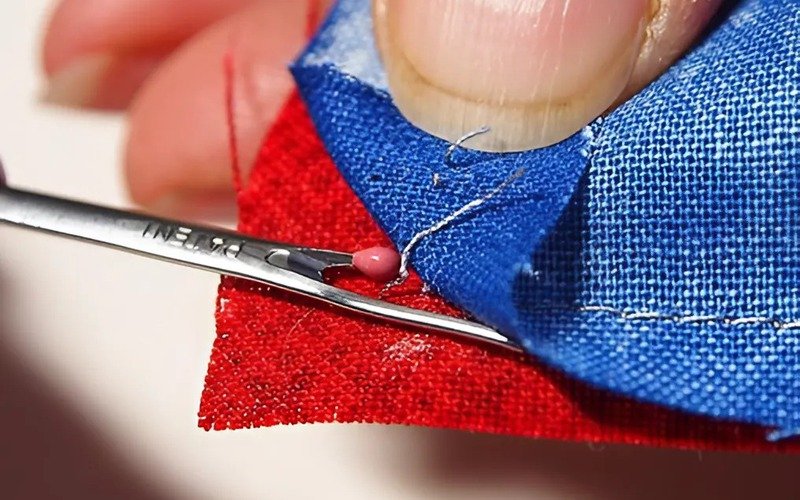
3.5. The small ball
The other, shorter side of the fork often has a tiny ball. This ball point is usually red, but it can be other colors. This ball is for safety. It is a safety feature. It helps stop the seam ripper from catching or tearing your fabric when you slide it. The ball makes the tool slide smoothly and protects fabric. This is very helpful for thin or delicate fabrics that can tear easily.
3.6. The curved blade
Look in the curve of the fork, between the sharp point and the ball point. There is a very small, very sharp blade there. This blade is the part that does the cutting threads. When you pick up a stitch with the sharp point and push, the thread slides into this curve. The blade then cuts the thread.
3.7. The protective cap
Most seam rippers come with a plastic protective cap. It fits over the forked head. The main job of the cap is safety. It is a safety feature. It covers the sharp head when you are not using the tool. This protects the blade from getting dull. It also stops you from poking yourself by accident.
You can often put the cap on the end of the handle. This makes the handle longer. Some people find a longer handle easier to hold and use.
4. How to use a seam ripper: Step-by-step guide
Now you know the parts. Let’s learn how to use a seam ripper. It is easy if you practice a little. We will show you a few common ways for unpicking seams and stitches. Remember to be gentle and take your time. From our experience at Packlove, taking it slow is the best way to get good results when using a seam ripper to open sewn seams easily. You also need to know how to use a seam ripper safely on clothes.
4.1. Before you start: Quick prep
- Good light: Make sure you can see the stitches very clearly.
- Flat surface: Work on a table so you can control the tool well and protect the fabric.
- Know your stitches: Look closely to see exactly which stitches you need to take out from the seam.
- Catch loose threads: Keep a small dish or a piece of sticky tape near you. You can put the tiny cut threads there so they don’t make a mess.
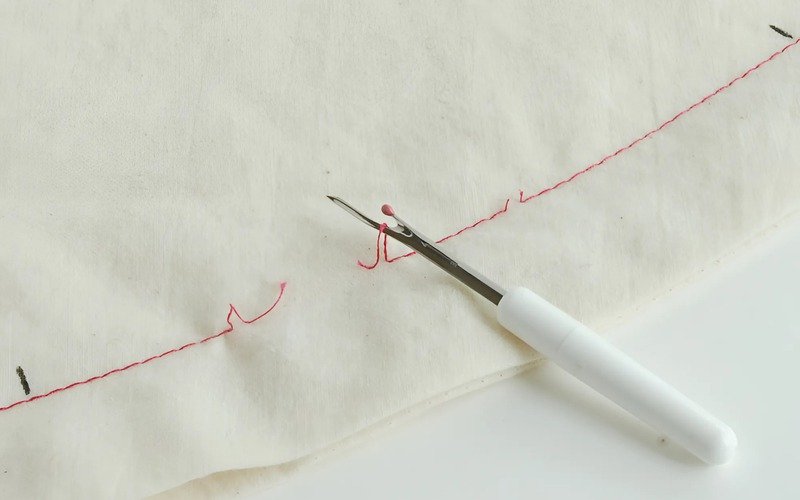
4.2. Method 1: Removing stitches one by one
This way is best if you only need to remove a few stitches. It’s also good for tricky areas or for fabric that is thin or might tear easily (delicate fabric). This method is key to how to use a seam ripper for unpicking seams carefully.
- Hold the fabric with one hand. Keep it smooth but don’t pull it too hard.
- With your other hand, take the seam ripper. Slide the long, sharp point under one stitch. Make sure you only pick up the thread of the stitch, not the fabric itself.
- Gently push the seam ripper forward a little. The thread will go into the curved blade in the fork and the blade will cut it.
- Do this for every few stitches. For example, cut one stitch, skip two stitches, then cut the next stitch. Or cut every stitch if there are only a few.
- After you cut some stitches, turn the fabric over. You should be able to gently pull the two pieces of fabric apart. The cut threads will come out. Use your fingers or tweezers to pick off any small bits of thread.
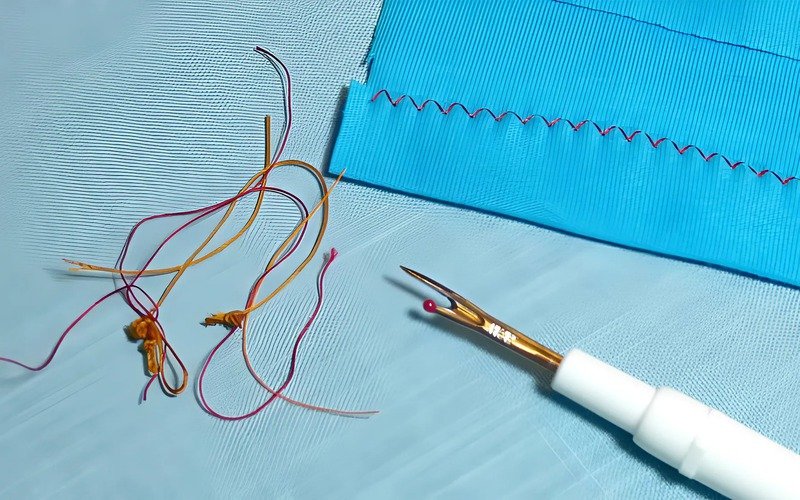
4.3. Method 2: Using the ball point for longer seams
This way is good for long, straight lines of stitches on strong fabrics like cotton jeans (denim) or thick cotton. It is faster. Do not use this for thin or delicate fabrics. This shows how to use a seam ripper safely on clothes and is great for using a seam ripper to open sewn seams easily on tough materials.
- First, use Method 1 to cut the first two or three stitches at the start of the seam. This makes a little opening.
- Hold the fabric pieces apart a little with one hand. Put the seam ripper into the seam. The small ball point should be facing down. It should touch the fabric layer that is on the bottom, or the inside of the seam.
- The sharp point should be facing up. The blade in the fork should be ready to cut the threads of the seam.
- Gently slide the seam ripper along the seam. The ball point will help protect the fabric from getting caught. The blade will cut the threads as you move. Use slow, steady, gentle pressure. Don’t push hard.
- When the seam is open, pull the fabric pieces apart. Take away any loose threads from both sides of the fabric.
Important Note: Be careful! Do not push too hard or go too fast. You could still cut the fabric by accident. This method is best for straight seams. It is not good for very tight stitches or delicate fabrics.
You use a seam ripper after your sewing machine has stitched the buttonhole. This is a precise way of cutting threads to make a functional opening.
- Check your buttonhole. Make sure the stitches are all done and strong. Especially check the thick stitches at each end (these are called bar tacks).
- Very Important Safety Tip: Put a straight pin across each end of the buttonhole. Put the pin just inside the thick bar tack stitches. The pins will stop your seam ripper from cutting threads too far and cutting the bar tacks. This is crucial for opening buttonholes correctly.
- Carefully put the sharp point of the seam ripper into the fabric inside the buttonhole stitches. Start at one end, near one of the pins.
- Gently push the seam ripper. Let the blade cut the fabric. Move it towards the pin at the other end of the buttonhole. The pin will stop your tool.
- If the buttonhole is long, you can start from one end and cut to the middle. Then, turn your fabric and cut from the other end towards the middle.
Some people like to use small, sharp scissors for very tiny buttonholes after making a hole with the point. But a seam ripper is usually used.
5. Safety first! Tips for using your seam ripper safely
A seam ripper is a sharp tool! It is important to use it carefully. This will protect your fabric and also protect you from getting hurt. Follow these safety precautions to ensure you know how to remove stitches without damaging fabric or yourself.
5.1. Protecting your fabric
- Work in good light: When you can see stitches clearly, you make fewer mistakes. You are less likely to cut the fabric. This is a good fabric protection tip.
- Use the ball point: If your seam ripper has a ball point of seam ripper, use it when you can (like in Method 2). The ball slides on the fabric and helps stop snags. These textile manipulation tools are designed for care.
- Cut on the ‘wrong’ side (back side): If you can, cut stitches from the back or inside of your project. If you make a tiny mark, it won’t show on the outside.
- Go slow and steady: Do not rush. Gentle, careful movements are best. If you push too hard, you can rip the fabric.
- Test first on a scrap: If you are not sure about a fabric (maybe it’s very thin), try the seam ripper on a small piece of scrap fabric first. Or try it on a part of the seam that will be hidden.
- Support delicate fabrics: For very thin fabrics, you can put a finger under the fabric to support it as you pick stitches. But be very, very careful not to poke your finger.
5.2. Protecting yourself
- Always cut away from yourself: Point the sharp end and the blade away from your fingers, hands, and your body. Never cut towards yourself. This is a key safety precaution.
- Keep fingers clear: Be careful where your other hand’s fingers are. Especially when you hold fabric tight, make sure your fingers are not in the way of the blade.
- Cap it when not in use: Always put the protective cap back on the seam ripper. Do this when you finish using it, or even if you just put it down for a moment.
- Store safely: Keep your seam ripper in a sewing box or a safe place. Keep it away from children and pets.
- Be mindful (pay attention): It is a small tool, but it is sharp. Always pay attention when you are holding it and using it.

6. Caring for your seam ripper
If you take a little care of your seam ripper, it will work well for a longer time. It’s one of your handy garment care accessories.
- Clean it: After you use it, wipe off any lint (fluff), dust, and tiny thread bits. A small, soft brush can help get threads out of the fork.
- Cap it: Always put the protective cap back on when you store it. This keeps the blade sharp and clean, and also prevents accidents.
- When to replace it: Seam rippers are usually not expensive. If you see it is getting dull (not sharp), if it doesn’t cut threads easily, or if it starts to snag (catch) your fabric more often, it is probably time to buy a new one. For most common seam rippers, trying to sharpen them is not easy or worth the cost.
7. Other handy uses for a seam ripper
A seam ripper is great for fixing sewing mistakes. But it can also be useful for other small jobs!
- Cutting stray threads: You can quickly snip off loose threads on clothes or projects you have finished. This makes them look neater.
- Removing labels/patches: You can carefully take off sew-on labels, brand tags, or old patches from clothes. This is good if a tag is itchy. It’s also the first step if you want to put on a new label or patch for your own brand. This is the best seam ripper for removing old clothing labels task. Removing old branding elements cleanly is important before applying and replacing sew-on branding elements to give garments a new look. This is an important part of label removal for rebranding.
- Opening tight packaging: You can sometimes use it (carefully!) to open tight plastic packages, if you don’t have scissors nearby.
- Opening envelopes: Some people use it to open paper envelopes, but be gentle.
8. Common questions about seam rippers (FAQs)
Here are answers to some questions people often ask about seam rippers.
8.1. What’s the difference between a seam ripper and scissors for removing stitches?
Scissors, especially small ones, can cut threads. But seam rippers are made just for this job. The fine point of a seam ripper helps pick out single stitches more easily than a scissor tip. Also, the ball point on many seam rippers helps protect fabric; scissors don’t have this. If you use scissors to rip seams, it’s easier to cut the fabric by mistake. A seam ripper, used right, is usually safer for your clothes.
8.2. Can I sharpen my seam ripper?
Most common seam rippers are cheap. They are not really made to be sharpened easily because the blade is small and hard to reach. If your seam ripper gets dull, it’s usually easier and cheaper to just buy a new one.
8.3. Are there different sizes or types of seam rippers?
Yes. The type we showed is the most common. You can also find:
- Larger seam rippers: These have bigger handles, sometimes an ergonomic seam ripper handle (shaped for comfort). Good if you use one a lot.
- Smaller seam rippers: These are more delicate, for very thin fabrics or tiny stitches.
- Some might have other features, like a blade that pulls in and out. But the basic forked head with a blade is usually the same.
8.4. I accidentally cut my fabric with the seam ripper. What can I do?
Don’t worry, this can happen sometimes!
- For a very small cut, a product called ‘Fray Check’ (a liquid) can stop it from fraying (getting more threads loose).
- If the cut is on a part of the fabric that will be hidden inside the seam, it might not show when you finish your project.
- Sometimes, you can fix a small cut with careful hand stitches or a tiny patch on the inside.
- The best way to stop this is to work slowly, in good light, and use the seam ripper’s safety parts like the ball point.
Read more:
So, we learned that a seam ripper is a small and simple tool. But it is very strong and very important for sewing. It’s one of the essential sewing tools and craft supplies.
It helps you fix mistakes, change clothes, open buttonholes, and even take off old labels. It truly is a versatile tailoring tool. Like any tool, the more you use your seam ripper, the better you will get at using it. Just practice a little.
It does not cost much money, but it can save you from feeling bad about mistakes. It helps you make your sewing and fabric projects look more professional. So, always keep your seam ripper near when you sew. It’s a real friend to anyone who sews! Are you ready for your next sewing project? Make sure you have all the essential sewing tools!
If you’ve used your seam ripper to remove old branding and are now thinking about giving your apparel a fresh, custom look, Packlove is here to help. We offer beautiful custom woven labels, easy-to-apply heat transfer labels (a label applied to fabric using heat and pressure, often tagless), and cool rubber labels (durable, flexible labels often made from PVC or silicone). Get a quote from Packlove for your custom labels now!


