


What Is Tracing Paper? Simple Guide: Uses And How to Trace


Ever wondered “What is tracing paper?” This see-through paper is a simple yet powerful tool for artists, designers, and crafters. This guide will clearly explain what tracing paper is, its special qualities, and how it can help you copy, transfer, and develop your creative ideas. We’ll also cover simple steps to get started. Let’s explore this versatile paper together!
1. Introduction: What is tracing paper?
1.1. Simple definition: What is tracing paper in easy words?
Tracing paper is a special, thin paper that you can see through. Its main job is to help you copy drawings or designs. The word translucent is often used to describe it, which simply means it lets light pass through, making it see-through.
1.2. What makes it special: A quick look at its main feature
Its defining characteristic is its translucency. This see-through quality allows you to place it over an image and clearly view the lines underneath for tracing.
1.3. Who this guide is for beginners
This guide is for anyone new to tracing paper. This includes artists, designers, students, crafters, and anyone curious about creative tools. We will explain what tracing paper is, why it’s useful, and how you can use it for your projects.
2. The key features of tracing paper
Understanding the key features of tracing paper helps you appreciate why it works so well.
2.1. Translucency: How see-through is it?
Translucency is the most vital feature. It refers to how much light passes through the paper, making the image below visible. Good tracing paper offers sufficient transparency to clearly reveal all details of the original image. This allows for accurate copying. This see-through quality often comes from how the paper fibers are processed to be thin and less opaque.
2.2. Paper weight (thickness): Is it thick or thin?
Tracing paper is usually quite thin. Paper thickness is often measured in GSM (grams per square meter – a measure of paper weight and thickness). A lower GSM means thinner paper. Typical tracing paper might range from 40 GSM (very thin) to around 90 GSM (slightly thicker but still good for tracing).
- Thinner paper (lower GSM): Easier to see through, excellent for very detailed tracing. However, it can tear more easily.
- Slightly thicker tracing paper (higher GSM): More durable and less prone to tearing. It might be a tiny bit less transparent.
Most people choose thinner tracing paper because its high transparency is best for tracing.
2.3. Surface texture: How does it feel?
Tracing paper typically has a smooth surface texture. This smoothness is important because it allows your pencil, pen, or marker to glide easily across the paper. This helps you create clean, consistent, and precise lines when you’re drawing or tracing. While some tracing papers might have a very slight “tooth” (a subtle texture), it’s generally much smoother than regular drawing paper.
2.4. Why these features matter for your projects
Together, translucency, appropriate thinness, and a smooth surface make tracing paper highly effective. These qualities ensure you can accurately copy images and easily transfer them. Understanding these features also helps you choose the right type of tracing paper if you see different options available.
3. Why use tracing paper? Exploring its many uses
Tracing paper is more than just for copying. It’s a versatile tool for many creative tasks.
3.1. Copying and replicating images or drawings
This is the most basic use: making an exact copy of an image or drawing. You might copy a favorite cartoon character, a technical diagram, or a decorative pattern. Artists also use it to practice drawing skills by tracing over existing artwork to better understand form and line. At Packlove, we know that many aspiring artists and designers use tracing to build their foundational skills before creating completely original work.
3.2. Transferring designs to other surfaces
Once you’ve traced a design, you can move (transfer) it to a different surface. This is incredibly useful for many projects. Examples of surfaces include:
- Fresh drawing paper for a final artwork
- Canvas for painting
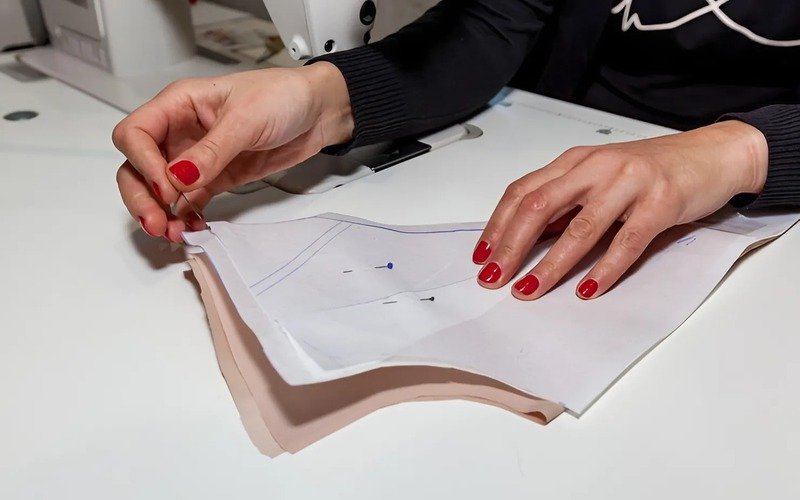
- Fabric for embroidery or sewing projects
- Wood for carving or wood-burning (pyrography)
- Even walls for planning small-scale murals
We’ll cover how to transfer designs later in this guide. From Packlove’s experience, we’ve seen clients use tracing to transfer initial logo sketches onto different mock-up materials before finalizing their branding.
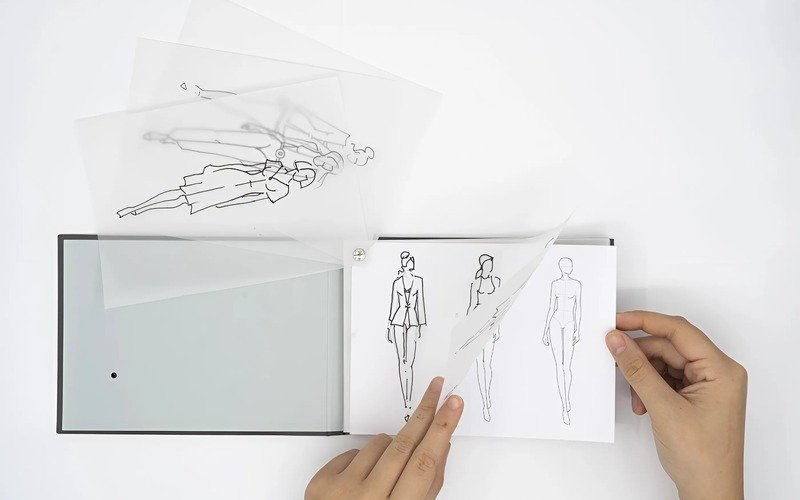
3.3. Layering and composition in art and design
Designers and artists often use tracing paper to experiment with layouts without changing their original drawings. You can draw different elements—like text, images, or shapes—on separate sheets of tracing paper. Then, you can place these sheets on top of each other or over a background.
This helps you visualize different compositions, adjust spacing, and see how different parts work together. It’s great for storyboarding, comic book layouts, or planning complex illustrations.
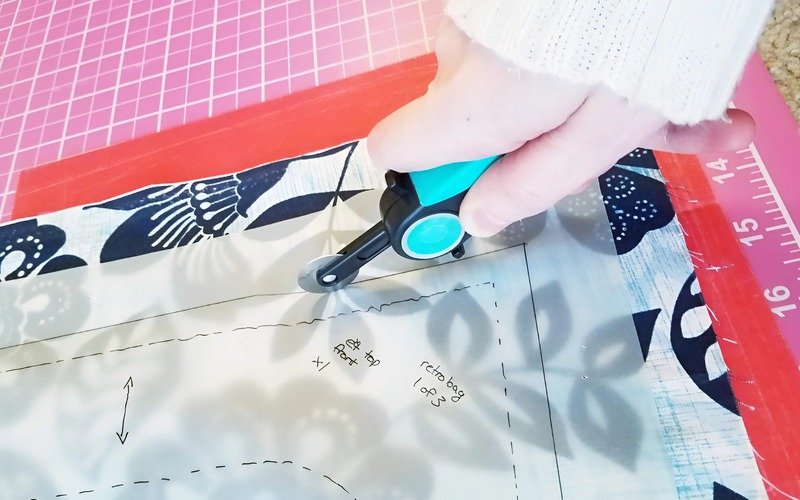
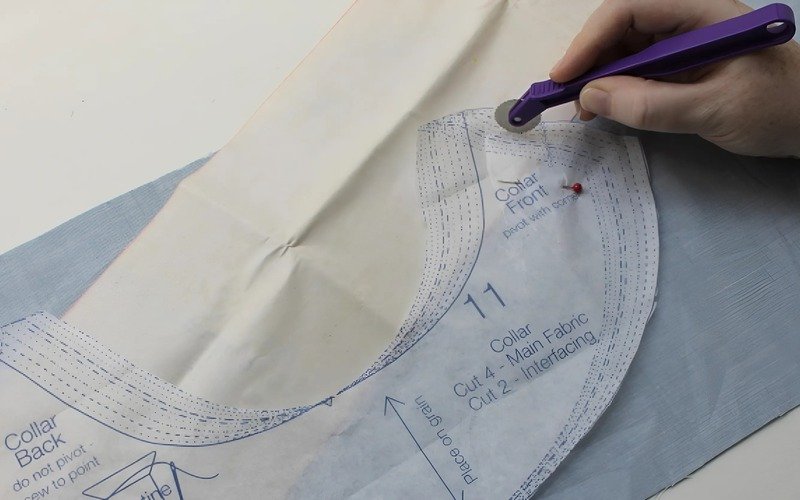
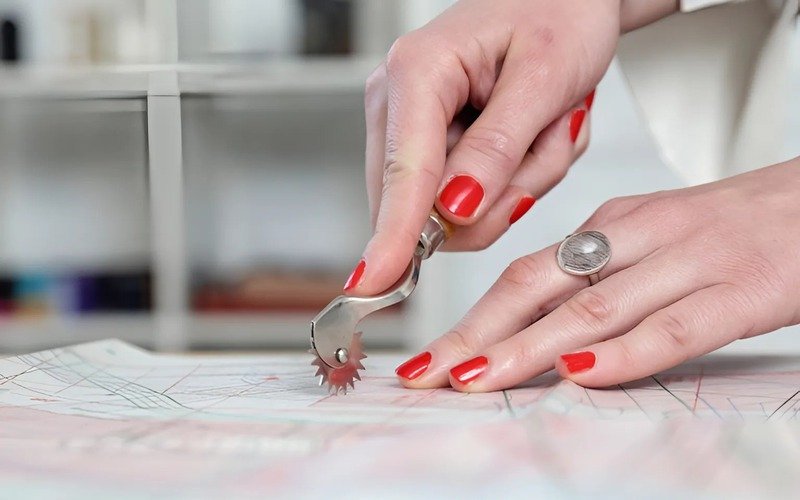
3.4. Pattern making for sewing and crafts
Tracing paper is an essential tool for people who sew or engage in crafts. It’s used to copy commercial sewing patterns to keep the original pattern safe or to make size adjustments. It’s also used to create or change patterns for quilting, appliqué, stained glass, and other crafts that need precise templates.
Tracing paper is a staple in the fashion industry for pattern drafting and modification, from initial concepts to production-ready patterns.
3.5. Developing ideas and sketches
Tracing paper helps in the iterative design process. You can start with a rough sketch, then place tracing paper over it to refine lines, add details, or try out different variations. This lets you make many improvements without having to redraw the whole thing each time.
This is useful for logo design, developing illustrations, and architectural sketches. Many successful logo designs Packlove produces start as rough sketches refined through layers of tracing paper, helping clients visualize and perfect their brand identity.
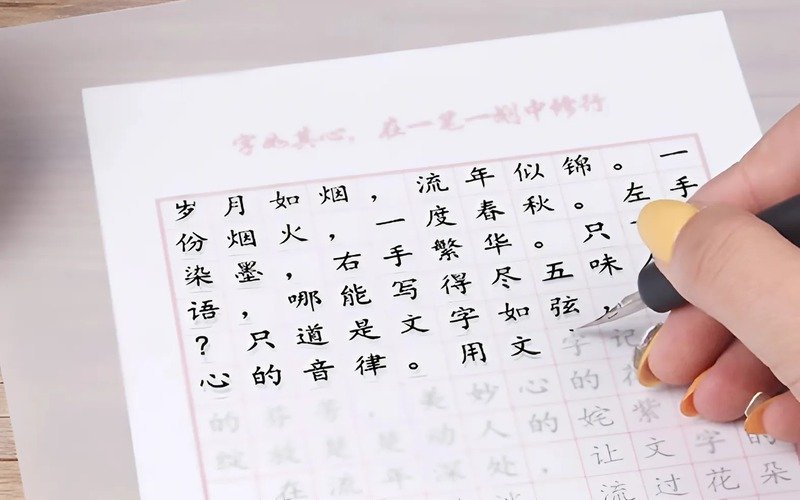
3.6. Practicing calligraphy or hand lettering
You can place tracing paper over calligraphy guides, examples of lettering, or printed fonts. Then, you can trace the letterforms again and again. This helps you practice your strokes, spacing, and consistency. It’s a great way to build muscle memory for beautiful hand lettering or calligraphy.
4. How to use tracing paper: A simple step-by-step guide
Using tracing paper is easy once you know the basic steps.
4.1. What you’ll need
Here’s a list of tools that will make tracing easier:
- Tracing paper: the main material for your work.
- Original image/drawing: the picture or design you want to copy.
- Pencil: An HB or B pencil is good for the initial tracing (not too hard to indent the paper, not too soft to smudge easily). You’ll want a softer pencil (like 2B, 4B, or even softer) for shading the back of the tracing paper if you plan to transfer the image using the graphite method.
- Tape (optional but recommended): low-tack masking tape or painter’s tape. This helps keep the tracing paper and original image from moving around. Based on many projects at Packlove, we find that using tape is a simple step that significantly improves accuracy and reduces frustration.
- Stylus, dull pencil, or ballpoint pen (for transferring): You’ll need something with a firm, non-sharp point to apply pressure when transferring your traced image. An old ballpoint pen that no longer writes is a great, readily available tool for this.
- Eraser: A soft white plastic eraser is recommended, as it’s gentle on the thin tracing paper.
4.2. How to trace an image
Follow these steps to trace your image:
- Prepare your workspace: Find a flat, clean, and well-lit surface to work on.
- Place tracing paper: Lay your sheet of tracing paper smoothly over the original image you want to copy. Make sure you can clearly see the original image through the tracing paper.
- Secure the papers (optional): Use small pieces of tape on the corners to secure the tracing paper to the original image. You might also want to tape both to your work surface. This prevents any movement while you trace.
- Trace the lines: Using your chosen pencil (like an HB or B), carefully and steadily draw over the lines of the original image. Apply gentle, consistent pressure. Take your time to be accurate. It’s better to lift your pencil to start new lines rather than dragging it, which can sometimes tear the delicate paper.
4.3. How to transfer your traced image to another surface
This popular method uses the graphite from your pencil to transfer the design.
- Complete your tracing: Make sure your image is fully traced onto the tracing paper.
- Prepare the back: Flip the tracing paper over so the side you drew on is facing down. Using a soft pencil (2B or softer), shade thoroughly over all the lines you traced. You want to create a good layer of graphite on the back of your traced lines. This acts like DIY carbon paper.
- Position on new surface: Flip the tracing paper back over (traced side up, shaded side down). Carefully place it onto the new surface (like clean drawing paper, wood, or fabric) where you want your design to appear.
- Secure again (optional): Tape the tracing paper to the new surface to stop it from moving while you transfer.
- Retrace to transfer: Using a harder pencil (e.g., H), a stylus, or a ballpoint pen, firmly draw over your original traced lines on the front of the tracing paper. The pressure will push the graphite from the shaded back of the paper onto the new surface. Use consistent pressure for best results.
- Check and remove: Gently lift a corner of the tracing paper to see if the design has transferred clearly. If all the lines are visible, you can carefully remove the tracing paper. Your design should now be lightly outlined on the new surface.
A Packlove tip: For delicate surfaces, test the transfer pressure on a scrap piece first. This helps you avoid indenting or damaging the material too deeply.
5. Choosing tracing paper: Are there different types?
While basic tracing paper is common, you might see a few options.
5.1. Common types available
You’ll usually find tracing paper in these formats:
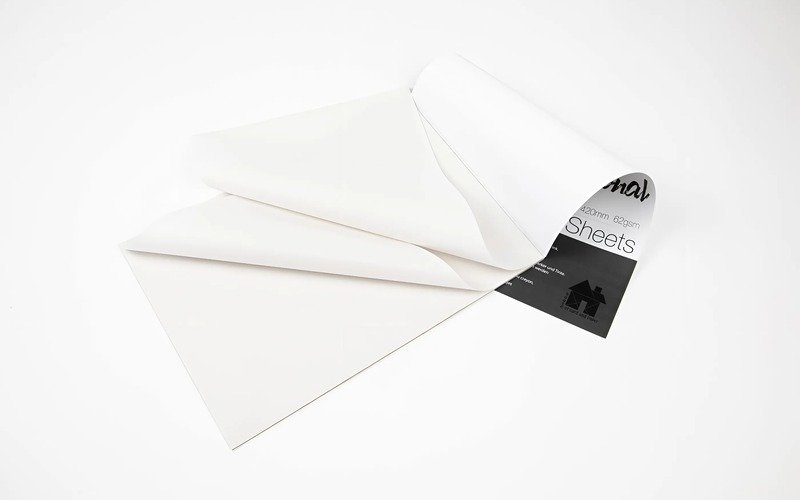
- Pads/Sheets: These are convenient for smaller projects and easy to store. They come in various standard sizes.
- Rolls: Rolls are good for larger projects, if you need a continuous sheet, or if you use tracing paper very often.
- Weights (GSM): As mentioned in Section 2.2, tracing paper comes in different thicknesses or GSM (grams per square meter). Lighter paper is often more transparent but also more delicate. Heavier tracing paper is more durable.
5.2. Mentioning specialized types
Occasionally, you might see specialized tracing paper like gridded tracing paper, which has printed grid lines helpful for projects needing scale or precise alignment. There’s also colored tracing paper, though it’s less common for basic tracing tasks.
6. Tips for getting great results with tracing paper
A few simple tips can help you get the best results.
6.1. Keeping your lines clean
- Rest your working hand on a separate clean sheet of paper placed over your tracing. This prevents oils from your hand smudging the graphite.
- Try to work from top to bottom. If you’re left-handed, work from right to left (and vice-versa if you’re right-handed) to avoid dragging your hand over fresh lines.
- Don’t press too hard with your pencil when first tracing.
6.2. Choosing the right pencil hardness
- For tracing: An HB or B pencil usually offers a good balance of visibility and erasability.
- For shading the back (for transfer): Use a soft pencil (2B, 4B, or softer) to lay down a rich graphite layer.
- For retracing to transfer: A harder pencil (H) or a stylus/ballpoint pen provides sharp pressure.
6.3. How to avoid tearing the paper
- Always be gentle, as tracing paper is thin.
- If you use tape, choose low-tack tape (like painter’s tape). Remove it slowly and carefully by pulling it away from the paper at an angle, not straight up.
- When erasing, hold the paper flat with one hand and use a soft eraser with gentle strokes.
6.4. Making sure your transfer is visible
- Shade the back of your traced lines thoroughly and evenly with a soft pencil.
- Apply firm, consistent pressure when retracing the lines to transfer the design.
- It’s a good idea to test your transfer on a scrap piece of the destination material first, especially if it’s a material you haven’t used before.
6.5. Storing your tracing paper
- Keep your tracing paper flat in a folder, portfolio, or drawer to prevent creases, wrinkles, or tears.
- Store it away from moisture or extreme temperatures, as these can affect paper quality.
7. Tracing paper in your design journey: the Packlove connection
Tracing paper isn’t just for practice; it’s a key tool in the early stages of design.
7.1. From sketch to product: How tracing paper helps in the first steps of design
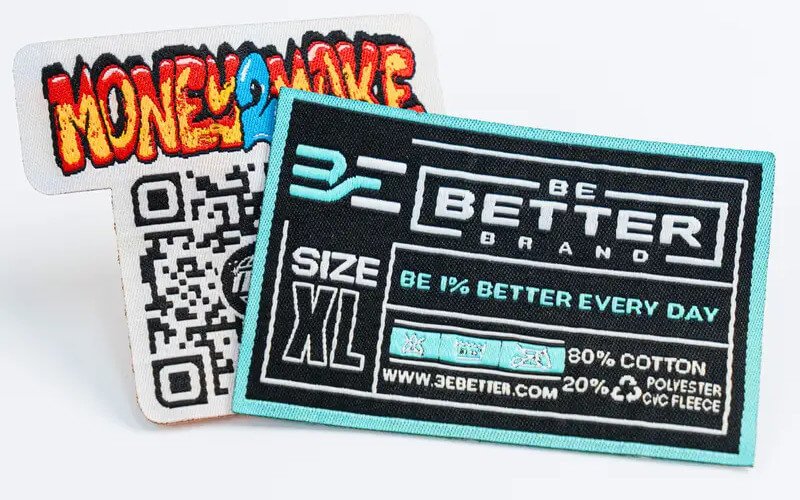
Many great designs for branding materials – like logos, labels, and packaging – start as simple sketches. Tracing paper is a valuable tool in this initial “idea” or conceptual phase. It allows for easy exploration and refinement of these early thoughts.
7.2. Perfecting your ideas: Using tracing paper to refine designs
Tracing paper can be used to iterate and improve sketches specifically for products. You can refine a logo sketch, try different layouts for a sticker, or adjust elements in a label design. It helps you get the design “just right” before you think about producing it.
7.3. Packlove.com can help bring your polished designs to life on various custom products
When your ideas, carefully refined with tools like tracing paper, are ready to become real products, Packlove is here to help. We can take your polished designs and bring them to life on items such as:

8. Frequently asked questions (FAQs) about tracing paper
Here are answers to some common questions about tracing paper.
8.1. What’s the best pencil to use on tracing paper?
For tracing directly onto tracing paper, an HB or B pencil is generally good. They make a clear line without being too soft and smudgy. For shading the back of the tracing paper to prepare for transfer, a softer pencil like 2B, 4B, or even 6B works best because it leaves more graphite, making the transfer darker.
8.2. Can I erase on tracing paper?
Yes, you can erase on tracing paper, but you need to be careful. Tracing paper is thin and can tear or wrinkle easily. It’s best to use a soft vinyl or plastic eraser and erase gently.
8.3. Can you print on tracing paper with a regular printer?
Some types of tracing paper are specifically made for use in inkjet or laser printers, but not all standard tracing paper is suitable. Regular, thin tracing paper might jam in a printer. Also, ink might smudge or not dry properly if the paper isn’t coated for printing. Always check the tracing paper’s packaging to see if it’s printer-compatible. If you want to try, test one sheet first, perhaps for creating quick mockups.
8.4. What’s the difference between tracing paper and vellum?
Both tracing paper and vellum are translucent (see-through). However, tracing paper is generally thinner and primarily used for tracing, transferring designs, and making preliminary sketches. Vellum is typically thicker, more durable, and has a smoother finish. Vellum is often used for final drawings, architectural plans, craft projects, or as a decorative overlay.
8.5. Is tracing paper the same as carbon paper?
No, they are different. Tracing paper is see-through; you place it over an original image and draw on it to copy the lines. Carbon paper is not see-through. It has a coating of waxy ink on one side. Carbon paper is placed between your original drawing (or your traced image on tracing paper) and the new surface. When you draw or write on the top sheet, the pressure transfers the ink from the carbon paper to the surface below.
8.6. How can I make my traced lines darker when transferring?
To make your transferred lines darker:
- Make sure you shade the back of your traced lines thoroughly and evenly with a soft pencil (like 2B or softer). The more graphite, the darker the transfer.
- Apply firm, consistent pressure when you go over the lines again with your stylus or hard pencil to transfer the design onto the new surface.
8.7. Is tracing paper recyclable?
Most plain, uncoated tracing paper is recyclable along with other paper products. However, it’s always a good idea to check your local recycling guidelines. Some heavily inked sheets or tracing paper that has been treated with wax or other substances (some specialty types) might have different disposal requirements.
Read more:
As we’ve seen, tracing paper is a simple yet surprisingly versatile and powerful tool. It’s fantastic for anyone involved in creative pursuits, whether you’re copying, transferring designs, or developing new ideas. We hope this guide has shown you how useful tracing paper can be. We encourage you to try it out for your own projects, whether it’s for art, crafts, design planning, or simply learning new techniques.
Remember, when those ideas you’ve carefully refined with tools like tracing paper are ready to become something more, Packlove is here to help. We can turn your creative visions into tangible products like custom labels, stickers, and unique packaging. Ready to bring your refined designs to life? Visit MyPackLove.com to explore our custom product options!


