Basting Stitch: Improve Apparel Quality And Fit
Understanding and utilizing the basting stitch correctly can significantly elevate the quality and efficiency of garment production for small apparel businesses. This article explores what a basting stitch is, why incorporating this technique is a strategic advantage for achieving consistent fit and handling challenging materials, and how to apply and remove these temporary stitches effectively for professional results.
Discover how this simple step acts as foundational quality control, saving time and resources in the long run. This guide will delve into the essentials of this technique.
1. Defining the basting stitch
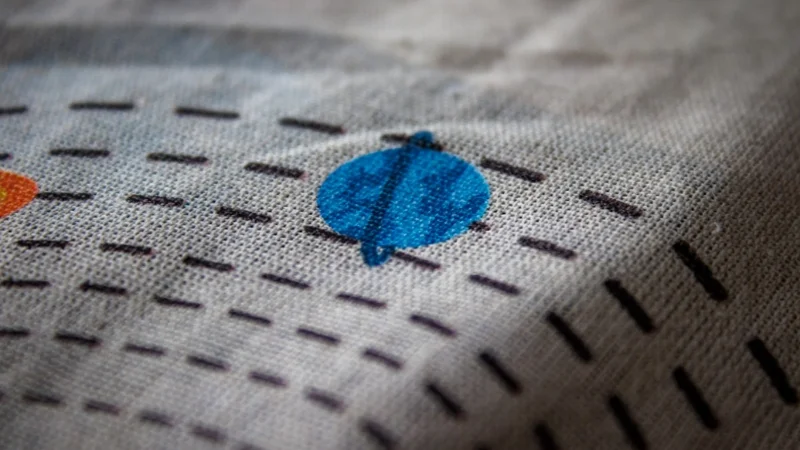
A basting stitch is essentially a form of temporary stitch used in sewing. Its defining characteristics include a longer stitch length compared to standard permanent stitches and intentionally loose tension. The primary purpose of this design is straightforward: easy removal once the stitch has served its function.
Think of running stitches used temporarily – these are often basting stitches. Sometimes referred to as a “tacking stitch,” basting serves as a preliminary step, much like sketching guides a painter before applying permanent color. These stitches aren’t meant to hold indefinitely but rather to prepare the way for final construction.

Core purpose
The core purpose of basting stitches is to create a temporary join between fabric layers. This preparatory function is crucial for several reasons in sewing and garment construction. Basting allows for initial checks on fitting before committing to permanent stitches, which are considerably harder to undo.
Furthermore, these temporary stitches reliably hold pieces together during complex assembly steps, such as inserting zippers or perfectly matching patterns across seams. Basting is also invaluable for managing tricky or unstable fabrics, preventing them from shifting or stretching during the final sewing process, ensuring a cleaner, more professional outcome.
2. Why basting is a smart move for your apparel business
2.1 Achieving consistent fit
One of the most significant advantages of basting facilitates accurate garment fitting. By temporarily assembling parts of a garment, or a full sample, using basting stitches, allows for trying the piece on a model or dress form before any permanent stitch is made.
This early check highlights potential fitting issues—like improper sleeve ease, dart placement errors, or an unflattering silhouette—at a stage where adjustments are simple. Catching these problems early through basting saves considerable time and materials compared to performing difficult alterations after final sewing.
For businesses involved in sample making, basting is an essential step in the development and approval cycle, ensuring the final product meets fit specifications and enhances overall quality control.
2.2 Mastering challenging fabrics
Certain materials present unique challenges during sewing. Basting proves particularly beneficial when working with slippery fabric like silks and chiffons, delicate velvets that can crush easily, bulky textiles such as thick coating fabrics, or knits prone to stretching. Basting helps prevent these fabric layers from shifting, sliding, or stretching unevenly while being guided through the sewing machine for permanent stitching.
While pins are a common holding tool, they can leave permanent holes in delicate fabrics or fail to securely hold multiple or thick layers together. Basting offers a more secure and less damaging method, ensuring greater control over difficult materials.
2.3 Simplifying complex assemblies
Many steps in garment construction involve intricate alignment or manipulation of fabric layers. Basting significantly simplifies these tasks:
- Setting in sleeves: ensures even distribution of ease and accurate placement within the armscye.
- Attaching collars and cuffs: guarantees precise alignment and prevents shifting during final stitching.
- Zipper insertion: holds zippers, especially concealed or lapped types, perfectly straight, preventing puckering.
- Aligning patterns: crucial for matching plaids, stripes, or prints across seams for a professional look.
- Creating neat pleats or gathers: holds folds or gathered fabric uniformly before securing them permanently.
- Applying trims: keeps piping, lace, or other edgings positioned evenly along seams or edges.
2.4 Enhancing sewing workflow
From a practical standpoint, sewing a basted seam offers an efficiency advantage over a seam held only with pins. Basting allows for a more continuous sewing motion, as there’s no need to constantly stop and remove pins before they reach the needle. This smoother workflow is particularly noticeable on longer seams or during small production runs where interruptions can accumulate, improving the overall pace of assembly.
2.5 Basting as foundational quality control
Integrating basting into the workflow elevates the process beyond a mere sewing technique; it becomes a fundamental aspect of quality control. This temporary stitching acts as a proactive measure, providing an opportunity to identify and rectify potential issues—such as misalignment, poor fit, or fabric handling problems—before they are locked in by the final seam.
Consistently using basting helps maintain high brand standards by preventing flaws and ensuring greater precision in garment construction, contributing to a superior finished product.
3. Strategic applications: putting basting stitches to work
3.1 Sample making and fit verification
Basting is indispensable during sample making. Constructing initial muslins or first samples with basting stitches allows for effective fitting of garments on live models or dress forms. Adjustments can be marked, stitches easily removed, and modifications made quickly, streamlining the fit verification process before cutting into final fabric.
3.2 Securing multi-layer components
When dealing with components made of multiple fabric layers, such as attaching yokes, setting pocket bags, or applying underlining or interfacing, basting is crucial. Temporarily stitching these layers together treats them as a single unit, preventing shifting and ensuring all pieces are accurately incorporated into the main garment structure. Consider components like a lined yoke or a welt pocket assembly where precision is paramount.
3.3 Precise zipper insertion
Achieving a perfectly installed zipper requires precise alignment. Basting the zipper tape to the fabric before final stitching is far superior to using pins alone, effectively preventing puckers and ensuring the zipper lies flat and straight. For particularly tricky curves or intersections, careful hand basting offers maximum control during zipper insertion.

3.4 Applying edgings
When attaching decorative or functional edgings like piping, lace, bias tape, or other trims, basting first ensures an even and consistent application. This temporary hold prevents the trim from stretching or shifting along straight lines or curves during the final stitching phase, resulting in a cleaner, more professional finish.
3.5 Pattern matching
For garments featuring stripes, plaids, or prominent prints, precise pattern matching across seams is critical for visual appeal and quality. Basting seams together allows for checking the alignment from the right side of the fabric before committing with permanent stitches. Adjustments can be made easily until the pattern matches perfectly, avoiding costly mistakes on patterned fabrics.
3.6 Easing fabric into curves
Easing involves fitting a slightly longer fabric edge smoothly onto a shorter one without creating visible gathers, commonly required for setting in a sleeve cap or sewing princess seams. Basting helps control and distribute this fullness evenly along the curved seam.
Often, two parallel rows of machine basting are sewn within the seam allowance; the threads are then gently pulled to ease the fabric into the required shape before permanent stitching.
3.7 Creating even gathers
To create soft gathers, such as for skirts or ruffled details, machine basting is the standard technique. One or typically two parallel rows of basting stitches, set to a long stitch length, are sewn within the seam allowance. The bobbin threads are then pulled simultaneously to draw up the fabric evenly into gathers before attaching the piece to the corresponding garment section.
3.8 Establishing temporary guidelines
A line of basting stitches can serve as an effective, removable marking guideline. This is useful for establishing an accurate fold line for a hem, indicating the placement for precise topstitching, or marking construction points that need to be visible during assembly but removed from the final garment. Contrasting thread makes these guidelines easy to see and follow.
4. How to execute a basting stitch: techniques for professionals
4.1 Gathering your tools
Before starting, ensure you have the necessary tools readily available:
- Hand-sewing needle: choose a size appropriate for your fabric weight.
- Thread: a contrasting thread color makes removal much easier. Standard polyester thread is usually sufficient; this is a good use for older or odd-colored thread spools, as high strength isn’t required for a temporary stitch.
- Sewing machine: required for machine basting.
- Sharp scissors: for cutting thread tails cleanly.
- Seam ripper: essential for removing the basting stitches later.
4.2 Hand basting method
Hand basting offers excellent control, especially for detailed areas or very delicate fabrics. Follow these steps:
- Prepare needle and thread: Thread the hand-sewing needle with a single strand of thread. Tie a small, simple knot at the end.
- Start stitching: Begin stitching just inside the intended final seam allowance line (e.g., if the final seam is 5/8″, start basting at about 1/2″). This prevents the basting from being caught in the permanent seam.
- Sew running stitches: Create running stitches by weaving the needle in and out of the fabric layers. Aim for a stitch length of approximately 1/4″ to 1/2″ (6-12mm). Crucially, maintain loose tension – the stitches should hold the layers together without pulling the fabric.
- Check alignment: Periodically ensure the fabric layers remain smooth and correctly aligned as you progress.
- End stitching: Secure the thread end with a couple of small stitches taken in the same place. Do not make a large knot; leave a thread tail of an inch or two to make removal easier. Remember, this is a temporary stitch.
4.3 Machine basting method
Machine basting is faster for longer, straighter seams.
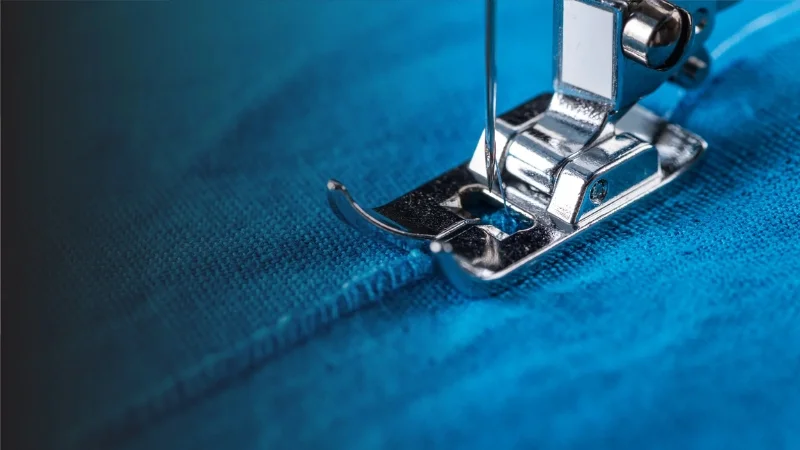
- Set machine: Select the straight stitch setting on your sewing machine. Set the stitch length to the longest possible option (often 4mm, 5mm, or higher – consult your machine’s manual if unsure).
- Prepare fabric: Align the fabric layers correctly under the presser foot.
- Sew seam: Begin sewing, guiding the fabric steadily. Crucially, do not use the backstitch function at the beginning or the end of the seam. Backstitching locks the stitches, making the basting extremely difficult to remove. Sew the basting line just inside the final seam allowance.
- Cut threads: Once finished, cut the threads, leaving generous thread tails (a few inches) at both the start and end of the seam for easy gripping during removal.
5. The final step: removing basting stitches cleanly
5.1 Why gentle removal matters
Taking care when removing basting stitches is vital for maintaining the quality of the finished garment. Careless or forceful removal can lead to several problems: pulling or snagging individual fabric threads, distorting the freshly sewn permanent seam line, leaving noticeable needle holes, or even tearing delicate fabrics.
This final step, done properly, preserves the professional appearance achieved through careful construction; neglecting this step requires extra work to fix potential fabric damage. Always prioritize gentle methods to remove these temporary stitches.

5.2 The right technique
Using the correct tool and method ensures clean removal without harming the fabric or permanent stitches.
- Tool: the primary tool should be a sharp seam ripper.
- Method: use the point of the seam ripper to gently lift one basting stitch away from the fabric surface. Carefully slide the cutting edge of the ripper under the lifted stitch and cut the thread. Repeat this process every few inches (or every 5-10 cm) along the length of the basted seam.
- Pulling: once stitches are cut at intervals, gently grasp a thread tail or a loose segment and pull the cut pieces of thread out from between the fabric layers. If significant resistance is felt, stop pulling. Check if the basting thread is accidentally caught in the permanent stitching and snip the basting thread closer to the snag point if necessary. Avoid yanking forcefully.
- Access: work from the side of the fabric that provides the easiest access to the basting stitches without putting stress on the permanent seam or the fabric itself. Often, starting from the side with the longer thread tails is easiest. Employ gentle removal throughout.
5.3 Timing is key
The generally recommended time to remove basting stitches is before the final pressing of the seam or garment area. Applying heat and steam from an iron can sometimes cause the temporary stitch threads to embed slightly into the fabric fibers or conform to the heat setting, making them more difficult to remove cleanly and potentially leaving more noticeable impressions or holes behind.
While there might be exceptions in complex tailoring where basting holds something critical during a specific pressing stage, removing before the final press is the standard best practice.
6. Related questions
6.1 Is basting necessary for every seam?
No, basting isn’t strictly required for every single seam. Its necessity depends largely on the fabric type, the complexity of the seam, and the sewist’s experience level. For instance, sewing a simple straight seam on a stable cotton fabric might not require basting if handled carefully.
However, basting provides significant benefits and is highly recommended for critical seams affecting fit (like shoulders or side seams), curved seams, when working with challenging fabrics (slippery, thick, stretchy), complex constructions (like setting sleeves or collars), or when precision pattern matching is essential. Using a temporary stitch here prevents errors.
6.2 What’s the best type of thread to use for basting?
The thread used for basting doesn’t need special characteristics like high strength. While specific cotton basting thread exists (which breaks easily for removal), standard Polyester sewing thread works perfectly well. The most helpful tip is to choose a thread color that contrasts sharply with your fabric.
This makes the temporary stitches highly visible and much easier to remove later. Avoid using overly fuzzy thread that might leave fibers behind, or very weak, old thread that might break constantly during basting, causing frustration. Many professionals use up leftover spools of odd-colored thread for this purpose.
6.3 Can I ever leave basting stitches in the final garment?
Generally, the answer is no; basting stitches should be removed. Leaving visible basting on the exterior of a garment looks unprofessional. The primary exception might be if the basting is completely hidden within an enclosed seam (like inside a facing or lining) and was sewn with thread that perfectly matches the fabric.
Even then, removal is considered best practice. Leaving basting in can add unnecessary bulk, however minor, and there’s always a small risk the temporary stitch could pull or cause distortion later, especially after washing. Removal ensures the cleanest finish and intended drape.
6.4 How does basting compare to using temporary fabric adhesives or clips?
Basting, temporary spray adhesives, and clips all serve to hold fabric layers together, but they excel in different situations. Adhesives can be quick for appliqué or small areas, but they risk gumming up sewing needles, can be difficult to remove completely, and may leave residue.
Clips (like Wonder Clips) are excellent for holding edges, especially on thick materials where pins are difficult, but they don’t offer control within the body of the seam allowance area, which is crucial for curves, easing, or large pieces.
Basting stitches provide the most precise control over fabric alignment across the entire length of a seam, making them superior for tasks requiring high accuracy like pattern matching, easing, or complex garment construction.
Read more:
In essence, the basting stitch is more than just a temporary stitch; it’s a fundamental technique in professional sewing. Its value lies in enabling accurate garment fitting, providing control over challenging fabrics, ensuring precision in complex assembly steps, and serving as a crucial preliminary quality control measure.
Incorporating basting is an investment in the construction process, proactively preventing costly mistakes and saving valuable time that might otherwise be spent fixing errors locked in by permanent stitches.
Adopting or refining the use of basting as a standard practice can significantly elevate the professional garment construction quality for small apparel businesses. Embracing this technique consistently leads to more polished, better-fitting garments and ultimately, higher quality results that reflect well on your brand.
For further expert advice on refining production techniques or for sourcing high-quality branding elements like custom labels, hang tags, or poly mailers designed to complement your apparel, consider connecting with My Pack Love.


