Beginner Sewing Tools: The Ultimate Guide & Essential Kit
Embarking on your sewing journey can feel daunting with countless tools available. Don’t worry! This guide cuts through the confusion, revealing the absolutely essential tools every beginner needs. We’ll explore their uses, helping you build a foundational kit without unnecessary expense. Understanding and utilizing these core tools correctly is key. Learn to avoid common beginner pitfalls, saving time, fabric, and frustration. This article eliminates the guesswork, empowering new sewists to approach projects confidently. Proper tool use makes the finished project professional. Let’s build skills!
1. Introduction to Essential Sewing Tools for Beginners
Starting your sewing adventure requires more than just fabric and thread. Having the right beginner sewing tools is absolutely crucial for success. The proper sewing supplies directly impact the quality of your projects, making the process smoother and more enjoyable. Imagine trying to cut fabric with dull scissors – frustrating, right? Essential sewing tools eliminate the struggle.
This guide will walk you through both essential and optional tools, helping you build a complete sewing kit tailored to your needs. We’ll cover everything you need for getting started with sewing, from cutting and measuring to marking and pressing. It is very important to have the right tools for your project.
When choosing your tools, consider factors like quality, your budget, and the types of projects you plan to tackle. Investing in durable tools often saves money in the long run, while specific projects may require specialized additions. Think of quality, to extend the life of the tools.
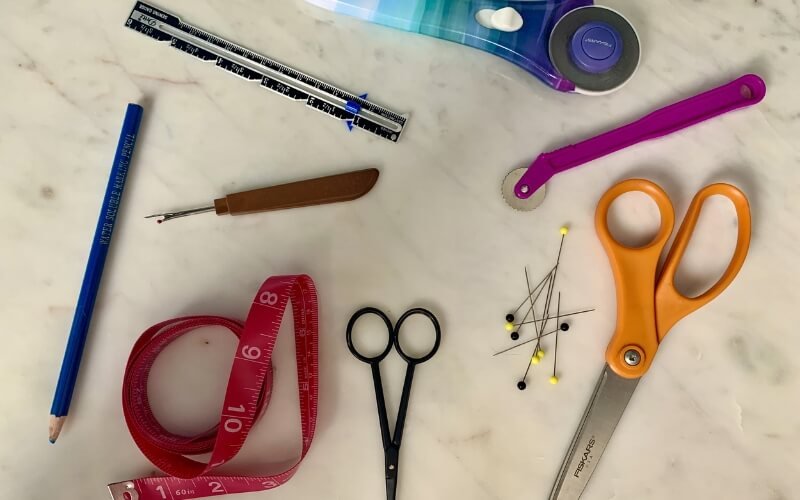
2. Cutting Tools: The Foundation of Sewing
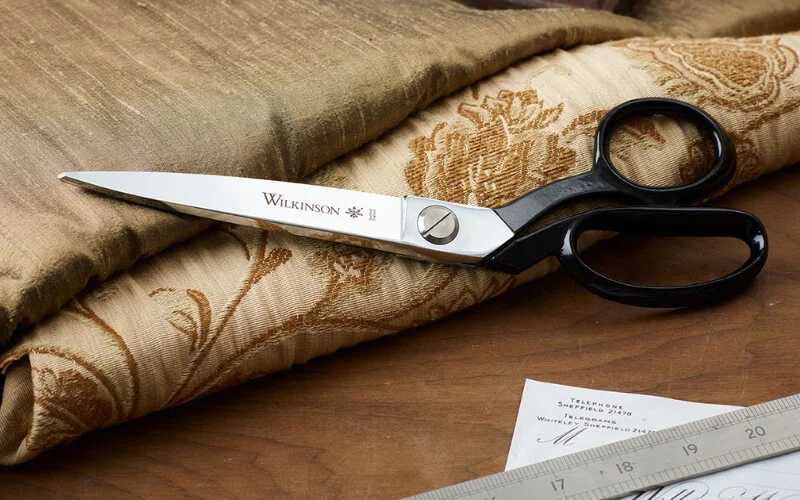
2.1 Fabric Shears: Your Most Important Investment
Fabric shears, also known as dressmaking shears, are arguably the most crucial investment in your sewing arsenal. Unlike regular scissors, fabric scissors are specifically designed for cutting fabric. Their bent-handled shears design allows the lower blade to slide smoothly along the cutting surface, ensuring clean, accurate cuts. They create a smooth cut for sewing.
Choose stainless steel fabric shears that are 8″ or longer for maximum versatility. This length allows for efficient cutting of larger fabric pieces. It’s essential to select shears designed for your dominant hand (right-handed or left-handed) for optimal control and comfort. Ensure comfortable and precise cutting of the fabric. Proper shears will make the job easy.
2.2 Thread Snips: For Precision and Detail Work
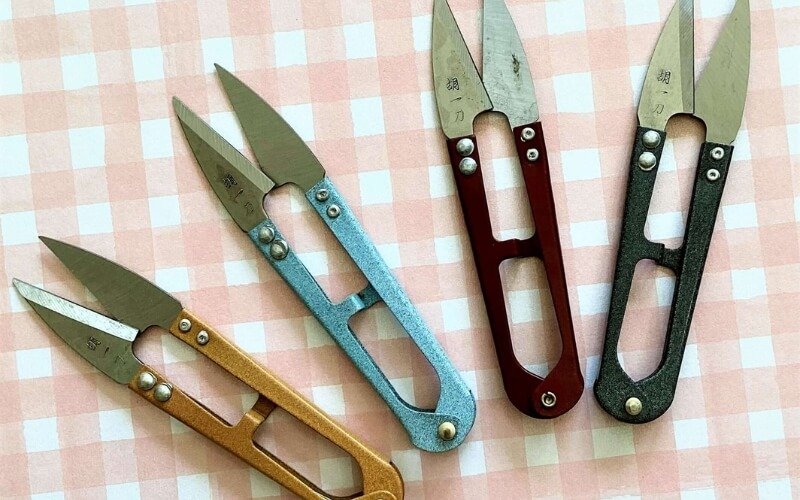
Thread snips are small, sharp scissors designed for precision cutting in sewing. Their primary purpose is snipping threads close to the fabric and trimming seam allowances. Their compact size, typically 3-5 inches, and pointed blades make them easy to control. They are perfect for detail.
These sewing scissors are indispensable for achieving a clean, professional finish. It’s crucial to dedicate your thread snips solely to sewing tasks. Using them on paper or other materials will dull the blades, hindering their ability to make precise cuts. Keep them clean and close.
2.3 Seam Ripper: Your Undo Button
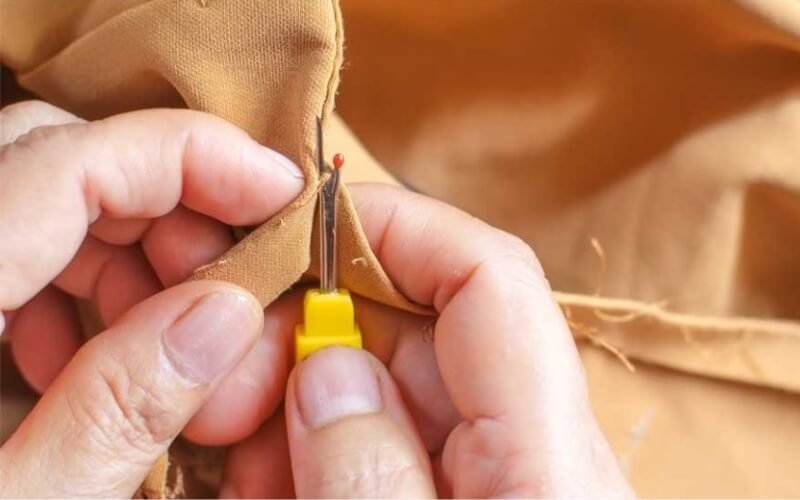
A seam ripper is an essential tool for every sewist, acting as your “undo button” for sewing projects. Its primary function is removing stitches cleanly and efficiently, whether they’re mistakes or intentional alterations. A well made seam ripper is an essential tool for every level of sewist. It will be put to use.
This tool features a distinctive U-shape with a sharp, pointed end for slipping under individual stitches. A small red ball on one prong protects the fabric from accidental cuts. The curved blade severs the thread. Use the pointed end to carefully slide beneath the unwanted stitch, then gently push forward to cut.
Always use a seam ripper with caution to avoid damaging the surrounding fabric. Practice on a scrap piece of fabric first to get a feel for the tool. Remember, even experienced sewists rely on their seam rippers! It is a part of sewing.
2.4 Craft Scissors: Protecting Your Fabric Shears
Protecting your valuable fabric shears is paramount, and that’s where craft scissors come in. Designating a separate pair of scissors for cutting paper patterns, templates, and other non-fabric materials is essential. This will prevent you from accidentally using your fabric scissors. It will extend the life of your good scissors.
Any comfortable pair of paper scissors, 8″ or longer, will work perfectly for this purpose. The key is to have a dedicated pair of craft scissors readily available in your sewing space. This simple habit will prevent your precious fabric shears from becoming dull and damaged.
3. Rotary Cutting Tools: Speed and Accuracy (Optional)
3.1 Self-Healing Cutting Mat: Protecting Your Workspace
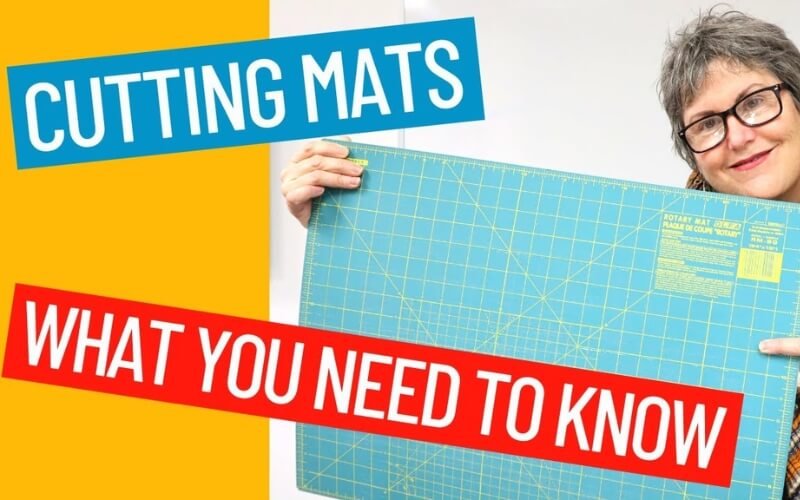
A cutting mat is the foundation of the rotary cutting system. Its primary purpose is to protect your work surface from the sharp blade of a rotary cutter. Self-healing mats are made from a special material that allows cuts to “close up,” leaving the surface smooth and preventing blade damage.
These mats typically feature grid lines, acting as a built-in measuring guide for fabric cutting and ensuring accurate dimensions. A 36″ x 24″ self-healing mat is a versatile size, accommodating larger projects and providing ample space for maneuvering fabric. The grid is very useful.
3.2 Clear Acrylic Ruler: Essential for Straight Cuts
A clear ruler, specifically a clear acrylic ruler, is an indispensable companion to the rotary cutter and cutting mat. It acts as a guide, ensuring perfectly straight cuts when used with a rotary cutter. It is also useful in measuring.
A 6″ x 24″ acrylic ruler is a highly recommended size, providing sufficient length for most cutting tasks. The transparent material allows you to see the fabric beneath, enabling precise alignment and measurement. Store your ruler flat or hanging to prevent warping or damage, ensuring its long-term accuracy. Remember to only use this ruler with rotary cutting.
3.3 Rotary Cutter: Efficient Cutting of Multiple Layers
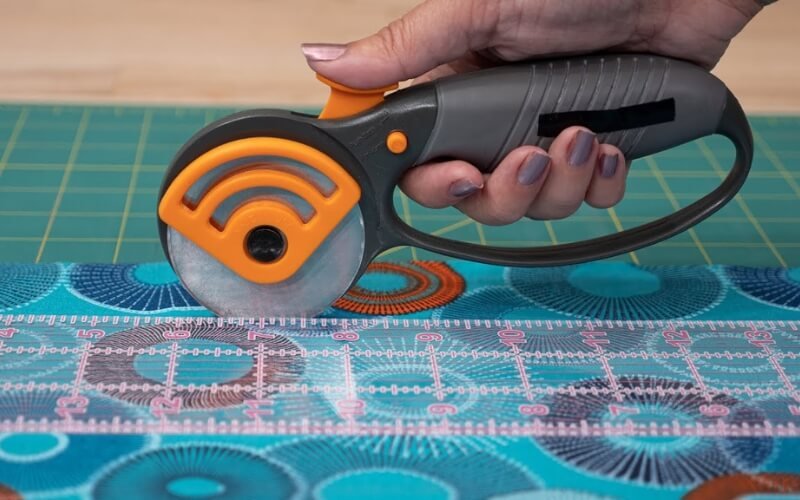
The rotary cutter is a handheld tool with a circular blade that resembles a pizza cutter. It’s designed for efficiently cutting through multiple layers of fabric with speed and precision when used in conjunction with a cutting mat and clear ruler. Rotary cutters cut accurate.
A 45mm rotary cutter is a versatile size suitable for most sewing projects. When choosing a rotary cutter, prioritize a comfortable handle that fits your hand well. Crucially, always ensure the safety cover is engaged when the cutter is not in use to prevent accidents.
4. Measuring Tools: Accuracy is Key
4.1 Flexible Tape Measure: For Bodies and Curves
A flexible tape measure is an absolutely essential tool for taking body measurements, which are crucial for garment construction. It’s also indispensable for measuring curved seams and other non-linear shapes. The flexibility helps in getting accurate figures.
A tape measure that’s 60 inches long is standard and provides ample length for most measuring needs. Look for one with markings in both inches and centimeters for versatility. Choose a measuring tape with metal ends to prevent fraying and ensure durability. The material should be sturdy and resistant to stretching.
4.2 Seam Gauge: Marking Consistent Seam Allowances
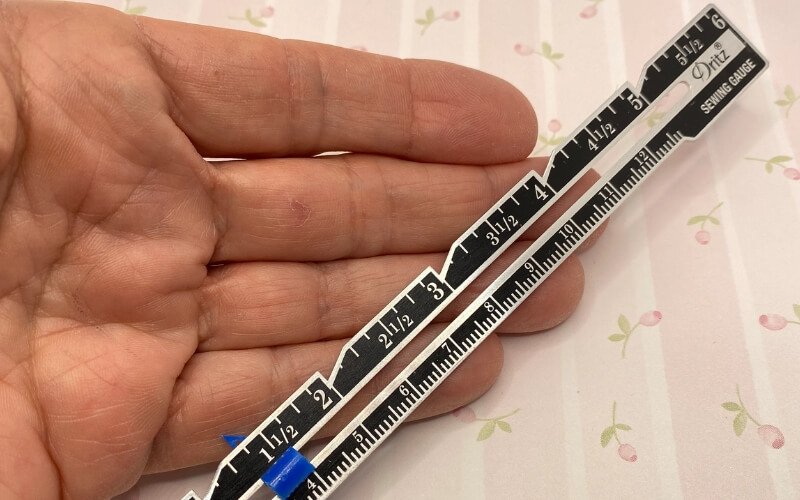
A seam gauge is a small but mighty tool designed for marking consistent seam allowances, hems, and buttonhole placements. This ensures uniformity and accuracy throughout your sewing project, leading to a polished final product. This tool helps achieve a neater project.
This measuring tool features a sliding guide that can be set to a specific measurement. Once set, you can easily mark the desired distance from the fabric edge, ensuring consistent spacing for seams, hems, or other details. The seam gauge helps mark straight lines.
4.3 Yardstick or Measuring Yard: For Fabric Lengths
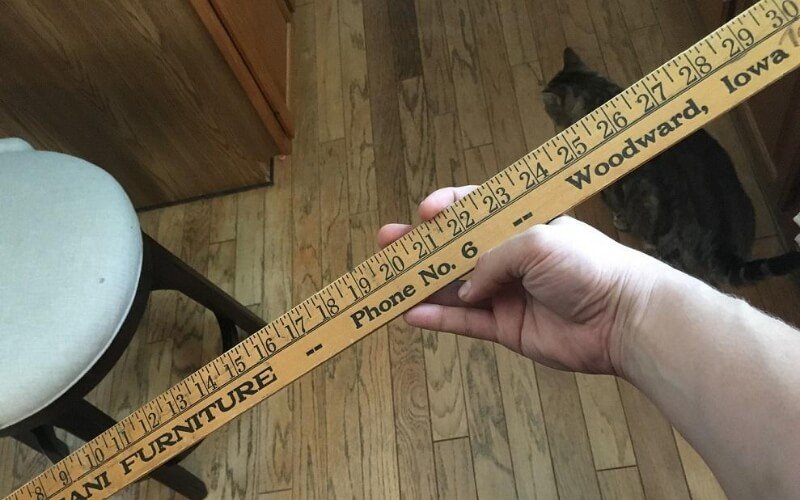
A yardstick, or measuring yard, is primarily used for measuring lengths of fabric, particularly when purchasing fabric or cutting larger pieces. It provides a straight, rigid edge for accurate measurement. A yardstick is also helpful in creating a straight edge.
A standard 36 inches yardstick, made of either wood or metal, is a common and useful tool. While a cutting mat with grid lines can also be used for measuring fabric lengths, a yardstick provides a dedicated, portable solution. Having a yardstick is always useful.
4.4 Marking Tools: Transferring Your Design
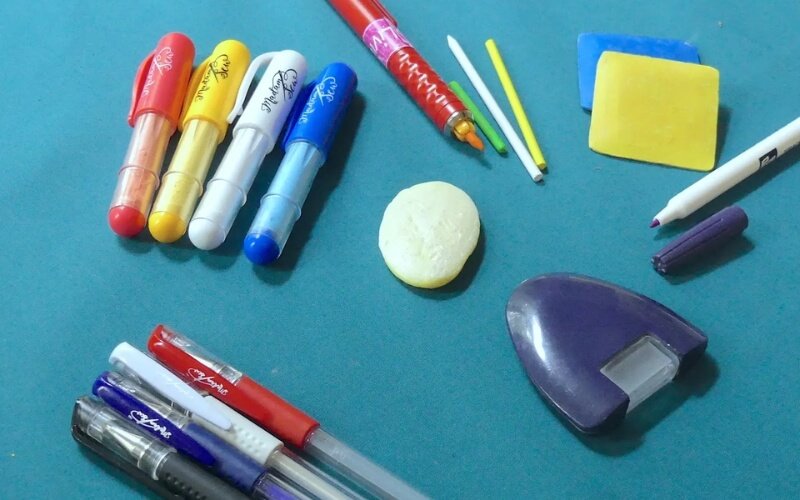
Fabric marking pencils are a popular and versatile choice for transferring pattern markings to fabric. They offer a precise and easy-to-control method for creating temporary lines. They come in a variety of colors.
Water-soluble pencils are highly recommended because the marks can be easily removed with a damp cloth or by washing the fabric. It’s best to have both white pencils (for dark fabrics) and blue pencils (for light fabrics) to ensure visibility. The markings must be clear.
Before using any marking tool on your project, always test it on a scrap piece of fabric first. This ensures that the marks can be removed completely without damaging the fabric. Other options include tailor’s chalk or a tracing wheel and paper. There are several options.
5. Securing Tools: Holding it All Together
5.1 Glass Head Pins: Heat-Resistant and Reliable
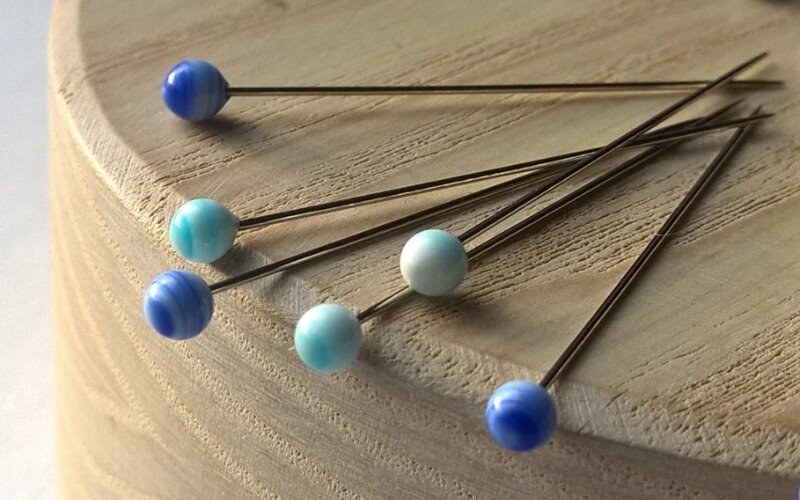
Glass head pins are highly recommended for beginners due to their heat-resistant properties. Unlike plastic-head pins, glass head pins won’t melt when you iron over them, preventing damage to both your fabric and your iron. This safety feature is crucial.
These sewing pins have sharp points that glide easily through most fabrics without snagging. Store your straight pins in a pincushion or a secure container to keep them organized and prevent accidental pricks. Proper storage is essential for preventing injury.
5. 2 Sewing Clips: An Alternative for Delicate Fabrics
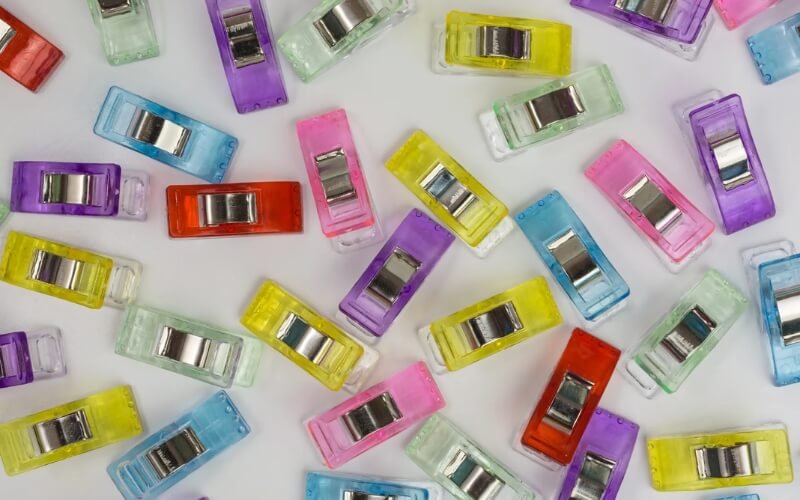
Sewing clips, sometimes called wonder clips or fabric clips, offer a versatile alternative to pins, particularly for certain types of fabrics. They’re ideal for holding together heavy fabrics, knits, and delicate fabrics that might be damaged by pinholes. They are another option.
Quilting clips are also handy for clipping fabric to your work surface, keeping it taut and preventing shifting while you work. For convenient storage and organization of your sewing clips, buttons, and even fabric scraps, My Pack Love’s zipper bags are a perfect solution. These durable, reusable bags keep everything tidy and easily accessible.
6. Hand Sewing Tools: For When You Need Finesse
6.1 Hand Sewing Needles: Choosing the Right Size and Type
Hand sewing needles are categorized by type and size. The numbering system for needle sizes can be confusing at first: the larger the number, the finer the needle. This is important to understand.
For beginners, an assorted pack of sewing needles or a pack of “Sharp” needles in size 7 is a great starting point. Size 7 sharps are versatile and well-suited for sewing medium-weight woven fabrics, which are commonly used in beginner projects. Having the correct needles makes sewing more efficient.
6.2 Needle Threader: A Time-Saver for Small Eyes
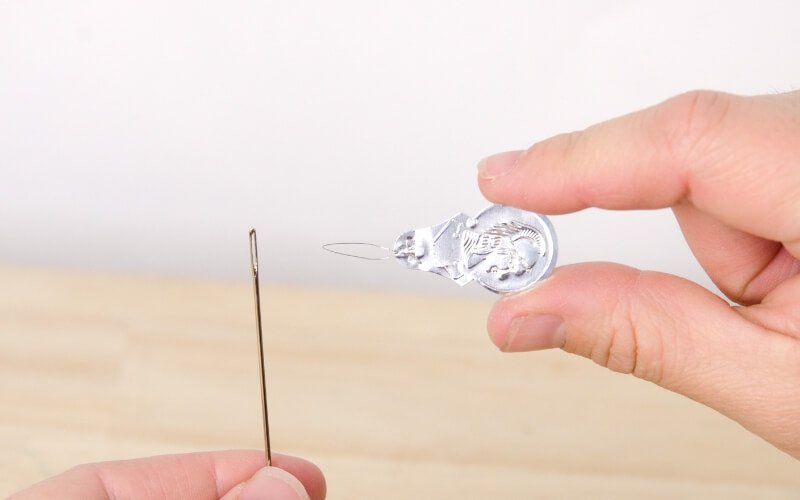
A needle threader is a small, inexpensive tool that can save you significant time and frustration, especially when dealing with the tiny eyes of hand sewing needles. It is a simple tool.
This handy sewing tool features a thin, flexible wire loop. You insert the loop through the needle’s eye, pass the thread through the loop, and then pull the loop back through the eye, bringing the thread with it. Threading needles is now much faster.
6.3 Thimble: Protecting Your Fingers
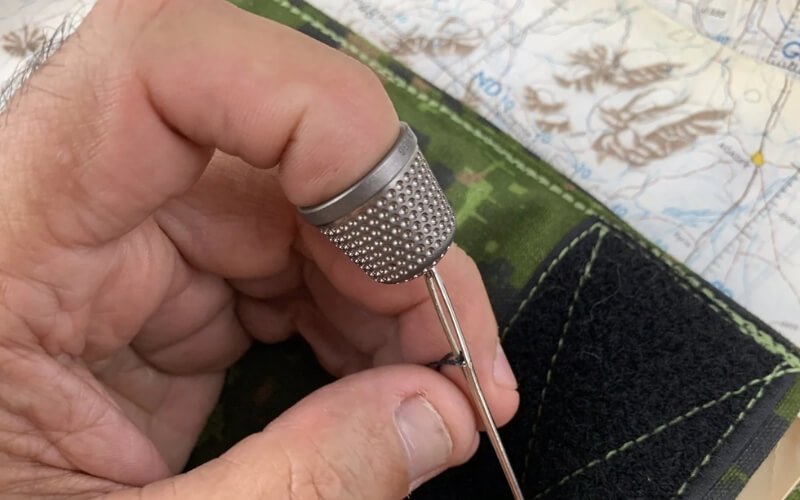
A thimble is designed to protect your finger from the blunt end of a needle while hand sewing, especially when pushing the needle through thicker fabrics or multiple layers. Consistent use prevents soreness and injury.
Thimbles come in various materials, including metal, leather, and plastic. It’s worth trying different types to find one that fits your finger comfortably and provides adequate finger protection. A well-fitting thimble will make hand sewing much more comfortable, especially for longer periods. Comfort is key.
7. Sewing Thread: The Glue That Holds Your Project Together
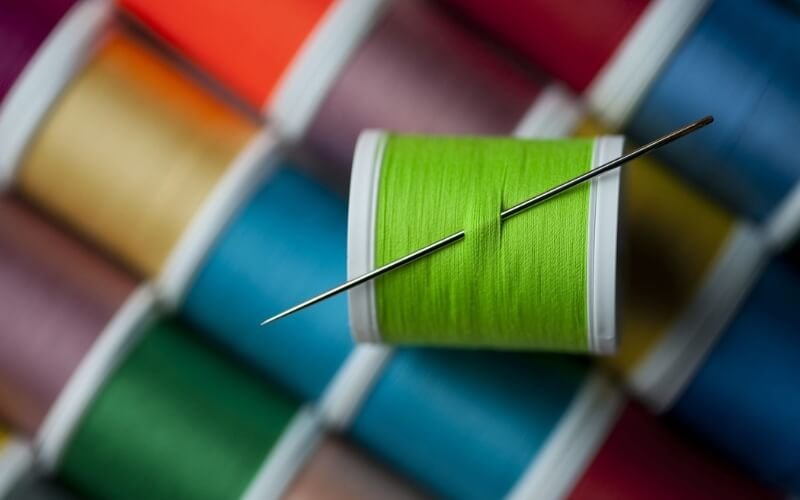
For beginners, a high-quality all-purpose thread, such as Mettler’s Metrosene, is an excellent choice. This type of sewing thread, typically made from polyester thread, is designed for both hand sewing and machine sewing, offering versatility for various projects.
All-purpose thread is known for its strength and smooth finish, which prevents fraying and ensures that it glides easily through the fabric and your sewing machine. This minimizes the risk of thread breakage and skipped stitches. High quality thread produces a professional finish.
When selecting thread, try to match the thread color to your fabric as closely as possible for a seamless look. Alternatively, neutral colors like gray, white, or tan can blend well with a variety of fabric colors. The selection should be based on the project.
8. Pressing Tools: Achieving Crisp and Professional Results
8.1 Ironing Board or Pressing Surface: Essential for Flat Seams
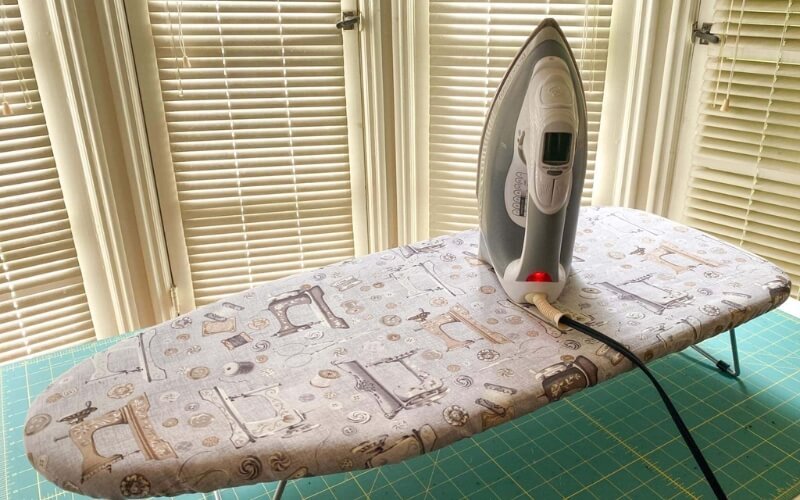
A sturdy pressing surface is a must-have for any sewist. This provides a stable and heat-resistant area for pressing fabric and seams. It can make a significant difference.
Options range from compact tabletop ironing boards to full-size boards with retractable legs. Whichever you choose, ensure it has a removable, washable cover for easy cleaning and maintenance. The cover will need cleaning from time to time. This keeps your fabrics clean.
8.2 Steam Iron: Your Wrinkle-Removing Weapon
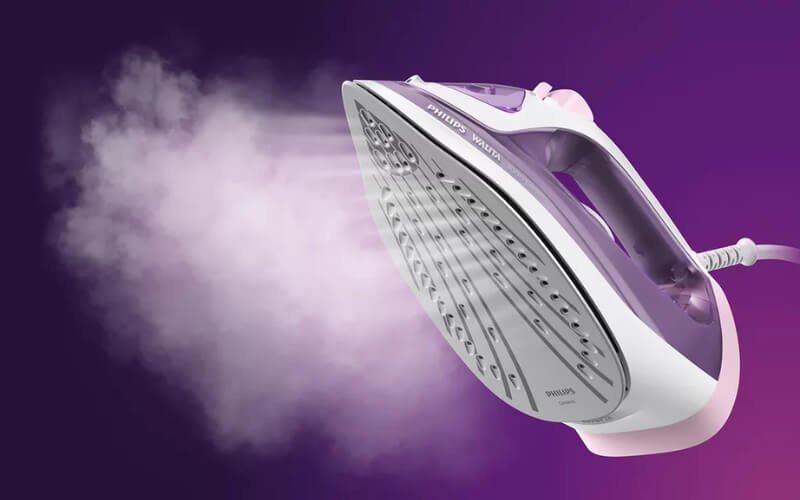
A quality steam iron is an indispensable tool for pressing seams, removing wrinkles, and shaping fabric. Look for an iron with variable temperature settings to accommodate different fabric types, from delicate silks to sturdy cottons. Using the correct setting is essential.
The steam function is particularly beneficial, as the moisture helps to relax fibers and create crisp, flat seams. Some irons feature an auto-off function, a valuable safety feature that automatically turns off the iron when left unattended. Store your iron in a safe, upright position to prevent accidental burns or damage. Always keep out of reach of children.
8.3 Spray Bottle: For Added Moisture Control
A simple spray bottle filled with water or spray starch is a helpful addition to your pressing toolkit. A light mist of water can help to relax stubborn wrinkles, while spray starch can provide extra crispness to seams and edges. It gives more options.
Using a spray bottle allows for greater control over the amount of moisture applied, preventing oversaturation of the fabric. This is particularly important for delicate fabrics that may be prone to water spots. Water is great for natural fibers.
9. Other Helpful Sewing Tools for Beginners
9.1 Sewing Machine: The Workhorse of Your Sewing Room
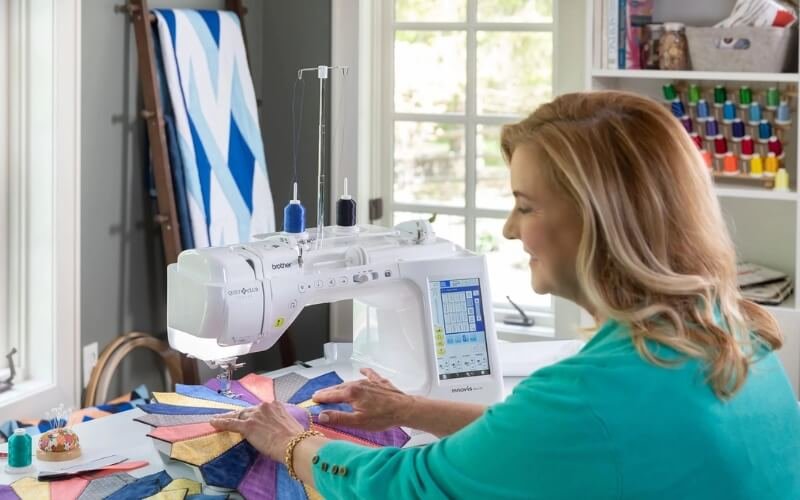
For most sewing projects, a sewing machine is an indispensable tool. While hand sewing has its place, a sewing machine significantly speeds up the process and provides consistent, strong stitches. Choosing the correct machine can be confusing.
If you’re just starting, research and choose a beginner sewing machine model. These machines typically have simpler controls and features, making them easier to learn and use. Look for one with basic stitches.
9.2 Extra Bobbins: Always Be Prepared
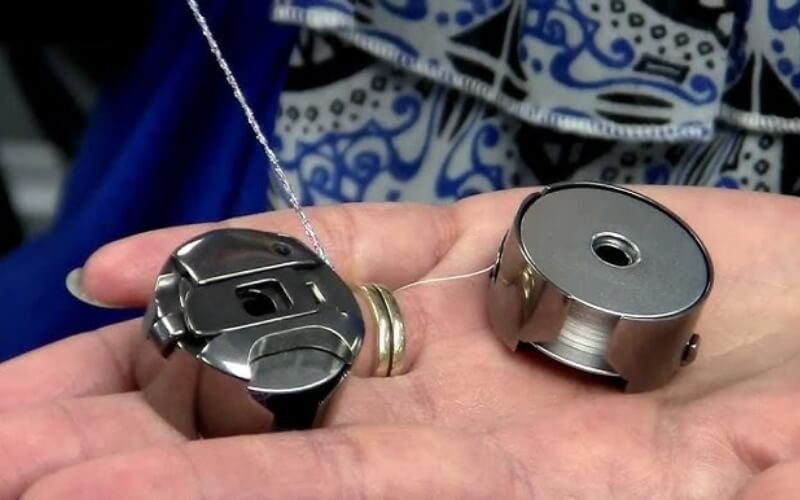
Bobbins are small spools that hold the lower thread in your sewing machine. Having extra bobbins on hand is essential, allowing you to winding bobbins with different thread colors or types without constantly stopping to rewind a single bobbin. Multiple colors may be required.
It’s crucial to ensure that the sewing machine bobbins you purchase are the correct type for your specific sewing machine model. Using the wrong bobbins can damage your machine or cause stitching problems. The correct bobbin will operate smoother.
9.3 Pinking Shears: Preventing Fraying on Seam Edges
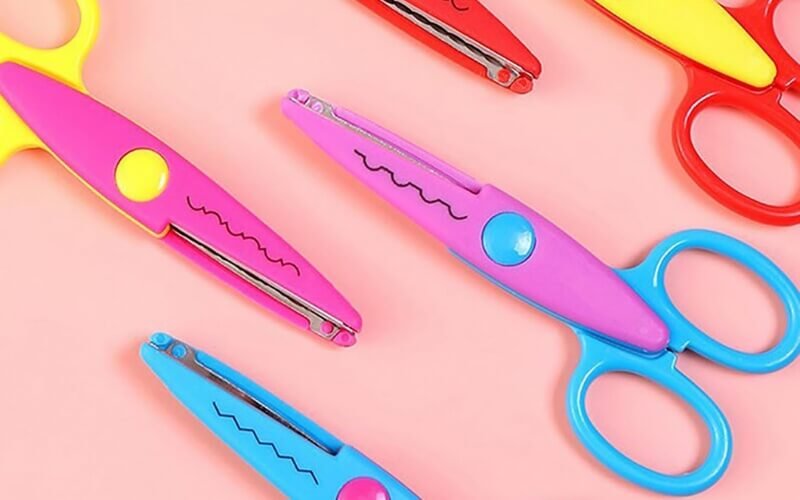
Pinking shears are scissors with serrated blades that create a zigzag edge when cutting fabric. This zigzag pattern helps to prevent fraying on the raw edges of seams, providing a simple seam finish. This is especially useful.
While not strictly essential (as there are other methods for finishing seams), pinking shears offer a quick and easy way to minimize fraying, particularly on woven fabrics. Zigzag scissors can add a professional finish.
10. FAQs about Beginner Sewing Tools
10.1 What is the bare minimum of sewing tools I need to start?
The absolute essentials for a beginner’s sewing kit include fabric shears (dedicated solely to fabric), a set of hand sewing needles, all-purpose thread, a flexible measuring tape, a seam ripper (for those inevitable mistakes!), and straight pins (glass head recommended). These tools will allow you to perform the basic.
10.2 Where is the best place to buy sewing tools?
Sewing tools are widely available at various retailers. Local fabric stores (like Joann) and craft stores (like Michaels) offer a good selection and the opportunity to see the tools in person. Online retailers like Amazon provide vast choices and competitive pricing. My Pack Love is an excellent resource for custom packaging and labeling solutions, perfect for adding a professional touch to your finished creations.
10.3 How much should I expect to spend on beginner sewing tools?
The cost of beginner sewing tools can vary depending on quality and whether you include a sewing machine. A basic kit without a machine can range from $50 to $150. Investing in higher-quality tools upfront can often save money in the long run, as they’ll last longer.
10.4 How do I care for and maintain my sewing tools?
Proper care ensures your tools remain in good working condition. Clean fabric shears regularly and apply a drop of oil to the pivot point occasionally. Store tools in a dry, safe place. Replace hand sewing needles when they become dull or bent. Sharp needles are important.
10.5 What are some easy sewing projects for beginners to practice using these tools?
Simple projects like pillowcases, tote bags, napkins, or basic garments (like a simple skirt or pajama pants) are excellent for practicing your sewing skills. Numerous free, beginner-friendly patterns are available online; search for “easy sewing projects for beginners” to find inspiration and tutorials. Start simple and work on skills.
11. My Pack Love – Providing service for Beginner Sewing Tools
As you embark on your sewing journey and begin creating beautiful, handmade items, consider how you’ll present and package your finished products. My Pack Love offers a comprehensive range of custom packaging and labeling solutions, perfect for adding a professional touch and enhancing your brand, whether you’re selling your creations or gifting them to loved ones. We will help projects stand out.
My Pack Love offers a great solution, the Value Booster Kit. This kit provides sewists with a curated selection of customizable labels, designed to elevate the presentation of finished projects. The kit may include woven labels, heat transfer labels, and rubber labels, allowing you to choose the perfect option for each item. Add a professional finish.
Woven labels offer exceptional durability and a classic, high-end feel. They can be fully customized with your brand name, logo, and care instructions, choosing from various materials, sizes, and designs. These labels are perfect for adding a professional touch to handmade garments and accessories. Sew them onto your creations.
Heat transfer labels provide a convenient and versatile labeling option. They’re easy to apply with a household iron and are suitable for a wide range of fabrics. This makes them a great choice for adding branding or care instructions to items where sewing a label might be difficult. Application is simple.
Rubber labels offer a unique, textured look and exceptional durability. They’re particularly well-suited for items that require frequent washing, such as children’s clothing or bags. Their robust nature ensures that your branding remains intact, even after repeated use and laundering. They create a unique look.
Beyond labels, My Pack Love also provides practical zipper bags in various sizes. These bags are incredibly useful for storing sewing supplies, organizing ongoing projects, and protecting delicate fabrics from dust and damage. Keep supplies neat and organized.
For shipping your finished sewing projects, My Pack Love offers poly mailers, a lightweight and durable packaging option. These mailers protect your creations during transit, ensuring they arrive in perfect condition. They are excellent for shipping.
To explore the full range of custom packaging and labeling solutions offered by My Pack Love, and to discover how they can help you elevate your sewing creations, visit https://mypacklove.com/. Contact us today to discuss your specific needs and create a personalized branding solution!
Read more:
Embarking on a sewing journey is an exciting endeavor, and having the right tools at your disposal is absolutely crucial for success and enjoyment. The proper tools not only make the process easier but also contribute significantly to the quality of your finished projects. It will eliminate headaches.
Beginners are encouraged to start with the essential tools outlined in this guide and gradually expand their toolkit as their skills and project needs evolve. There’s no need to acquire everything at once. Build your kit slowly.
Remember, sewing is a wonderfully rewarding hobby that allows you to express your creativity and create unique, personalized items. Having the proper tools can make the learning process smoother, more efficient, and ultimately, more enjoyable. Embrace the learning and have fun.
We encourage you to bookmark this guide as a handy reference for your sewing journey. As you gain experience, you’ll develop a deeper understanding of your tool preferences and needs, allowing you to build the perfect sewing kit for your unique style and projects. Keep this guide for future needs.


