


Bleaching Clothes Safely: Protect Your Apparel Stock


Maintaining brilliant white garments is essential for apparel businesses aiming for a crisp, professional presentation. Improper bleaching, however, can lead to irreversible damage, impacting inventory and potentially harming your brand’s reputation.
This guide provides practical, step-by-step instructions on how to assess fabrics, choose the correct bleach, implement safe handling procedures, and troubleshoot common issues, ensuring your white stock remains pristine while protecting fabric integrity. Understanding these processes allows businesses to manage their whitening needs effectively and safely.
1. Before you bleach: assessing fabric safety – the crucial first step for businesses
Before introducing any bleach to your garments, a thorough assessment is non-negotiable. Skipping this step risks damaging valuable stock. Careful evaluation involves checking care labels and understanding the fabric’s composition.
1.1 Decoding the garment care label: your first checkpoint
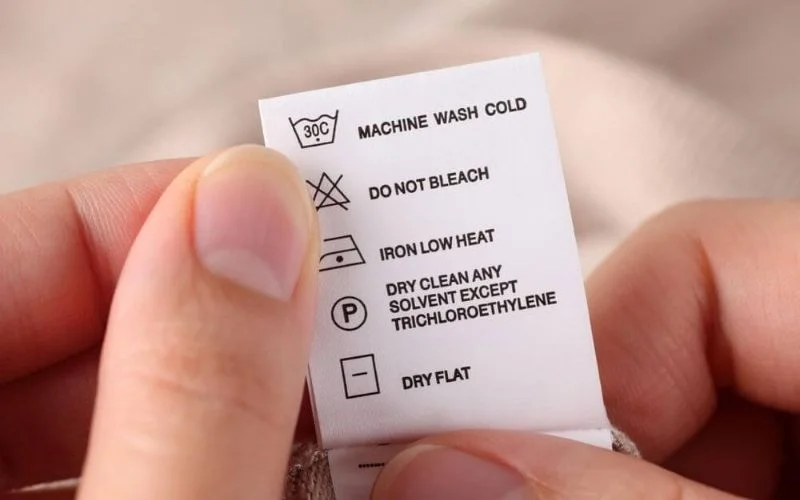
The garment care symbol provides the quickest initial guidance. Always check the fabric care labels first, especially when processing multiple items. Familiarize yourself with these three standard symbols related to bleach:
- Open triangle: Indicates the garment is safe to wash with any type of bleach, including Chlorine Bleach.
- Triangle with diagonal lines inside: Signals that only non-chlorine bleach (oxygen bleach) should be used. Chlorine Bleach will likely cause damage or discoloration.
- Solid triangle with an ‘X’ over it: Means Do Not Bleach. Applying any type of bleach poses a significant risk to the fabric or color.
1.2. Beyond the label: why understanding fiber content is key
While care labels are useful, they sometimes default to “Do Not Bleach” as a precaution, especially on blended fabrics. Understanding the fiber content provides a more accurate picture of bleach compatibility. Certain textile fiber types react poorly, leading to irreversible fabric damage:
Fibers incompatible with Chlorine Bleach:
- Wool
- Silk
- Spandex
- Leather
- Mohair
Reason: Chlorine Bleach chemically reacts with the proteins in animal fibers (wool, silk, mohair, leather) and certain synthetic fibers like Spandex, causing them to weaken, yellow, or even dissolve. Even small percentages, such as 3-5% Spandex blended with cotton, render the garment unsafe for Chlorine Bleach.
Fibers generally safe for Chlorine Bleach (if white and colorfast):
- Cotton
- Linen
- Polyester
- Rayon (Viscose)
- Nylon
Note: While the base fiber might be safe, dyes and finishes can still be affected. Always perform a colorfastness test. For businesses handling diverse apparel stock, knowing the fiber content is crucial for preventing widespread damage.
1.3. The colorfastness test: preventing unwanted surprises
Even if the fiber type seems compatible with Chlorine Bleach, dyes might not be. Perform a colorfastness test before proceeding, especially on colored whites or items with colored trims. This simple check helps in preventing damage:
- Prepare solution: Mix 2 teaspoons of Chlorine Bleach with ¼ cup of water.
- Apply: Find an inconspicuous area (inside seam, hem, or cuff). Apply one drop of the solution using a cotton swab.
- Wait: Let the solution sit for exactly 1 minute.
- Check: Rinse the area thoroughly with cold water and blot dry with a clean white cloth. Examine the spot for any signs of color change or fading.
- Multi-colored items: If testing bleach on a garment with multiple colors, test each color separately.
This test is a small investment of time that safeguards valuable inventory from unexpected discoloration.
2. Choosing your whitening tool: chlorine vs. oxygen bleach explained
Selecting the appropriate bleach type is fundamental to achieving desired results without compromising the fabric. The two primary options available have distinct properties and applications.
2.1. Chlorine bleach (sodium hypochlorite): the powerhouse whitener
Commonly known as household bleach, Chlorine Bleach utilizes sodium hypochlorite as its active ingredient. This chemical is a strong oxidizer, meaning its chemical composition allows it to break down the chemical bonds of chromophores (the parts of molecules responsible for color), thus achieving potent whitening and stain removal.
Pros:
- Strongest whitening power for fabrics, effective on stubborn dinginess and stains.
- Excellent sanitizing properties, killing bacteria, viruses, and mold.
Cons:
- High risk of fabric damage or yellowing on incompatible fibers (wool, silk, Spandex, etc.).
- Can damage or remove color from non-colorfast items.
- Has a strong odor and requires careful handling due to its corrosive nature.
Best use cases: Whitening durable white fabrics like Cotton and Linen; situations requiring thorough sanitization.
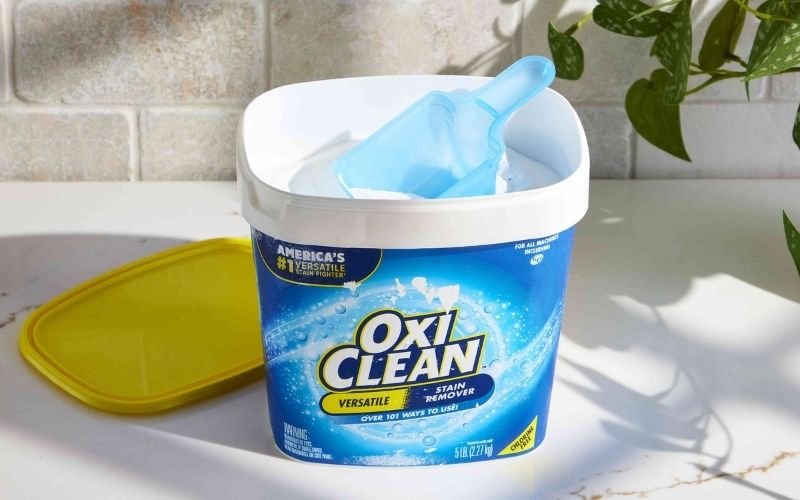
2.2. Oxygen bleach (hydrogen peroxide-based): the gentler brightener
Oxygen Bleach products typically contain sodium percarbonate or sodium perborate, which release hydrogen peroxide when mixed with water. This release of oxygen gently lifts stains and brightens fabrics.
Pros:
- Generally color-safe for many fabrics and dyes when used as directed (always follow label instructions indicating Non-Chlorine Bleach Only use).
- Gentler on fabrics, suitable for items containing Spandex or synthetic blends (if the care label permits).
- Effective for maintaining brightness with regular use.
- Less harsh odor compared to Chlorine Bleach.
Cons: Less potent whitening power than Chlorine Bleach for severely yellowed or heavily stained whites.
Best use cases: Maintaining the brightness of whites and light colors; treating items where Chlorine Bleach is forbidden (e.g., those containing Spandex, wool, silk, or specific dyes); general brightening for delicates or synthetics where permitted.
3. Safety first: handling bleach responsibly in your workspace
Both Chlorine Bleach and Oxygen Bleach require careful handling to prevent harm to individuals and damage to materials. Adhering to chemical safety protocols is essential in a professional setting.
3.1. Essential protective gear: non-negotiables
Always use appropriate personal protective equipment (PPE) when handling bleach:
- Protective gloves: Wear waterproof gloves made of nitrile or rubber. Fabric gloves offer no protection.
- Eye protection: Use safety glasses or goggles, especially when pouring liquid bleach or working with soaking solutions, to guard against splashes.
These safety precautions are standard practice for safe handling of cleaning chemicals.
3.2. The importance of good ventilation
Chlorine Bleach releases fumes that can irritate the eyes, nose, and throat. Ensure adequate ventilation when using bleach, particularly Chlorine Bleach and especially during soaking tasks which involve larger quantities or longer exposure times.
- Work in a large, open area.
- Open windows and doors.
- Use fans to circulate air away from breathing zones.
Proper ventilation is a key aspect of chemical safety and safe handling.
3.3. Dilution is critical: why undiluted bleach is harmful
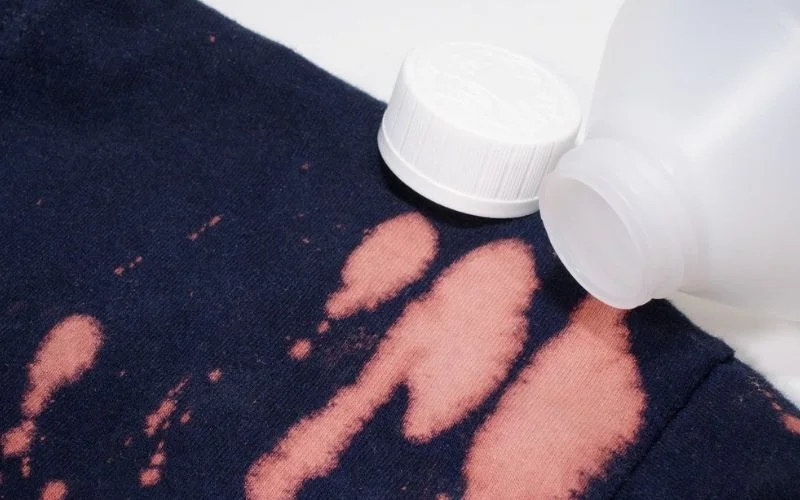
Never apply undiluted bleach (concentrated bleach) directly to fabrics. Concentrated bleach is highly corrosive and can cause immediate fabric damage, such as weakening fibers, creating holes, or causing severe discoloration upon contact.
Critical rule: Always dilute Chlorine Bleach with water before adding garments or according to washing machine dispenser instructions. Dilution is fundamental for both safety and effective use.
Ignoring dilution guidelines compromises chemical safety and garment integrity.
3.4. Chemical safety: avoid dangerous mixtures
Mixing bleach, particularly Chlorine Bleach, with other cleaning agents can create hazardous conditions. Heed this critical chemical safety warning:
NEVER mix Chlorine Bleach with:
- Ammonia (creates toxic chloramine gas)
- Acids like vinegar (creates toxic chlorine gas)
- Rubbing alcohol
- Other household cleaners or detergents (unknown reactions possible)
These bleach mixtures pose a serious toxic gas risk. Always use bleach separately from other chemicals during the cleaning process. Proper handling of bleach includes awareness of incompatibility.
3.5. Proper storage practices for safety and efficacy
Correct bleach storage ensures both safety and maintains product efficacy.
- Keep bleach in its original, labeled container.
- Ensure the cap is tightly sealed.
- Store upright in a cool, dark, dry place.
- Keep away from children, pets, and food preparation areas.
- Store separately from incompatible chemicals like acids and ammonia. Use a locked cabinet if necessary.
- Note that bleach degrades over time, especially when exposed to heat and light, losing its effectiveness.
4. The bleaching process: step-by-step whitening methods
With safety precautions and fabric assessments complete, follow these methodical steps for effective whitening.
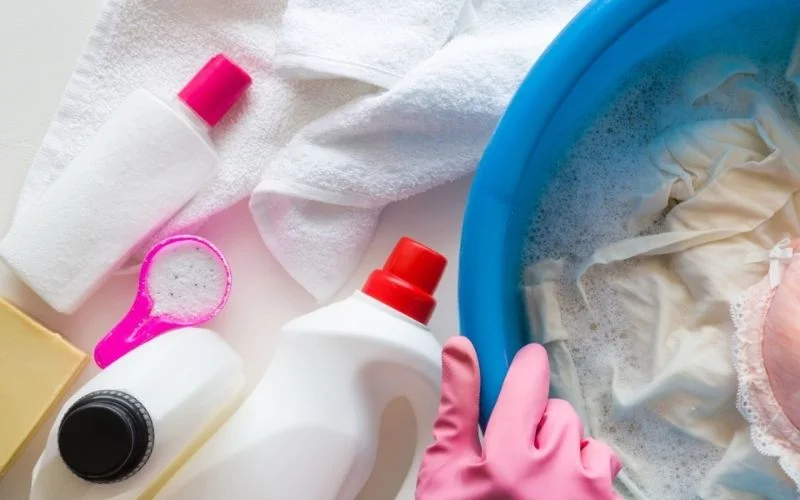
4.1. Preparation: sorting and pre-treating stains
Begin the hands-on laundry process by:
- Sorting laundry: Separate items based on fabric type, color (whites only for Chlorine Bleach), and care label instructions (bleach-safe vs. Non-Chlorine Bleach vs. Do Not Bleach).
- Pre-treating stains: For concentrated or tough stains (like ink, grease, or heavy food spills), applying a suitable stain removal product directly to the stain before the overall bleaching process can yield better results. This guide focuses primarily on the whitening/bleaching step itself.

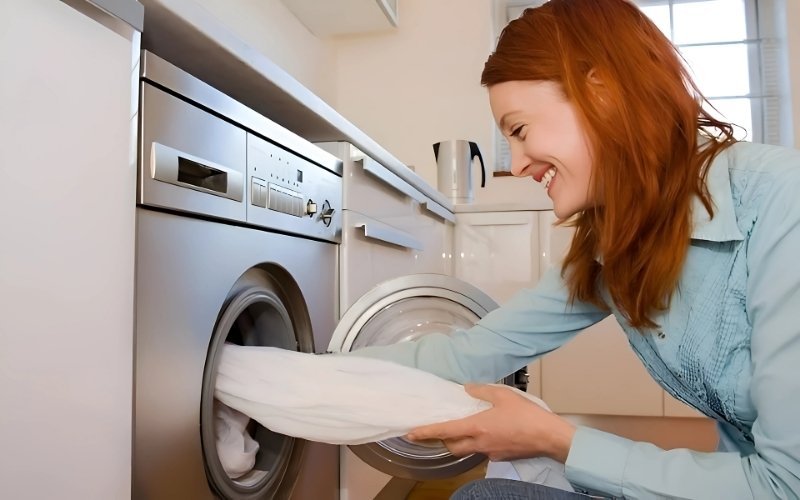
4.2. Method 1: machine washing with bleach (laundry process)
Using bleach in a washing machine is convenient for general whitening and sanitizing.
Using the dispenser: Most washing machine settings include a specific bleach dispenser. Add the recommended amount of bleach (Chlorine Bleach or Oxygen Bleach) here before starting the cycle. The machine will dispense and dilute automatically at the correct time. For HE washer machines, fill only to the max line, which is usually less than standard machines.
Manual addition (standard top-loaders without dispenser):
Start the wash cycle with detergent and allow the tub to fill partially with water.
- Dilute the measured bleach amount in 1 quart (approx. 1 liter) of water.
- Add the diluted bleach solution to the wash water about 5 minutes after the cycle has begun agitating. This allows the detergent to start working first.
Dosage: Refer to the table below for typical Chlorine Bleach amounts (always check product label). Oxygen Bleach dosage varies widely; follow package directions.
Water temperature: Use hot water wash settings if the garment care label permits, as this enhances bleach performance.
Rinse: Select an extra rinse cycle for rinsing thoroughly to ensure all bleach residue is removed.
Note: Always confirm amounts on your bleach product label.
| Machine Type | Goal | Chlorine Bleach Amount (Typical Concentrated Bleach) |
|---|---|---|
| Standard | Sanitizing | ½ cup |
| Standard | Whitening (Normal Soil) | ⅓ cup |
| Standard | Whitening (Heavy Soil) | ⅔ cup |
| High Efficiency (HE) | Sanitizing | ¼ cup (or Max Line) |
| High Efficiency (HE) | Whitening (Normal/Heavy Soil) | Fill Dispenser to Max Line |
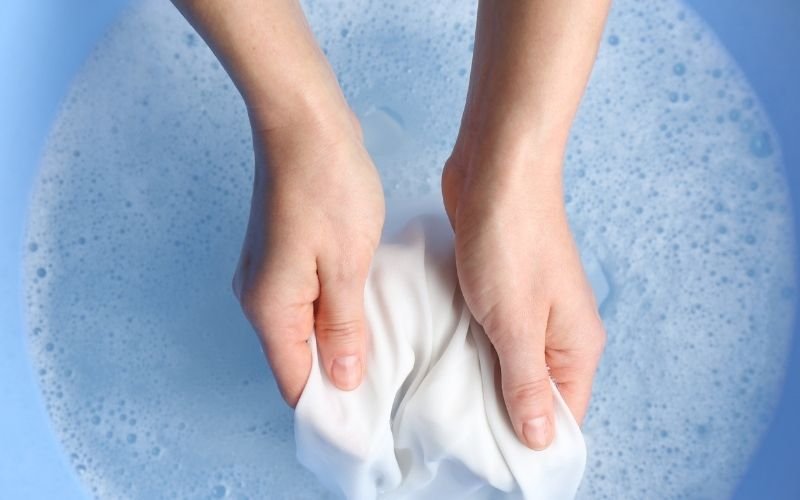
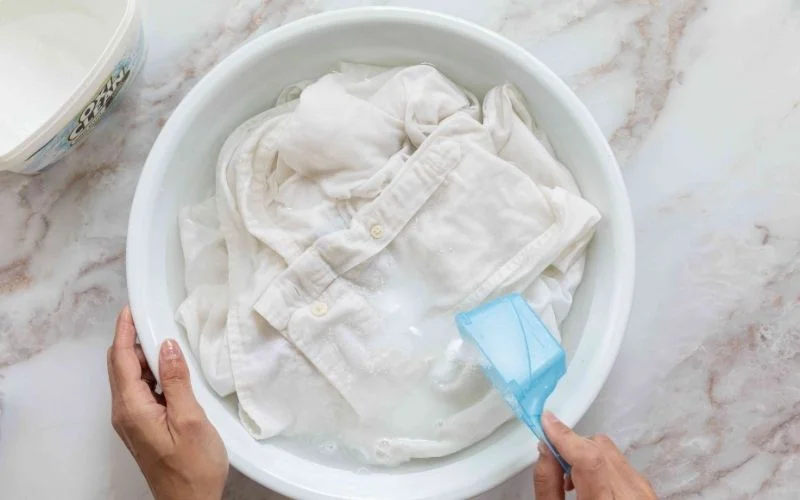
4.3. Method 2: soaking for deep whitening or problem items
Soaking is effective for tackling overall dinginess or treating multiple items uniformly.
Container: Use a plastic tub, basin, or sink (avoid metal containers with Chlorine Bleach).
Dilution ratio: For Chlorine Bleach, a common ratio is ¼ cup bleach per gallon (approx. 4 liters) of cool water. Crucially, always follow the dilution instructions on your specific product label. For Oxygen Bleach, follow package directions for soak concentration and water temperature (often warm or hot).
Submersion: Add garments, ensuring they are fully submerged in the solution. Avoid overcrowding.
Soaking time:
- Chlorine Bleach: Soak for a maximum of 5 minutes. Longer soaking dramatically increases the risk of fabric damage. Set a timer.
- Oxygen Bleach: Soaking times vary significantly (typically 1 to 8 hours). Follow the product label instructions precisely.
Post-soak: Drain the soaking solution. Rinse the garments thoroughly under cold running water (rinsing thoroughly). Immediately wash the items in a regular machine cycle with detergent (do not add more bleach).
4.4. Method 3: careful spot treating (use with caution)
Spot treating with bleach is generally high-risk and should only be attempted as a last resort on small stains located on otherwise white, durable, bleach-safe fabrics.
- Preparation: Work in a well-ventilated area with protective gear.
- Dilution: Prepare a diluted bleach solution (e.g., 1 part Chlorine Bleach to 3 or 4 parts water).
- Application: Using a cotton swab or the corner of a clean white sponge, carefully dab the diluted solution only onto the stained area, avoiding surrounding fabric.
- Risks: Be aware this method can easily create light spots or cause localized fabric damage.
- Immediate action: Rinse the treated area thoroughly with cold water immediately after application (within 30-60 seconds). Do not let the solution dry.
- Wash: Wash the entire garment immediately afterward according to its care label.
This method carries a significant risk of fabric damage and is often best avoided for valuable inventory.
5. Troubleshooting common bleaching problems
Even with careful procedures, issues can arise. Understanding common problems helps in diagnosing and preventing them.
5.1. Dealing with unexpected yellowing
Yellowing after bleaching is a frustrating outcome. Common causes include:
- Fiber incompatibility: Using Chlorine Bleach on fibers like wool, silk, Spandex, or sometimes even Polyester or Nylon (especially when combined with high heat) can cause a chemical reaction leading to yellowing.
- Hard water issues: Iron or manganese in water (reaction with metals) can react with Chlorine Bleach, depositing rust-like stains that appear yellow or brown.
- Overuse or high concentration: Using too much bleach or an improperly diluted solution (improper bleaching) can scorch certain fabrics, causing yellowing.
Potential fixes: For hard water issues, using a laundry additive designed to remove rust/minerals might help. An Oxygen Bleach soak can sometimes lessen yellowing caused by Chlorine Bleach misuse, but often the damage is permanent. Prevention through correct assessment and dosage is far more effective.
5.2. Identifying and preventing fabric damage
Signs of fabric damage include holes, rips, threadbare patches, or a generally weak, brittle feel after washing.
Causes:
- Using the wrong bleach type for the fiber (e.g., Chlorine Bleach on Spandex).
- Concentration issues (solution too strong or undiluted bleach contact).
- Excessive soaking time, particularly with Chlorine Bleach.
Prevention: Damage is usually irreversible. Strict adherence to fabric assessment, correct dilution, appropriate bleach type selection, and controlled soaking times is paramount.
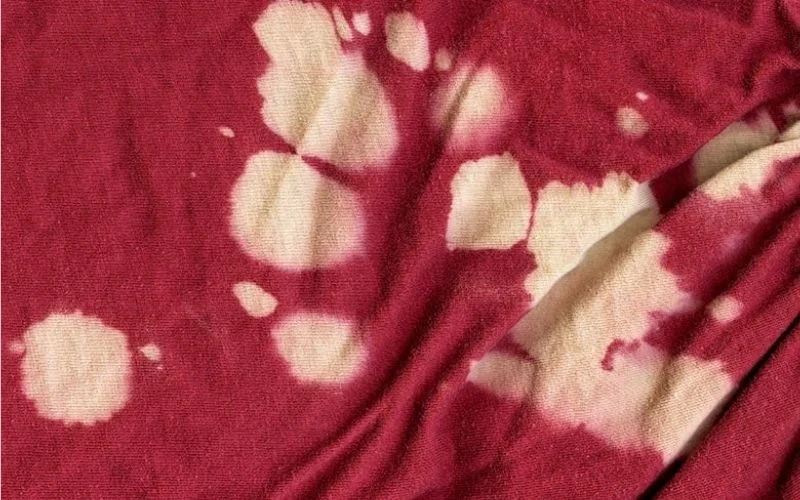
5.3. Addressing uneven whitening or patchiness
Uneven whitening or patchiness typically results from procedural errors:
- Washer loading: Overloading the washing machine prevents proper circulation, leading to uneven bleach distribution.
- Incorrect addition: Pouring undiluted bleach directly onto dry fabrics causes concentrated spots of intense whitening or damage.
- Uneven soaking: If parts of the garment are not fully submerged during soaking, those areas won’t be whitened consistently.
Prevention: Ensure proper machine loading, always use correct dilution and addition methods (dispenser or pre-diluted solution added to water), and ensure full submersion during soaks.
6. Maintaining brightness after bleaching: long-term care
Achieving bright whites is only half the battle; maintaining them requires proper follow-up care.
- Rinsing thoroughly: Always ensure bleach is completely removed. Use an extra rinse cycle in the washing machine after bleaching. Residue can weaken fabric integrity over time and potentially cause yellowing when exposed to heat.
- Drying clothes: Avoid high heat drying, which can sometimes contribute to the yellowing of white fabrics, especially if any residue remains. Air drying or using a low heat setting is often preferable for maintaining brightness and ensuring garment longevity.
- Maintenance: For ongoing maintaining brightness, consider using Oxygen Bleach periodically (as permitted by the care label) instead of relying solely on frequent, potentially harsher, Chlorine Bleaching. This helps preserve fabric integrity long-term.

7. Related questions
7.1. Can I save a garment if I accidentally used chlorine bleach on a “non-chlorine bleach only” item?
Unfortunately, damage from using Chlorine Bleach on items labeled Non-Chlorine Bleach Only (often containing Spandex, wool, silk, or sensitive dyes) is typically permanent. You might see immediate yellowing or weakening (fabric damage).
Rinsing the garment thoroughly with cold water immediately might stop further reaction but is unlikely to reverse existing damage. Prevention by carefully checking the garment care label and fiber content is crucial.
7.2. How does hard water affect bleaching results?
Hard water contains dissolved minerals like Iron and manganese. When Chlorine Bleach is used in hard water, these minerals can undergo a reaction with metals, oxidizing and depositing onto fabrics, causing yellowing or rust-colored stains.
Using a water softener system or adding a laundry booster that chelates (binds) minerals can mitigate this issue. Oxygen Bleach is generally less susceptible to adverse reactions with typical hard water minerals.
7.3. Is it safe to bleach clothes with printed logos or colored embellishments?
Using Chlorine Bleach on garments with prints, logos, embroidery, or colored trims is generally not recommended. The bleach is likely to cause fading, discoloration, or damage (fabric damage) to these elements, even if the base fabric itself is bleach-safe according to the garment care label.
While you could attempt a colorfastness test on a hidden part of the embellishment itself, the risk remains high. Oxygen Bleach might be a safer alternative if the label allows Non-Chlorine Bleach Only, but testing is still essential, and results aren’t guaranteed. Treat such items with extreme caution or avoid bleaching altogether.
Read more:
- Safely Bleach Clothes: Tips to Avoid Damage and Whiten
- How to Avoid Sweat Patches on Clothes: Stay Dry Tips
- Air Dry vs Tumble Dry: Best Way to Dry Clothes? Pros and Cons
Successfully bleaching white garments hinges on a systematic approach: Assess fabric (care label, fiber content), choose bleach (Chlorine Bleach vs. Oxygen Bleach based on fabric and need), implement safety precautions, follow the correct bleaching process (dilution, timing, method), and know how to troubleshoot common problems like yellowing or fabric damage.
For an apparel business, mastering these steps in garment care protects inventory value, enhances product presentation, and reinforces brand quality. Whether using Chlorine Bleach for heavy-duty whitening or Oxygen Bleach for maintenance and sensitive items, careful execution ensures bright whites without compromising the garment.


