Create Custom Dress Patterns: Beginner’s Guide and Methods
Tired of ill-fitting store-bought patterns and limited design choices? Creating your own dress patterns unlocks a world of custom-fit clothing and limitless design possibilities. This guide addresses the frustrations of sewers and designers seeking unique garments that perfectly reflect their vision and body shape. Discover various methods for crafting dress patterns, understand their pros and cons, and gain the knowledge to begin your patternmaking journey. Say goodbye to pattern limitations and hello to design freedom! Let’s start!
1. Understanding Different Methods for Creating Dress Patterns
1.1 Method 1: Creating Dress Patterns by Tracing Existing Garments
With this beginner-friendly method, you trace an existing garment to create a sewing pattern. Lay the garment flat, trace the pieces and understand garment construction. You might need deconstruction for complex pieces. The primary limitation of this method is that you can only replicate the style of the garment you are tracing. Simpler garments with fewer seams, like T-shirts, A-line skirts, and pajama pants, are most suitable for this technique.
Tools and materials:
- Pattern paper (tracing paper, dot paper, or even medical exam table paper)
- Pencils or markers
- Ruler or measuring tape
- Pins
- Scissors
- Existing garment
- Flat surface (table or floor)

1.2 Method 2: Drafting Dress Patterns with Slopers/Blocks (Flat Pattern Cutting)
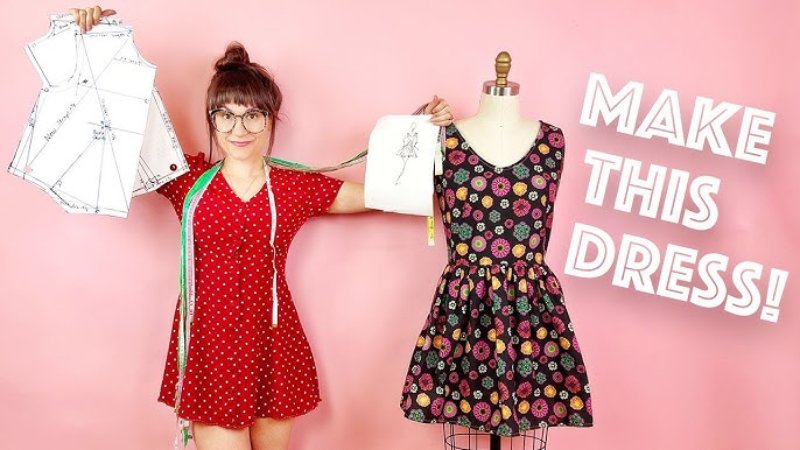
Slopers or blocks are basic, fitted patterns representing the body’s shape. You can purchase pre-made basic pattern or draft from measurements.
Tools and materials:
- Slopers/Blocks
- Pattern Paper
- Rulers
- Pencils
- French Curve
- Awl
- Tracing Wheel
- Scissors
1.3 Method 3: Creating Dress Patterns Through Draping
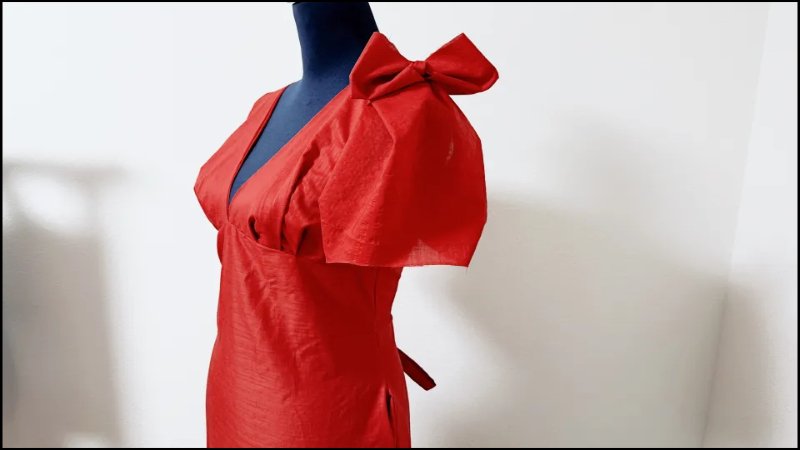
Draping involves fabric manipulation directly on a dress form to create a three-dimensional design. This design process is visual and creative. It’s an advanced method best for experienced sewers. A dress form or mannequin is required. Suitable fabrics are Chiffon, silk, satin, rayon and jersey knits. Unsuitable fabrics are canvas, wool, corduroy and brocades.
Tools and materials:
- Dress form
- Muslin fabric (or other draping fabric)
- Pins (lots of them!)
- Scissors
- Fabric marking tools (chalk, water-erasable pen)
- Ruler or measuring tape
- French curve (optional, but helpful)
2. Drafting a Dress Pattern from Your Measurements (Step-by-Step Guide)
2.1 Preparing Your Measurements
Taking accurate measurements is crucial. Wear well-fitting undergarments, stand straight, use a flexible measuring tape and have someone else help if possible. You’ll need the following measurements: bust (fullest part), waist (natural waistline), hips (fullest part), back waist length, shoulder width, sleeve length, upper arm circumference and desired dress length.

2.2 Drafting the Basic Bodice Block
- Step 1: Draw a rectangle representing the back bodice. Use back waist length and half the bust measurement + ease.
- Step 2: Mark the bust line, waistline, and shoulder line.
- Step 3: Shape the armhole and neckline.
- Step 4: Add darts for shaping.
- Step 5: Repeat for the front bodice, adjusting for bust depth.
2.3 Drafting the Skirt Block
- Step 1: Draw a rectangle representing the skirt. Use length and half the hip measurement + ease.
- Step 2: Mark the waistline and hipline.
- Step 3: Shape the side seams.
- Step 4: Add darts or other shaping elements (if desired).
2.4 Drafting the Sleeve Block
- Step 1: Draw a rectangle representing the sleeve. Use sleeve length and upper arm circumference + ease.
- Step 2: Shape the sleeve cap.
- Step 3: Mark the elbow line (if needed).
- Step 4: Shape the wrist opening.
2.5 Adding Seam Allowances and Trueing the Pattern
Seam allowances are extra fabric added beyond the stitching line and are necessary for construction. A standard seam allowance is typically 1/2 inch or 5/8 inch. Add seam allowances to all pattern edges. Trueing is the process of blending and smoothing out any jagged lines or corners on your pattern pieces. Add seam allowances (extra fabric beyond the stitching line, typically 1/2 inch or 5/8 inch) to all edges of your pattern pieces.
Tools and materials
- Pattern paper (dot paper, tracing paper, or similar)
- Pencil (sharp, for precise lines)
- Ruler (clear, with both inch and centimeter markings)
- French curve (for shaping armholes, necklines, and other curves)
- Measuring tape (flexible)
- Scissors (for cutting paper)
- Tracing wheel (optional, for transferring markings)
- Awl (optional, for marking points)

2.6 Testing the Pattern with a Muslin/Toile
Transfer the adjustments to the paper pattern. Before cutting into your final fabric, it’s crucial to test the pattern by creating a muslin (also called a toile). Sew the muslin pieces together using a long basting stitch, which is easy to remove. Try on the muslin, check the fit, and make any necessary adjustments by pinning or marking directly on the fabric. Transfer these adjustments back to your paper pattern.
3. Making Pattern Templates from Clothing – Detailed Instructions
3.1 Step-by-Step Instructions
- Step 1: Prepare the garment (clean, ironed, seams pressed).
- Step 2: Fold the garment in half vertically, aligning seams.
- Step 3: Lay the folded fabric garment on pattern paper.
- Step 4: Pin the garment to the paper.
- Step 5: Trace around the garment outline.
- Step 6: Mark notches, darts, and other important details.
- Step 7: Remove the garment.
- Step 8: Add seam allowances.
- Step 9: Label the pattern piece (e.g., “Front Bodice,” “Center Front,” “Cut 2”).
- Step 10: Cut out the pattern piece.
- Step 11: Repeat for all garment sections. This includes fronts, backs, sleeves, collars, cuffs, and any separate pieces for closures (like button plackets or zipper facings).
4. Essential Tips and Tricks for Dress Pattern Creation
4.1 Choosing the Right Materials
Selecting the correct materials are essential to start a project. Pattern paper comes in several forms, each with its own advantages: dot paper, tracing paper and kraft paper. Ensure that you use rulers, curves, and pencils to draft the patterns.

4.2 Mastering Basic Patternmaking Techniques
Understanding grainlines is crucial for ensuring that your garment hangs correctly. Learn how to make common pattern adjustments such as a full bust adjustment or a swayback adjustment. Explore various resources for further learning including books, websites and online courses. Make sure you understand grainlines to ensure your garment hangs correctly. If you need to adjust a pattern, try looking up how to do a full bust adjustment or a swayback adjustment. If you need more resources, there are plenty of books and videos online.
4.3 Labeling and Organizing Your Patterns
Clear labeling is essential for avoiding confusion. Include the name, date, size, cutting instructions and grainline on each pattern piece. Store your patterns in labeled envelopes or hanging files. To avoid confusion, clear labeling is essential.
4.4 Pattern Making Process and Aptitudes: Is It Right for You?
Before diving in, ask yourself: Is pattern making right for you? This process requires specific skills and aptitude. Be aware of the learning curve and time commitment. There will be challenges but also great rewards. This section is a self-assessment to help you decide.
4.5 Assessing Your Skills and Interests
Before you start this journey, ask yourself these questions. Do you enjoy problem-solving? Are you comfortable with math and geometry? Do you have patience and attention to detail? Are you willing to make a time commitment and learn a new skill? Are you passionate about creating your own clothing?
4.6 Understanding the Time Commitment
Learning patternmaking takes time and dedication. Start with simple projects and gradually increase complexity. Stay persistence and celebrate small victories.
5. Ethical Considerations When Creating and Selling Patterns
Copying commercial patterns and selling them as your own is both unethical and illegal, violating copyright laws. Instead, strive for originality by developing your own unique designs. If you are inspired by existing patterns, use them ethically as a starting point for something new. Always respect copyright and intellectual property to avoid legal issues and maintain a reputation for integrity in the design community.
6. FAQs about Creating Your Own Dress Patterns
6.1 How long does it take to learn to draft dress patterns?
Learning to draft dress patterns depends on your learning style. Realistically, it can take months, if not a year to develop the basic skills. Mastering advanced techniques can take even longer.
6.2 What are the best tools for patternmaking?
If you want to start patternmaking, there are some essential tools to get. A measuring tape, rulers, pattern paper, pencils, scissors and a tracing wheel are all required to start. A dress form is essential for draping techniques.
6.3 Can I sell patterns I create from tracing existing garments?
Selling a pattern you created by directly tracing an existing garment is a copyright violation and is therefore illegal. While tracing for personal use is generally acceptable, selling the resulting pattern infringes on the original designer’s intellectual property rights.
6.4 What’s the difference between a sloper and a block?
While the terms ‘sloper’ and ‘block’ are often used interchangeably, there’s a subtle technical difference. A sloper is a very basic, close-fitting pattern with no ease or seam allowances, representing the body’s exact measurements. A block, on the other hand, typically includes wearing ease (for comfort and movement) and may or may not include seam allowances.
6.5 How do I know if my pattern will fit before I sew it?
To see if the pattern fits before you sew it, it is best to make a muslin. By making this test garment from inexpensive fabric, you can check the fit and make any necessary adjustments to the pattern.
7. Packlove – Providing Service for Custom Clothing and Accessories
Packlove provides premium packaging and labeling solutions, ideal for showcasing your unique fashion creations and adding a professional touch. Whether you’re crafting custom clothing, accessories, or other unique products, we have the materials and expertise to help. Explore our range of customizable options, including woven labels, heat transfer labels, zipper bags, and more. We provide the high-quality finishing touches that add a professional, polished look to your finished product.
Read more:
In summary, creating a dress pattern can be done through tracing, using slopers, draping and drafting from measurements. Remember that practice, patience, and accurate measurements are key. Don’t be afraid to experiment and explore the world of patternmaking. Ready to elevate your brand’s packaging? Explore Packlove’s customizable options and request a quote today!


