


Dragon Patches: Apply and Care for Toothless and More!


This comprehensive guide provides everything you need to know about applying and caring for How to Train Your Dragon iron-on patches. Whether it’s adorning a jacket, backpack, or any favorite fabric item, adding a patch is a perfect way to showcase a love for this fantastic world.
This article will cover selecting the perfect patch, detailed application instructions, troubleshooting tips, and long-term care advice to ensure that patch remains vibrant and secure for years to come. Readers will gain valuable insights into the different types of patches available, and how to choose the right one based on quality and design.
Follow the detailed instructions, and learn how to maintain the patch’s appearance and adhesion through proper washing and care. Let’s read!
1. Choosing the Right How to Train Your Dragon Patch
1.1 Different Designs and Characters
The world of How to Train Your Dragon offers a fantastic array of characters and designs, each with unique appeal. Choosing the right patch means finding one that truly represents love for the franchise. Here are some popular options:
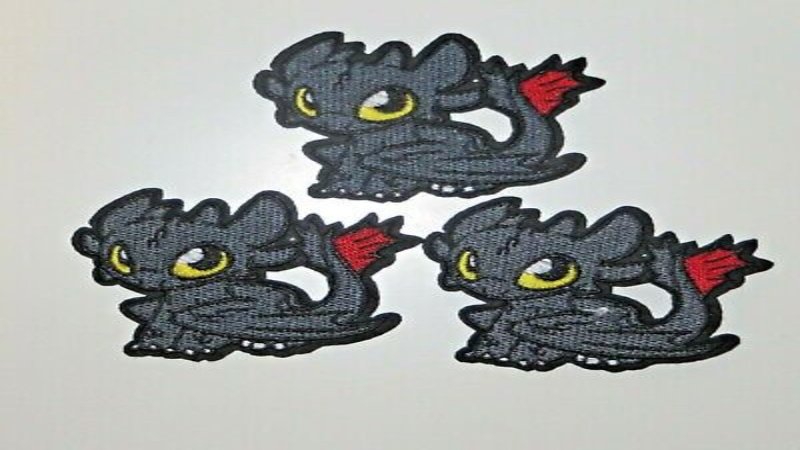
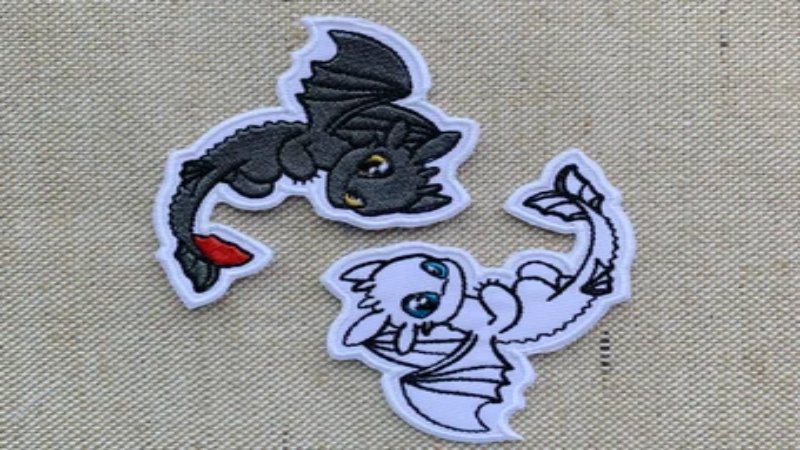
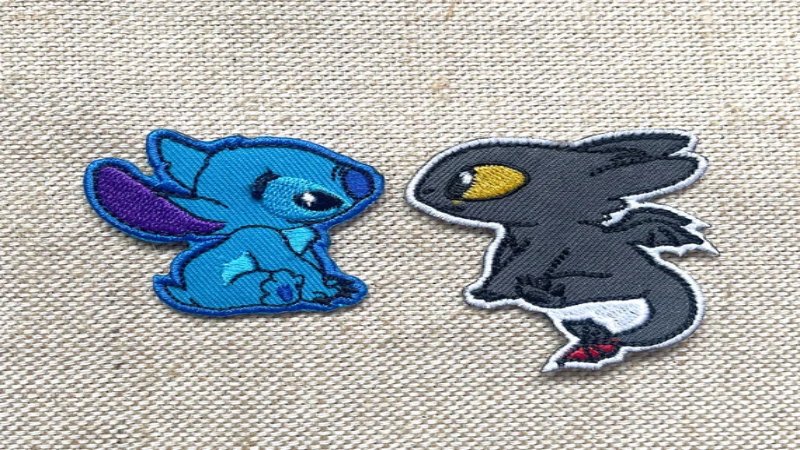
- Toothless: The undeniably adorable and powerful Night Fury (a rare and intelligent dragon species), Toothless is a favorite. Patches featuring Toothless often depict him in flight, in a playful pose, or showcasing his signature plasma blast.
- Hiccup: The resourceful and kind-hearted Viking (the main protagonist of the series) who befriends Toothless, Hiccup represents bravery and ingenuity. Hiccup patches may show him with Toothless, holding his inventions, or in his dragon-riding gear.
- Light Fury: This stunning, rare dragon (a close relative of the Night Fury) captivates with elegance and grace. Light Fury patches often highlight shimmering scales and graceful movements.
- Other Dragon Species: Beyond the main characters, there’s a whole host of dragon species to choose from, each with unique looks and abilities. Consider patches featuring the Monstrous Nightmare, Deadly Nadder, Gronckle, or Hideous Zippleback.
- Viking Symbols: For those seeking something simpler, a viking symbol will make a wonderful choice.
Beyond these, keep an eye out for exciting variations. Some patches feature characters in different poses or expressions. Others offer unique styles, from cartoonish to more realistic renditions. Additionally, some specialty patches incorporate features like glow-in-the-dark thread or 3D embroidered elements for added visual interest.
1.2 Size and Placement Considerations
Choosing the right size and deciding where to place the How to Train Your Dragon patch are crucial steps for a successful application. Thinking about the item being decorated and visualizing the final look will help achieve the desired result.
First, consider the size of the patch relative to the item. A large, detailed patch featuring Toothless in flight might be perfect for the back of a jacket, where there’s ample space to showcase the design. Conversely, a smaller patch of Hiccup’s emblem would be better suited for a backpack pocket, a hat, or the front of a clothing item.
1.3 Quality and Materials
When selecting a How to Train Your Dragon patch, understanding the differences in quality and materials is important for ensuring its longevity and appearance. Two primary types of patches are commonly available: embroidered and printed.
- Embroidered Patches: These patches are created by stitching threads onto a fabric backing, creating a textured, slightly raised design. Embroidery offers excellent durability and a classic look. The stitching can withstand wear and tear better than printed designs, making embroidered patches a good choice for items that will see frequent use.
- Printed Patches: Printed patches feature the design directly printed onto the fabric. This method allows for finer details and more complex color gradients than embroidery. However, printed patches may be more susceptible to fading or cracking over time, especially with repeated washing.
Regardless of the type, prioritize patches made with high-quality materials. Look for thick, durable backing fabric and vibrant, colorfast threads or inks. A well-made patch will resist fraying and maintain its appearance longer.
For an added assurance of quality, consider looking for officially licensed How to Train Your Dragon merchandise. Products officially licensed by DreamWorks Animation, the studio behind the franchise, typically adhere to higher quality standards. This doesn’t mean that unlicensed patches are necessarily inferior, but licensing provides an extra level of confidence in the product’s authenticity and craftsmanship.
2. How to Apply Your Iron-On Patch: Step-by-Step Instructions
2.1 Gathering Your Materials
Before starting the application process, it’s essential to gather all the necessary materials. Having everything organized and within reach will make the process smooth and efficient. Here’s a checklist:
- Your How to Train Your Dragon Iron-On Patch: Make sure it is clean and free of any packaging.
- The Garment/Fabric Item: This is the item you’ll be decorating (jacket, backpack, jeans, etc.).
- An Iron: A standard household iron is perfect. Ensure the iron is clean and free of any residue that could transfer to the fabric.
- A Pressing Cloth: This is a crucial item to protect both the patch and the garment. Use a thin, clean piece of cotton fabric, such as a pillowcase, handkerchief, or a piece of cotton muslin. Avoid using terry cloth or anything with a thick texture.
- A Hard, Flat Surface: An ironing board is ideal, but a sturdy table protected with a thick towel will also work. Avoid using soft or uneven surfaces.
2.2 Preparing the Fabric
Proper fabric preparation is a critical step that is often overlooked, but it significantly impacts the patch’s adhesion and longevity. Taking the time to prepare the material correctly ensures a professional-looking and durable result.
Pre-wash and Dry (Without Fabric Softener): If the garment is new, it’s highly recommended to pre-wash and dry it before applying the patch. This removes any sizing or finishes that might interfere with the adhesive. Crucially, do not use fabric softener during washing or drying. Fabric softener leaves a residue that can prevent the patch from bonding properly to the fabric.
Iron the Application Area: Once the garment is clean and dry, use the iron to create a smooth, wrinkle-free surface where the patch will be placed. Heat the area for 10-15 seconds to warm the fabric, which will help the adhesive activate more effectively. A smooth surface ensures that the entire patch makes contact with the fabric, leading to a stronger bond.
2.3 Positioning the Patch
Careful positioning is essential for a visually appealing result. Take your time with this step to ensure the patch is exactly where you want it before applying any heat.
- Place the Patch: Carefully position the How to Train Your Dragon patch on the prepared fabric. Ensure the adhesive side (the slightly shiny or textured side) is facing down, in direct contact with the garment.
- Check Alignment and Centering: Step back and visually inspect the patch’s placement. Ensure it’s straight, centered (if desired), and aligned correctly with any seams, pockets, or other design elements on the garment.
- Tips for Precision:
- Use a ruler or measuring tape to ensure precise centering or spacing from edges.
- For symmetrical placement on items like jacket sleeves or pant legs, measure from a common reference point (e.g., the shoulder seam or hem).
- Consider using small pieces of tailor’s chalk or a fabric marker (test on an inconspicuous area first) to lightly mark the desired position.
- Double-Check: Before proceeding to the next step, double-check the placement one last time. Once heat is applied, it’s difficult, if not impossible, to reposition the patch without potentially damaging the garment or the adhesive.
2.4 Applying Heat and Pressure
This is the core step where the patch’s adhesive bonds to the fabric. Precision and attention to detail are crucial for a successful and permanent application.
- Iron Settings: Set your iron to a medium-high heat setting. Crucially, turn off the steam function. Steam will interfere with the adhesive and prevent proper bonding. Most iron-on patches work best with a dry heat setting. If the patch came with specific manufacturer instructions, always follow those recommendations regarding temperature and time.
- Place the Pressing Cloth: Place the pressing cloth over the patch and the surrounding fabric. This is essential to protect the patch’s design from direct heat, which could cause scorching, melting, or discoloration. The pressing cloth also protects the garment itself.
- Apply Heat and Pressure: Place the hot iron directly onto the pressing cloth, covering the entire patch area. Apply firm, even pressure for the recommended time, typically 20-30 seconds. However, always defer to the patch manufacturer’s instructions. If no instructions are available, start with 20 seconds and check the adhesion (as described in the next step).
- Important Considerations:
- Maintain constant, even pressure across the entire patch. Avoid moving the iron around, as this can shift the patch or cause uneven heating.
- Pay particular attention to the edges of the patch, ensuring they receive sufficient heat and pressure.
- Use a timer.
2.5 Cooling and Checking Adhesion
After applying heat, allowing the patch to cool completely is crucial for the adhesive to set properly. This step also includes checking the adhesion to ensure a secure bond.
- Cool Down: Remove the iron and pressing cloth, but do not touch or move the patch. Allow it to cool completely to room temperature. This typically takes 5-10 minutes. Resist the temptation to peel or test the patch while it’s still warm, as this can weaken the bond.
- Check Edges: Once the patch is cool, carefully check the edges to see if they are firmly adhered to the fabric. Gently try to lift a corner or edge with your fingernail. If the patch lifts easily, it needs more heat.
- Re-apply Heat (If Needed): If any edges are not securely bonded, replace the pressing cloth and re-apply heat to those specific areas for a shorter duration (e.g., 10-15 seconds). Again, use firm, even pressure. Allow to cool completely and re-check. Repeat this process until the entire patch is firmly adhered.
2.6 Troubleshooting Common Problems
Even with careful application, sometimes issues can arise. This section provides solutions to common problems encountered when applying iron-on patches.
My patch is not sticking. What should I do?
Several factors can cause adhesion problems. First, ensure the iron is hot enough (medium-high, no steam) and that you’re applying firm, even pressure for the recommended time. Double-check that you’ve pre-washed the garment without fabric softener and that the application area is clean and dry. If the patch still won’t stick, try increasing the ironing time slightly (5-10 seconds at a time), always using a pressing cloth. If the problem persists, the patch’s adhesive may be faulty, or the fabric may not be suitable for iron-on patches (some synthetic fabrics have low heat tolerance).
The edges of my patch are lifting. How can I fix this?
Lifting edges are common if insufficient heat or pressure was applied to those areas. Replace the pressing cloth and re-apply heat to the lifting edges for 10-15 seconds, focusing on those specific spots. Allow to cool completely and re-check. Repeat until the edges are secure.
I accidentally scorched the fabric or the patch. Is there anything I can do?
Scorching can happen if the iron is too hot or left in one place for too long. Unfortunately, scorching is often irreversible. If the scorching is minor, you might be able to disguise it with fabric markers or paint (test on an inconspicuous area first). For significant scorching, the best option might be to remove the patch (if possible) and replace it, or to cover the scorched area with a larger patch or other embellishment.
My patch is crooked or misaligned. Can I reposition it?
Once the adhesive has fully bonded, it’s extremely difficult to reposition an iron-on patch without damaging the fabric or the patch. If the patch was just applied and is still warm, you might be able to carefully peel it off and try again, but this is risky. If the patch has cooled completely, repositioning is generally not recommended.
My patch has become detached after washing?
If you are sure you have followed all the instructions and the patch still comes off, you can consider using fabric adhesive. This type of glue is designed specifically for bonding fabric, providing a flexible, water-resistant hold. Apply a small amount of fabric adhesive to the back of the detached patch, carefully position it on the garment, and follow the adhesive manufacturer’s instructions for drying time and curing.
3. Caring for Your Iron-On Patch
3.1 Washing and Drying Instructions
Proper washing and drying techniques are essential to maintain the appearance and adhesion of your How to Train Your Dragon patch. Following these guidelines will help ensure its longevity.
- Turn Garment Inside Out: Before washing, turn the garment inside out. This protects the patch from direct abrasion against other clothes or the washing machine drum.
- Gentle Cycle: Wash the garment on a gentle cycle or a delicate setting. Avoid harsh agitation, which can stress the patch’s adhesive bond.
- Cold Water: Use cold water for washing. Hot water can weaken the adhesive and cause fading or damage to the patch’s design.
- Avoid Bleach and Harsh Detergents: Use a mild detergent and avoid bleach or any detergents containing bleach alternatives. These chemicals can damage the patch’s colors and adhesive.
- Air Dry (Recommended): The best way to dry a garment with an iron-on patch is to air dry it. Hang it up or lay it flat to dry, avoiding direct sunlight, which can cause fading.
- Low Heat Tumble Dry (If Necessary): If you must use a dryer, choose a low heat or delicate setting. High heat can weaken the adhesive and potentially damage the patch. Remove the garment from the dryer while it’s still slightly damp and allow it to air dry completely.
3.2 Long Term care and maintenance
To make your beautifully decorated item with How to Train Your Dragon last longer, here is the advice.
- Avoid Rubbing: Avoid doing actions that rub the surface where the patch is attached.
- Avoid Direct Sunlight: Store your clothes in places without the sun shining on them.
If you follow these instructions, your clothes will stay new and beautiful.
4. Where to Buy How to Train Your Dragon Iron-On Patches
Finding How to Train Your Dragon iron-on patches is relatively easy, with several options available both online and in physical stores. Choosing the right source depends on selection, price, and convenience.
- Online Retailers:
- Amazon: A vast marketplace with a wide selection of patches from various sellers. Offers competitive prices and often has customer reviews to help with decision-making.
- Etsy: A good source for unique, handmade, and custom-designed patches. Many independent artists and crafters sell their creations on Etsy, offering a more personalized touch.
- AliExpress: This online retail service based in China offers many cost effective How to Train Your Dragon Patches.
- Specialty Patch Shops: Some online stores specialize specifically in patches, offering a curated selection and potentially higher quality products.
- Physical Stores:
- Craft Stores: Stores like Michaels, Jo-Ann Fabrics, and Hobby Lobby often carry a selection of iron-on patches, including licensed character designs.
- Toy Stores: Some toy stores, especially those carrying How to Train Your Dragon merchandise, may also have patches available.
- Comic Book Shops and Pop Culture Stores: Stores catering to fans of comics, movies, and pop culture often stock patches related to popular franchises.
When buying online, always check seller ratings and reviews, and pay attention to shipping times and costs. For physical stores, it’s a good idea to call ahead to check availability before making a trip.
5. Related Questions
This section addresses common questions related to iron-on patches in general, providing broader context and helpful information.
5.1 Can iron-on patches be applied to all types of fabric?
No, not all fabrics are suitable for iron-on patches. Natural fibers like cotton, denim, and canvas are generally the best choices. Synthetic fabrics like polyester, rayon, and nylon can be more sensitive to heat and may melt or scorch.
Always check the garment’s care label for heat restrictions. If you’re unsure, test a small, inconspicuous area with the iron (using a pressing cloth) before applying the patch. Avoid using iron-on patches on delicate fabrics like silk, lace, or leather.
5.2 Can iron-on patches be removed?
Removing iron-on patches can be challenging and may damage the fabric. There are methods involving heat and solvents, but success is not guaranteed. It’s generally best to consider iron-on patches as a permanent embellishment. If you’re unsure about long-term commitment, consider sewing the patch on instead, which allows for easier removal later.
5.3 Are iron-on patches permanent?
While iron-on patches are designed to be durable, their permanence depends on several factors: the quality of the adhesive, the type of fabric, proper application, and care. With proper application and care (gentle washing, air drying), iron-on patches can last for a long time. However, they may eventually start to lift or detach, especially with frequent washing or heavy wear and tear. Sewing the edges of the patch after ironing can significantly increase its longevity.
5.4 Can I sew on an iron-on patch?
Yes, you definitely can!
Read more:
Applying and caring for a How to Train Your Dragon iron-on patch is a straightforward process that, when done correctly, allows fans to personalize their belongings and showcase their love for the franchise. By carefully selecting the right patch, preparing the fabric, following the application instructions precisely, and practicing proper care, these vibrant additions can bring a touch of Berk’s magic to everyday life.
Remember to prioritize quality materials, use a pressing cloth, and always follow the manufacturer’s instructions for the best results. With a little care and attention, your How to Train Your Dragon patch will remain a cherished emblem of adventure and friendship for years to come.


