DTF Transfer Mastery: Expert Guide to Perfect Application and Lasting Results
Unlock the vibrant world of DTF transfers with Packlove! If you’re a small business owner, clothing creator or just starting with garment decoration, achieving professional-quality prints is essential. This guide provides expert-backed instructions, troubleshooting and tips to avoid common pitfalls. Master the art of Direct-to-Film application and ensure durable, stunning results every time, transforming your creative vision into reality, enhancing your product, saving money and time. Let’s read it!
1. Mastering DTF Transfer Application: Your Expert Guide
1.1 Understanding the Essentials for Successful DTF Application
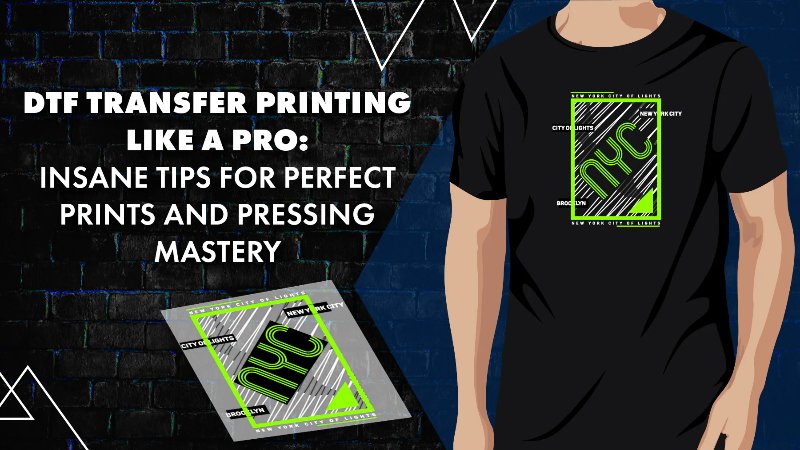
Direct-to-film (DTF) printing has emerged as a transformative force in the garment decoration industry. DTF transfer involves printing a design onto a specialized film, which is then transferred onto fabric using a combination of heat and pressure. This method has gained significant traction due to its ability to create vivid, full-color prints on a wide range of fabrics, eliminating the need for tedious weeding.
The effectiveness of DTF application is paramount to realizing its benefits. Proper application is the cornerstone of print durability and longevity. It’s what ensures that your designs can withstand repeated washing without fading, keeping them looking vibrant over time.
Furthermore, applying the correct method is how to achieve a polished, high-quality finish. Several elements play a crucial role in achieving optimal DTF application. Maintaining precise temperature control is non-negotiable, as is ensuring consistent pressure during the transfer process. The pressing time and the chosen peeling method (hot or cold) are also decisive factors.

1.2 Gathering Your DTF Application Toolkit: Materials Checklist
Prior to starting the DTF application process, it’s crucial to gather all the necessary materials. A dependable heat press is fundamental. There are several types to choose from, including:
- Clamshell: A popular choice known for its space-saving design.
- Swing-away: Offers a wider opening and better visibility, reducing the risk of accidental burns.
- Auto-open: Features automatic release, preventing over-pressing and potential damage to the garment.
Each type offers specific advantages, so select the one that best suits your workflow and needs.
A protective cover sheet is also indispensable. There are two primary options:
- Teflon Sheets: These provide a smooth, non-stick surface and are reusable, making them a durable choice.
- Parchment Paper: A more budget-friendly alternative, parchment paper is disposable and works well for single-use applications.
Other essential tools include:
- Heat-Resistant Tape: This secures the DTF transfer in place, preventing any movement during the pressing process.
- Infrared (IR) Temperature Gun: This allows for precise temperature verification, ensuring your heat press is operating at the optimal setting.
Investing in high-quality equipment, particularly a reliable heat press and an accurate temperature measurement device, is paramount. Inconsistent heating is a frequent cause of DTF application problems, leading to issues such as poor adhesion and reduced durability.
2. Step-by-Step Guide to Applying DTF Transfers Like a Pro
2.1 Step 1: Meticulous Preparation – The Key to DTF Success
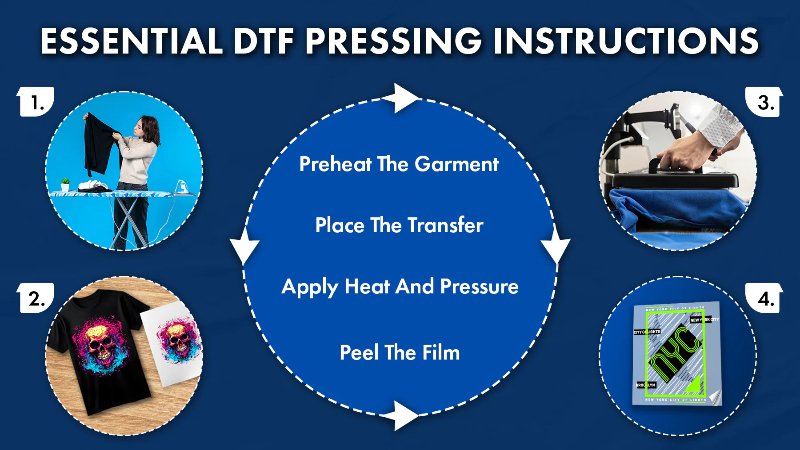
Thorough preparation is absolutely essential before applying any DTF transfer. Begin by pre-pressing the garment. This critical step serves multiple purposes:
- Moisture Removal: Eliminates any residual moisture within the fabric.
- Wrinkle Elimination: Creates a perfectly smooth surface.
- Lint Removal: Ensures a clean surface, free from any debris.
Pre-press for a short duration, typically 3-5 seconds, using medium pressure.
Next, conduct a meticulous inspection of the garment. Look for:
- Loose Threads: Trim any stray threads that might interfere with the transfer.
- Seams: Ensure no seams are present within the intended pressing area.
- Lint or Debris: Use a lint roller to thoroughly remove even the smallest particles.
Even microscopic fibers can compromise the adhesion of the transfer, so complete cleanliness is paramount.
Finally, focus on precise transfer positioning. A widely accepted guideline for shirt placement is to position the design approximately three finger-widths down from the collar. To maintain this positioning and prevent any shifting during the pressing process, consider using heat-resistant tape. This is particularly helpful when working with:
- Multi-Color Designs: Ensures accurate alignment of each layer.
- Slippery Fabrics: Prevents the transfer from sliding out of place.
Careful preparation and accurate placement are crucial for a successful DTF transfer.
2.2 Step 2: Heat Pressing Perfection – Temperature, Pressure, and Time
The heat pressing stage is where the magic happens, but it demands precision. Achieving the perfect combination of temperature, pressure, and time is critical for a successful DTF transfer.
Temperature:
- Different DTF film peel types require specific temperature ranges:
- Hot Peel: Typically requires temperatures between 130-135°C (266-275°F).
- Cold Peel: Generally needs higher temperatures, ranging from 160-175°C (320-347°F).
- Warm/Hybrid Peel: Falls in between, usually around 145-160°C (293-320°F).
It’s also essential to adjust the temperature based on the fabric composition:
- Cotton: Can typically withstand higher temperatures.
- Polyester and Blends: May require slightly lower temperature settings to prevent scorching or damage.
Pressure:
Firm, even pressure is absolutely essential for proper adhesion. Insufficient pressure can result in weak bonding and subsequent peeling problems. The method for adjusting pressure will depend on the specific type of heat press you are using. Consult your heat press manual for guidance.
Time:
The pressing duration is equally critical. Most DTF transfers require a pressing time of 10-20 seconds. However, this can vary depending on the peel type and the chosen temperature. Over-pressing should be strictly avoided, as it can damage both the transfer and the garment.
Protective Measures:
- Always use a cover sheet (either Teflon or parchment paper) to protect the transfer during the pressing process. A cover sheet also promotes even heat distribution across the transfer.
- Successfully navigating the heat pressing stage requires careful attention to these three interconnected elements: temperature, pressure, and time. They must be precisely calibrated to achieve optimal results.

2.3 Step 3: The Art of Peeling – Hot, Cold, and Everything In Between
The peeling method is a critical step in DTF application. Hot peel transfers are peeled immediately after pressing, offering a speed advantage. Cold peel transfers require complete cooling before peeling. Warm/Hybrid peels offer a compromise, requiring a brief waiting period before peeling.
For hot peel transfers, peel immediately after the heat press cycle completes. Use a smooth even peeling motion, starting from a corner. For cold peel, let the garment cool completely to room temperature. Peel slowly and steadily, ensuring the design adheres fully.
If parts of the design don’t stick during peeling, don’t force it. Re-press with slightly more pressure or heat, double-checking your temperature accuracy. Ensure you’re applying even pressure across the entire transfer area. Understanding the peel type is crucial.
2.4 Step 4: Final Cure & Post-Press – Enhancing Durability and Finish
Post-pressing is a crucial, often-overlooked step that significantly enhances DTF print durability and finish. It fully cures the ink, improving washability and softening the hand feel of the design. This step “seals” the design, adding longevity.
For post-pressing, use the same temperature as your initial press. Press for 10-20 seconds. Use parchment paper for a matte finish or a Teflon sheet for a glossier look. This helps protect the design and ensures even heat distribution.
Optionally, you can perform a second peel and press for even greater adhesion. Reposition the film and press again for about 7 seconds. After post-pressing, allow the garment to cool completely before handling or folding.
3. Caring for Your DTF Printed Garments: Longevity Tips
3.1 Washing Best Practices for DTF Prints
Always wash your DTF printed garments inside out. This simple step protects the design from abrasion during the wash cycle. Use cold water and a gentle cycle. Hot water and harsh agitation can damage the print. Washing DTF prints correctly is the key to longevity.
Choose a mild detergent and avoid bleach, fabric softeners or any harsh chemicals. These can degrade the ink and cause fading or cracking. Following these washing tips will significantly extend the life of your DTF designs.
Before washing for the first time, allow the print to cure for 24-48 hours. This ensures the ink is fully set. Line drying is best. If using a dryer, tumble dry on the lowest heat setting only. Avoid ironing directly over the print.

4. Troubleshooting Common DTF Application Problems & Solutions
4.1 Design Peeling or Lifting After Pressing
If your DTF design is peeling or lifting after pressing, several factors could be at play. Insufficient pressure or too low a temperature are common culprits. Uneven heat distribution across the heat press platen can also cause problems. Always pre-press garments and Re-press them with a cover sheet.
Another possibility is using the incorrect peel type for your transfer. Ensure you’re following the specific instructions for hot, cold or warm peel. Always pre-press your garments to remove moisture and wrinkles. Double-check peel type instructions and follow it. If the problem persists, check your heat press temperature with an IR thermometer for accuracy. Ensure even pressure across the entire design area.
4.2 Faded or Washed-Out Prints After Washing
Faded or washed-out prints after washing indicate potential issues with curing, ink, or washing procedures. Insufficient curing, meaning the print wasn’t fully set during post-pressing is a frequent cause. Using the incorrect ink type for your DTF process can also lead to fading.
Harsh detergents and washing too soon after application can also damage the print. Always use mild detergents and avoid bleach or fabric softeners. Allow the print to cure for 24-48 hours before the first wash. Review the washing instructions provided earlier in this guide. Ensure you’re following all recommended steps for washing DTF printed garments. Use quality DTF inks for vibrant, long-lasting results.
4.3 Sticky or Tacky Print Feel
A sticky or tacky print feel after pressing often indicates over-pressing. This means you may have used too much heat or pressed for too long. Using the incorrect cover sheet can also contribute to this issue.
To address this, try reducing your pressing time or temperature slightly. Experiment with different settings on scrap fabric to find the optimal balance. Consider using parchment paper for your post-press, which can sometimes help reduce tackiness. Try post-pressing briefly.
In some cases, a sticky feel can result from ink residue. You should ensure your ink is properly curing during the post-pressing process. If the problem continues, consult your ink supplier for advice.

4.4 Uneven Print or Color Distortion
Uneven prints or color distortion can be caused by several factors. Uneven pressure across the heat press platen is a primary suspect. Wrinkles in the garment during pressing can also lead to uneven results. Ensure even pressure across the platen.
Transfer movement during pressing, especially with intricate designs, can cause blurring or distortion. Low-quality DTF transfers can also result in poor print quality. Use high-quality DTF transfers. To prevent these issues, meticulously smooth the garment before pressing, removing any wrinkles or creases. Use heat tape to securely position the transfer and prevent any shifting. Always use high-quality DTF transfers from reputable suppliers to ensure the transfer is fully and evenly adhered during pressing.
5. FAQs About DTF Transfer Application
5.1 What is the ideal temperature for applying DTF transfers on cotton shirts?
The ideal temperature for cotton shirts is generally 150-160°C (302-320°F). Press for 15-20 seconds. However, always check your DTF transfer supplier’s instructions. Variations may exist depending on the transfer type.
5.2 Hot peel vs. cold peel DTF – which is better?
Neither is definitively “better.” It depends on your needs. Hot peel is faster. Cold peel is often recommended for intricate designs.
5.3 Can I use a household iron to apply DTF transfers?
Yes, you can but it’s not ideal. Set your iron to around 163°C (325°F) or cotton setting (no steam). Apply firm pressure for 10-15 seconds. Heat presses provide better results.
5.4 How long do DTF transfers last on garments?
DTF transfers are known for durability. When applied and cared for correctly, prints can last for a long time. Longevity depends on proper washing.
5.5 What fabrics work best with DTF transfers?
DTF is versatile. It works well on cotton, polyester, blends, canvas and denim. Test on scrap fabric first.
6. Packlove – Your Partner for Premium Garment Decoration Solutions
Packlove has over 8 years of experience in the garment industry. We specialize in high-quality labels, clothing tags, zipper bags and poly mailers. We understand garment decoration and branding, including DTF application. Our focus is providing the essential finishing touches.
We believe that just like proper DTF application is crucial for print quality, high-quality labels and packaging are essential for brand presentation. Packlove provides solutions, custom labels, tags and packaging to elevate your brand. Visit Packlove!
Read more:
This guide has covered the key steps for successful DTF transfer application. Remember the importance of meticulous preparation, precise pressing, correct peeling, thorough post-pressing, and proper garment care. Mastering DTF transfers requires practice and attention to detail.


