Free Clothes Pin Bag Patterns: Easy DIY Sewing Tutorial
Are you tired of chasing down runaway clothespins? Or maybe you’re a sewing enthusiast itching for a quick and satisfying project? This article will teach you to get rid of the chaos. We’ll also discuss those who want a touch of personal flair in their laundry routine. We are also looking for a solution to the environmental damage caused by disposable packaging.
This article offers a welcome solution: free, easy-to-follow patterns and a detailed tutorial for crafting your own clothespin bag. It’s a simple yet effective way to keep your clothespins organized and within reach, eliminating laundry-day frustration. Creating a custom clothespin holder allows you to add a unique touch to your laundry room while keeping things tidy.
Beyond mere organization, crafting your own clothespin bag offers a sense of accomplishment and is also practical and visually appealing. By choosing to make your own, you’re opting for a reusable solution, contributing to a more sustainable lifestyle, and reducing waste. This will improve your daily laundry chores and give you a good experience.
1. Why You Need a Clothes Pin Bag? (And Why DIY is Best)
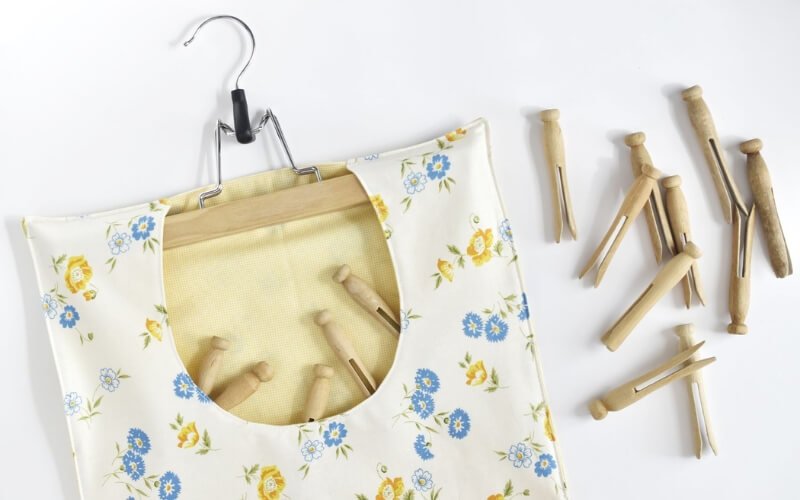
A clothespin bag, sometimes called a peg bag, is a simple yet ingenious solution for taming laundry chaos, specifically your clothespins. Imagine having a dedicated clothespin holder right where you need it, keeping your clothespins within easy reach and preventing them from getting lost. Not only does it bring order to your laundry room, but it also adds a touch of charm to your laundry organization.
Opting for a DIY sewing project to create your own clothespin bag offers benefits that extend beyond just organization. Making your own bag proves incredibly cost-effective, especially when using fabric scraps you might already have.
This approach not only saves you money compared to purchasing a pre-made version but also unlocks unparalleled customization. Select fabrics, colors, and even add embellishments that perfectly reflect your style and complement your laundry area’s decor.
Beyond the practical and aesthetic advantages, crafting your own bag is an eco-friendly choice. It’s a fantastic way to embrace sustainable living by repurposing fabric scraps and reducing textile waste. Even if you’re new to sewing, this project is designed to be beginner-friendly. With our free pattern and detailed instructions, this is a perfect opportunity to dive into sewing for beginners.
2. Choosing the Right Fabric for Your Clothespin Bag
Selecting the right fabric is crucial for creating a clothespin bag that is not only functional but also visually appealing. Your choice should hinge on factors like durability, washability, and aesthetics. Various options are available, from classic cotton and linen to sturdy canvas and even upcycled denim. By understanding the characteristics of each, you can make an informed decision that best suits your needs and style.
2.1 Best Fabrics for Durability and Longevity
When it comes to durability, cotton is a popular and reliable choice. Quilting cotton, known for its softness and breathability, is readily available in countless patterns and colors. Cotton canvas offers increased strength for a more robust bag. Linen fabric is another excellent option, prized for its rustic charm, exceptional strength, and ability to withstand frequent washing. While it might come at a slightly higher cost, its long-lasting nature makes it a worthwhile investment.
For heavy-duty use, consider canvas or duck cloth. These fabrics are renowned for their sturdiness, making them ideal for clothespin bags that will see a lot of wear and tear. While they might feel a bit stiff initially, they will soften with each wash. Don’t overlook the eco-friendly option of upcycled denim. Giving old jeans new life as a clothespin bag is both sustainable and results in a uniquely durable creation.
2.2 Considering Fabrics for Style and Aesthetics
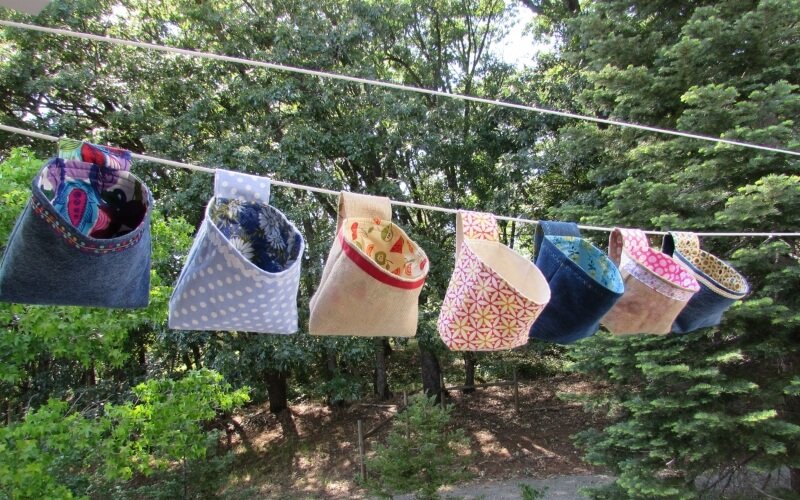
Fabric choice significantly impacts the overall look and feel of your clothespin bag. You can create visual interest by using contrasting fabrics for different parts, such as the main body, pockets, or trim. The possibilities are endless, ranging from subtle pairings to bold combinations.
Patterned fabrics are another great way to add personality and style to your creation. Consider your laundry room decor when selecting fabrics. Choose colors, patterns, and textures that complement the existing aesthetic, creating a cohesive and personalized look.
2.3 Optional: Adding a Waterproof Lining
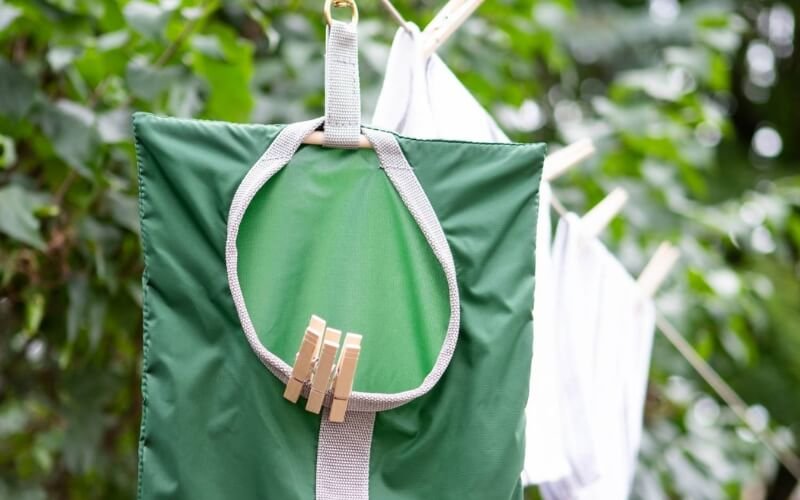
If you plan to use your clothespin bag outdoors or live in a humid climate, a waterproof lining is a wise addition. This extra layer provides moisture protection, preventing your clothespins from getting damp and reducing the risk of mildew. Materials like PUL fabric (polyurethane laminate) or laminated cotton are excellent choices for this purpose. They are water-resistant, easy to clean, and will extend the life of your bag by keeping it dry.
3. Essential Materials and Tools for Your Sewing Project
Before you begin, gather all the necessary sewing supplies to ensure a smooth and enjoyable experience. This comprehensive materials list covers everything you’ll need, from fabric and thread to essential tools like scissors, a sewing machine, needle, pins, a ruler, and an iron. Depending on your chosen design, you might also need interfacing, a zipper (optional), or a button (optional). Having everything organized beforehand will save you time and make the process more efficient.
3.1 Fabric Requirements: How Much Do You Need?
The amount of fabric you need depends on the size of your clothespin bag and the specific pattern you’re using. For a standard size, you’ll typically need two pieces of main fabric measuring 45 x 85 cm (18 x 33 inches). If you’re using a lining fabric, you will need the same amount. For the hanger cover, you need two pieces of contrasting fabric, 5 x 45 cm.
These measurements are just a starting point. You can adjust them to create a larger or smaller bag or to accommodate a different size hanger. If you’re adding optional features like pockets or a lining, you’ll need to calculate fabric requirements accordingly. Consider the dimensions of each additional element and add them to your total fabric calculation to get the precise amount of fabric required.
3.2 Choosing the Right Clothes Hanger
The clothes hanger serves as the foundation of your clothespin bag, so choosing the right one is essential. While various types exist, including plastic, wood, and wire hangers, a sturdy plastic hanger is often recommended. Plastic hangers are durable, lightweight, and rust-resistant, making them ideal for this project. However, a child-size hanger can be used for a smaller bag. Alternatively, a wooden hanger can add a touch of rustic charm to your finished product.
3.3 Gathering Your Sewing Tools
Having the right tools on hand is just as important as having the right materials. You’ll need a sewing machine in good working order, along with needles appropriate for your chosen fabric. Ensure you have a sufficient supply of thread that matches or complements your fabric.
A pair of sharp fabric scissors is essential for precise cutting, and paper scissors will come in handy for pattern adjustments. Pins are needed to hold fabric pieces together, while a ruler and measuring tape will ensure accurate measurements.
An iron and ironing board are crucial for pressing seams and achieving a professional finish. While optional, tools like a rotary cutter, cutting mat, and seam ripper can significantly simplify the process.
3.4 Optional Embellishments: Adding a Personal Touch
Embellishments offer a fantastic way to personalize your clothespin bag and make it truly unique. Consider adding woven labels, buttons, trim, rickrack, embroidery, or even fabric paint to express your individual style. These small details can elevate your creation from simple to special. For a truly professional touch, our custom woven labels at mypacklove.com are an excellent option. They provide a polished and personalized finish to any handmade item, including your new clothespin bag.
4. Step-by-Step Guide: Sewing Your Clothespin Bag
See more ways to sew clothespin bags:
This section provides a comprehensive, step-by-step guide to sewing your clothespin bag. It’s designed to be beginner-friendly, with detailed instructions and clear language. Ideally, each step would be accompanied by visuals, such as photos or illustrations, to further enhance understanding. These sewing steps are designed to be easy-to-follow, breaking down the process into manageable chunks.
4.1 Preparing the Fabric: Cutting and Interfacing
Begin by accurately cutting out all the fabric pieces according to your chosen pattern. Pay close attention to the grain lines marked on the pattern pieces, as this will affect the final look and drape of your bag. Following the grain lines ensures the fabric hangs correctly and maintains its shape. If your pattern calls for it, apply fusible interfacing to the designated fabric pieces. Interfacing adds stability and structure to the fabric, preventing it from stretching or losing its shape over time. To apply, place the interfacing’s adhesive side against the wrong side of the fabric and press with a hot iron, following the manufacturer’s instructions.
4.2 Creating the Hanger Opening and Clothespin Access
Next, fold the main fabric right sides together, then center the hanger on top and trace the top hanger outline onto the fabric. Cut the fabric to the traced shape, creating 4 hanger shapes. With two layers still pinned, make a horizontal cut through two layers of fabric to create the opening for the clothespins. Cover the upper part with a contrasting strip of fabric. Now pin the fabric for the main bag and sew with a 3 mm stitch. Press or iron the seam allowance apart. Next, pin the opposite fabric piece to the strip and sew with a 0.39″ (1 cm) seam allowance. Repeat for the large piece.
4.3 Sewing the Main Body of the Bag
Pin or clip the two main pieces together, right sides facing each other. Ensure all edges are carefully aligned. Sew the pieces together, leaving a turnaround opening on the side with a seam allowance of approx. 0.39″ (1 cm). Remember to backstitch at the beginning and end of each seam to secure the stitches.
Once sewn, cut the seam allowance at the corners to make shaping easier. Turn the piece right side out and shape the seam with a knitting needle or similar, iron if necessary. Arrange the bag neatly and clip or pin. Stitch close to the edge, and make sure to tidy up the turn openings. Leave a gap of approximately 0.79″ (2 cm) at the top for the coat hanger hook.
4.4 Adding a Lining (Optional)
If adding a lining, sew the lining pieces right sides together, leaving a 3-inch opening on one side. Box the corners by matching the seams, measuring 1.5″ from the end, drawing a line, and stitching along it. Trim the excess fabric. Turn the lining right side out and press. Attach the tab now if you are including it. Insert the outer bag into the lining bag with right sides together. Match side seams, pin around the top edge, and stitch. Pull the outer bag through the opening in the lining. Press the seam that attaches the lining to the outer fabric. Stitch the opening in the lining shut.
4.5 Creating a Tab Closure (Optional)
For a tab closure, sew the tab pieces together with right sides facing, leaving one short side open. Clip the corners, turn right side out, and press. Topstitch if desired. Center the tab on the lining, aligning raw edges, and stitch using a basting stitch. If using, stitch a buttonhole on the tab and sew a button on the bag to align with the buttonhole.
4.6 Finishing Touches: Woven Labels and More
Now is the perfect time to add those special finishing touches that will make your clothespin bag truly unique. Consider sewing a woven label into a side seam or onto the front of the bag for a professional and personalized touch. Our custom woven labels at mypacklove.com are a fantastic option, offering high quality and a wide range of customization possibilities. Double-check that the hanger fits well. Insert the hanger and hang up your clothespin bag. You can also add trim, if desired.
See more ways to sew clothespin bags:
5. Beyond Clothespins: Creative Uses for Your New Bag
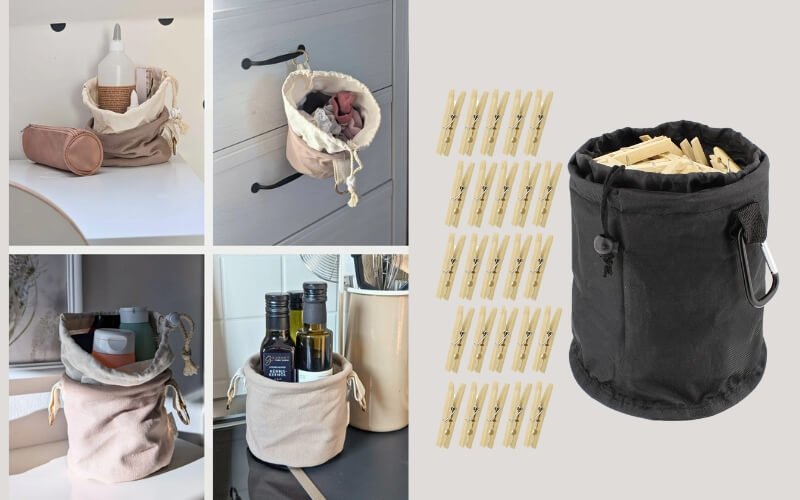
Your new clothespin bag is more than just a laundry accessory; it’s a versatile, multi-purpose storage solution that can be used throughout your home. Its clever design and customizable nature make it adaptable to a wide range of organizational needs, extending its functionality far beyond the laundry room. Let’s explore some creative other uses for your new bag, demonstrating its versatility.
5.1 Organizing Small Items in the Bathroom
The clothespin bag can be a game-changer for bathroom organization. It provides a convenient and accessible way to store all those small, easily misplaced items like hair accessories. Hair ties, hair clips, and bobby pins can be neatly tucked away, keeping your bathroom counters clutter-free and your mornings running smoothly. No more searching for that elusive hair tie when you’re rushing to get ready!
5.2 Storing Craft Supplies
Crafters, rejoice! Your clothespin bag can also serve as a handy organizer for all those small craft supplies. Buttons, beads, sequins, and yarn scraps can be neatly stored, keeping your crafting space tidy and your materials within reach. For larger or more diverse collections of craft supplies, our custom zipper bags at mypacklove.com are an excellent solution. They offer durability, various sizes, and customization options to perfectly suit your needs, ensuring your supplies are well-organized and protected.
5.3 Travel-Friendly Toiletry Bag
A smaller version of the clothespin bag can be repurposed as a travel-friendly toiletry bag. It’s the perfect size to hold travel-size toiletries, makeup, or other small essentials for your next trip. For transporting these items, especially liquids, our custom poly mailers at mypacklove.com are a lightweight and convenient option. They offer protective features to keep your toiletries safe during transit, and their customizable nature allows you to add a personal touch to your travel gear.
6. FAQs about Clothes Pin Bag Sewing Project
What is the best type of fabric to use for a clothes pin bag?
The best fabric choices for a clothespin bag are durable, washable, and aesthetically pleasing. Cotton, linen, and canvas are all excellent options. Cotton offers softness and breathability, linen provides strength and a natural texture, and canvas is known for its exceptional sturdiness. Your choice depends on your priorities and desired aesthetic.
6.1 How do I adjust the pattern for a different size hanger?
Adjusting the pattern for a different size hanger is straightforward. Measure the width and height of your hanger, and then modify the fabric dimensions accordingly. Add a few extra inches to the width to accommodate the hanger’s bulk and ensure the bag hangs properly. You may also need to adjust the length of the opening to fit your specific hanger.
6.2 Can I add a zipper to my clothes pin bag?
Yes, you can add a zipper to your clothespin bag for added security. This involves a few extra steps, such as inserting the zipper between the main fabric and the lining before sewing the bag together. For those interested, we offer a pattern with a zipper closure that provides detailed instructions on this process.
6.3 How do I prevent the fabric from fraying?
Preventing fabric from fraying is essential for creating a durable and long-lasting clothespin bag. You can use pinking shears, which cut a zig-zag edge that helps to minimize fraying. Alternatively, you can apply a zig-zag stitch along the raw edges using your sewing machine. If you have a serger, it will provide the most professional and effective finish.
6.4 Where can I find free clothes pin bag patterns?
This article provides a selection of free, downloadable clothes pin bag patterns in PDF format. You can find them in the “Free Clothes Pin Bag Patterns to Download” section, which includes a variety of styles and features to suit different needs and skill levels. Simply click on the links to access the patterns and start your project.
7. My Pack Love – Providing Service for Custom Sewing and Packing Accessories
At My Pack Love, we are dedicated to providing high-quality custom sewing and packing accessories, designed to elevate your creations and streamline your packaging process. We are committed to customer satisfaction and offer unique product offerings that cater to a wide range of needs, especially for those passionate about sewing and crafting. Our diverse product range is tailored to enhance your brand image, adding a touch of professionalism and personalization that sets you apart.
Our Value Booster Kit is a game-changer for those selling handmade goods. It’s carefully curated to enhance product presentation, making your creations stand out and leaving a lasting impression on your customers. This comprehensive kit helps elevate your brand image, ensuring your products are perceived as high-quality and professionally crafted.
For those who sew, our high-quality custom woven labels are a must-have. They add a professional and personalized touch to your handmade items, instantly increasing brand recognition. These labels are meticulously crafted to reflect your unique brand identity, ensuring your creations are easily identifiable and leave a lasting impression.
Heat Transfer Labels offer a modern and versatile labeling solution. They are incredibly easy to apply and highly durable, making them perfect for a wide variety of fabrics. Their sleek design and long-lasting nature make them an excellent alternative to traditional labels.
Rubber Labels provide a unique tactile experience combined with exceptional durability and water resistance. They are ideal for items that require a robust label that can withstand harsh conditions while maintaining a distinctive look.
Our custom zipper bags are perfect for packaging and organizing a variety of items, including craft supplies. Their versatility and customization options make them an indispensable tool for keeping your materials tidy and protected.
Finally, our poly mailers offer a lightweight, cost-effective, and customizable shipping solution. They ensure your products are well-protected during transit, giving you peace of mind and saving on shipping costs.
Read more:
We’ve explored the many benefits of creating your own clothespin bag, from bringing order to your laundry routine to embracing a more sustainable approach. This sewing tutorial has provided you with all the necessary information, including a step-by-step guide and free patterns, to embark on this rewarding DIY project. Now it’s time to get started and experience the satisfaction of completing a handmade item.
With our free patterns, you can start sewing your personalized clothespin bag today. Choose your favorite design, gather your materials, and enjoy the process of creating something both functional and beautiful. Remember, this isn’t just about laundry organization; it’s about the versatility of a well-crafted bag. Beyond storing clothespins, you can use it to organize bathroom essentials, craft supplies, or even as a travel-friendly toiletry bag.
The simple act of making something with your own hands brings a unique sense of accomplishment. This clothespin bag is more than just a sewing project; it’s a testament to your creativity and resourcefulness. We hope this summary of key takeaways has inspired you. Thank you for taking the time to explore this guide. We encourage you to share your creations and ask any further questions you may have!


