How to Fix a Nylon Jacket Hole or Tear: The Ultimate Guide to Patching
Nylon jackets, valued for being lightweight and often water-resistant, are a staple in many wardrobes, especially for those who love the outdoors. But they can also be prone to rips, tears, and holes. A snag on a branch, a brush against a rough surface, or even just everyday wear and tear can leave your favorite jacket looking worse for wear. This can be incredibly frustrating, and the thought of having to replace an otherwise perfectly good piece of clothing can be disheartening. Replacing a damaged jacket can become a costly endeavor.
That’s where this guide comes in. Instead of tossing that damaged jacket, This guide will demonstrate the process to bring it back to life. Repairing your nylon jacket is a cost-effective, and sustainable solution that offers several benefits:
- Save Money: Patching a hole is significantly cheaper than buying a new jacket.
- Extend Jacket Lifespan: Keep your favorite piece of outerwear in use for longer.
- Sustainability: Reduce waste by repairing instead of replacing.
This comprehensive guide provides easy-to-follow, step-by-step instructions on how to patch nylon jackets, regardless of the size or type of damage. You’ll gain the knowledge and confidence to tackle any repair, from a tiny pinhole to a larger tear, ensuring your jacket is ready for your next adventure.
1. Assessing the Damage and Choosing the Right Patch
1.1 Inspecting the Damage
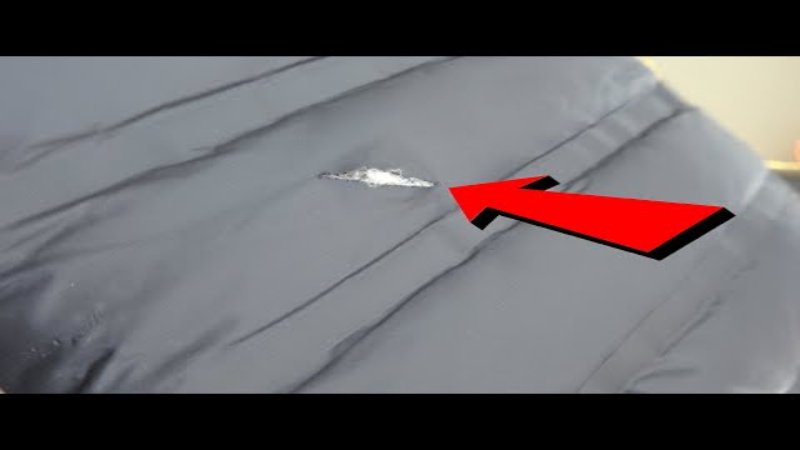
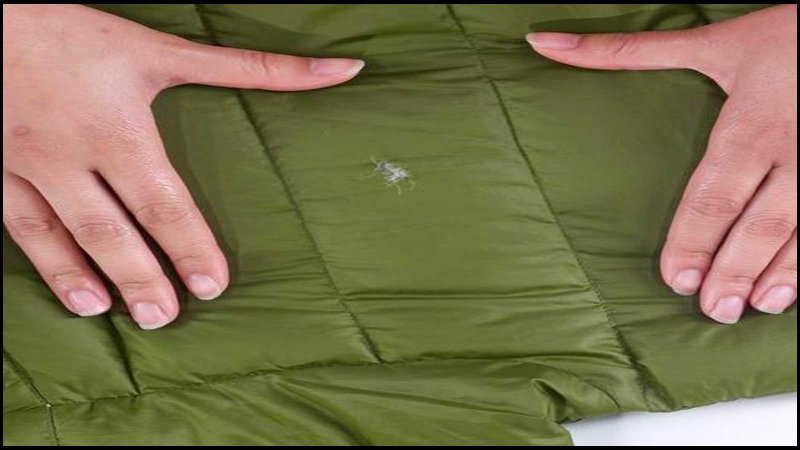
Before repairing your nylon jacket, carefully inspect the damage. The extent (size), form (shape), and position of the tear or hole, along with the type of damage (tear, puncture, or hole), and the condition of the surrounding fabric, are all crucial. These factors determine the best patch and repair technique. Check if the damage is a simple tear, a puncture, or a larger hole. Also, see if the fabric around the damage is weak, requiring a larger patch for support.

1.2 Types of Nylon Jacket Patches
Choosing the correct patch type is crucial for a successful and long-lasting repair. Let’s dive into some common kinds of patches:
- Self-Adhesive Patches: These are the easiest to use and are perfect for small to medium-sized repairs. They come with a pre-applied adhesive backing – simply peel and stick. They’re great for quick fixes and on-the-go repairs.
- Iron-On Patches: Iron-on patches offer increased durability compared to self-adhesive patches. The heat from the iron activates the adhesive, creating a stronger bond with the nylon fabric. These are a good option for areas that experience more wear and tear.
- Pre-Cut vs. Roll Patches:
- Pre-Cut Patches: These come in various shapes and sizes (circles, squares, rectangles). They’re convenient and ready to use, saving you the trouble of cutting.
- Roll Patches: These come in a roll and allow you to cut the patch to the exact size and shape you need. This provides more flexibility, especially for irregularly shaped tears.
- Color and Texture Matching: For an unnoticeable repair, picking a patch that closely matches the color and texture of your jacket is essential. Patches are available in a wide array of colors, and some even mimic the texture of common nylon fabrics.
- Material Compatibility:
Nylon fabrics come in different varieties. Ripstop nylon, for example, has a grid pattern that helps prevent tears from spreading. While most patches will work on various nylon types, checking the patch manufacturer’s recommendations for material compatibility is always a good idea.
1.3 Considering Waterproofing
When repairing a waterproof nylon jacket, remember that regular patches (stick-on or iron-on) usually aren’t waterproof and can make the repaired spot vulnerable to leaks. Your best bet for maintaining waterproofing is to use a patch specifically designed to be waterproof. Alternatively, you can use a standard patch and then apply a seam sealant (a liquid or tape) around the edges to create a waterproof barrier.
2. Step-by-Step Guide to Applying a Nylon Jacket Patch
2.1 Preparing the Jacket
Proper preparation is key to ensuring the patch adheres correctly and lasts long. Here’s what you need to do:
- Clean the Area: Use isopropyl alcohol and a clean cloth to thoroughly clean the area around the damage. This removes any dirt, oil, or residue that could interfere with the patch’s adhesion. Allow the alcohol to evaporate completely before proceeding.
- Trim Loose Threads: Use small, sharp scissors to carefully trim any loose threads or frayed edges around the tear or hole. This creates a clean, smooth surface for the patch to adhere to.
- Dealing with Down (If Applicable): If you’re repairing a down jacket, you’ll need to address any down feathers that might be poking out. Gently push any escaping down back into the hole. If necessary, you can use a small piece of tape to temporarily hold the down in place while you apply the patch.

2.2 Applying a Self-Adhesive Patch
Self-adhesive patches are incredibly convenient for quick repairs. Here’s a step-by-step guide:
- Select/Cut the Patch: Choose a pre-cut patch that’s the right size and shape, or cut a piece from a roll patch, ensuring it extends at least 0.5 inches (1.27 cm) beyond the damage in all directions.
- Round the Corners: If your patch has square corners, use scissors to round them. Rounded corners are less likely to snag and peel up over time.
- Peel and Stick: Carefully peel off the backing paper from the patch. Position the patch over the damage, ensuring it’s centered and covers the entire area.
- Apply Pressure: Press down firmly on the patch, starting from the center and working your way outwards. Use your fingers or a smooth, hard object (like the back of a spoon) to apply consistent pressure.
- Smooth Out Bubbles: Make sure there are no air bubbles trapped under the patch. Work any bubbles out towards the edges.
2.3 Applying an Iron-On Patch
Iron-on patches provide a more robust and permanent repair. Follow these steps:
- Select/Cut the Patch: Similar to self-adhesive patches, choose or cut a patch that’s appropriately sized, extending beyond the damage by at least 0.5 inches.
- Round the Corners: Round the corners of the patch to prevent peeling.
- Set Iron to Low Heat: Set your iron to a low heat setting, without steam. It’s crucial to use low heat to avoid damaging the nylon fabric. Consult the patch manufacturer’s instructions for specific temperature recommendations.
- Position the Patch: Place the patch over the damage, adhesive side down.
- Use a Pressing Cloth: Place a thin cotton pressing cloth (like a handkerchief or piece of an old t-shirt) over the patch. This protects the nylon jacket from direct contact with the hot iron.
- Iron the Patch: Press the iron firmly onto the pressing cloth over the patch. Use a circular motion and apply even pressure for the recommended time (usually 15-30 seconds, but check the patch instructions). Do not move the iron back and forth as you would when ironing clothes; this can shift the patch.
- Check Adhesion: Carefully lift the pressing cloth and check if the patch has adhered properly. If not, repeat the ironing process for a few more seconds.
- Cool Down: Allow the patch and jacket to cool completely before handling.
2.4 Reinforcing the Repair (Optional)
If you need a more robust repair, especially on high-stress areas of the jacket or for substantial damage, there are a couple of ways to add reinforcement. One method is “double patching,” which involves applying patches to both sides of the damaged fabric for extra strength. Another is to use seam sealant, applying it around the patch’s edges to not only create a waterproof seal but also to help secure the patch and prevent it from lifting. Always follow the drying instructions for the seam sealant.

3. Maintaining Your Repaired Nylon Jacket
3.1 Washing and Drying
Proper care after patching is essential to ensure the longevity of the repair and the jacket itself. Here are some guidelines:
- Washing:
- Gentle Cycle: Wash the jacket on a gentle cycle using cold or lukewarm water. Avoid using hot water, as it can weaken the adhesive of the patch.
- Mild Detergent: Use a mild detergent specifically designed for delicate fabrics or outerwear. Avoid using harsh chemicals, bleach, or fabric softeners.
- Turn Inside Out (Optional): Turning the jacket inside out before washing can help protect the patch from abrasion during the wash cycle.
- Close Zippers and Fasteners: Close all zippers, snaps, and Velcro closures to prevent them from snagging on the patch or other parts of the jacket.
- Drying:
- Air Dry: The best way to dry a patched nylon jacket is to air dry it. Hang it on a hanger or lay it flat on a clean, dry surface. Avoid direct sunlight or heat, which can damage the fabric and the patch.
- Low Heat Tumble Dry (If Necessary): If you must use a dryer, use the lowest heat setting and tumble dry for a short period. Remove the jacket while it’s still slightly damp and allow it to air dry completely.
- Check Patch Adhesion: After washing and drying, check the patch to make sure it’s still firmly adhered. If you notice any lifting or peeling, you can try to re-adhere it with an iron (using a pressing cloth and low heat) or apply a small amount of seam sealant to the edges.
3.2 Long-Term Care
To prevent future damage and keep your repaired jacket in good condition, follow these tips:
- Avoid Sharp Objects: Be mindful of sharp objects or rough surfaces that could snag or tear the jacket, especially in the patched area.
- Proper Storage: Store your jacket in a cool, dry place. Avoid hanging it in direct sunlight or cramming it into a tight space, which can put stress on the patch and the fabric.
- Periodic Inspections: Regularly inspect the patch and the surrounding area for any signs of wear and tear. Address any issues promptly to prevent further damage.
- Reapply Seam Sealant (If Needed): If you used seam sealant, check it periodically and reapply if necessary to maintain a waterproof seal.
4. Related Questions
4.1 Can I use a nylon patch on other types of fabric?
Nylon patches are generally suitable for other synthetic fabrics like polyester. However, they may not adhere well to natural fibers like cotton or wool. Always check the patch manufacturer’s recommendations for fabric compatibility. If unsure, test the patch on a hidden area of the garment first.
4.2 What if my patch starts to peel off?
If a self-adhesive patch starts to peel, you can try to re-adhere it by applying pressure. For iron-on patches, you can try reheating the patch with an iron (using a pressing cloth and low heat). If these methods don’t work, you may need to remove the old patch and apply a new one. You might also consider using seam sealant around the edges to help prevent future peeling.
4.3 My jacket is a very bright/unusual color – how can I find a matching patch?
Finding an exact color match for a brightly colored or uniquely patterned jacket can be challenging. Some options include:
- Check Specialty Stores: Outdoor gear retailers and fabric stores often have a wider selection of patch colors and materials.
- Online Retailers: Online retailers offer a vast selection of patches, making it more likely you’ll find a close match.
- Consider a Contrasting Patch: If an exact match is impossible, you could choose a contrasting color or a fun, decorative patch that complements the jacket’s design.
- Use a Clear Patch: Clear patches are a good option for any color jacket, as they are nearly invisible.
4.4 How long will the patch last on my jacket?
The lifespan of a patch depends on several factors, including the type of patch, the quality of the application, the frequency of use and washing, and the care taken to protect the jacket. A well-applied patch, especially an iron-on patch, can last for years with proper care.
4.5 Can I sew the patch even though it’s a self-adhesive type?
Yes, you can. It will reinforce to make sure your patch will stick longer.
Read more:
Patching a nylon jacket is a simple, cost-effective, and sustainable way to extend the life of your favorite outerwear. Instead of discarding a damaged jacket, you can easily repair it with the right tools and techniques. By following the steps outlined in this guide, you can confidently tackle any rip, tear, or hole, restoring your jacket to its former glory.


