How to Label Clothes: Durable Methods That Last
Labeling clothes might seem like a small detail, but it’s a crucial one. From conveying essential information to enhancing the brand’s image, clothing labels play a multifaceted role. This ultimate guide provides a complete overview of how to label clothes effectively, covering everything from choosing the right materials to ensuring compliance with relevant regulations. By the end of this guide, readers will understand the key elements of a successful clothing label and be equipped to create labels that inform, protect, and elevate their brand.
1. Why Label Clothes? Understanding the Benefits
In shared living environments like nursing homes, summer camps, and college dorms, laundry often becomes a communal activity. This can easily lead to misplaced or lost clothing, causing emotional distress and financial strain for residents and their families.
Clearly labeled clothes significantly reduce the chances of items ending up in the lost and found, ensuring that belongings return to their rightful owners. This simple act provides peace of mind and avoids the unnecessary expense of replacing lost items.

1.2 Protecting Valuable Clothing Items
Whether it’s a designer dress, a vintage jacket, or a cherished handmade sweater, certain clothing items hold significant value, either monetary or sentimental. Labeling these items provides a clear indication of ownership, acting as a deterrent against accidental mix-ups or, in some cases, even theft. It’s a simple way to safeguard prized possessions.
1.3 Maintaining Hygiene and Organization
In shared living spaces, maintaining hygiene is paramount. Labeled clothes help prevent the accidental sharing of personal items, reducing the potential spread of germs or allergens. Beyond hygiene, labels contribute significantly to better organization. Whether it’s in a child’s dresser, a shared closet, or a storage bin, labeled clothing makes it easy to identify items quickly, simplifying wardrobe management and saving time.
1.4 Branding and Inventory Management for Businesses
For small clothing businesses, labels are an essential tool for branding and inventory management. Custom labels featuring a logo, brand name, and care instructions create a professional image and reinforce brand recognition. Labels also streamline inventory management, allowing businesses to easily track stock levels, sizes, and styles. This is crucial for efficient operations and customer satisfaction.
1.5 Identifying Clothing After Alteration or Repair
Labels help tailors and dry cleaners to identify clothing. So customers don’t have to worry about mixing up their garments.
2. Choosing the Right Labeling Method: A Comprehensive Comparison
2.1 Permanent Labeling Options
Permanent labeling methods are designed to withstand repeated washing and wear, providing a long-lasting solution for identifying clothing. These options are ideal for items that require frequent laundering or for situations where permanent identification is essential, such as in nursing homes or for children’s clothing. The most common permanent methods include fabric markers, laundry stamps, iron-on labels, and sew-on labels.

2.2 Fabric Markers and Laundry Pens
Fabric markers and laundry pens are specially designed to write directly on fabric, providing a permanent and washable marking solution. They are a popular choice for their ease of use and versatility.
Pros:
- Relatively inexpensive.
- Easy to use, requiring no special equipment.
- Widely available in various colors and tip sizes.
- Suitable for a wide range of fabrics.
Cons:
- Ink can sometimes bleed, especially on loosely woven fabrics.
- May fade slightly over time with repeated washing.
- Can be difficult to remove if a mistake is made.
- Not ideal for very dark fabrics (light-colored inks may not show up well).
2.3 Marking Your Garments with Fabric Markers
Step-by-step Instructions:
- Pre-wash the garment: Washing and drying the fabric before applying the marker removes any sizing or finishes that might interfere with ink adhesion.
- Test on a scrap piece of fabric: Before marking the garment, test the marker on a hidden area or a scrap of similar fabric to check for ink bleeding and ensure the desired color and line thickness.
- Place a piece of cardboard or thick paper behind the fabric: This prevents the ink from bleeding through to the other side of the garment.
- Write clearly and firmly: Use a smooth, even pressure to write the desired information. Avoid pressing too hard, which can cause the ink to spread.
- Allow the ink to dry completely: Let the ink dry thoroughly according to the manufacturer’s instructions (usually several hours or overnight).
- Heat-set the ink (optional, but recommended): Many fabric markers recommend heat-setting the ink to improve its permanence. This can be done by ironing the marked area (with a pressing cloth between the iron and the fabric) or by placing the garment in a hot dryer for a specified time. Refer to the marker’s instructions for specific heat-setting guidelines.
Consider using a fabric marking pencil to sketch out the design or text before applying the permanent marker.
2.4 Laundry Stamps
Laundry stamps offer a quick and consistent way to apply permanent markings to clothing, particularly useful for labeling multiple items with the same information (e.g., a name or initials).
Pros:
- Fast and efficient for labeling multiple items.
- Creates a uniform and professional-looking mark.
- Self-inking stamps are convenient and mess-free.
- Custom stamps can be created with personalized information.
Cons:
- Can be more expensive than fabric markers, especially for custom stamps.
- Ink may bleed on some fabrics.
- Limited to the design and size of the stamp.
- May require re-inking periodically.
2.5 Iron-On Labels
Iron-on labels are pre-printed or customizable labels that are applied to fabric using heat and pressure from an iron. They provide a durable and professional-looking labeling solution.
Pros:
- Durable and long-lasting.
- Resistant to fading and washing.
- Available in a variety of sizes, styles, and colors.
- Can be customized with names, logos, or other information.
- Relatively easy to apply.
Cons:
- Can be more expensive than fabric markers or stamps.
- Require an iron and ironing board.
- May not adhere well to all types of fabric (e.g., very textured or heat-sensitive fabrics).
- Can be difficult to remove.
2.6 Sew-On Labels
Sew-on labels, typically made of woven fabric, are considered the most durable and traditional method of labeling clothes. They are attached by stitching them directly onto the garment, either by hand or with a sewing machine.
Pros:
- Extremely durable and long-lasting.
- Resistant to fading, washing, and wear.
- Can be applied to virtually any type of fabric.
- Offer a classic and professional look.
- Can be removed and replaced if necessary (though this requires some effort).
Cons:
- Require basic sewing skills or a sewing machine.
- More time-consuming to apply than other methods.
- May not be suitable for very delicate fabrics (the stitching could damage the fabric).
2.7 Temporary Labeling Options
Temporary labeling methods offer a convenient solution for situations where permanent marking is not desired or necessary. These options are ideal for short-term use, such as identifying clothing for a trip, a sporting event, or a temporary stay in a shared living environment. They are also useful for items that might be resold or donated later. Common temporary labeling methods include stick-on fabric labels, plastic tag labels, and even a quick fix with masking tape and a permanent marker.

2.8 Stick-On Fabric Labels
Stick-on fabric labels are a quick and easy temporary labeling solution. They feature an adhesive backing that allows them to be applied directly to fabric without the need for ironing or sewing.
Pros:
- Very easy to apply – simply peel and stick.
- No special equipment required.
- Removable without leaving residue (on most fabrics).
- Available in a variety of sizes and styles.
Cons:
- Not as durable as permanent labeling methods.
- May not withstand repeated washing.
- Can fall off if not applied correctly or if the fabric is heavily textured.
- Not suitable for all fabric types.
2.9 Plastic Tag Labels
Plastic tag labels, often used in retail settings, can also be a convenient temporary labeling option for personal use. These labels typically consist of a small plastic tag with a clip or pin attachment.
Pros:
- Easy to attach and remove.
- No special equipment required (although some may come with an attachment tool).
- Reusable.
- Do not damage the fabric.
Cons:
- Can be bulky and uncomfortable.
- May not be suitable for delicate fabrics or close-fitting garments.
- Can be easily lost if not securely attached.
- Not very discreet.
2.10 Masking Tape and Permanent Marker
In a pinch, masking tape and a permanent marker can serve as a very basic, temporary labeling solution. This method is not ideal for long-term use or for items that require frequent washing, but it can be useful in emergencies or for very short-term needs.
Pros:
- Readily available and inexpensive.
- Requires no special equipment.
- Easy to apply and remove.
Cons:
- Not durable or waterproof.
- Tape can leave a sticky residue on some fabrics.
- Not very aesthetically pleasing.
- Ink may bleed or fade.
- Only used for a short time
2.11 Comparison Table: Labeling Methods at a Glance
| Labeling Method | Durability | Cost | Ease of Use | Removability |
|---|---|---|---|---|
| Fabric Markers | Medium | Low | High | No |
| Laundry Stamps | High | Medium | High | No |
| Iron-On Labels | High | Medium | Medium | No |
| Sew-On Labels | Very High | Medium-High | Low | Yes (with effort) |
| Stick-On Fabric Labels | Low | Low | High | Yes |
| Plastic Tag Labels | Medium | Low | High | Yes |
| Masking Tape and Marker | Very Low | Very Low | High | Yes |
3. Labeling Different Fabric Types: Tips and Tricks
3.1 Cotton and Cotton Blends
Cotton and cotton blends are generally the easiest fabrics to label. They are durable and can withstand various labeling methods, including fabric markers, laundry stamps, iron-on labels, and sew-on labels. Because cotton is typically heat-resistant, iron-on labels are a particularly good option.
Synthetic fabrics like polyester and nylon require more caution, especially when using heat-based methods. These materials can be heat-sensitive and may melt or scorch if exposed to high temperatures. When using iron-on labels, use a low heat setting and always use a pressing cloth. Fabric markers, laundry stamps, and sew-on labels are generally safe options for synthetics.
3.2 Delicate Fabrics
Delicate fabrics like silk, lace, and wool require a gentle approach. Avoid harsh chemicals or methods that could snag, tear, or distort the fabric. Sew-on labels are often the best choice, using a fine needle and thread and a delicate stitch. Avoid using iron-on labels unless specifically designed for delicate fabrics, and always test in an inconspicuous area first. Fabric markers should also be used with caution and tested beforehand.
3.3 Knitted Fabrics
Knitted fabrics, such as sweaters and socks, present a unique challenge due to their stretch and texture. Sew-on labels are generally preferred, as they can move with the fabric without causing distortion. When sewing, avoid stretching the fabric, and use a stitch that allows for some give. Iron-on labels can be used, but be very careful to not overheat or stretch the fabric.

3.4 Dark vs. Light Fabrics
The color of the fabric plays a crucial role in label visibility. On dark fabrics, use light-colored labels or markers (white, silver, or light pastels) for good contrast. On light fabrics, use darker labels or markers (black, navy, or dark colors). This ensures that the label information is easy to read.
4. Labeling Specific Clothing Items: A Practical Guide
4.1 Shirts and Tops: Discreet Label Placement
For shirts and tops, several discreet and convenient placement options exist:
- Care Tag: The existing care tag is often the most convenient place to add a name or identifying mark, especially when using fabric markers or laundry stamps.
- Inside Side Seam: Sewing or ironing a label onto the inside side seam, near the bottom hem, provides a hidden but easily accessible location.
- Inside Back Collar: Placing a small label on the inside back collar, below the existing brand label (if present), is another discreet option.
Pants and Skirts (Placement Options: Waistband, Inside Seam)
For pants and skirts, consider these placement options: - Inside Waistband: The inside waistband, either at the back or side, offers a discreet and comfortable location for a label.
- Inside Side Seam: Similar to shirts, the inside side seam near the pocket or hem is another good option
4.2 Underwear and Socks
Labeling underwear and socks requires a bit more consideration for comfort and discretion:
Elastic Band (Underwear): The inside of the elastic waistband is a suitable location, ensuring the label doesn’t irritate the skin.
Inside Side Seam (Underwear): A small label can be sewn or ironed onto the inside side seam.
Inside Top Cuff (Socks): Placing a label on the inside of the top cuff is a common and discreet option.
Sole (Socks): For dark-colored socks, a light-colored fabric marker can be used to write directly on the sole.
4.3 Outerwear and Accessories
Outerwear often has more labeling options due to its construction:
- Inside Lining: The lining of a jacket or coat provides ample space for labels.
- Inside Pocket: Placing a label inside a pocket is a discreet and protected location.
- Existing Brand Label: Sewing a small name label near the existing brand label can be a good approach.
Accessories (Hats, Scarves, Gloves)
Labeling accessories requires a delicate touch to avoid damaging the item: - Hats: The inside sweatband or an existing tag is the best location.
- Scarves: A small, sew-on label at one end or on the inside seam is recommended.
- Gloves: Labeling gloves can be tricky. A small, sew-on label inside the cuff is often the best option, if feasible.
5. Troubleshooting Common Labeling Problems
5.1 Labels Falling Off
Labels, particularly stick-on or iron-on varieties, may sometimes detach from clothing. This can be due to several factors:
- Poor Initial Adhesion: The label may not have been applied with enough pressure or heat (for iron-on labels).
- Incorrect Fabric Type: The label may not be compatible with the fabric type.
- Repeated Washing and Drying: Over time, the adhesive can weaken, especially with frequent exposure to hot water and high dryer temperatures.
- Textured Fabric: Labels may not adhere well to heavily textured fabrics.
Solutions:
- Reapply (Iron-on): If an iron-on label is starting to peel, you may be able to reapply it by using a pressing cloth and applying heat and pressure again.
- Sew It On: If a label repeatedly falls off, consider sewing it onto the garment for a permanent solution.
- Choose the Right Label: Select a label specifically designed for the type of fabric you are labeling.
- Follow Instructions Carefully: Always follow the label manufacturer’s instructions for application and care.
5.2 Ink Bleeding or Fading
Ink bleeding or fading can make labels illegible and unsightly. This can be caused by:
- Incorrect Ink Type: Using a non-permanent marker or a marker not designed for fabric.
- Fabric Type: Loosely woven fabrics are more prone to ink bleeding.
- Washing Too Soon: Not allowing the ink to dry completely before washing.
- Harsh Detergents or Bleach: Using harsh chemicals can cause ink to fade or bleed.
Solutions:
Pre-test: Always test the marker or stamp on a scrap piece of fabric or a hidden area of the garment before applying it to the visible area.
Use Fabric-Specific Markers: Use markers or stamps specifically designed for use on fabric.
Heat-Set: Heat-set the ink according to the manufacturer’s instructions.
Wash Gently: Wash labeled items in cold water with a mild detergent. Avoid using bleach.
5.3 Removing Labels
If you need to remove a label, do so carefully to avoid damaging the fabric. The best removal method depends on the type of label:
Stick-on Labels: Gently peel off the label. If there’s residue, see section 5.4.
Iron-on Labels:
- Heat Method: Place a pressing cloth over the label and apply heat with an iron (medium setting, no steam). This may soften the adhesive, allowing you to peel off the label.
- Adhesive Remover: Apply a fabric-safe adhesive remover (see section 5.4) to the label and surrounding area. Allow it to sit for the recommended time, then gently try to peel off the label.
- Sew-on Labels: Use a seam ripper or small, sharp scissors to carefully cut the threads attaching the label to the garment. Be very careful not to cut the fabric itself.
5.4 Dealing with Sticky Residue
After removing a stick-on or iron-on label, you may be left with sticky residue on the fabric. Here’s how to remove it:
- Rubbing Alcohol: Apply a small amount of rubbing alcohol to a clean cloth and gently rub the residue. Test on an inconspicuous area first.
- Commercial Adhesive Remover: Use a fabric-safe adhesive remover, following the manufacturer’s instructions.
- Vinegar: Apply a small amount of warm water, add vinegar to the area of the residue, and gently rub
- Avoid Harsh Chemicals: Do not use harsh chemicals or solvents that could damage the fabric.
6. Labeling for Small Clothing Businesses: Branding and Beyond
6.1 Choosing Professional Labeling Options
Small businesses have several professional labeling options to choose from, each with its own advantages:
- Woven Labels: These are considered the industry standard for high-quality apparel. They are created by weaving threads together to form the design, resulting in a durable and sophisticated label. Woven labels are ideal for showcasing logos, brand names, and care instructions.
- Heat Transfer Labels: These labels are applied using heat and pressure, transferring the design onto the fabric. Heat transfer labels are a good option for intricate designs or when a “tagless” look is desired. They are often used for care labels and neck labels.
- Printed Fabric Labels: Printed fabric labels are created by printing a design onto a roll of fabric. They work well for displaying care and content information
6.2 Creating Custom Labels with Logos and Care Instructions
Creating custom labels allows businesses to incorporate their branding elements and essential information:
- Logo: The label should prominently feature the brand’s logo, reinforcing brand recognition.
- Brand Name: Include the full brand name, even if the logo is present.
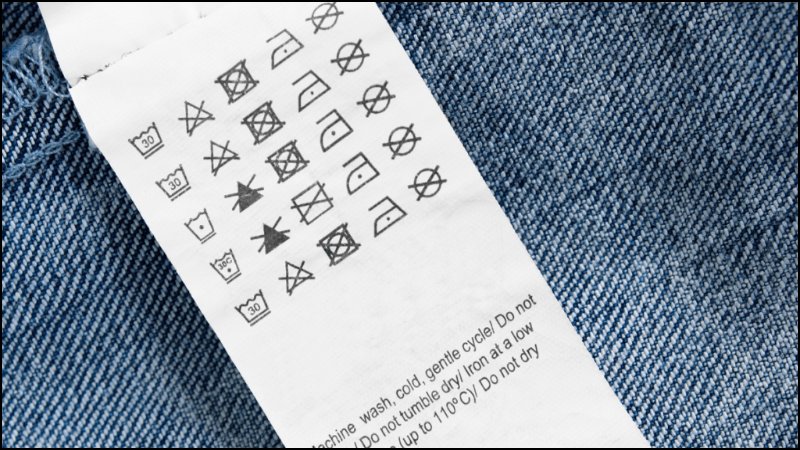
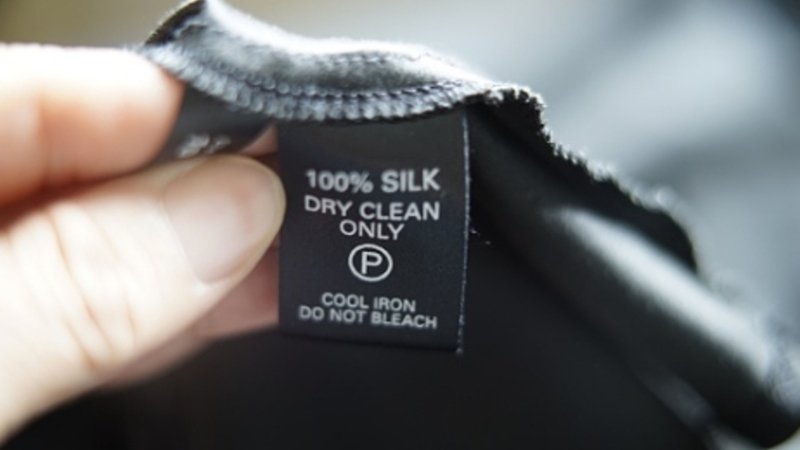
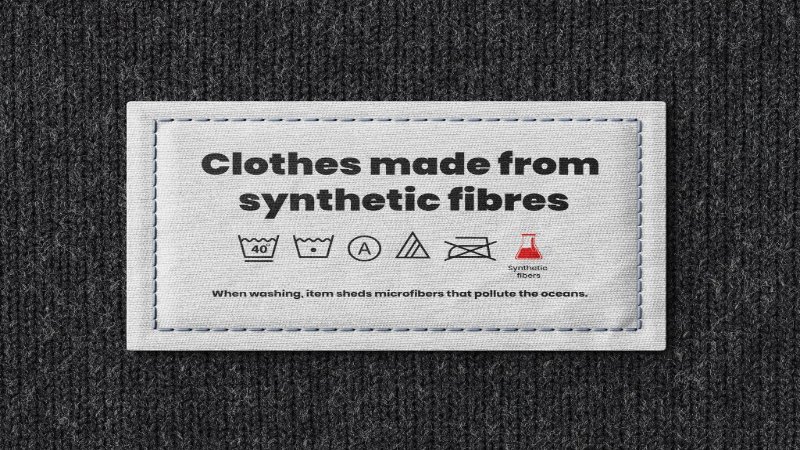
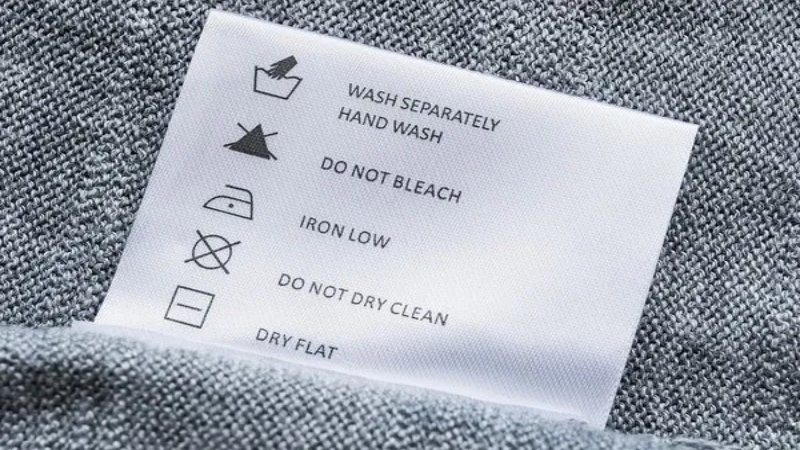
- Care Instructions: Clear and accurate care instructions are legally required and essential for customer satisfaction.
- Fiber Content: Legally required information about the fiber composition of the garment.
- Country of Origin: Legally required information about where the garment was manufactured.
- Website/Social Media: Consider adding a website URL or social media handles to encourage customer engagement.
Online label makers and specialized printing services offer easy ways to design and order custom labels.
6.3 Label Placement for Branding and Aesthetics
Strategic label placement enhances the overall presentation of the garment:
- Neck Labels: The back of the neck is a standard location for brand labels, often placed below the collar.
- Hem Tags: Small, folded labels sewn into the bottom hem or side seam can add a subtle branding touch.
- Side Seam Labels: Care labels and fiber content information are often placed on the inside side seam.
- Sleeve Labels: Place the label on the sleeve of the shirt.
The goal is to choose placements that are both visible and discreet, complementing the garment’s design.
6.4 Inventory Management with Barcodes and QR Codes
Labels can play a crucial role in inventory management:
- Barcodes: Incorporating barcodes on labels allows for quick and accurate scanning, facilitating stock control, sales tracking, and order fulfillment.
- QR Codes: QR codes can link to online product information, size charts, care instructions, or even promotional content. This provides a way to engage customers and provide additional value.
7. Related Questions
7.1 How can I label clothes for sensitive skin?
For individuals with sensitive skin, choosing the right labeling method is crucial. Opt for soft, natural materials like cotton or silk for sew-on labels. Avoid labels with rough textures or harsh chemicals. If using iron-on labels, ensure they are specifically designed for sensitive skin and are OEKO-TEX certified (or similar), indicating they have been tested for harmful substances. Consider placing labels on the inside seams or under existing care tags to minimize direct contact with the skin.
7.2 What is the most eco-friendly way to label clothes?
For environmentally conscious labeling, prioritize sustainable materials and processes. Consider sew-on labels made from organic cotton, recycled polyester, or other eco-friendly fabrics. Look for label suppliers that use water-based inks and minimize waste in their production processes. If using iron-on labels, choose those made with recycled materials and non-toxic adhesives. Even better, consider partnering with a supplier like Packlove, committed to ethical and sustainable practices in the garment industry.
7.3 Can I use a label maker to create clothing labels?
Some label makers are designed to print on fabric ribbons or iron-on tapes, allowing you to create custom clothing labels. However, the durability and washability of these labels may vary. It’s essential to choose a label maker and tape specifically designed for fabric use and to test the labels thoroughly before applying them to a large number of garments. This method is often best suited for personal use or small-scale labeling, rather than large-volume production.
7.4 Are there special labels for dark clothing?
While there aren’t labels specifically made for dark clothing, the key is to ensure sufficient contrast. Use white or light-colored labels or markers on dark fabrics to ensure the information is easily readable. Iron-on labels with a white background and dark text are a good option. For sew-on labels, choose a light-colored fabric and thread.
Read more:
Labeling clothes, whether for personal use or for a small business, involves a range of considerations, from choosing the right method and materials to ensuring proper placement and addressing potential problems. By understanding the various labeling options, from simple fabric markers to professional woven labels, and by following the tips and tricks outlined in this guide, anyone can effectively label garments for a variety of purposes.
Remember that proper labeling not only prevents loss and aids in organization, but it also protects valuable items, contributes to hygiene, and, for businesses, enhances branding and streamlines inventory management. So, take the time to choose the best labeling approach for your specific needs, and start labeling with confidence!


