How to Sew a Straight Line: Beginner’s Guide and Expert Tips
Embarking on your sewing journey, or even striving to elevate your existing skills, often hinges on one fundamental technique: sewing a straight line. It’s a cornerstone for countless projects, from crafting elegant garments to piecing together intricate quilts, and essential for achieving professional-looking, durable results. Wobbly, uneven seams can compromise both the structure and aesthetics, potentially leading to fit issues in clothing or a less polished finish.
This comprehensive guide is tailored for sewists of all levels, whether you’re just starting, experiencing challenges with consistent straight stitches, or aiming to refine your existing technique. Mastering the art of the straight seam not only instills confidence but unlocks a wider range of sewing possibilities.
We’ll provide actionable advice, troubleshoot common problems, and suggest tools to help you achieve beautifully straight lines every time. You’ll gain the skills and assurance to approach any sewing endeavor, knowing that your seams will be strong, accurate, and visually appealing, regardless of whether you prefer hand sewing or using a machine.
1. Essential guidelines for sewing straight lines
1.1 The Importance of Practice and Patience
Before tackling your main project, dedicate time to practicing on scrap fabric. Sewing straight lines is a fundamental skill that improves with consistent effort. Start with a slower sewing speed, especially as a beginner; this allows for greater control and accuracy.
As your confidence and technique refine, you can gradually increase your speed. Mastering fabric manipulation requires patient, focused sewing, with eyes observing the fabric and the stitching closely.
1.2 Proper posture and fabric control
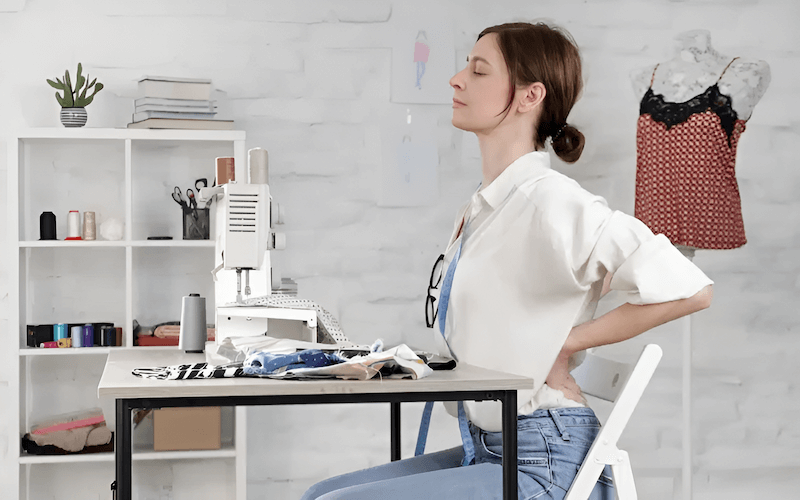
Maintaining the correct posture is crucial. Sit upright with good back support, facing your sewing machine squarely. Position your hands gently on either side of your fabric, guiding it lightly without pulling or pushing. Remember, the sewing machine’s feed dogs are responsible for moving the fabric.
Proper posture helps optimize fabric manipulation. Reposition your hands frequently to maintain consistent control, ensuring a smooth and even feed.
1.3 Needle maintenance and breaks
A sharp needle is paramount for creating clean, straight stitches. Replace your sewing machine needle regularly—ideally, after every 8 hours of sewing or after completing a significant project. A dull needle can lead to fabric puckering and troubleshooting uneven stitches.
During extended sewing sessions, take regular breaks. This allows you to reposition the fabric, rest your eyes, and prevent fatigue, which often contributes to errors in the seam.
2. Mastering straight lines on a sewing machine
2.1 Avoiding the needle-watching trap
A common pitfall for beginners is focusing solely on the needle’s movement. Instead, direct your gaze slightly ahead of the presser foot, along the intended seam line. Ironically, watching the needle can cause unintentional hand movements, leading to wobbly straight stitch. Mastering this simple shift in focus significantly improves sewing technique and sewing accuracy.
2.2 Letting the feed dogs do their job
Resist the urge to pull or push the fabric through the sewing machine. The feed dogs are specifically designed to advance the fabric at a consistent rate. Your role is to gently guide the material, ensuring it remains aligned with your chosen seam guide. Over-manipulating the fabric can interfere with the feed dogs’ function, resulting in uneven stitches. Correct fabric manipulation is key to perfect the sewing technique.
2.3 The importance of sewing speed and adjustments
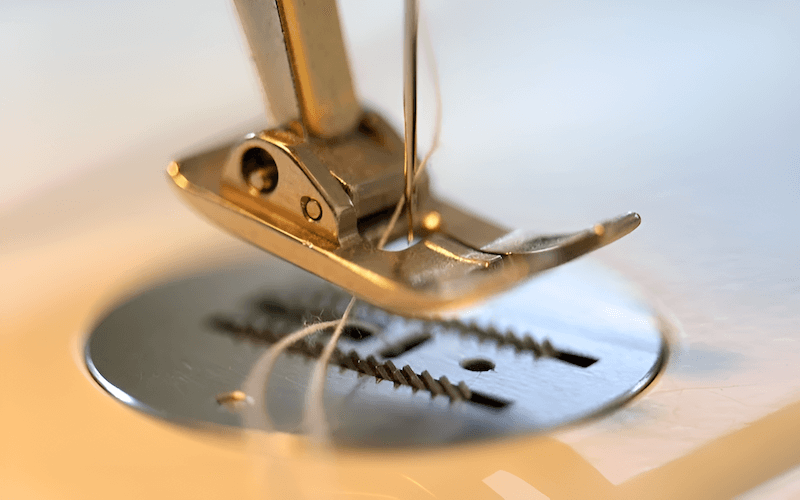
Especially when starting out, or when working with delicate or slippery fabrics, begin with a slow, deliberate speed. Consistent speed enables greater precision and allows for easier corrections. If you notice the fabric drifting off course, stop sewing, lower the needle positioning, lift the presser foot, and gently realign the fabric before continuing. This proactive approach ensures greater overall sewing accuracy.
3. Supporting your fabric for straighter seams
3.1 Dealing with large projects
Sewing large or bulky projects presents unique challenges. The weight of the excess fabric can pull it downwards, disrupting your seam alignment. Gravity causes the fabric to sag, making it difficult to maintain a consistently straight line.
To counteract this, support the excess fabric on a spacious, flat surface, like a sewing table, both in front of and behind your sewing machine, improving fabric manipulation, with these useful sewing tips.
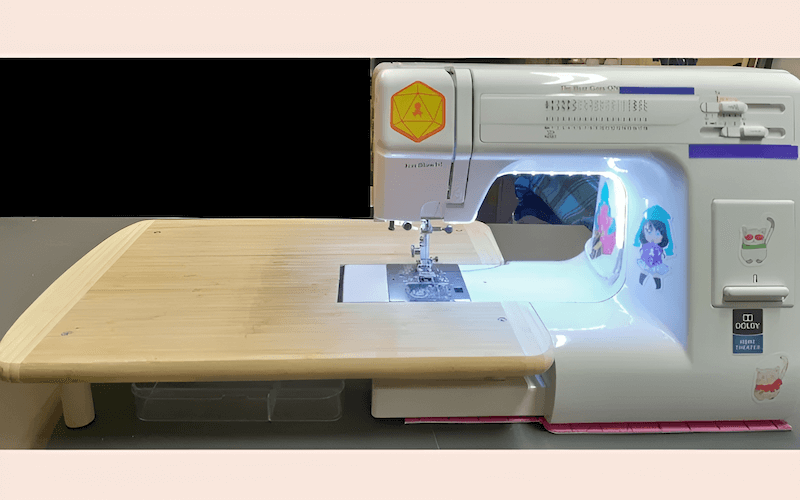
3.2 Using a sewing machine extension table
A sewing machine extension table is a valuable accessory that provides additional support, especially for larger projects. It expands the flat work area around your machine, preventing the fabric from draping down and distorting the seam. This added fabric support significantly enhances control and accuracy when handling bulky materials or large expanses of fabric.
4. Choosing your reference point: Guides and techniques
4.1 Using needle plate markings
Most sewing machine have seam guide markings etched onto the needle plate. These lines and numbers indicate different seam allowances. To use them, align the edge of your fabric with the marking that corresponds to your desired seam allowance. Common standards include 5/8 inch for garment sewing and 1/4 inch for quilting. This method helps marking fabric in sewing machine.
4.2 Using the presser foot as a guide
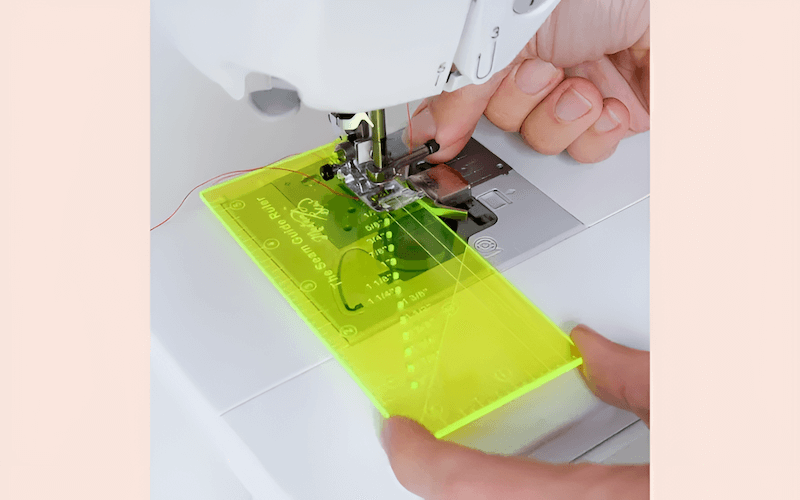
The presser foot itself can also serve as a convenient visual guide. On many standard presser feet, the inside edge aligns with a 1/4-inch seam allowance, while the outside edge corresponds to a 3/8-inch allowance. However, it’s crucial to verify these measurements on your specific machine.
4.3 Creating a custom guide with tape
For a temporary, customizable guide, apply washi tape, painter’s tape, or masking tape directly to your sewing machine bed. Position the tape parallel to the needle at the precise distance of your desired seam allowance. You can even mark a focal point on the tape, to resist the temptation to watch the needle. This is a simple DIY sewing guide, and useful sewing tips in marking fabric.
4.4 Marking your seam line directly
Another reliable method involves drawing the stitching line directly onto your fabric using washable fabric markers or tailor’s chalk. This creates a clear, unmistakable path to follow. Align the marked line with the center groove or marking often found on the sewing tools needle plate. This step offers precise visual guidance, especially helpful for beginners.
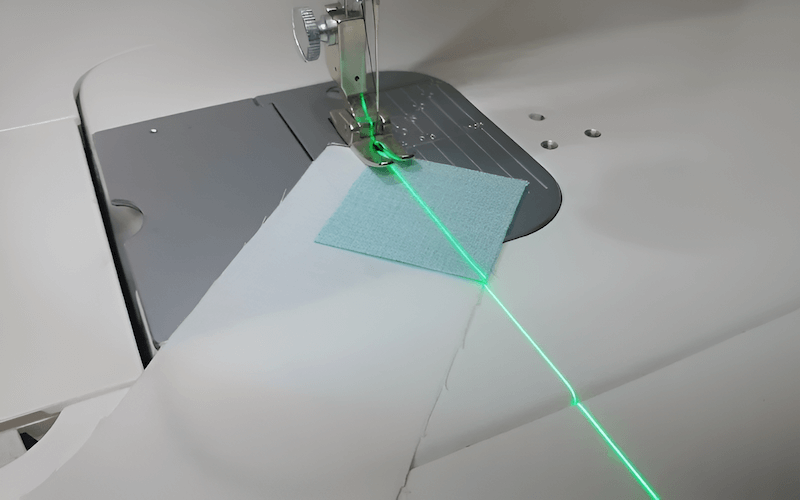
4.5 Utilizing a laser guide
For those seeking a high-tech solution, a laser guide offers exceptional precision. It projects a perfectly straight line onto the fabric, serving as an unwavering visual aid. Laser Guide is one of the useful sewing tools
5. Seam guide attachments for enhanced accuracy
5.1 Magnetic seam guides
Magnetic seam guides are handy tools that attach magnetically to the metal needle plate of your sewing machine. Position the guide at your desired seam allowance distance from the needle. It creates a physical barrier, guiding the fabric edge for consistent stitching.
While some believe they are harmful to computerized machines, they are generally safe; however, check your machine’s manual for specific warnings. It is popular sewing accessories.
5.2 Sewing edge vinyl strips
Sewing Edge vinyl strips offer an alternative, particularly for those wary of magnets near computerized machines. These strips adhere to the sewing machine bed, providing a similar physical guide for the fabric’s edge as the magnetic guide. It’s an excellent option for ensuring consistent seam. It is useful sewing accessories, and a useful seam guide.
5.3 DIY seam guide options (Post-It notes, Lego brick)
For quick, budget-friendly alternatives, consider these DIY seam guide options. A stack of Post-It notes or a Lego brick, secured with Blu-Tack, can serve as makeshift guides. Position them at your desired distance from the needle. These readily available items offer surprisingly effective solutions, proving that accurate seams don’t always require expensive tools. These are some easy sewing tips for those with budget sewing.
6. Specialty presser feet for straight-line sewing
6.1 Adjustable guide foot
An adjustable guide foot features a flange that can be set to a precise distance from the needle. This feature offers exceptional control over seam allowance, especially beneficial when working with wider seams or decorative topstitching. This specialized presser foot is invaluable for achieving consistent, professional-looking results, and one of the popular sewing accessories.
6.2 Quarter-Inch quilting foot
A quarter-inch quilting foot is specifically designed for the precise 1/4-inch seams essential in quilting. Many have a built-in edge guide, further ensuring accuracy. This specialized presser foot simplifies the process of achieving the consistent, narrow seams crucial for quilt construction. It is one of the important sewing accessories.
6.3 Border guide presser foot
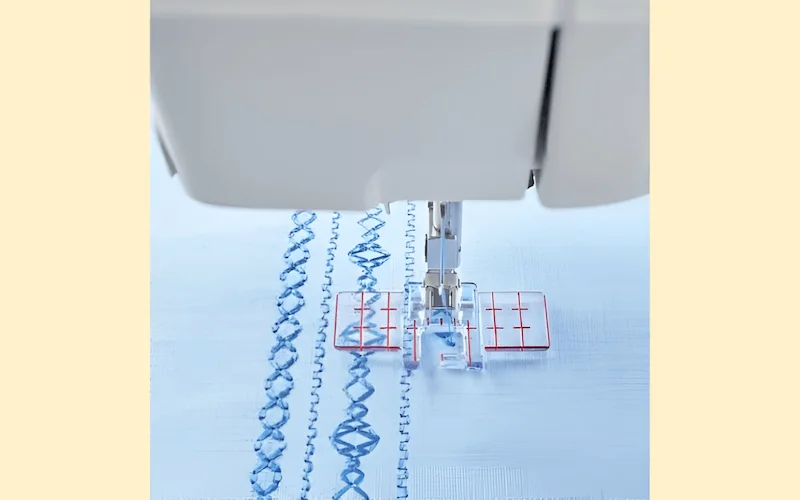
A border guide presser foot excels at sewing parallel rows of stitching, ideal for decorative topstitching or quilting. It features multiple markings that allow you to align the previous row of stitching, guaranteeing even spacing between lines. This presser foot is a valuable tool for creating intricate designs with consistent, parallel stitching. Also, one of the useful sewing accessories.
7. Adjusting needle position for precision
Sewing very close to the fabric edge presents a challenge. The fabric might not be fully engaged by both sets of feed dogs, causing it to shift or pull away from the seam line. Adjusting the needle positioning to the right (on most machines) allows you to sew narrow hems and small seams while keeping the fabric securely under the presser foot. Use the stitch width control to adjust needle position with a straight sewing technique.
8. Achieving straight lines with hand sewing
8.1 Preparing the thread and needle
For optimal hand sewing, cut a thread length of approximately 18 to 30 inches. Threading a needle properly, and secure the end with a sturdy knot by knot tying.
8.2 Marking your guideline
Before you begin hand sewing, use a ruler and tailor’s chalk (or a washable fabric marker) to draw a perfectly straight guideline on the marking fabric. This step is critical for achieving a straight hand-sewn seam.
8.3 Creating even stitches
The basic running stitch involves bringing the needle up from the back of the fabric and then down a short distance away. A stitch length of roughly 1/4 inch is suitable for many seams, but prioritize consistency above all else. This simple sewing technique forms the foundation of many hand-sewn projects.
9. FAQs about how to sew a straight line
9.1 What is the best stitch length for sewing a straight line?
The standard stitch length for most fabrics is 2.5mm. Use a shorter stitch length (1.5-2mm) for delicate fabrics or a longer stitch length (3-4mm) for thicker fabrics or basting.
9.2 My fabric keeps bunching up. How can I prevent this?
Fabric bunching could be incorrect thread tension, a dull needle, or uneven fabric feed. Check tension settings, replace the needle, ensure proper fabric alignment. Consider a walking foot.
9.3 How can I sew a straight line on slippery fabrics like silk or satin?
Slippery fabrics are challenging. Try placing tissue paper underneath, using a walking foot, or reducing presser foot pressure. Use fine silk pins to avoid damage.
9.4 Is it better to sew fast or slow for straight lines?
Sew at a slow to moderate speed, especially when learning. Slower speed gives more control. Increase speed with experience gradually.
9.5 What do I do when stitch is not straight?
If stitching goes off course, use a seam ripper to remove incorrect stitches and start again. Don’t sew over a crooked seam; it makes it worse.
10. Packlove – Providing service for sewing and customization
At Packlove, we appreciate that precision and quality are paramount. We provide customization services to bring your creative vision to reality. Our specialties include high-quality woven labels, heat transfer labels, and rubber labels for apparel and accessories, allowing you to add a personalized touch. Our Value Booster Kit offers an all-in-one branding solution.
Beyond labels, we provide customizable packaging, like zipper bags and poly mailers, ensuring products are presented and shipped securely. We are experts in working with different materials and techniques, including color printing, embossing, and foil stamping.
With years of experience, we’re committed to exceptional customer service, helping you find perfect solutions. Explore our website for our full range, or contact us for a personalized quote!
Read more:
Sewing a straight line is a foundational sewing skill, demanding practice and patience. This guide covered key techniques: hand sewing, machine sewing, utilizing guides, and adjusting settings. Keep practicing and experimenting to discover your preferred methods. With persistence, anyone can master straight-line sewing.


