


Iron-On Patches: The Definitive Uniform Patch Guide


Uniforms are more than just clothes; they represent belonging, achievement, and identity. Whether it’s for a sports team, a club, a scouting troop, or a professional organization, a well-maintained uniform speaks volumes. One of the most common ways to personalize and identify these uniforms is with patches.
However, applying these patches, especially iron-on-patches, can sometimes feel like a daunting task. Many people worry about damaging their uniform shirt, ensuring proper patch placement, or achieving patch durability.
Proper fabric care and the correct adhesive application are key to success. This guide is designed to provide the reader with the knowledge and confidence to apply iron-on-patches correctly, ensuring they last and look great. The reader will receive a comprehensive, step-by-step approach, covering everything from preparing materials to troubleshooting common issues, allowing to master this essential skill. Let’s read!
1. Preparing for Patch Application
Before even touching the iron, proper preparation is essential for a successful patch application. Taking the time to gather materials and assess fabric compatibility will significantly impact the final result.
1.1 Gathering Your Materials
To get started with the project, it’s important to have everything on hand. This will streamline the process and prevent interruptions:
- iron-on-patch: Choose the patch that best reflects an identity. There are many Types of patches, choose the right one for the reader
- Uniform shirt: Ensure the shirt is clean and ready for the application.
- Iron: A standard household iron will work perfectly.
- Ironing board: Provides a stable, heat-resistant surface.
- Press Cloth: A thin cotton cloth (like a pillowcase or handkerchief) to protect the patch and uniform.
- Tweezers: Helpful for handling the patch, especially when checking adhesion.
- Ruler or Measuring Tape: For precise patch placement.
- Pins: To temporarily hold the patch in place before ironing.
1.2 Checking Fabric Compatibility
iron-on-patches require heat, so it’s essential to choose the right fabric to prevent damage to your uniform. Fabrics like cotton, polyester, and cotton-poly blends are typically suitable for iron-on-patches. However, delicate fabrics such as rayon, nylon, vinyl, and leather are not recommended, as they are easily damaged by high heat. Always check your uniform’s care label for specific ironing guidelines and temperature limits. If you’re uncertain about the fabric’s heat tolerance, test a small, inconspicuous area first.
1.3 Preparing the uniform shirt
To ensure the best possible bond between the iron-on-patch and the uniform, the shirt needs to be clean and properly prepared:
- Wash and Dry: Start with a clean uniform shirt. Any dirt, dust, or residue can interfere with the adhesive.
- Iron the Shirt: Remove any wrinkles from the area where applying the patch. A smooth surface is crucial for even heat distribution and optimal adhesion. A wrinkled surface can prevent the patch from adhering correctly.
- Lay Flat: Place the shirt on the ironing board, ensuring the area for patch application is flat and accessible.
1.4 Understanding Your Patch
Before applying your patch, determine the application method by identifying the patch type: iron-on or sew-on. The key difference is the backing. iron-on-patches have a layer of heat-activated adhesive that looks like a shiny or slightly sticky film. Sew-on patches do not have this adhesive and typically have a fabric or felt backing. For iron-on-patches, ensure the adhesive is clean and free of debris for optimal adhesion.
2. Step-by-Step Ironing Instructions
Now that everything is prepared, it’s time to apply the patch. Following these steps carefully will ensure a secure and long-lasting bond.
2.1 Step 1: Setting Up Your Ironing Area
A well-prepared ironing area is crucial for both safety and effectiveness.
- Stable Surface: Place the ironing board on a flat, stable surface. Ensure it’s sturdy enough to withstand firm pressure.
- Clear Space: Remove any flammable materials from the surrounding area.
- Good Lighting: Ensure adequate lighting to see the work clearly.
- Unplugged Iron: Start with the iron unplugged and cold.
2.2 Step 2: Positioning the Patch
Correct Patch placement is essential for a professional-looking uniform.
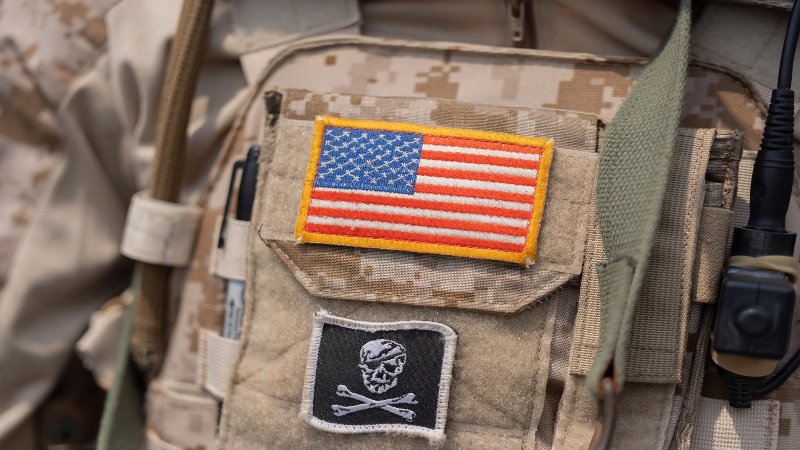
- Reference Guidelines: If working with a uniform that has specific placement guidelines (like a scout uniform or military uniform), consult those guidelines before proceeding.
- Centering: For patches that need to be centered (on a pocket, for example), use a ruler or measuring tape to find the exact center point.
- Symmetry: If applying multiple patches, ensure they are symmetrically placed and aligned.
- Temporary Placement: Use pins or a small piece of tape to hold the patch in the desired location temporarily. This allows for adjustments before applying heat. Tweezers may also help in placement, especially the small details.
- Visual Check: Step back and look at the uniform from a distance to ensure the Proper patch placement is visually appealing and correct.
2.3 Step 3: Setting the Iron Temperature
The correct temperature setting is critical for activating the adhesive without damaging the fabric.
- No Steam: Ensure the iron’s steam setting is turned OFF. Steam will prevent the adhesive from bonding properly.
- Fabric-Specific Heat:
- Cotton/Cotton Blends: Use a high setting (usually “Cotton” or “Linen” on the iron).
- Polyester/Synthetic Blends: Use a medium setting (usually “Synthetic” or “Polyester” on the iron).
- Delicate Fabrics (if compatible): Start with a low setting and gradually increase the heat if needed. Always use a press cloth.
- Test: If unsure about the correct setting, start with a lower temperature and gradually increase it until the adhesive melts. It’s always better to start low and increase heat than to start too high and risk scorching.
Here’s a table summarizing the recommended temperature ranges:
| Fabric Type | Iron Temperature Range (Fahrenheit) | Iron Setting | Notes |
|---|---|---|---|
| Cotton, Linen | 350-400°F | Cotton/Linen | High heat is usually safe. |
| Polyester, Poly Blends | 300-350°F | Synthetic/Polyester | Medium heat; avoid prolonged contact. |
| Delicate Fabrics (if compatible) | 250-300°F | Low/Delicate | Use a press cloth; test in an inconspicuous area. |
- Warm-Up Time: Allow the iron to heat up completely to the selected setting before applying it to the patch. This usually takes a few minutes.
2.4 Step 4: Applying Heat and Pressure
This is the core of the process, where the adhesive is activated and the patch bonds to the fabric.
- Press Cloth Placement: Place the press cloth over the patch and the surrounding fabric. This protects both the patch and the uniform from direct heat.
- Initial Press: Place the hot Iron directly on top of the press cloth, covering the entire patch area.
- Firm, Even Pressure: Press down firmly with the iron. Apply consistent, even pressure across the entire patch. Avoid any sideways movement of the iron, as this can shift the patch or smear the adhesive.
- Duration: Hold the iron in place for the recommended time, typically 30-60 seconds. For thicker patches or fabrics, it may take longer. Check the patch manufacturer’s instructions for specific timing recommendations.
- Check: Check the process by using tweezers.
- Repeat if Necessary: If the patch hasn’t fully adhered after the initial press, repeat the process for another 30-60 seconds.
2.5 Step 5: Checking Adhesion and Cooling
After applying heat, it’s important to check the bond and allow the patch to cool completely.
- Careful Inspection: After removing the iron and press cloth, carefully inspect the edges of the patch. Use tweezers to gently lift a corner and see if it’s securely attached.
- Re-Press if Needed: If any part of the patch is loose, replace the press cloth and apply heat and pressure again for another 30-60 seconds.
- Cooling Time: Allow the patch to cool completely before handling the uniform. This is crucial for the adhesive to set properly. Avoid touching or moving the patch during this time. Cooling usually takes 5-10 minutes.
2.6 Step 6: Iron from the inside
Ironing from the inside of the uniform can help improve the bond between patch and fabric
- Turn the uniform shirt inside out, exposing the back of the patch area.
- Place the press cloth over the back of the patch.
- Apply heat and pressure with the iron, just as done on the front. Hold for 30-60 seconds.
- This helps to further melt the adhesive and ensure it penetrates the fabric fibers from both sides.
3. Alternative Application Methods
While ironing is the most common method for applying patches, there are alternative techniques that can provide added security or be used when ironing isn’t suitable.
3.1 Sewing for Reinforcement
For maximum durability, especially on items that will be heavily used or washed frequently, sewing the patch is highly recommended. Even if the patch has an iron-on adhesive, sewing provides an extra layer of security.
Benefits of Sewing: While iron-on-patches offer convenience, sewing provides unmatched durability and versatility. The stitched bond is significantly stronger, preventing peeling and allowing application to any fabric, regardless of heat tolerance.
Basic Hand-Sewing Instructions: Sewing on a patch requires a few simple steps. First, thread a needle with a color that matches the patch’s border or use invisible thread, and tie a secure knot. Begin sewing from the inside of the uniform, bringing the needle up through both the fabric and the edge of the patch. Use a small, consistent stitch, such as a whip stitch or a back stitch, working your way around the entire perimeter of the patch. Once you’ve completed the circle, tie off the thread securely on the inside of the garment, and trim any extra thread close to the knot.
3.2 Using a Sewing Machine
If you have access to a Sewing machine, this can be a faster and more efficient way to sew on patches, especially for larger patches or multiple patches.
Machine Setup: Getting ready to machine sew your patch? Here’s what you need! Grab thread that matches your patch or go with clear. Pick the right needle for your fabric – usually a universal needle, but a denim needle for tougher stuff. A zig-zag stitch is your best friend for attaching patches – it grabs those edges really well. Play around with the stitch width and length to get the look you want. Wider zig-zags give more coverage.
Sewing Process: Position the patch on the uniform, securing it with pins or (optionally) iron-on adhesive. Lower the presser foot. Sew slowly along the patch edge, pivoting at corners by stopping with the needle down, lifting the presser foot, turning the fabric, and lowering the foot again. Overlap stitches at the end and use backstitch to secure both beginning and end. Trim excess threads.
3.3 Using Fabric Glue (as a last resort)
Fabric Glue for Patches can be used as an alternative to ironing or sewing, but it’s generally considered a less durable option and should be used with caution.
- Limitations of Fabric Glue:
- Weaker Bond: Fabric glue does not create as strong a bond as ironing or sewing.
- May Not Withstand Washing: Many fabric glues are not designed to withstand repeated washing and may dissolve or weaken over time.
- Potential for Residue: Some fabric glues can leave a visible residue on the fabric.
- Not Suitable for All Fabrics: Fabric glue may not be compatible with all fabric types.
- Application Instructions (if using):
- Test on Scrap Fabric: Before applying glue to the uniform, test it on a scrap piece of fabric or an inconspicuous area of the uniform to ensure compatibility and check for any discoloration or residue.
- Apply Sparingly: Apply a thin, even layer of glue to the back of the patch. Avoid using too much glue, as this can seep through the fabric and create a mess.
- Position the Patch: Carefully position the patch on the uniform.
- Press and Hold: Press the patch firmly in place for the recommended time (usually specified on the glue packaging).
- Drying Time: Allow the glue to dry completely before handling the uniform. This may take several hours or even overnight.
- Consider adding a few stitches around the edges, even after gluing, for some added hold.
4. Troubleshooting Common Problems
Even with careful preparation and application, sometimes things don’t go as planned. This section addresses common issues and provides solutions.
4.1 Patch Not Sticking
One of the most frequent problems is a patch that fails to adhere properly to the fabric. There are some causes and solutions:
- Insufficient Heat:
- Cause: The iron wasn’t hot enough to melt the adhesive completely.
- Solution: Increase the iron temperature (within the safe range for the fabric) and reapply heat, using firm pressure and a press cloth. Ensure the iron is fully heated before applying.
- Insufficient Pressure:
- Cause: Not enough pressure was applied during ironing.
- Solution: Reapply heat with very firm, even pressure. Consider using a harder surface beneath the ironing board for better leverage.
- Uneven Heat Distribution:
- Cause: The iron wasn’t held in place long enough, or the heat wasn’t evenly distributed across the entire patch.
- Solution: Reapply heat, ensuring that the entire patch area receives consistent heat and pressure for the recommended time. Move the iron slightly without lifting it to ensure all areas are covered.
- Damp Fabric or Patch:
- Cause: Moisture prevents the adhesive from bonding. The steam setting on the iron was accidentally used, or the fabric/patch was damp.
- Solution: Ensure both the fabric and the patch are completely dry. Turn off the iron’s steam setting. Reapply heat with a dry press cloth.
- Incorrect Fabric Type:
- Cause: The fabric is not compatible with iron-on-patches (e.g., rayon, nylon, leather).
- Solution: Unfortunately, if the fabric is not suitable for ironing, the patch may not adhere. Consider sewing the patch instead.
- Old or Defective Patch:
- Cause: If the patch has been stored for a long time or improperly, the adhesive may have degraded.
- Solution: Consider using a fresh patch, if available. Sewing may be the only option for attaching an old patch with compromised adhesive.
- Dirty Fabric:
- Cause: The fabric had oils, dirt or residue on it that prevented the adhesive from bonding.
- Solution: Wash and completely dry the garment, then try reapplying the patch following all instructions.
4.2 Fabric Scorching or Damage
Scorching or damaging the fabric is a serious concern, especially with delicate materials. There are some causes and solutions:
- Excessive Heat:
- Cause: The iron temperature was too high for the fabric type.
- Solution: Unfortunately, scorching is often irreversible. Prevention is key. Always check the fabric care label and start with a lower iron temperature, increasing it gradually only if necessary. Use a press cloth. If minor scorching occurs, try gently rubbing the area with a damp cloth or a specialized fabric cleaner.
- Prolonged Heat Exposure:
- Cause: The iron was left in one place for too long.
- Solution: Similar to excessive heat, this damage may be irreversible. Prevention involves using a press cloth and applying heat for the recommended time, checking frequently.
- No Press Cloth:
- Cause: The iron was applied directly to the fabric without a protective barrier.
- Solution: Always use a press cloth (cotton pillowcase, handkerchief) to protect the fabric from direct heat.
- Iron Soleplate Dirty:
- Cause: Residue on the iron’s soleplate transferred to the fabric.
- Solution: Clean the iron’s soleplate regularly according to the manufacturer’s instructions.
4.3 Adhesive Residue
Adhesive residue may sometimes remain on the fabric after applying or removing a patch. Allow the fabric to cool completely. Gently scrape off any hardened excess with a fingernail or dull knife. Apply an adhesive remover according to its instructions, testing it on a hidden area first. Finally, wash the garment.
5. Caring for Your Uniform with Ironed-On Patches
Once the patch is successfully applied, proper care is essential to maintain its appearance and longevity.
5.1 Washing Instructions
Washing a uniform with ironed-on patches requires a bit of extra care to prevent the patch from detaching or becoming damaged.
- Turn Inside Out: Before washing, turn the uniform shirt inside out. This protects the patch from abrasion against other clothes or the washing machine drum.
- Gentle Cycle: Use a gentle or delicate wash cycle with cold water. Hot water can weaken the adhesive.
- Mild Detergent: Use a mild detergent. Avoid harsh chemicals, bleach, or fabric softeners, as these can damage the patch or the adhesive.
- Avoid Overloading: Don’t overload the washing machine. Give the uniform plenty of room to move freely.
- Consider hand-washing for maximum protection, especially if the patch is large or delicate.
- If washing multiple items with patches, wash them together to reduce friction.
5.2 Drying Instructions
Proper drying is just as important as washing when it comes to preserving ironed-on patches.
- Air Dry is Best: The best way to dry a uniform with ironed-on patches is to air dry it. Hang it on a hanger or lay it flat on a clean, dry surface. Avoid direct sunlight, as this can fade the colors of the patch or the uniform.
- Low Heat Tumble Dry (if necessary): If need to use a dryer, use the lowest heat setting (e.g., “Delicate” or “Air Fluff”). Remove the uniform promptly when it’s slightly damp to prevent overheating.
- Avoid Over-Drying: Over-drying can weaken the adhesive and cause the patch to peel or crack.
5.3 Reattaching a Loose Patch
Even with the best care, a patch may occasionally start to loosen, especially around the edges.
- Inspect Regularly: Periodically check the edges of the patch for any signs of lifting or peeling.
- Re-Ironing: If a patch starts to come loose, can often reattach it by ironing it again.
- Place the uniform on the ironing board.
- Cover the patch with a press cloth.
- Apply heat and firm pressure with the iron for 30-60 seconds.
- Allow the patch to cool completely.
- Check the adhesion and repeat if necessary.
- Sewing (if re-ironing fails): If re-ironing doesn’t work, or if the patch continues to loosen, sewing it on is the best solution for long-term durability. Follow the hand-sewing or machine-sewing instructions provided earlier.
- Fabric Glue (Temporary fix): Can you use a small amount of fabric glue to secure a loose edge, but this is a temporary solution. Sewing is preferable for a lasting repair.
6. Related Questions
6.1 Can I iron on a patch to a hat?
Yes, patches can be ironed onto many hats, but it depends on the hat’s material. Cotton or cotton-blend hats are generally suitable. Avoid ironing onto hats made of materials that could melt or scorch, such as plastic or certain synthetic fabrics. For hats with a curved surface, it can be challenging to apply even heat and pressure. Consider using a small, rounded object (like a tailor’s ham) inside the hat to provide support while ironing. Sewing the patch onto the hat is often a better option for a secure and long-lasting attachment.
6.2 How long do iron-on-patches last?
The lifespan of an iron-on-patch depends on several factors, including the quality of the adhesive, the fabric it’s applied to, how often the item is washed and worn, and the care taken during washing and drying. With proper application and care, an iron-on-patch can last for many years. However, patches on items that are frequently used or laundered may start to loosen sooner. Sewing the patch on, either initially or after it starts to peel, significantly extends its lifespan.
6.3 Can I remove an iron-on-patch?
Removing an iron-on-patch can be tricky, and it may not always be possible to remove it completely without leaving some residue or damaging the fabric. The success of removal depends on the type of adhesive, the fabric, and how long the patch has been attached. Heating the patch with an iron (covered with a press cloth) can sometimes soften the adhesive, allowing to gently peel it off. Adhesive removers can also be used, but always test them on an inconspicuous area first.
6.4 What if my patch has special instructions?
Some patches, particularly those made with specialty materials or embellishments, may have specific application instructions. Always check the patch packaging or the manufacturer’s website for any special recommendations. If in doubt, it’s best to err on the side of caution and use a lower heat setting or consider sewing the patch instead.
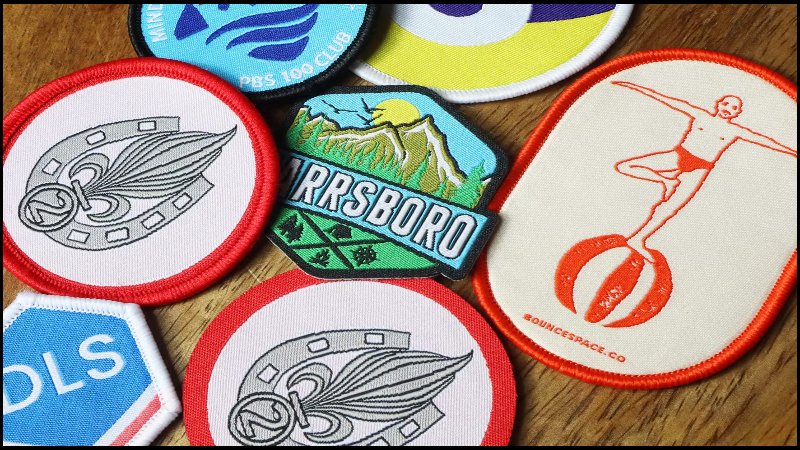
6.5 What’s the difference between embroidered, woven, and PVC patches?
- Embroidered patches have a classic, textured look created by stitching threads onto a fabric backing.
- Woven patches use thinner threads, allowing for finer detail and a smoother surface.
- PVC patches are made from durable, waterproof plastic and have a 3D appearance.
- The choice depends on the desired look, level of detail, and durability needed.
- Iron-on backings can be applied to embroidered and woven patches, but are less common on PVC patches due to the heat sensitivity of the material.
Read more:
Mastering the art of ironing on uniform patches is a valuable skill, allowing to personalize, identify, and maintain uniforms with confidence. By following the step-by-step instructions, paying close attention to fabric compatibility and temperature settings, and taking proper care of the garment after application, the result is a professional-looking and long-lasting attachment. Remember that preparation is key, and when in doubt, sewing the patch provides the most secure and durable solution. With a little practice and patience, anyone can successfully apply iron-on-patches and keep their uniforms looking their best.


