Learn Basic Sewing Techniques: Hand and Machine Stitches for Beginners
Embark on your sewing journey with our comprehensive guide to essential techniques, perfect for both hand and machine stitching. Whether you’re mending a beloved garment, crafting a unique creation, or simply exploring a rewarding new hobby, understanding the basics is key. We’ll demystify common stitches, empowering you to confidently tackle any project and avoid costly mistakes, transforming your creative vision into reality with a newfound skill.
1. Getting started with basic sewing: Tools and materials
1.1 Essential sewing supplies for beginners
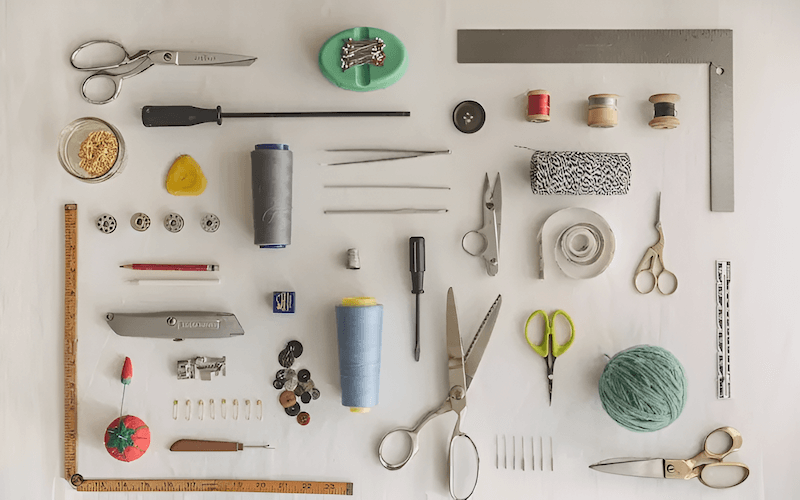
Equipping yourself with the right tools is the first step towards successful sewing. Needles are crucial, available in various sizes and types like sharps for general use and ballpoints for knits. Selecting the correct thread is equally important; all-purpose polyester works well, but cotton, silk, or other specialty threads might be needed. Fabric shears are designed specifically for cutting fabric, while small thread snips are handy for trimming loose ends.
Straight pins hold fabric layers together, while safety pins are useful for securing heavier materials or elastic. A flexible, retractable measuring tape is essential for accurate measurements. Don’t underestimate the seam ripper, a lifesaver for correcting inevitable mistakes. A thimble protects your finger when hand sewing.
Consider these optional but helpful additions: a pincushion to store pins, marking tools like chalk or fabric pens for transferring patterns, and a ruler for precise lines. Having these tools organized and readily available will streamline your sewing process. These tools form the basis of a kit that every beginner should be acquainted with.
1.2 Choosing the right fabric for your project
Fabric choice significantly impacts your project’s outcome. Woven fabrics, such as cotton and linen, are generally easier for beginners due to their stability and minimal stretch, whilst denim is durable. Knit fabrics, like jersey and fleece, offer more stretch but can be more challenging to handle. These may require special needles or techniques.
For beginners, cotton and linen are excellent starting points. Their forgiving nature makes them ideal for learning basic stitches and techniques. Remember that it’s highly recommended to prewash your fabric before starting any project. This crucial step prevents shrinkage after your garment or item is completed, ensuring a perfect fit and long-lasting results.
1.3 Understanding basic sewing terminology
Before diving into stitching, let’s define some fundamental terms. A seam is the line where two pieces of fabric are joined together. The hem is the finished edge of a piece of fabric, often folded and sewn to prevent fraying. Stitch refers to a single loop of thread made by the needle.
Seam allowance is the distance between the edge of the fabric and the stitching line, typically 1/4 to 5/8 inch. Backstitch is a strong, secure stitch created by overlapping stitches, used for reinforcement. Finally, a running stitch is a simple, basic stitch used for gathering or basting. These words will become common place.
2. Mastering basic hand sewing techniques
2.1 Threading a needle and knotting thread
Mastering these fundamentals is essential for any hand sewing project. Begin by cutting a manageable length of thread, approximately 18 inches, to prevent tangling. Optionally, you can wet the end of the thread to make it easier to pass through the needle’s eye. Once inserted, create a secure knot.
A simple overhand knot works well, but a tailor’s knot provides extra security. To tie an overhand knot, make a loop, pass the thread end through the loop, and pull tight. Practice ensures quick and efficient needle threading and knotting.
2.2 The Running stitch: Your first stitch
The running stitch is the foundation of hand sewing, ideal for quick mending, gathering fabric, or creating temporary basting stitches. To begin, insert the needle from the back of the fabric to the front. Make a small stitch, about 1/4 inch or less. Bring the needle back up through the fabric a short distance away.
Continue this process, creating a line of evenly spaced stitches. The running stitch is versatile and easy to learn, making it perfect for beginners. The distance between each stitch can be changed depending on its use. Basting typically has longer stitches.
2.3 The Backstitch: Strength and security
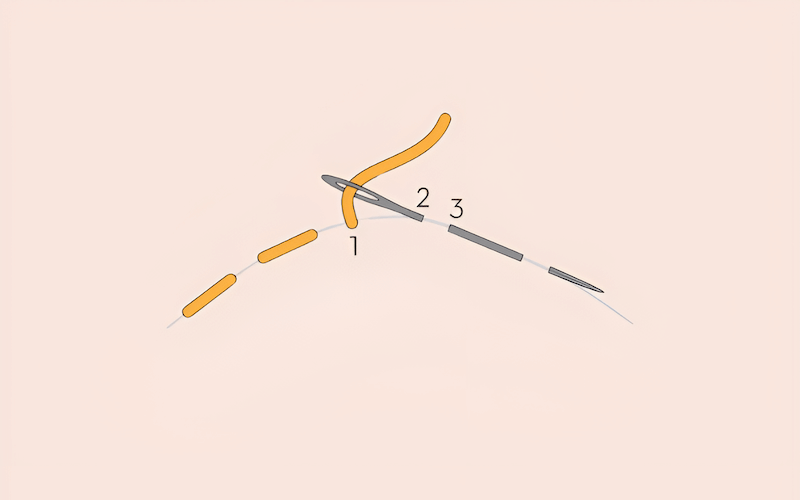
For seams requiring extra durability, the backstitch is your go-to. Stronger than the running stitch, it’s perfect for creating seams that will withstand wear and tear, and for outlining. Start with a small running stitch for anchoring. Then, insert the needle a short distance behind the previous stitch.
Bring the needle up a short distance ahead of the previous stitch. This overlapping action creates the characteristic strength of the backstitch. Continue this pattern, ensuring each stitch overlaps the previous one, forming a solid line. This gives its robust finish.
2.4 The overcast stitch (Whip Stitch): Preventing fraying
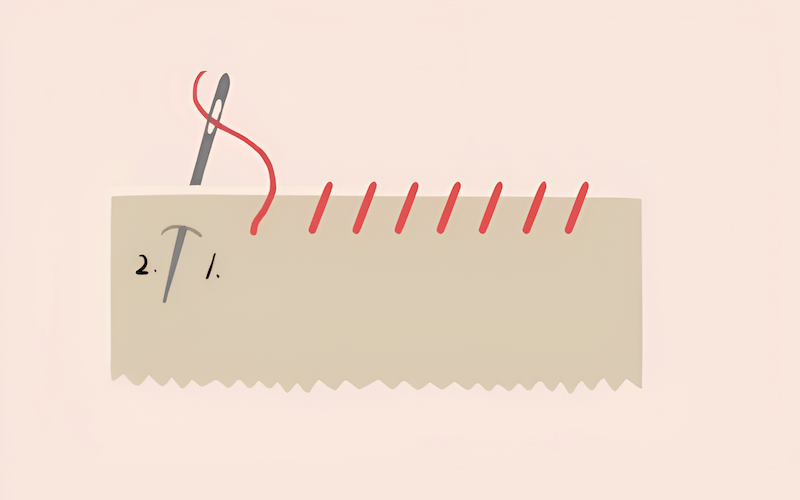
The overcast stitch, also known as the whip stitch, is essential for finishing raw fabric edges to prevent them from unraveling. Begin by inserting the needle from the back of the fabric to the front, close to the edge. Bring the needle over the edge of the fabric.
Then insert it back up through the back, creating a loop around the edge. Repeat this process, making evenly spaced stitches along the entire edge. This creates a neat, protective barrier that keeps your fabric intact. Correct spacing keeps your fabric in shape.
2.5 The slip stitch: Invisible hemming
The slip stitch is the secret to achieving hems where the stitches are virtually invisible from the right side of the fabric. This technique requires precision and practice. Start by folding the hem allowance under twice, creating a clean, folded edge. Then, insert the needle into the fold of the hem itself.
Next, pick up only a tiny amount of fabric from the main garment – just a thread or two is sufficient. Slide the needle back into the fold of the hem, a short distance away from your entry point. Repeat these steps, creating small, hidden stitches that secure the hem without being visible.
2.6 The blanket stitch (Buttonhole Stitch): Finishing and function
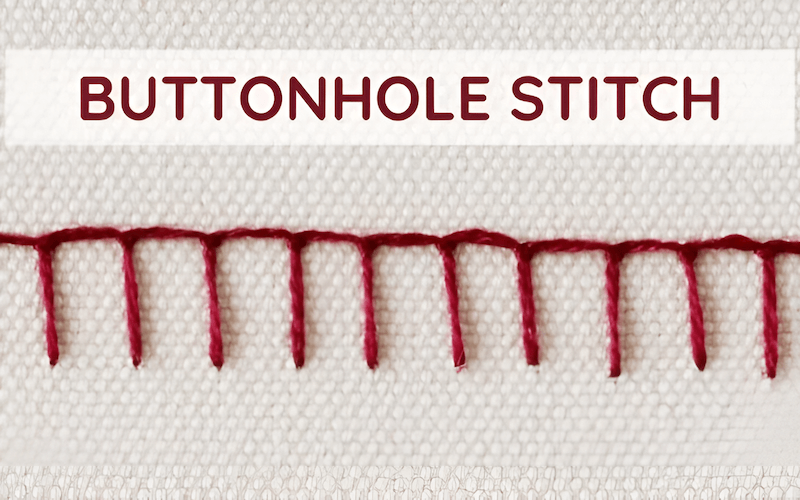
The blanket stitch serves a dual purpose: finishing edges with a decorative touch and creating hand-worked buttonholes. Begin by inserting the needle from the back of the fabric to the front, near the edge. As you bring the needle forward, pass it through the loop of thread.
This creates the characteristic looped edge of the blanket stitch. Pull the thread tight, and repeat this process, maintaining even spacing between stitches. For buttonholes, the stitches are placed very close together, creating a reinforced opening. It’s a versatile and visually appealing stitch.
2.7 Other useful hand stitches (Cross Stitch, French Knot)
While slightly more advanced, cross stitch and French knots are valuable additions to your hand sewing repertoire. Cross stitch, with its X-shaped stitches, is primarily used for decorative designs and embroidery. French knots create small, raised dots, adding texture and detail to your projects.
3. Exploring basic machine sewing techniques
3.1 Getting to know your sewing machine
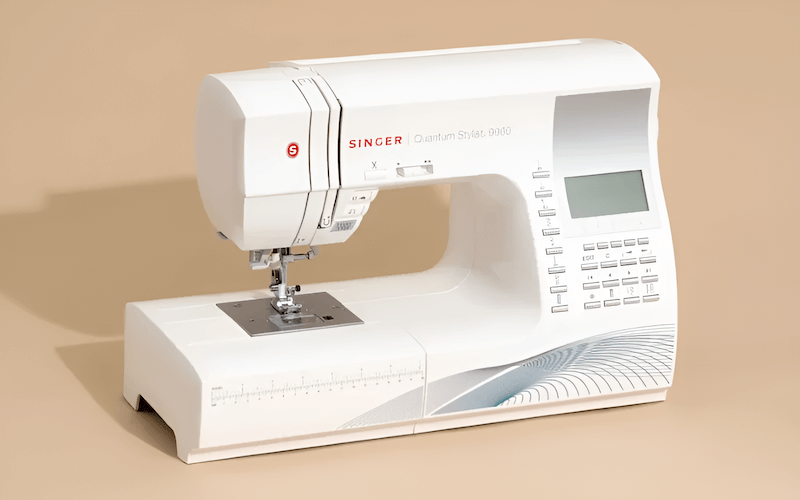
A sewing machine, while initially intimidating, is simply a tool with a few key components. The needle carries the upper thread, while the presser foot holds the fabric in place. The bobbin, housed in the bobbin case, provides the lower thread. Feed dogs move the fabric forward. The stitch selector allows you to choose different stitch types and settings.
3.2 The straight stitch: The foundation of machine sewing
The straight stitch is the cornerstone of machine sewing, used for the vast majority of seams. To begin, ensure your machine is properly threaded and the bobbin is wound. Place your fabric under the presser foot, aligning the edge with the desired seam allowance. Lower the presser foot to secure the fabric.
Gently press the foot pedal to start sewing, guiding the fabric smoothly. Remember to backstitch at the beginning and end of each seam. This involves sewing a few stitches in reverse, locking the stitches in place and preventing unraveling. Controlling your machine takes practice.
3.3 The Zigzag stitch: Versatility and fray prevention
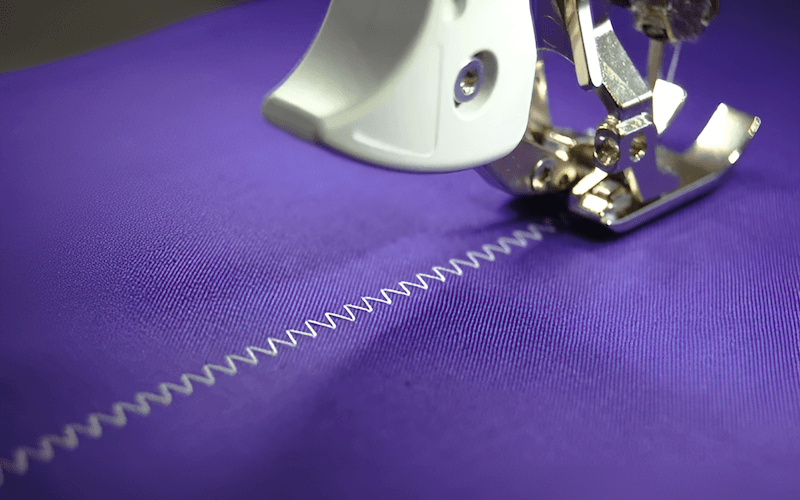
The zigzag stitch offers versatility beyond the straight stitch. It’s invaluable for finishing raw edges to prevent fraying, and its inherent stretch makes it ideal for sewing knit fabrics. Many machines also use a zigzag stitch to create buttonholes. You can adjust both the width and length of the zigzag stitch.
A wider stitch is suitable for heavier fabrics or wider seams, while a narrower stitch works well for delicate fabrics or narrow seams. Experiment with different settings to achieve the desired result. The length will alter the look.
3.4 The blind hem stitch: Professional hems
The blind hem stitch allows you to create hems that are nearly invisible from the right side of the fabric, achieving a professional finish. This stitch typically requires a special presser foot and specific machine settings. The machine creates a combination of straight stitches.
And a wide zigzag that catches only a tiny bit of the fabric on the right side. Careful alignment and practice are essential for mastering this technique. The results are well worth the effort, providing a clean, polished look.
3.5 Other useful machine stitches
Beyond the basics, many sewing machines offer additional stitch options. The buttonhole stitch automates the creation of buttonholes, often with a specialized foot. The overlock stitch, commonly found on sergers but also on some sewing machines, creates a professional, serged edge that encases the raw edge of the fabric.
Decorative stitches provide a wide range of embellishment options, from simple patterns to intricate designs. However, not all machines have these capabilities, so check your machine’s manual. Knowing what is available is important.
4. Troubleshooting common sewing problems
4.1 Thread bunching or breaking
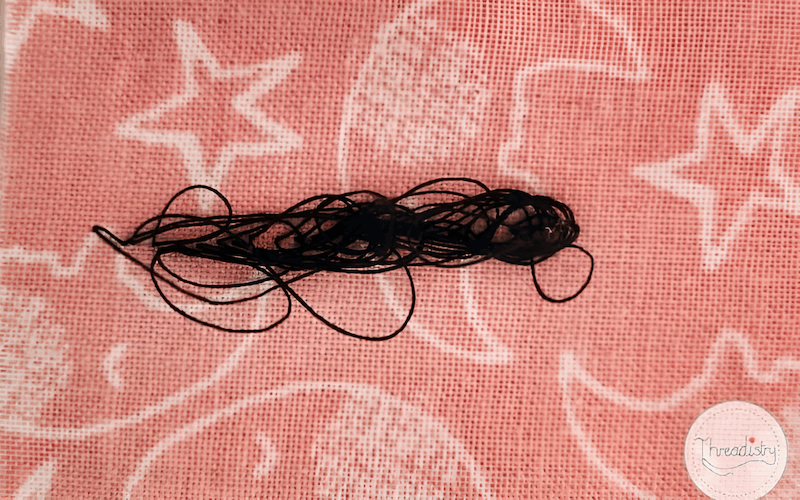
Experiencing thread bunching or breaking can be frustrating, but it’s often easily resolved. Common culprits include incorrect threading of the machine (both top thread and bobbin), incorrect tension settings, using old or poor-quality thread, or a damaged needle. Try re-threading your machine completely, ensuring the thread is properly seated in all guides and tension discs.
Adjust the tension according to your fabric and thread type. If the problem persists, replace the needle with a new one of the correct size and type. Also, check that the bobbin is wound correctly and inserted properly. Finally, consider using a higher-quality thread.
4.2 Skipped stitches
Skipped stitches often indicate a needle problem. The most likely causes are using the wrong type of needle for your fabric, a bent or dull needle, or incorrect threading. Ensure you’re using the appropriate needle – ballpoint for knits, sharps for wovens, and the correct size for your fabric weight.
Always replace a bent or dull needle, as even slight damage can affect stitch quality. Double-check your threading, both top and bobbin, to ensure everything is correctly positioned. If problems persist, check machine settings.
4.3 Uneven seams
Achieving even seams requires practice and attention to detail. Common causes of uneven seams include not guiding the fabric evenly through the machine, inconsistent seam allowance, and fabric layers shifting during sewing. Use a seam guide on your machine, if available, to maintain a consistent seam allowance.
Pin your fabric layers together securely before sewing, especially for slippery or stretchy fabrics. Practice guiding the fabric without pulling or pushing it, letting the feed dogs do the work. Correcting these issues is crucial.
4.4 Fabric puckering
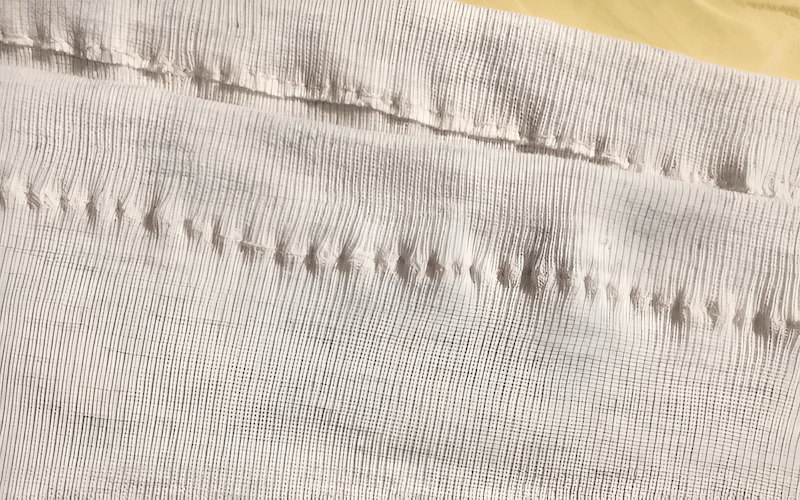
Fabric puckering can mar the appearance of your project. It’s often caused by incorrect tension settings (usually too tight), an incorrect stitch length for the fabric, or stretching the fabric while sewing. Experiment with adjusting the tension, both upper and lower, until the stitches lie flat without puckering.
Use a longer stitch length for delicate fabrics and a shorter stitch length for heavier fabrics. Most importantly, avoid pulling or stretching the fabric as you sew; let the machine feed the fabric naturally.
5. Practice projects for beginners
Putting your newfound skills into practice is essential! Here are a few easy projects perfect for beginners, allowing you to hone your techniques and build confidence:
- Pillowcase: A simple project involving straight seams and basic hemming.
- Tote Bag: Slightly more involved, but still relies primarily on straight seams and offers the opportunity to practice sewing handles.
- Scrunchie: These require working with stretchy, using skills learned.
These projects provide a solid foundation for future, more complex endeavors. They help build a solid foundation.
6. FAQs about basic sewing techniques
6.1 What is the easiest stitch to learn?
The running stitch is generally considered the easiest. Its simple in-and-out motion of the needle makes it intuitive and quick to master, forming the basis for many other stitches.
6.2 What type of thread should I use for basic sewing?
All-purpose polyester thread is a great starting point. It’s strong, durable, widely available, and compatible with a broad range of fabrics, making it a versatile choice for most beginner projects.
6.3 How do I prevent my fabric from fraying?
Several methods can prevent fraying. Hand sewers can use the overcast stitch, while machine sewers can opt for a zigzag stitch. Pinking shears, which cut a zigzag edge, also minimize fraying.
6.4 My sewing machine keeps jamming. What should I do?
First, ensure safety: turn off and unplug the machine. Then, re-thread both the top thread and the bobbin completely. Check the bobbin for proper insertion and winding. Verify you’re using the correct needle and thread for your fabric. If jamming persists, consult your machine’s manual or a sewing professional.
6.5 Where can I find free sewing patterns for beginners?
Numerous online resources offer free patterns. Pinterest is a great visual search engine for ideas. Many sewing blogs provide free patterns and tutorials (search for “free sewing patterns”). Fabric company websites often feature free patterns designed for their fabrics.
7. Packlove – Providing service for sewing lovers
At Packlove, our mission is to empower sewing enthusiasts of all levels with high-quality products that elevate their creations. We understand the passion and dedication that goes into every stitch, and we’re committed to providing the tools and resources you need to bring your vision to life. We provide the best resources for success.
We offer a range of products designed to add a professional touch to your handmade items, including custom Woven Labels, vibrant Heat Transfer Labels, and durable Rubber Labels. These finishing touches not only enhance the aesthetic appeal of your projects but also help establish your brand identity. These help when selling products.
We’re here to support you every step of the way. Visit our website at https://mypacklove.com/ to explore our products and learn more. You can also reach us via email at [email protected] or by phone at +84 363615867. Let us help you showcase your sewing talent!
Read more:
Mastering basic sewing techniques, both hand and machine, is the cornerstone of a fulfilling and rewarding journey in the world of sewing. These fundamental skills provide the foundation for everything from simple mending to creating intricate garments and personalized crafts. Don’t be afraid, you will improve.
Regular practice is key to developing your skills and building confidence. Embrace mistakes as learning opportunities; each imperfection is a step closer to mastery. Remember, sewing is a journey, not a race. It offers endless opportunities.
Start your first sewing project today! Explore the resources available, experiment with different techniques, and unleash your creativity. Visit our website for more sewing tips, inspiration, and the perfect finishing touches for your creations.


