Leather Crafting for Beginners: Your Easy Step-by-Step Guide
Leather crafting is a wonderfully accessible hobby, perfect for beginners seeking a creative outlet or even a small business idea. If you’re new to leatherwork, feeling overwhelmed is common. Where do you begin? What tools are essential? How do you avoid costly mistakes?
With the rise of DIY and a desire for unique, handmade items, leather crafting offers a rewarding and relaxing pursuit. Starting your leather crafting journey correctly is crucial for early success and lasting enjoyment. Without clear guidance, beginners can easily become discouraged, waste resources, and miss out on the satisfaction of creating beautiful leather goods.
This article provides a clear, step-by-step roadmap to demystify leather crafting for absolute beginners. We’ll build your confidence, equip you with essential skills and knowledge, and empower you to successfully complete your first projects. Benefit from expert advice to avoid common pitfalls and make informed decisions, setting you on the path to a fulfilling leather crafting adventure.
1. Getting started with leather crafting: Your beginner’s journey
Embarking on beginner leather crafting is surprisingly accessible and incredibly rewarding! If you’re looking to learn leather crafting as a beginner, you’ll find it’s an enjoyable path into the world of DIY. Leather crafting is accessible to everyone, allowing you to create handmade, personalized, and truly unique items.
From wallets to belts, the versatility of leatherwork is immense, and the satisfaction of crafting something with your own hands is unmatched. The beauty of easy leather making lies in its simplicity – the basic leather projects are straightforward to learn, and these foundational skills readily build as you progress.
You’ll be pleased to discover that setting up for introductory leather crafting doesn’t require a huge investment, and the initial skills you gain are transferable to countless projects. Even affordable leather for crafting beginners and simple leather crafting kits for beginners can get you started on this fulfilling journey.
2. Choosing your first leather crafting project: Keep it simple!
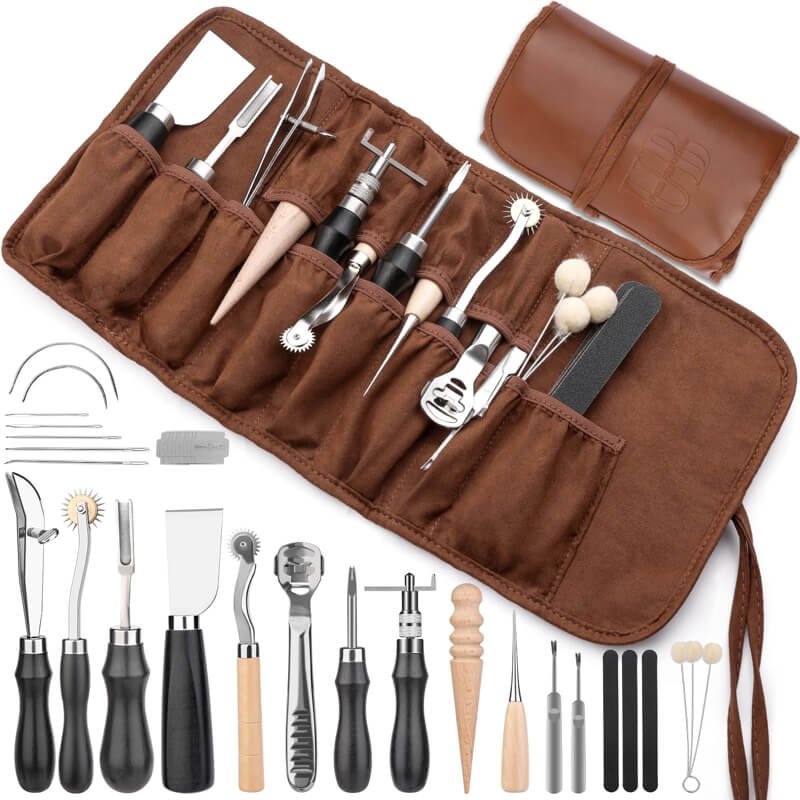
When you’re diving into leather crafting, selecting your first leather project is a crucial step. The key is to start small and keep it simple! Choosing easy projects is the best way to build your confidence and really focus on mastering the core skills you’ll need. Trying to tackle something too ambitious right away can be overwhelming and lead to frustration.
To get you inspired, here are some beginner projects ideas, ranging from super simple to slightly more involved:
- Very simple & quick wins: Think projects like keychains, simple bracelets, or leather tags for luggage. These are fantastic for getting a feel for the leather and practicing basic cutting and stitching.
- Slightly more complex, still beginner-friendly: Once you’re comfortable with the basics, you can move onto projects like card holders, slim wallets, leather coasters, or even bookmarks. These projects introduce slightly more steps and allow you to refine your techniques.
For future inspiration, as you gain confidence, you can consider slightly more ambitious, yet still beginner-appropriate projects such as crafting a simple belt, a stylish watch strap, or even a durable dog collar.
Ultimately, the best simple leather project for your first attempt is one that genuinely sparks your passion and keeps you motivation high. Choose something that excites you, and the learning process will be even more enjoyable!
3. Essential leather crafting skills for beginners: Mastering the basics
To truly enjoy beginner leather crafting, mastering a few essential skills is key. These basic techniques form the foundation for almost all leather projects. Don’t worry, these fundamental skills are easier to learn than you might think, and they’ll quickly become core skills you rely on.
3.1 Cutting leather
Accurate cutting is absolutely essential in leather crafting. Clean, precise cuts are the starting point for a professional-looking finished piece. For leather cutting techniques beginners can easily learn, you’ll primarily use a leather knife, leather shears, or a rotary cutter. Always use a cutting mat to protect your work surface and, most importantly, prioritize safety when working with sharp tools. Take your time and focus on following your pattern lines carefully.
3.2 Saddle stitching
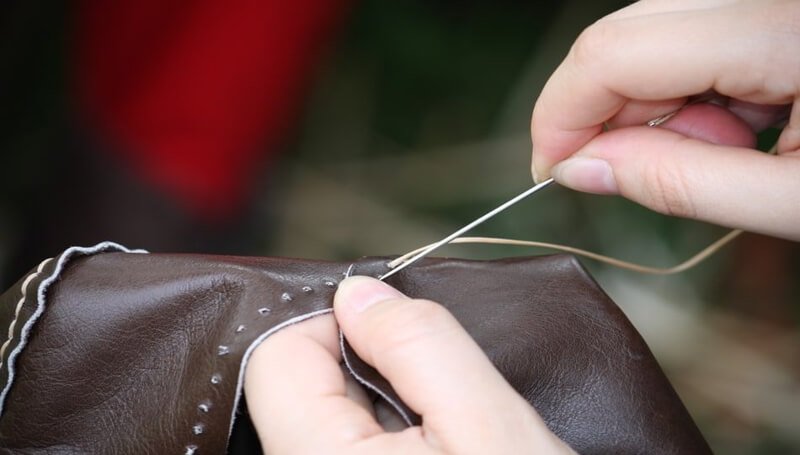
Saddle stitch is a renowned hand-stitching method in leatherwork, celebrated for its exceptional strength and classic aesthetic. Leather stitching for beginners often starts with the saddle stitch because it’s durable and relatively straightforward to learn.
The process involves using two leather needles and a single length of leather thread, passing them through each stitch hole in opposite directions and locking them together. To create consistent stitch holes, you’ll use a stitching awl and pricking irons (also known as stitch markers). These tools help you mark and create evenly spaced holes for a neat and strong stitch line.
3.3 Edge finishing
Edge finishing is crucial for taking your leatherwork to the next level. It enhances both the look and durability of your projects by refining and protecting the leather edges. Two edge finishing techniques perfect for beginners are burnishing and edge beveling.
Edge beveling, done with an edge beveler, rounds off sharp edges for a smoother profile. Then, burnishing, using a burnisher, polishes the edge to a sleek, professional shine. Mastering these techniques will significantly elevate the quality of your finished leather pieces.
4. Must-have leather crafting tools for beginners: Starting smart
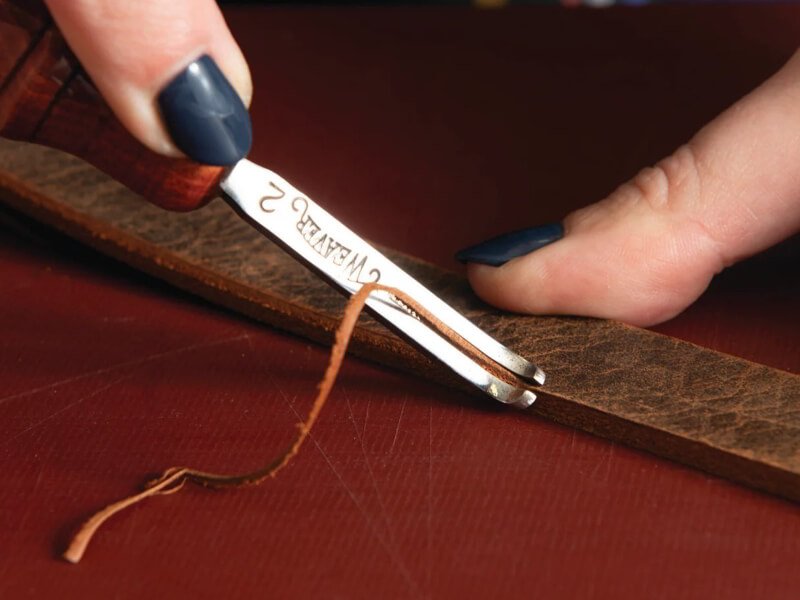
When you’re just beginning leather crafting, it’s wise to start with the essential tools. You don’t need to buy everything at once! Focusing on the basic tools will prevent you from overspending and feeling overwhelmed. This tool kit of starter tools will be sufficient to get you going and allow you to build your collection gradually as you progress.
4.1 Cutting tools
- Craft knife or utility knife: A versatile utility knife or craft knife is a must-have for beginner leather crafting. It’s excellent for making both straight and curved cuts in leather. Make sure to use sharp blades and replace them regularly for clean cuts.
- Scissors or leather shears: Leather shears or heavy-duty scissors are incredibly useful, especially for cutting thinner pieces of leather or making pliable, curved cuts.
- Cutting mat: A cutting mat, ideally a self-healing mat, is essential to protect your work surface from scratches and damage while cutting. It also helps to extend the life of your blades.
- Ruler or straight edge: A metal ruler or straight edge is crucial for achieving accurate straight cuts and taking precise measurements.
4.2 Stitching tools
- Stitching awl: A stitching awl is specifically designed to create consistent, clean holes in leather for hand stitching. It pierces through the leather, making way for your needle and thread.
- Pricking irons or stitch markers: Pricking irons, also known as stitch markers, are used to mark evenly spaced stitch locations along your leather pieces before you create the holes with the awl. This ensures consistent and professional-looking stitch lines.
- Harness needles: Harness needles are specifically designed for leather needle work. They have a blunt tip that helps them slide through existing holes without piercing the leather fibers, making hand stitching easier and more efficient.
- Waxed thread: Waxed thread or leather thread is a strong and durable thread specifically designed for leather stitching. The wax coating helps to protect the thread from abrasion and moisture, and also aids in keeping your stitches secure.
- Hammer or leather mallet: A non-metal hammer or leather mallet is used to gently tap your awl and pricking irons into the leather. Using a leather mallet or a nylon-headed hammer prevents damage to your metal tools.
4.3 Finishing & other essential tools
- Edge beveler: An edge beveler is used to shave off a small portion of the leather edge, creating a rounded and refined edge for a more professional finish.
- Burnisher: A burnisher is used to smooth and polish the edges of your leather after beveling. Rubbing the burnisher along the edge creates friction and heat, resulting in a smooth, sealed, and professional-looking edge.
- Leather glue or contact cement: Leather glue, specifically contact cement, is used to temporarily bond leather pieces together before stitching. This helps to keep your pieces aligned and makes stitching easier and more accurate.
- Canvas rags or cloth: Canvas rags or any soft cloth are useful for applying leather finishes, dyes, and for general cleanup during your leather crafting process.
- Wing dividers (optional but helpful): Wing dividers are a helpful, though not strictly essential, tool for beginners. They are used to mark consistent lines parallel to the edge of your leather, which is particularly useful for marking stitch lines evenly.
5. Understanding leather for beginners: Types and where to buy
Before you start crafting, understanding a little about leather itself is really helpful. You’ll often hear terms like leather tannage, leather weight, leather temper, and leather finish. Let’s break these down simply:
- Tannage refers to how the animal hide is turned into leather. It’s the most important factor determining the leather’s properties.
- Weight indicates the thickness of the leather, often measured in ounces per square foot. Heavier weight means thicker leather.
- Temper describes the leather’s softness or firmness. It can range from very soft and pliable to firm and rigid.
- Finish is the surface treatment applied to the leather, affecting its appearance, texture, and water resistance.
5.1 Types of leather for beginners
For beginners, the type of tannage is the most crucial thing to consider. The two main types you’ll encounter are vegetable-tanned and chrome-tanned leather.
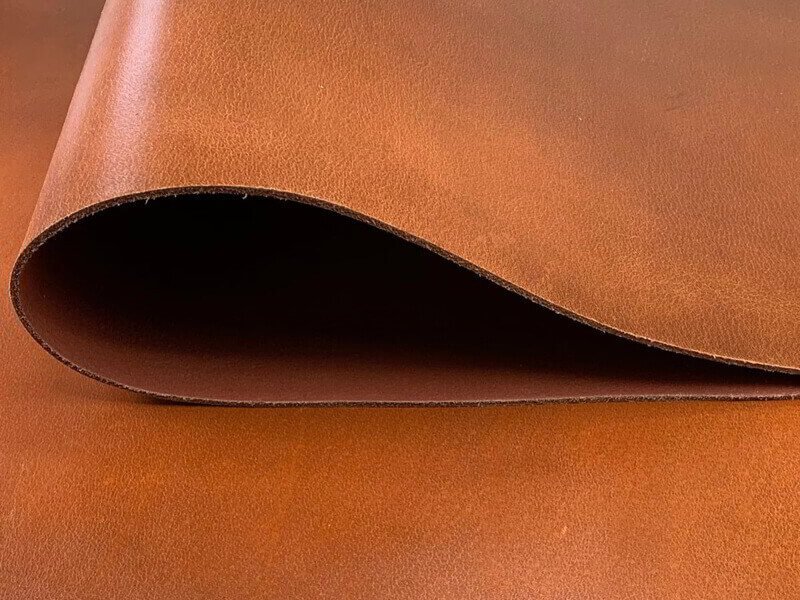
- Vegetable tanned leather (Veg Tan): Vegetable tanned leather is generally considered the best starting point for beginners. Veg tan leather is tanned using natural plant-based tannins, a traditional and longer process. This results in a higher quality leather that is thicker, more durable, and has a beautiful, natural look. Veg tan is fantastic because it’s very versatile – it’s excellent for tooling, meaning you can stamp and carve designs into it, and it readily absorbs dyes, making it ideal for achieving custom colors.
- Chrome tanned leather (Chrome Tan): Chrome tan leather is tanned using chromium salts, a much faster and less costly process. This results in thinner leather that is generally softer and more pliable than veg tan. However, chrome tan leather is typically less durable and not as suitable for tooling or intricate shaping. While chrome tan is used for many leather goods, for most beginner projects focused on structure and durability, veg tan is a better choice.
For your starting leather, we recommend leather that is vegetable-tanned. Its versatility and workability make it the best leather for beginners to learn and practice with.
5.2 Where to purchase leather
Finding a good source for leather supplies is essential. Here are a few options for buying leather:
- Online leather suppliers: There are many reputable leather suppliers online where you can buy leather. They often offer a wide selection and ship directly to you.
- Local leather craft stores or hobby shops: If you have a local leather store or even a general hobby shop in your area, these can be great places to purchase leather, especially if you want to see and feel the leather before buying. They can also offer helpful advice for beginners.
- Start with smaller pieces and scrap leather: When you’re just starting out, it’s wise to begin with smaller pieces or scrap leather. This is a more affordable option for practice and allows you to experiment without a large initial investment. Many suppliers sell scrap bags or smaller cuts specifically for this purpose.
Vegetable-tanned leather comes in different cuts, such as sides, bellies, and shoulders, which are different sections of the hide. For beginner projects, smaller pieces or pre-cut project packs are often sufficient and more manageable.
6. Cutting leather like a pro: Techniques and safety
Cutting leather accurately and safely is a fundamental skill in leather crafting. Always remember that a sharp knife is your best friend, but also demands respect and caution. Safety should be your top priority whenever you’re working with cutting tools.
6.1 Basic cutting techniques
Achieving straight cuts with a utility knife and straight edge:
- When your project demands clean, straight lines—for instance, when crafting belts or straps—a utility knife combined with a straight edge is the preferred method. Follow these steps for optimal results:
- Stabilize the leather: Place the leather piece securely on a cutting mat to prevent movement.
- Align the straight edge: Position a ruler or straight edge precisely along the intended cut line. Apply firm downward pressure to ensure it remains stationary.
- Initial scoring: Using a sharp utility knife, make a light, initial cut along the straight edge. This preliminary “scoring” pass creates a guide for the blade, minimizing the chance of tearing.
- Progressive cutting: Continue with several passes, gradually increasing pressure with each pass, until the leather is completely cut. Avoid attempting to cut through in a single, forceful motion, as this can lead to uneven edges and increase the risk of the blade slipping.
- Refine for perfection: Once the piece is cut, use the tip of your knife to carefully trim away any tiny, redundant leather fibers for a clean edge.
Handling curves and thinner leather with leather shears/scissors:
- For curved cuts or when working with thinner leather pieces, leather shears or heavy-duty scissors are the recommended tools. Follow this advice for creating smooth, flowing curves:
- Precise marking: Clearly mark the desired curved line on the leather.
- Controlled, short cuts: Instead of attempting one long cut, use a series of short, controlled snips. Gently rotate the leather as you cut, staying true to the curve.
- Line adherence: Keep the blades of the scissors aligned directly on the marked line throughout the cutting process.
- Practice and patience: Achieving perfectly smooth curves requires practice. Don’t be discouraged by initial imperfections; consistent practice will improve your technique.
Rotary cutters (for future consideration):
As you gain proficiency, you might consider incorporating a rotary cutter, especially useful for making extended cuts on thinner leather. This tool features a rolling circular blade that moves along the leather, guided by a straight edge.
6.2 Marking and measuring leather
Accurate marking and measuring are just as important as the cutting itself. Precise marking ensures your cuts are exactly where you intend them to be, leading to project success.
- Using patterns: For projects with specific shapes, use leather patterns. Trace the pattern onto your leather using a pen, awl, or scratch compass.
- Rulers and straight edges: Use a ruler or straight edge for measuring and marking straight lines.
- Wing dividers: Wing dividers are excellent for marking consistent parallel lines, such as stitch lines, from the edge of your leather.
6.3 Safety first!
- Always cut away from yourself: Direct the blade away from your body and hands at all times.
- Use a sharp knife: A sharp knife requires less force to cut, making it safer and easier to control. Dull knives are more likely to slip and cause injury. Change blades frequently.
- Use a cutting mat: A cutting mat not only protects your work surface but also provides a stable base for cutting and helps to prevent your knife from slipping.
- (Optional) Consider cut-resistant gloves: For added safety, especially when you are starting out or working on more challenging cuts, consider wearing cut-resistant gloves on your non-cutting hand.
By mastering these leather cutting techniques and prioritizing safety, you’ll be cutting leather like a “beginner pro” in no time!
7. Leather finishing touches: Protecting and polishing your work
Leather finishing is a vital step that enhances your leather projects in several ways. It significantly improves leather protection, boosting durability and water resistance, while also elevating the aesthetics of your finished piece.
7.1 Basic edge finishing:
To make your leather edges look really polished, we use two main steps: beveling and burnishing.
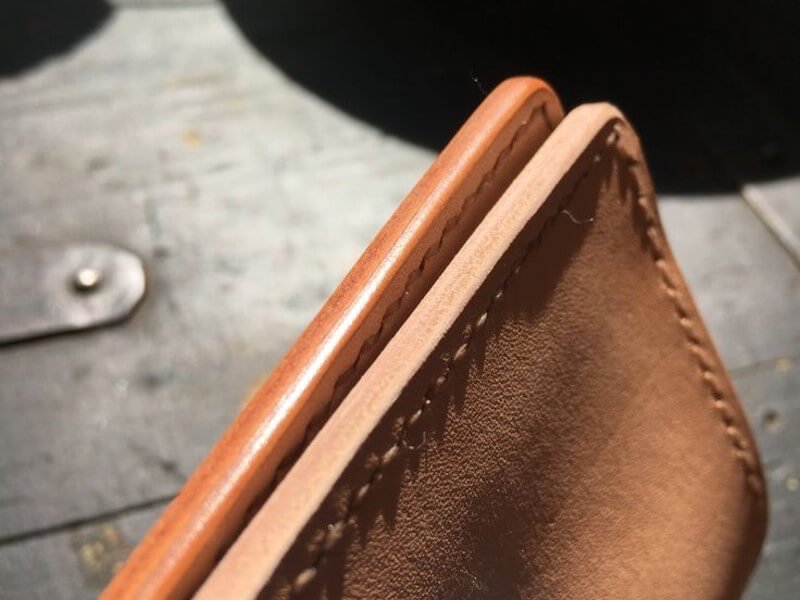
- Edge beveling (quick reminder): Think of beveling as rounding off the sharp corners of your leather edge. You use an edge beveler tool to shave off a tiny bit of the edge, making it less square and more rounded. This is the first step to getting a smooth edge.
- Burnishing: After beveling (or even if you skip beveling for a more squared edge), burnishing is like polishing the edge to make it smooth and shiny. You use a burnisher tool and rub it quickly back and forth along the edge. Sometimes you add a little water or gum tragacanth to help it get even smoother. Burnishing seals the edge and gives it that professional, finished look.
7.2 Leather conditioners and finishes:
- Leather conditioner: Using a leather conditioner is essential for leather care. Conditioners nourish the leather, keeping it supple and preventing it from drying out and cracking over time. Various types of conditioners are available, from creams to oils, choose one suitable for your leather type. Regular conditioning is crucial for leather protection and longevity.
- Acrylic Resolene/leather finish: For added water resistant finish and enhanced durability, consider applying an Acrylic Resolene or similar leather finish. This creates a protective top coat, shielding the leather from moisture, scuffs, and wear. These finishes are generally simple finishes and easy to apply, often with just a cloth or sponge.
By incorporating these basic leather finishing techniques, you’ll not only protect your leather creations but also give them a beautifully polished and professional final touch.
8. Common mistakes to avoid as a leather crafting beginner
Avoid frustration and wasted effort by being aware of these common beginner pitfalls. Here’s expert advice to steer you clear of these mistakes.
8.1 Using dull tools
Using dull knife blades and awls is a major mistake. Dull tools are dangerous and make leatherwork much harder. Keep your tools sharp. Sharp tools are safer and more effective.
8.2 Rushing the process
Rushing the process leads to mistakes. Patience is essential in leather crafting. Take your time to learn techniques properly. Focus on accuracy, not speed.
8.3 Starting with overly complex projects
Avoid starting with overly complex projects. Begin with simple projects to build skills and confidence. Master the basics first.
8.4 Not practicing basic skills
Not practicing basic skills is a mistake. Practice cutting, stitching, and finishing on scrap leather. Practice is crucial for improvement.
8.5 Neglecting safety
Neglecting safety is a serious error. Prioritize leather crafting safety at all times. Use sharp tools carefully and always cut away from yourself.
9. FAQs about leather crafting for beginners
9.1 What are the best leather crafting projects for absolute beginners?
Start with keychains, simple cardholders, bookmarks, and luggage tags. These are small, quick projects needing few skills. They build confidence fast as they are easy to complete and introduce basic cutting and stitching without being overwhelming, perfect for your first leather crafting experiences.
9.2 What is the most essential tool for leather crafting beginners?
A sharp craft knife or utility knife is arguably the most essential. It’s incredibly versatile for cutting leather, a fundamental skill for almost every project. From straight lines to curves, a sharp knife is indispensable for shaping leather pieces and is the foundation of leather crafting.
9.3 What type of leather should a beginner start with?
Vegetable tanned leather is highly recommended for beginners. It’s versatile, workable, and great for learning techniques. Veg tan is forgiving and responds well to tooling and dyeing, making it ideal for practice and a wide range of starter projects as you learn the craft.
9.4 Where can I find free leather crafting patterns for beginners?
Find free leather crafting patterns on platforms like Pinterest, crafting blogs, and leathercraft websites. Search online for “free leather patterns beginner” to discover many options. These resources offer a wealth of designs to get you started without any initial cost for patterns.
9.5 How much does it cost to get started with leather crafting?
Starting costs can be low. Begin with a basic tool kit and scrap leather to minimize initial investment. This lets you explore leather crafting affordably. Costs increase as you advance and need more tools and materials for complex projects, but the initial entry is quite accessible.
Read more:
Alright, you’ve now got a solid foundation to begin your leather crafting adventure! Remember, the journey starts with simple steps, a bit of patience, and the willingness to learn. Embrace the process, practice those basic skills, and soon you’ll be amazed at the beautiful and unique items you can create. Leather crafting is a truly rewarding skill that opens up a world of creative possibilities. And just like those final touches matter in your craft, we at Packlove understand the importance of quality and detail in every creation.


