


Master Sewing with Silk: Your Guide to Flawless Results


Silk, a luxurious and beautiful fabric, often intimidates sewers. Many hesitate, fearing they’ll ruin this delicate material. This guide provides the knowledge and skills to overcome those fears. By following these steps, anyone can approach their machine, handle silk, and produce beautiful garments with confidence. This comprehensive resource addresses common concerns, offers practical tips, and breaks down complex techniques into manageable steps.
1. Understanding Silk: Why It’s Different
Silk fabric, a natural fiber renowned for its luxurious feel and elegant appearance, demands a different approach than other materials. Its unique properties, like exquisite drape and natural luster, make it a prized choice for high-end garments. Understanding these characteristics is crucial for successful sewing. Because of its delicate nature, special handling and specific techniques are required.
1.1 What Makes Silk Unique?
Silk stands apart due to its unique combination of properties. The fiber type creates a texture that is both smooth and soft, yet surprisingly strong. Its weight can vary, influencing the drape, which ranges from fluid and flowing to structured and voluminous. One of silk’s most captivating features is its natural sheen, giving it a luxurious feel.
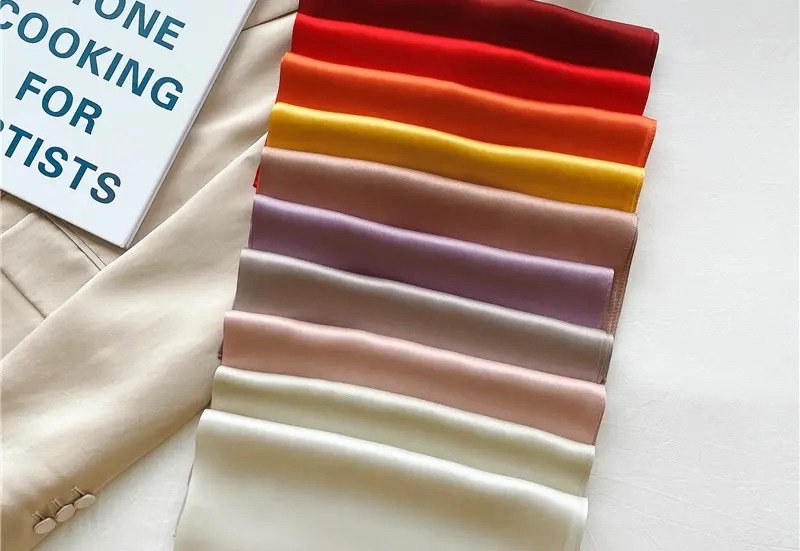
1.2 Briefly, The Different Types of Silk and Their Uses
Many kinds of silk fabrics exist, each possessing unique characteristics.
- Charmeuse: Known for its glossy surface and liquid drape, it’s perfect for lingerie, blouses, and flowing dresses.
- Habotai: A lightweight, plain-weave silk with a gentle sheen. It is commonly used for linings, scarves, and summer garments.
- Crepe de Chine: Features a subtle, crinkled texture, offering a matte appearance and excellent drape. Suitable for blouses, dresses, and skirts.
- Dupioni: Recognized by its slubby, irregular texture, it has a crisp hand and is often used for structured garments like jackets and dresses.
- Organza: A sheer, stiff fabric with a crisp drape. Ideal for overlays, bridal veils, and interfacing.
- Taffeta: Known for its smooth, crisp texture and subtle sheen. Used for formal wear, linings, and ribbons.
- Raw silk: An unrefined silk with a nubby texture and matte finish. Often used for casual garments and home décor.
- Silk Noil: A type of raw silk with a soft drape and textured surface.
- Georgette: A sheer, lightweight fabric with a crinkled texture, offering good drape. Used for blouses, dresses, and scarves.
- Chiffon: An extremely lightweight, sheer fabric with a soft, flowing drape. Perfect for evening wear, scarves, and overlays.
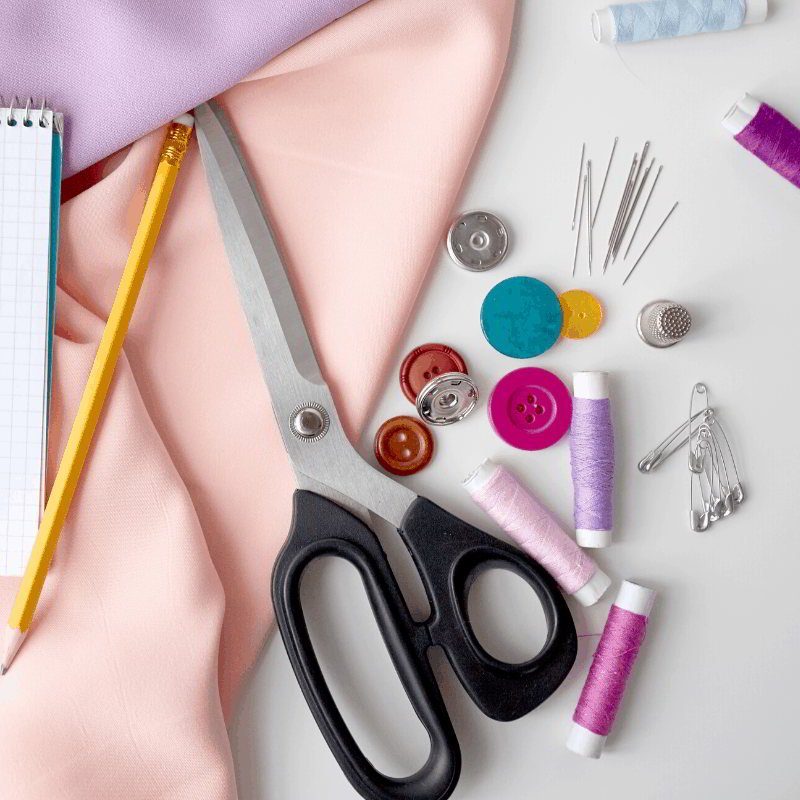
2. Essential Tools and Materials for Sewing Silk
Achieving flawless results with silk requires having the right tools. Certain tools are essential for preventing damage and ensuring precise seams.
2.1 Needles: Choosing the Right Type and Size
Using the correct needles is critical when working with silk. Microtex needles are specifically designed for delicate fabrics. Their sharp, slender points prevent snagging and minimize holes. Choosing the right size is also crucial. For lightweight silks, a 60/8 needle is recommended, while medium-weight silks may require a 70/10. These needles are designed for use in sewing machines.
2.2 Thread: Selecting the Best Fiber and Weight
The thread choice can significantly impact the final seam. While silk thread might seem like the obvious choice, it’s often too delicate for structural seams. Instead, opt for cotton thread or fine polyester thread. These provide the necessary strength without damaging the silk.
2.3 Cutting Tools: Rotary Cutters vs. Scissors
Cutting silk accurately is paramount. A rotary cutter, used in conjunction with a cutting mat, is highly recommended. It provides clean, precise cuts without lifting or shifting the fabric, minimizing the risk of slippage. While scissors can be used, they require more care to prevent distortion.
2.4 Pins: Silk Pins and Their Importance
Standard pins can leave permanent holes or snags in delicate silk. Silk pins, also known as fine pins or sharp pins, are essential. These have extra-fine points that glide through the fabric without causing damage.
2.5 Other Helpful Tools
Several other tools can greatly assist in handling.
- Pressing cloth: Protects the silk from direct heat and prevents shine or scorching.
- Fabric weights: Help hold the fabric in place during cutting, preventing slippage.
- Tissue paper: Can be placed under the silk to provide additional stability during cutting and sewing.
- Seam ripper: A necessary tool for carefully removing stitches without damaging the fabric.
- Tailor’s clapper: This wooden tool is used to absorb steam and apply pressure to seams, creating exceptionally flat and crisp finishes.
3. Preparing Your Silk Fabric for Sewing
Proper preparation is key to a successful outcome. Taking the time to prepare the delicate fabric will make the entire process smoother.
3.1 Pre-Washing Silk: Why and How
Pre-washing silk is crucial for several reasons. It removes any residual finishes, allows for potential shrinkage, and prevents water spots from appearing during pressing. Always test a swatch of fabric first to determine how it reacts to washing. Use a gentle wash cycle with lukewarm water and a mild detergent.
3.2 Drying and Pressing Silk
After pre-washing, handle the silk with care. Avoid wringing or twisting, which can damage the fibers. Instead, gently roll the fabric in a towel to remove excess water, then lay it flat to dry. Once dry, press the silk with a low heat setting and always use a press cloth.
3.3 Stabilizing Silk Fabric
To make cutting and sewing easier, consider using a fabric stabilizer. Spray stabilizer or tissue paper can provide temporary stability, preventing the fabric from shifting. Apply the stabilizer according to the manufacturer’s instructions.
4. Cutting Silk Fabric with Precision
Cutting silk demands accuracy and attention to detail. Employing the right techniques ensures that pattern pieces are cut correctly, preventing distortion and ensuring a well-fitting garment.
4.1 Techniques for Preventing Slippage
Silk’s slippery nature can make it challenging to cut accurately. Several methods can be employed to prevent slippage. Fabric weights or pattern weights, placed strategically around the pattern pieces, help hold the fabric in place. Tissue paper, placed underneath the silk, provides additional grip and prevents shifting. Using a cutting mat with a non-slip surface also contributes to stability.
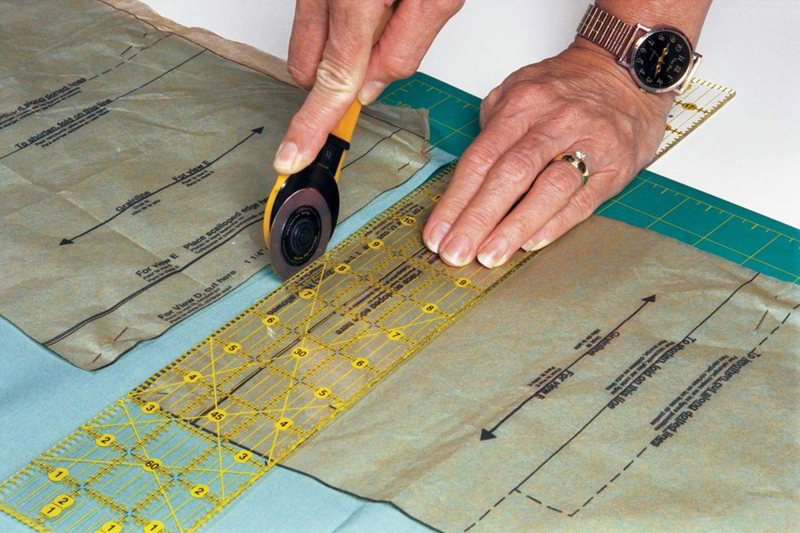
4.2 Using a Rotary Cutter
A rotary cutter is the preferred tool for cutting silk. It provides clean, continuous cuts without lifting the fabric. Use a sharp blade and a cutting mat to protect the work surface. Apply even pressure and make confident strokes, cutting at a slight angle for optimal control.
4.3 Using Scissors
While a rotary cutter is ideal, sharp fabric scissors can be used if necessary. However, extra care must be taken. Use long, smooth cuts, and minimize lifting the fabric. This helps prevent distortion and ensures accuracy.
4.4 Pattern Layout and Cutting Single Layers
Cutting silk in single layers is highly recommended. This prevents the fabric from shifting and ensures that both layers of a pattern piece are identical. Carefully lay out the pattern pieces on the single layer of silk, paying close attention to the grainline. This method minimizes distortion and promotes accuracy.
5. Sewing Silk: Techniques and Best Practices
Sewing silk requires a delicate touch and specific techniques. Implementing these best practices will help achieve professional-looking results and prevent common problems.
5.1 Machine Settings: Stitch Length and Tension
Adjusting the sewing machine settings is crucial. A shorter stitch length (1.5-2mm) is recommended for silk. This prevents puckering and creates a stronger seam. Proper tension is also essential. Test the settings on scrap fabric to ensure the stitches are balanced and don’t cause the fabric to gather or stretch.
5.2 Hand Basting: A Crucial Step for Accuracy
Hand basting is a highly recommended step when sewing silk. It provides temporary stitches that hold the fabric layers together securely, preventing shifting during machine sewing. Although it may seem time-consuming, hand basting ultimately saves time and frustration by ensuring accuracy.
5.3 Sewing Seams: Preventing Puckering and Distortion
When machine sewing silk seams, gentle handling is key. Hold the fabric taut both in front of and behind the presser foot, but avoid stretching it. Maintain an even feed, allowing the machine to guide the fabric smoothly.
5.4 French Seams: The Ideal Finish for Silk
French seams are an excellent choice for finishing silk seams. This technique encloses the raw edges within the seam, preventing fraying and creating a clean, professional look. This is particularly important for silk, which is prone to unraveling.
- Step 1: With wrong sides together, sew a narrow seam (typically 1/4 inch).
- Step 2: Trim the seam allowance close to the stitching.
- Step 3: Press the seam open, then fold the fabric with right sides together, encasing the raw edges.
- Step 4: Sew a second seam (typically 3/8 inch) along the folded edge, enclosing the previous seam allowance.
- Step 5: Press the finished seam to one side.
5.5 Other Seam Finishes
While French seams are ideal, other seam finishes can be used. A baby hem or a rolled hem are suitable for lightweight silks, creating a narrow, delicate finish.
6. Pressing Silk During and After Construction
Proper pressing techniques are essential for maintaining the beauty and integrity of silk. Gentle handling and appropriate heat settings are crucial.
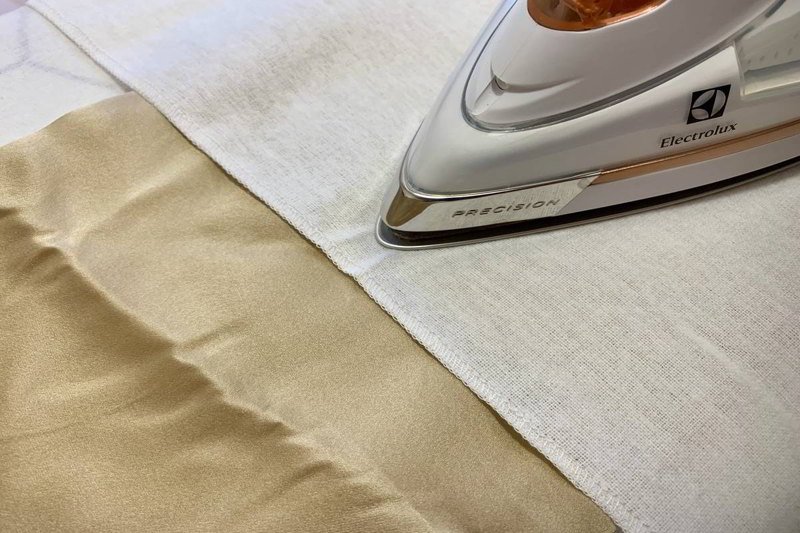
6.1 Using a Pressing Cloth: Protecting Your Fabric
Always use a pressing cloth when pressing silk. This protects the fabric from direct heat, preventing scorching, shine, and watermarks. A piece of silk organza makes an excellent pressing cloth.
6.2 Iron Settings: Temperature and Steam
Use a low heat setting on your iron, specifically the “silk” setting if available. Minimize steam, as excessive moisture can damage silk fibers. If using steam, test on a scrap of fabric first.
6.3 Pressing Techniques: Avoiding Marks and Damage
The correct pressing technique involves lifting and lowering the iron, rather than sliding it across the fabric. Use gentle pressure and an up-and-down motion. Avoid sliding, which can stretch and distort the silk.
7. Troubleshooting Common Silk Sewing Problems
Even with careful preparation, problems can arise when sewing silk. Knowing how to address these issues ensures a successful project.
7.1 Puckering Seams: Causes and Solutions
Puckering seams are a common problem. Several factors can contribute to this:
- Incorrect tension: Too much tension can cause the fabric to gather. Adjust the machine’s tension settings.
- Incorrect stitch length: A stitch length that is too long can result in puckering. Use a shorter stitch length.
- Incorrect needle or thread: Using a needle or thread that is too thick can cause the fabric to pucker. Switch to a Microtex needle and fine thread.
- Improper fabric handling: Stretching or pulling the fabric while sewing can lead to puckering. Hold the fabric taut but avoid stretching.
7.2 Slipping Fabric: Techniques for Control
Silk’s slippery nature can make it difficult to control during sewing. Techniques from previous sections, such as using fabric weights, tissue paper, and hand basting, are crucial for preventing slippage. Pinning carefully with silk pins also helps maintain control.
7.3 Fraying Edges: Prevention and Remedies
Fraying edges are a common concern with silk. The best prevention is to use appropriate seam finishes, such as French seams. If fraying occurs, carefully trim the loose threads. Serging the edges can also prevent further unraveling.
7.4 Needle Holes and Marks: Minimizing Damage
Using the correct needle and pins is essential for minimizing needle holes and marks. Always use silk pins and Microtex needles with fine, sharp points. Avoid excessive pinning and re-pinning in the same area.
7.5 Skipped Stitches: Identifying and Fixing
Skipped stitches can occur for several reasons. Here’s how to troubleshoot them:
- Incorrect Needle: An incorrect needle type or size can fail to form a stitch. Make sure you are using a sharp Microtex needle appropriate for your silk’s weight.
- Dull Needle: A dull or damaged needle will struggle to pierce the fabric correctly. Always start a new project with a fresh needle.
- Incorrect Thread: The thread may be incompatible with the needle. Ensure you are using a fine, high-quality polyester or cotton thread.
- Improper Tension: Incorrect thread tension can prevent the stitch from forming. Test and adjust your machine’s tension on a scrap piece of silk.
- Machine Setup: Improper machine threading is a common cause of skipped stitches. Double-check that your machine is threaded correctly.
8. Caring for Your Finished Silk Garment
Proper care is essential for preserving the beauty and longevity of finished silk garments.
8.1 Washing and Drying
Proper care begins with gentle washing. Hand washing with a mild detergent in lukewarm water is often the safest method. Alternatively, some silks can be machine-washed on a delicate cycle, preferably inside a mesh laundry bag. Dry cleaning is also a reliable option for many silk garments. After washing, avoid wringing the fabric, as this can damage the delicate fibers.
8.2 Ironing and Storage
To iron your silk garment, use a low heat setting (or the dedicated “silk” setting on your iron) and always press on the reverse side of the fabric. Using a pressing cloth is highly recommended to prevent shine or heat damage. For storage, hang silk items on padded hangers to maintain their shape. Keep them in a cool, dry place away from direct sunlight to prevent the color from fading and the fibers from weakening over time.
9. Related Questions
9.1 Can I use a serger on silk fabric?
Yes, but use a 3-thread overlock stitch and test on scraps first.
9.2 What’s the best way to repair a snag in silk?
Gently try to work the snag back into the weave with a fine needle.
9.3 How do I prevent silk from fading?
Avoid direct sunlight and harsh detergents. Hand wash or dry clean.
9.4 Is silk fabric suitable for all types of garments?
Silk is versatile, but its drape and weight should be considered for the intended garment.
Read more:
With this guide, anyone can confidently sew with silk. This resource has provided the necessary information to master silk-sewing techniques. By understanding the unique properties of silk, using the right tools and techniques, and practicing patiently, beautiful, and professionally-finished silk garments can be created.


