


Remove Heat Seal Labels: Iron, Solvent, Freeze


Heat seal labels, often used for branding or care instructions, are designed to be permanent. But sometimes you need to remove them. This guide provides several effective methods for removing heat seal labels, including using an iron, solvents, or even your freezer.
You’ll learn step-by-step instructions, safety precautions, and tips for choosing the right approach for your specific fabric and label type. With a little patience and the right technique, you can remove those stubborn labels without damaging your garments.
1. Understanding Heat Seal Labels and Adhesives
1.1 What are Heat Seal Labels?
Heat seal labels (Heat transfer labels) are a type of label that’s applied to fabric using a combination of heat and pressure. This process creates a strong, permanent bond between the label and the garment. These labels are commonly used for branding (logos, brand names), care instructions, size information, and decorative elements on clothing and other textile items.
They are often made from materials like vinyl, flock (a velvety textured material), or other heat-transfer materials. Unlike sewn-on labels, heat seal labels are essentially fused to the fabric.
1.2 How Does Heat Seal Adhesive Work?
Heat seal labels rely on heat-activated adhesives. These adhesives are specially formulated to be solid at room temperature but to soften and become sticky when heated to a specific temperature. Here’s a simplified explanation of the process:
- Solid at Room Temperature: The adhesive on the back of the label is initially solid and non-sticky.
- Heat Application: When heat is applied (usually with an iron or a heat press), the adhesive reaches its melting point and becomes soft and tacky.
- Pressure Application: Pressure is applied simultaneously with heat. This forces the softened adhesive to penetrate and bond with the fabric fibers.
- Cooling and Bonding: As the adhesive cools, it solidifies again, creating a strong, permanent bond between the label and the fabric. This bond is designed to be resistant to washing, drying, and normal wear and tear.
2. Preparing for Heat Seal Label Removal
2.1 Assessing the Garment and Label
Proper assessment helps you choose the right removal method and avoid damaging your clothing. Identify the Fabric Type: Determine the fabric composition of your garment. Common fabrics include:
- Cotton
- Polyester
- Blends (e.g., cotton/polyester)
- Delicate fabrics (silk, rayon, lace)
2.2 Gathering Your Tools and Materials
Having the right tools on hand will make the removal process much easier.
Essential Tools:
- Iron: For applying heat to soften the adhesive.
- Ironing board: Provides a stable, heat-resistant surface.
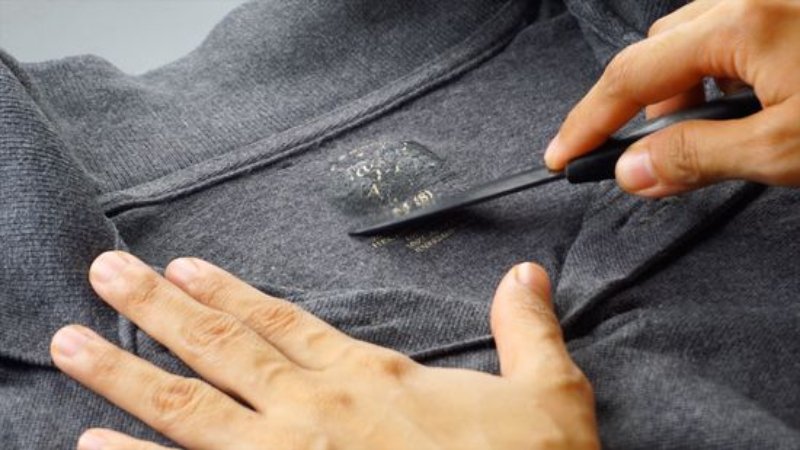
- Tweezers: For lifting and peeling away the loosened label.
- Parchment paper: Protects the fabric and prevents the iron from sticking to the adhesive.
- Pressing cloth: A thin, clean cotton cloth (like a pillowcase or handkerchief) used to protect delicate fabrics from direct heat.
3. Method 1: Removing Heat Seal Labels with an Iron
3.1 Step-by-Step Guide (Iron Method)
Preparation:
- Place a towel or ironing board cover on a flat, heat-resistant surface.
- Turn the garment inside out so the back of the label faces up.
- Set your iron to a low to medium heat setting (e.g., synthetic, silk, or wool setting) and do not use steam.
- Crucially, consult the garment’s care label for the correct ironing temperature. Start with a lower setting and only increase if needed.
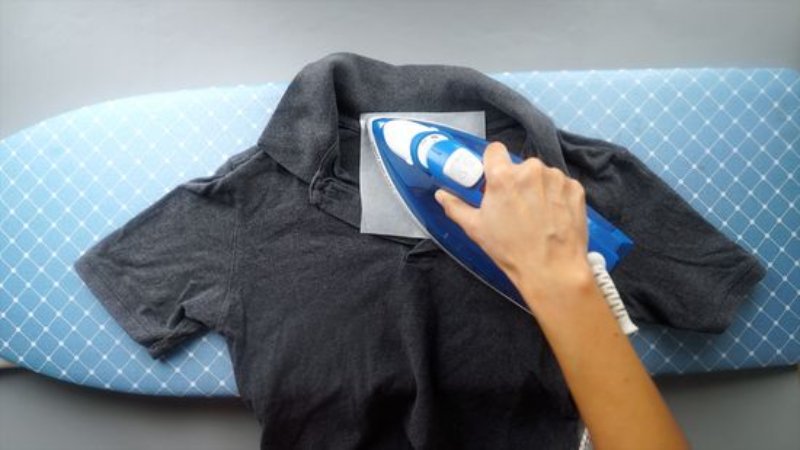
- Place a sheet of parchment paper inside the garment, directly beneath the label, to prevent the adhesive from transferring to the other side.
- Place another sheet of parchment paper on top of the fabric, over the back of the label, to protect the fabric from direct heat.
Ironing Process:
- Press the iron firmly onto the parchment paper covering the back of the label.
- Hold the iron in place for 10-15 seconds.
- Avoid moving the iron back and forth, as this can smear the adhesive or damage the fabric.
Checking the Label:
- After 10-15 seconds, carefully lift a corner of the parchment paper.
- Use tweezers to check if the edge of the label is starting to lift.
3.2 Tips and Precautions (Iron Method)
Avoid overheating: Never use a higher heat setting than recommended for the fabric. Overheating can scorch, melt, or otherwise damage the garment.
- Test on an inconspicuous area: If you’re unsure about the fabric’s heat tolerance, test the iron on a hidden area (like the inside of a hem) first.
- Always use parchment paper: This prevents the adhesive from sticking to your iron and protects the fabric.
- Be patient: Removing a heat seal label can take time. Don’t rush the process, and be prepared to repeat the heating and peeling steps multiple times.
- Delicate fabrics: For delicate fabrics, use extra caution and consider using a pressing cloth (a thin cotton cloth) between the parchment paper and the iron for added protection. Use the lowest possible heat setting.
4. Fabric Temperature Guide
4.1 Fabric Iron Setting Temperature Range Time (seconds)
| Fabric | Temperature Setting | Temperature (°C / °F) | Time (seconds) |
|---|---|---|---|
| Wool | Warm | 135°C / 275°F | 10-15 |
| Cotton | Hot | 204°C / 400°F | 10-15 |
| Silk | Cool | 148°C / 300°F | 5-10 |
| Polyester | Warm | 148°C / 300°F | 10-15 |
| Linen | Hot | 230°C / 445°F | 10-15 |
5. Method 2: Removing Heat Seal Labels with a Solvent
5.1 Choosing the Right Solvent
To remove sticky residue from clothing, rubbing alcohol is a good option for most fabrics like cotton and polyester, but always test it first in a hidden spot as it’s flammable and requires ventilation.
Acetone is stronger and effective on cotton and some synthetics, but avoid it on acetate, triacetate, and modacrylic, and also ensure good ventilation.
Vinyl letter remover is generally safe and effective for most fabrics, designed specifically for this purpose; however, always test it first in an inconspicuous area and follow the manufacturer’s instructions. Regardless of the product, always test in a hidden spot and use in a well-ventilated area for safety.
5.2 Step-by-Step Guide (Solvent Method)
Test the solvent: Before applying any solvent to the label, test it on a hidden area of the garment (like the inside of a hem or seam) to check for discoloration, staining, or damage.
- Ventilate the area: Work in a well-ventilated area, preferably outdoors or near an open window, as solvents can have strong fumes.
- Protect your work surface: Cover your work surface with a non-absorbent material, such as plastic or a thick layer of newspaper.
- Turn the garment inside out: Expose the back of the fabric where the label is attached.
6. Method 3: Removing Heat Seal Labels with the Freezing Method
6.1 Step-by-Step Guide (Freezing Method)
Place the garment in a freezer bag: Fold the garment so that the heat seal label is exposed and not touching other parts of the garment. Place it in a plastic freezer bag.
- Freeze the garment: Place the bag in the freezer for at least 2-3 hours, or even overnight. The goal is to make the adhesive brittle.
- Remove from freezer: Take the garment out of the freezer.
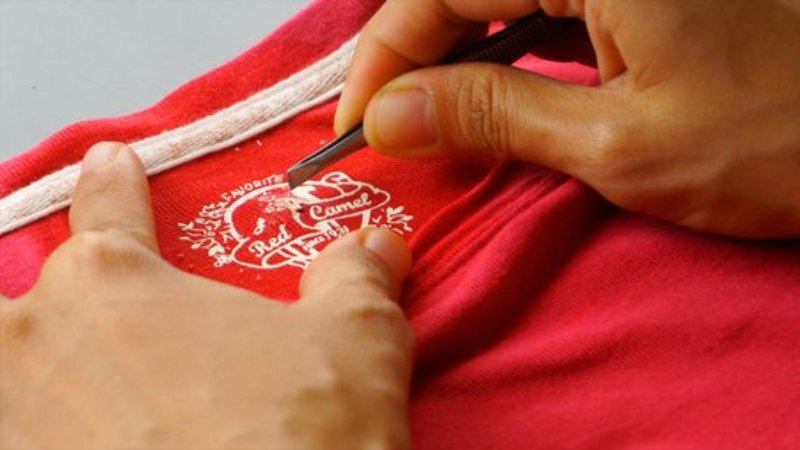
- Peel or scrape off the label: Immediately after removing the garment from the freezer, try to peel off the label with your fingers or tweezers. If the adhesive is sufficiently brittle, the label may crack and break off in pieces. You can also try using a blunt knife or a credit card to gently scrape off the frozen adhesive. Do not use sharp tools, as they could damage the fabric.
- Wash the garment: Once you’ve removed as much of the label as possible, wash the garment according to its care instructions.
6.2 When to Use the Freezing Method
The freezing method works best on adhesives that become hard and brittle when cold. It may not be effective on all types of heat seal labels, particularly those with very flexible or rubbery adhesives. It is a good option to consider for:
- Delicate fabrics: When heat or solvents pose a high risk of damage.
- Heat-sensitive fabrics: When you cannot use the heat from iron.
- Solvent-sensitive fabrics: If you cannot use solvent for your fabrics
7. Removing Adhesive Residue
7.1 Techniques for Removing Sticky Residue
- Re-apply Heat: Sometimes, reapplying heat with an iron and parchment paper (as described in Method 1) can soften the remaining adhesive, allowing you to rub it off with a clean cloth.
- Dish Soap and Warm Water: For washable fabrics, try applying a small amount of dish soap to the residue, adding a few drops of warm water, and gently rubbing the area with your fingers or a soft cloth. Rinse thoroughly and repeat if necessary.
- Rubbing Alcohol: Apply a small amount of rubbing alcohol to a clean cloth and gently dab or rub the residue. Always test on an inconspicuous area first.
- Acetone (Nail Polish Remover): Acetone can be effective on stubborn residue, but use it with extreme caution and only on fabrics that can tolerate it (see solvent compatibility chart earlier). Never use acetone on acetate, triacetate, or modacrylic fabrics. Test on a hidden area first.

7.2 Dealing with Stubborn Residue
If the adhesive residue is particularly stubborn, you may need to try a combination of techniques or repeat the application of a chosen method several times.
- Repeat Techniques: Try repeating the steps of your chosen method (heat, solvent, or adhesive remover) multiple times.
- Combine Methods: You might try applying heat to soften the residue, then using a solvent or adhesive remover to dissolve it.
- Professional Cleaning: If you’ve tried multiple methods and the residue persists, or if you’re concerned about damaging the garment, consider taking it to a professional dry cleaner. They may have specialized cleaning agents and techniques that can remove the residue without harming the fabric.
8. Troubleshooting Common Problems
8.1 Label Only Partially Removes
If the label only partially removes, leaving some of the adhesive or label material behind, don’t panic. First, try reapplying heat using your chosen method (iron, hairdryer, etc.). Ensure you’re applying sufficient heat for the recommended time.
If the label material is still stuck, try using a small amount of the appropriate solvent (if applicable to your label type and fabric – always test in an inconspicuous area first!). Carefully apply the solvent to the remaining residue. Finally, use tweezers to meticulously lift and remove any stubborn pieces. Avoid pulling aggressively, as this can damage the fabric.
8.2 Fabric Damage During Removal
It’s crucial to be very careful when removing labels to avoid damage to the fabric. Always use gentle, slow movements. Never force the label off. If you do encounter problems, such as snagging the fabric or causing slight discoloration, stop immediately.
For snags, try to carefully trim any loose threads. For discoloration, a gentle fabric cleaner specifically designed for the fabric type might help, but always test on a hidden area first. In some cases, minor damage may be unavoidable, especially with delicate fabrics. If significant damage occurs, consult a professional cleaner or tailor.
8.3 Residue Won’t Come Off
Stubborn residue can be frustrating. If your initial removal method leaves adhesive behind, you’ll need a residue remover that’s safe for your fabric. Several options exist:
- Specialty Adhesive Removers: Look for commercial adhesive removers designed for fabric. These are often available at craft stores or online. Always test on a hidden area first.
- Rubbing Alcohol (Isopropyl Alcohol): This can be effective on some adhesives, but always test it on an inconspicuous area of the fabric first, as it can cause discoloration or damage to some materials. Apply a small amount to a clean cloth and gently rub the residue.
- Mild Dish Soap and Water: For water-based adhesives, a solution of warm water and a few drops of mild dish soap might work. Apply with a clean cloth and rub gently. Rinse thoroughly.
- Oil-Based Solutions (for certain adhesives only): With extreme caution and thorough testing, a small amount of cooking oil (like vegetable or olive oil) or a specialized oil-based cleaner might help dissolve certain types of adhesive. This is a last resort and should only be used if you’re certain it won’t stain or damage the fabric. Follow up with a thorough cleaning with soap and water to remove the oil.
8.4 Label Tears During Removal
If the label tears while you’re removing it, don’t pull on the remaining pieces forcefully. This can worsen the tear and potentially damage the fabric underneath. Instead, try to reapply heat to the torn area. This can sometimes soften the adhesive enough to allow you to lift the remaining pieces more easily.
Use tweezers to carefully pick off the smaller, torn fragments. If the label is very fragile, you may need to remove it in very small pieces, working slowly and patiently.
9. Related Questions
9.1 How to remove heat seal labels from hats?
Removing heat seal labels from hats requires some special considerations. The curved surface of a hat can make it difficult to apply even heat with an iron. Use a small, handheld iron if possible, and work in small sections. Be mindful of the hat’s material. Straw, felt, and some synthetic materials are easily damaged by heat or solvents. Test any removal method on an inconspicuous area first.
9.2 How to remove heat transfer vinyl?
Heat transfer vinyl (HTV) is a type of heat seal label, so the removal methods are largely the same as those described in this article. The most common approaches are using heat (an iron or hair dryer) to soften the adhesive, or using a solvent (like rubbing alcohol or a specialized vinyl letter remover) to dissolve it. Always test any method on a hidden area first.
9.3 Can I put a new heat seal label over an old one?
Generally, this is not recommended. The old adhesive residue can interfere with the new label’s bond, preventing it from adhering properly. The surface may also be uneven, leading to a poor-quality application. It’s best to remove the old label completely before applying a new one.
9.4 What’s the best way to remove heat seal labels in bulk (for businesses)?
For businesses needing to remove heat seal labels in bulk, efficiency is key. A heat press can provide more consistent and controlled heat application than a handheld iron, especially for larger labels. Solvent-based methods, using specialized vinyl letter removers, may also be faster for large quantities. Always prioritize safety and test any method on a small sample before proceeding with a large batch.
9.5 Can I use a hair dryer instead of an iron?
A hair dryer can be used as an alternative heat source, but it’s generally less effective than an iron. A hair dryer produces a less concentrated and less consistent heat, so it may take longer to soften the adhesive. It’s best suited for small labels, delicate fabrics, or situations where you need a very gentle heat source.
Read more:
Removing heat seal labels from clothing can be accomplished successfully with a little knowledge and patience. The three primary methods – using an iron, applying a solvent, or freezing the garment – each have their advantages and disadvantages, and the best approach depends on the specific label and fabric type.
Remember to always assess the garment and label, gather the appropriate tools, and test any method on an inconspicuous area first. Work slowly and carefully, and don’t be afraid to repeat steps or combine methods if necessary. By following these guidelines, you can remove unwanted heat seal labels and keep your clothes looking their best.


