Remove Iron-On Patches, Vinyl and Transfers: Easy Guide
Whether it’s a change of style, a repurposed garment, or a misplaced decal, there are times when you need to remove iron-on patches, vinyl lettering, or heat transfers from fabric. But doing it incorrectly can damage your clothes. This easy-to-follow guide provides safe and effective methods for removing these embellishments, with step-by-step instructions and tips for handling various fabrics and dealing with stubborn adhesive residue. You’ll be able to confidently remove unwanted iron-ons and give your clothes a fresh start.
1. Understanding Iron-Ons and Fabrics: Before You Start
1.1 Types of Iron-Ons
There are three main types of iron-ons, each with slightly different characteristics:
- Iron-on Patches: These are pre-made decorative patches with a heat-activated adhesive on the back. They are typically made of fabric (often embroidered) and have a thicker, more substantial feel.
- Heat Transfer Vinyl (HTV): HTV is a thin, flexible vinyl material with a heat-activated adhesive. It’s commonly used for creating custom designs, lettering, and logos on clothing. HTV usually comes on a clear carrier sheet that is removed after application.
- Iron-on Transfers: These are designs printed on special transfer paper with heat-activated ink. When heat is applied, the ink transfers from the paper to the fabric.
All three types rely on heat-activated adhesive to bond to the fabric. This means that heat is required to both apply and, often, to remove them.

1.2 Common Fabric Types and Their Heat Sensitivity
Different fabrics react differently to heat and solvents, which are often used in iron-on removal. Understanding your fabric’s properties is essential for avoiding damage:
- Cotton: Generally durable and heat-resistant. Can usually withstand medium to high heat settings on an iron.
- Polyester: More heat-sensitive than cotton. Use low to medium heat settings.
- Blends: (e.g., cotton/polyester) Heat tolerance depends on the blend ratio. Start with a lower heat setting and increase gradually if needed.
- Delicate Fabrics (silk, rayon, lace): Extremely heat-sensitive and easily damaged. Avoid using high heat or harsh solvents. Professional removal is often recommended.
1.3 Fabric Type Heat Setting Solvent Resistance Notes
- Cotton Medium-High Good Generally durable and easy to work with.
- Polyester Low-Medium Fair Can be heat-sensitive; avoid high heat. Test solvents in an inconspicuous area first.
- Cotton/Poly Blend Medium Fair Heat tolerance depends on the blend ratio; start with a lower setting.
- Silk Very Low Poor Extremely delicate; avoid heat and solvents if possible. Professional removal often recommended.
- Rayon Very Low Poor Similar to silk; very delicate and easily damaged.
- Lace Very Low Poor Extremely delicate, easily snagged or torn.
1.4 Identifying the Adhesive
While most iron-ons use heat-activated adhesive, knowing the type of iron-on can give you clues about the adhesive:
- Iron-on patches: Typically have a thicker layer of adhesive that may appear slightly milky or opaque.
- Heat Transfer Vinyl (HTV): The adhesive is usually integrated into the vinyl itself and is not visible separately. The presence of a clear carrier sheet is a strong indicator of HTV.
- Iron-on Transfers: The adhesive is part of the ink that transfers to the fabric. There may be a slight sheen or stiffness to the transferred design.
1.5 Essential Tools and Materials
Having the right tools and materials on hand will make the iron-on removal process easier and safer. Here’s a comprehensive list:
- Iron: Used to apply heat to soften the adhesive.
- Hair dryer: An alternative heat source, useful for delicate fabrics or small areas.
- Parchment paper: Protects the fabric and prevents the iron from sticking to the adhesive.
- Tweezers: For lifting and peeling away the loosened iron-on.
- Weeding tool: (Optional) A specialized tool with a pointed tip, often used for removing HTV. Helpful for intricate designs.
- Rubbing alcohol (Isopropyl alcohol): Can help dissolve some adhesives. Always test on an inconspicuous area first.
- Acetone (Nail polish remover): A stronger solvent that can dissolve some adhesives. Use with extreme caution and only on durable fabrics. Always test on a hidden area first. Avoid on delicate fabrics.
- Commercial iron-on remover/ VLR Vinyl Remover / Adhesive remover: Products specifically designed for removing iron-ons or adhesive residue. Follow manufacturer’s instructions carefully.
- Soft cloths: For applying solvents and wiping away residue.
- Cotton balls: For applying solvents to small areas.
2. Step-by-Step Removal Methods
2.1 The Heat Method (Using an Iron)
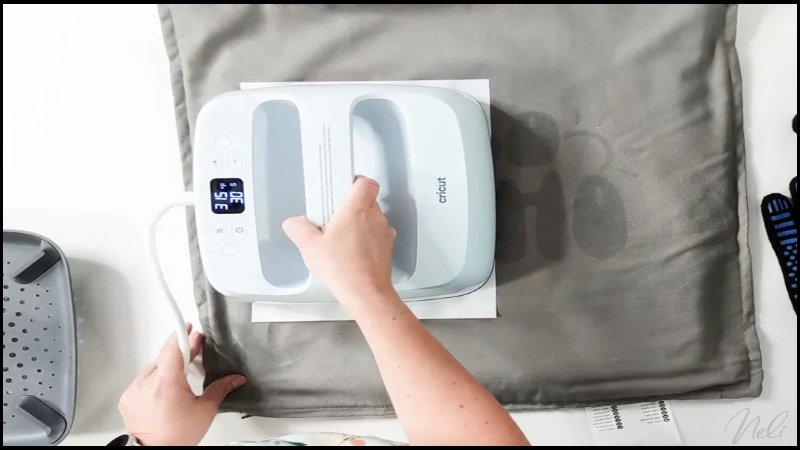
The heat method is often the most effective starting point, especially for iron-on patches and HTV. Heat softens the adhesive, making it easier to peel away the iron-on. Place a towel or ironing board cover on your work surface to protect it from heat.
Turn the garment inside out, so you’re working on the back of the fabric where the iron-on is attached. Set your iron to a low to medium heat setting (usually the synthetic or silk setting), without steam. Consult the fabric care label for the garment’s heat tolerance. Start with a lower setting and increase gradually if needed.

2.2 The Solvent Method (Rubbing Alcohol or Acetone)
Solvents can help dissolve the adhesive, making it easier to remove the iron-on. However, solvents can also damage some fabrics, so this method should be used with caution and always tested on an inconspicuous area first.
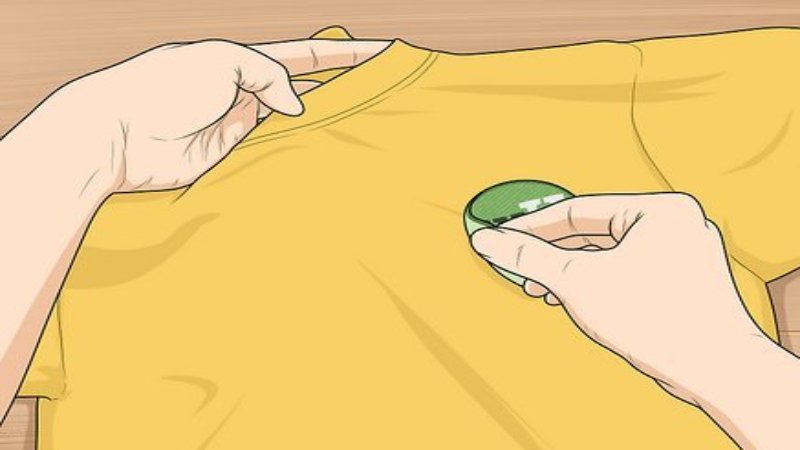
Apply a small amount of rubbing alcohol or acetone to a hidden area of the garment (like the inside of a hem) to check for discoloration or damage. Work in a well-ventilated area, as solvents can have strong fumes and work on the back of the fabric where the iron-on is attached. Saturate a cotton ball or soft cloth with rubbing alcohol (or acetone, if appropriate for the fabric).
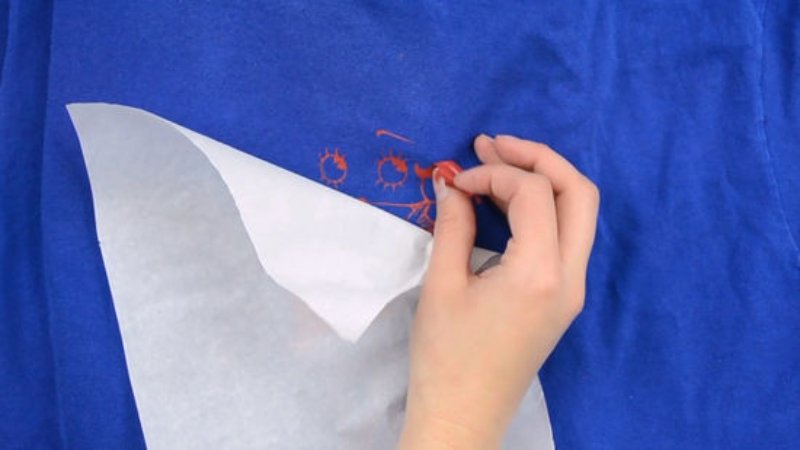
Apply the solvent to the fabric behind the iron-on, allowing it to soak through and loosen the adhesive. Let the solvent sit for a few minutes to work on the adhesive. Use tweezers or a weeding tool to carefully peel away the iron-on from the fabric.
You may need to repeat the application of solvent and peeling process several times. Once the iron-on is removed, wash the garment according to its care instructions to remove any remaining solvent residue.
2.3 Using a Commercial Iron-On Remover
Commercial iron-on removers, such as VLR Vinyl Letter Remover, are specifically formulated to dissolve the adhesive used in iron-ons.
- Read the instructions: Always read and follow the manufacturer’s instructions carefully. Different products may have different application methods and safety precautions.
- Test on a hidden area: Test the remover on an inconspicuous area of the garment first.
- Apply the remover: Apply the remover according to the product instructions. This may involve spraying it on, applying it with a brush, or soaking the fabric.
- Wait: Allow the remover to work for the recommended time.
- Peel away the iron-on: Use tweezers or a weeding tool to remove the loosened iron-on.
- Wash the garment: Wash the garment according to its care instructions.
2.4 The Hair Dryer Method (Gentle Heat)
A hair dryer can be used as a gentler heat source, particularly for delicate fabrics or small iron-ons.
Step-by-step Instructions:
- Set: Set the hair dryer to a low or medium heat setting.
- Heat: Hold the hair dryer a few inches away from the back of the fabric (garment turned inside out) where the iron-on is attached. Move the hair dryer back and forth to heat the adhesive evenly.
- Peel: After heating for a minute or two, try to peel up a corner of the iron-on with tweezers. If it doesn’t lift easily, continue heating.
- Repeat: Repeat the heating and peeling process until the iron-on is removed.
2.5 Combining Methods
For particularly stubborn iron-ons, you can strategically combine the heat and solvent methods:
- Start with heat: Always begin with the heat method (iron or hair dryer) to try to soften the adhesive.
- If heat alone doesn’t work: If the iron-on is still resisting removal after repeated heating, you can try applying a solvent after heating. The heat may help the solvent penetrate the adhesive more effectively.
- Proceed with caution: Be extra careful when combining methods, as the fabric may be more vulnerable to damage after being heated. Always test solvents on a hidden area first.
2.6 Removing Adhesive Residue
After removing an iron-on, you may be left with some adhesive residue on the fabric. This is a common problem, but there are several ways to remove it:
- Rubbing Alcohol: Apply a small amount of rubbing alcohol to a clean cloth and gently rub the residue. Test on an inconspicuous area first..
- Warm, Soapy Water: For washable fabrics, soaking the area in warm, soapy water can sometimes loosen the residue, allowing you to rub it away with a cloth.
3. Troubleshooting and Tips
3.1 Dealing with Stubborn Iron-Ons
Some iron-ons, particularly older ones or those applied with a very strong adhesive, can be extremely difficult to remove. Here are some strategies for tackling stubborn iron-ons. Try repeating the heat method or the solvent method several times.
Sometimes, multiple applications are needed to fully loosen the adhesive. If rubbing alcohol isn’t effective, you can try a stronger solvent like acetone (on appropriate fabrics and always with a test in a hidden area). Carefully combine the heat and solvent methods, as described earlier.
If you’ve tried multiple methods and the iron-on still won’t budge, or if you’re concerned about damaging the garment, it’s best to consult a professional tailor, dry cleaner, or garment care specialist. They may have access to specialized tools and techniques that are not available to consumers.

3.2 Preventing Fabric Damage
The best way to deal with fabric damage is to prevent it in the first place. Here are some key tips:
- Use Low Heat: Always start with the lowest effective heat setting on your iron or hair dryer. Increase the heat gradually only if necessary.
- Test Solvents: Always test any solvent (rubbing alcohol, acetone, adhesive remover) on an inconspicuous area of the garment before applying it to the iron-on.
- Work Slowly and Patiently: Avoid rushing the process. Take your time and work carefully, especially when peeling away the iron-on.
- Avoid Excessive Force: Don’t pull, tug, or scrape at the iron-on too aggressively. This can stretch, tear, or distort the fabric.
4. Use Right Tools
4.1 Tips for Small Business Owners
For small business owners in the apparel industry, removing iron-ons can be a recurring task, whether it’s dealing with customer returns, correcting mistakes, or repurposing inventory. Here are some tips:
- Invest in Quality Tools: A good quality iron, a variety of solvents, and specialized tools like weeding tools and commercial iron-on removers can make the process more efficient and less risky.
- Train Employees: If you have employees who handle iron-on removal, ensure they are properly trained on the correct techniques and safety precautions.
- Quality Control: Implement quality control measures during the iron-on application process to prevent mistakes that might require later removal.

5. Related Questions
5.1 Can I remove an iron-on from a delicate fabric like silk or lace?
Removing iron-ons from delicate fabrics is extremely risky and often not recommended. The heat or solvents required can easily damage these materials. If removal is absolutely necessary, it’s best to consult a professional tailor or dry cleaner who specializes in delicate fabrics.
They may have specialized techniques or tools that can minimize the risk of damage. For a simple solution on some delicate fabrics, you might consider covering the design instead.
5.2 I tried to remove an iron-on, and it left a sticky outline. What should I do?
This is a common problem, indicating that some adhesive residue remains on the fabric. Try using rubbing alcohol,, or warm, soapy water to remove the residue. Always test these methods on an inconspicuous area first. You may need to repeat the application several times to remove all traces of the adhesive.
5.3 Can I reuse an iron-on after I remove it?
Generally, no. The heat-activated adhesive is designed for a single application. Once the iron-on has been removed, the adhesive is usually no longer effective. You might be able to reattach a very recently applied iron-on patch using fabric glue, but this is not a reliable solution.
5.4 Will removing an iron-on leave a mark on the fabric?
There’s always a risk of leaving some mark, especially if the iron-on has been in place for a long time or if the adhesive was very strong. The mark might be a slight discoloration, a change in texture, or a faint outline of the design. The best way to minimize marking is to choose the appropriate removal method for the fabric and iron-on type, work slowly and carefully, and avoid excessive heat or harsh chemicals.
5.5 I accidentally melted some of the vinyl onto my iron. How do I clean it?
Unplug the iron and let it cool slightly. While it’s still warm (but not hot), try to wipe off the melted vinyl with a damp cloth. You can also try using a specialized iron cleaner, following the product instructions. For stubborn residue, you can try making a paste of baking soda and water, applying it to the cooled iron soleplate, and gently scrubbing.
Read more:
Removing iron-on patches, vinyl, and transfers requires careful consideration of the materials involved and a willingness to experiment with different methods. There’s no one-size-fits-all solution, and the best approach will depend on the specific iron-on type, the fabric, and the adhesive. Always start with the gentlest method possible, and progress to more aggressive techniques only if necessary.
Remember to prioritize safety by testing solvents in hidden areas, working in a well-ventilated space, and using appropriate heat settings. With patience and the right techniques, you can successfully remove unwanted iron-ons and give your clothes a new lease on life.


