


Removing Iron-On Letters: Easy Garment Fixes


Have you ever enthusiastically applied iron-on letters or decals to a garment, only to later realize a mistake, want a change, or need to repurpose the item? Maybe the design didn’t age well, a name needs updating, or perhaps a DIY project didn’t quite go as planned. Whatever the reason, removing those seemingly permanent additions can feel daunting. Many people worry about damaging their favorite fabrics in the process.
This guide provides the solutions. Within these steps, you’ll discover multiple proven methods for safely removing iron-on letters, decals, heat transfer vinyl (HTV), and iron-on transfers from various fabrics, including cotton, polyester, and even delicate materials.
You’ll learn how to break down the adhesive bond effectively and minimize any potential adhesive residue. From utilizing everyday household items to exploring specialized tools, this resource equips you with the knowledge to tackle this task confidently and reclaim your garments. You’ll get a refreshed and blank canvas.
1. Understanding iron-on letters and adhesives
1.1 What are iron-on letters?
Iron-on letters are pre-cut shapes or characters made from materials designed to adhere to fabric using heat. They provide a convenient way to personalize garments, accessories, and other textile items. The most common type is heat transfer vinyl (HTV), a thin, flexible material with a heat-activated adhesive backing. Other variations include flock (which has a velvety texture) and glitter (which incorporates glitter particles for a sparkly effect).
1.2 How does the adhesive work?
The magic behind iron-on letters lies in their heat-activated bonding process. The adhesive, typically a type of thermoplastic, is solid at room temperature. When heat is applied (usually with an iron or heat press), the adhesive melts and penetrates the fabric fibers. As it cools, the adhesive solidifies, creating a strong bond between the letter and the fabric.
1.3 Why is removal sometimes difficult?
Several factors can influence the difficulty of removing iron-on letters. The strength of the adhesive itself plays a crucial role; some adhesives are formulated to be more permanent than others. The type of fabric also matters. The age of the letters is another factor; older letters may have a stronger bond. Finally, the original application method, including the temperature and pressure used, can affect how well the adhesive has bonded.
2. Essential tools and materials
2.1 Gathering your supplies
Before starting the removal process, it’s best to gather all the necessary tools and materials. This preparation will help ensure a smoother and more efficient workflow. Here’s a comprehensive list:
- Heat source: An iron (with adjustable temperature settings) or a hairdryer (for delicate fabrics).
- Peeling tools: Tweezers (for precise lifting), a butter knife (for gently prying edges), or a craft knife (for carefully separating stubborn letters).
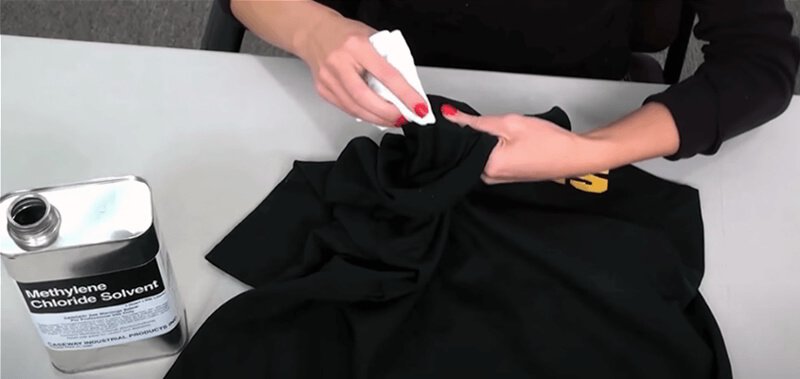
- Solvent (if needed): Rubbing alcohol (isopropyl alcohol), a commercial adhesive remover, or, in some cases, acetone (use with caution and test first).
- Protective barriers: Parchment paper (to protect the fabric and iron) or towels (to insulate surfaces).
- Application tools: Cotton swabs (for precise solvent application) and clean cloths (for wiping residue).
- Safety item: Gloves.
- Workspace: A well-ventilated area (especially when using solvents).
2.2 Choosing the right solvent
Selecting the appropriate solvent depends on the fabric type and the adhesive’s strength. Here’s a comparison to guide your choice:
| Solvent | Fabric Compatibility | Effectiveness | Safety | Pros | Cons |
|---|---|---|---|---|---|
| Rubbing alcohol | Generally safe for most fabrics, including cotton | Good for moderate adhesive residue | Relatively safe, but always test in an inconspicuous area. | Widely available, inexpensive, less likely to damage fabrics. | May require multiple applications for stubborn residue. |
| Acetone | Use with extreme caution; may damage synthetics | Very effective for stubborn adhesive | Flammable; use in a well-ventilated area. Avoid on delicates. | Fast-acting, dissolves adhesive quickly. | Can damage or discolor certain fabrics (especially synthetics like acetate or triacetate). |
| Commercial adhesive remover | Generally safe for most fabrics, but always test first | Excellent for removing sticky residue | Generally safe, but follow product instructions. | Specifically designed for adhesive removal, effective on a variety of surfaces. | May leave an oily residue that requires washing. |
| Nail polish remover | Some contain acetone, check label | Good | Flammable; use in a well-ventilated area. Avoid on delicates. | Readily available | May contain additional ingredients, best to use the acetone-free option. |
Important note: Always perform a spot test in an inconspicuous area of the garment before applying any solvent to the entire affected area.
2.3 Safety precautions
Prioritizing safety is crucial when working with heat and solvents. Here are essential precautions to follow:
- Ventilation: Work in a well-ventilated area, especially when using solvents.
- Gloves: Wear gloves to protect skin from direct contact with solvents.
- Testing: Always test any solvent on a hidden area of the fabric first.
- Flammability: Keep solvents away from open flames and heat sources, as many are flammable.
- Child and pet safety: Store solvents and tools out of reach of children and pets.
3. Method 1: Removing iron-on letters with heat
3.1 Preparing your garment
- Turn inside out: Turn the garment inside out.
- Place on flat surface: Lay the garment on a flat, heat-resistant surface.
- Protect inner layer: Insert a piece of cardboard or a folded towel inside the garment, directly beneath the area with the iron-on letters.
3.2 Using an iron
- Set iron temperature: The appropriate iron temperature depends on the fabric type. Cotton and linen: Use the cotton/linen setting (usually high heat). Polyester and synthetics: Start with a lower setting (synthetic/low heat) and gradually increase if needed.
- Place parchment paper: Place a sheet of parchment paper over the back of the iron-on letters.
- Apply heat and pressure: Press the iron firmly onto the parchment paper, directly over the letters. Apply even pressure and hold for 10-15 seconds.
- Check for loosening: After the initial heating, carefully lift a corner of the parchment paper and use tweezers to gently test if the edge of a letter has started to loosen.
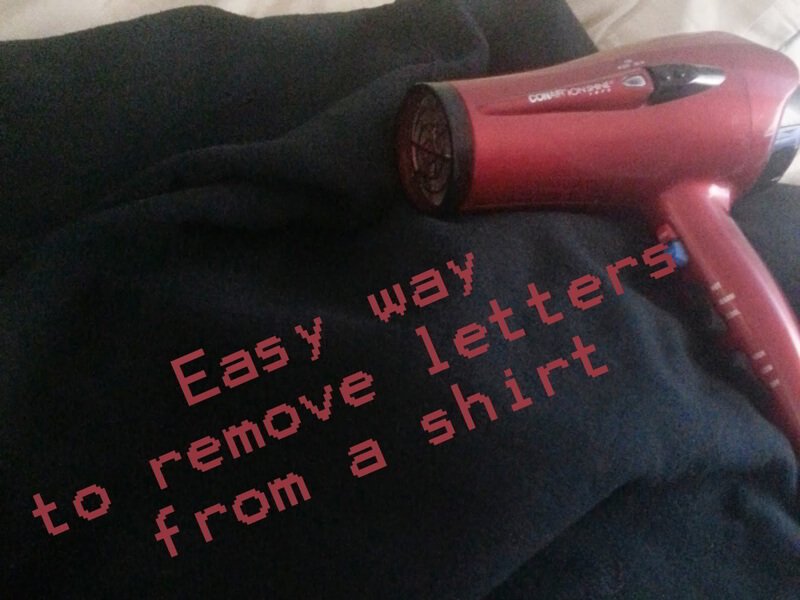
3.3 Using a hairdryer
- Choose high heat setting: Set your hairdryer to the highest heat setting.
- Direct heat: Hold the hairdryer a few inches away from the back of the iron-on letters (again, with the garment inside-out). Keep the hairdryer moving constantly to avoid overheating any one spot.
- Monitor for loosening: Continue heating for several minutes, periodically checking for loosening.
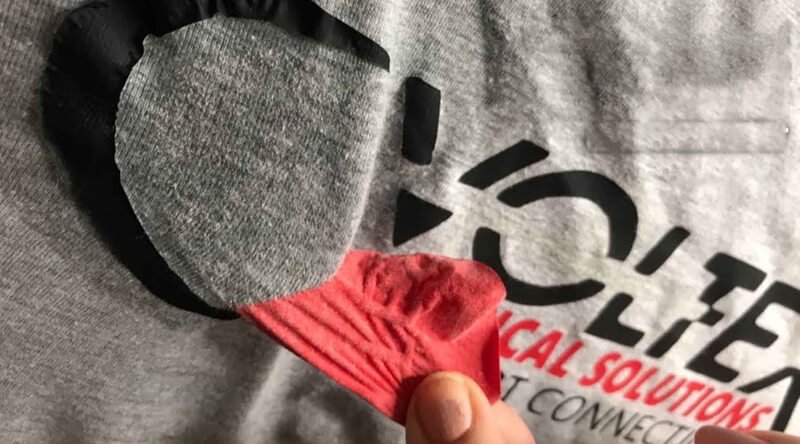
3.4 Peeling off the letters
- Lift carefully: Once the adhesive has softened sufficiently, use tweezers or a butter knife to carefully lift the edge of a letter.
- Peel slowly: Peel the letter away from the fabric slowly and steadily.
- Reheat if necessary: If any part of the letter remains stuck, reapply heat to that specific area before continuing to peel.
3.5 Dealing with stubborn letters
If some letters or parts of the design prove particularly stubborn, don’t give up. Try a combination of approaches:
- Reapply heat: Continue applying heat, focusing on the areas that are still adhered.
- Introduce solvent (with caution): If heat alone isn’t enough, after attempting the heat method, you can consider carefully applying a small amount of rubbing alcohol or adhesive remover to the back of the fabric.
- Be patient: Work methodically and patiently.
4. Method 2: Removing iron-on letters with solvents
4.1 Choosing your solvent
Your choice of solvent is crucial. For most fabrics, rubbing alcohol is a safe start. For more stubborn adhesive, a commercial adhesive remover might be necessary, but always test it on a hidden part of the garment first to prevent damage.
4.2 Testing on an inconspicuous area
This step is non-negotiable. Before applying any solvent to the visible part of the garment, perform a test on a hidden area.
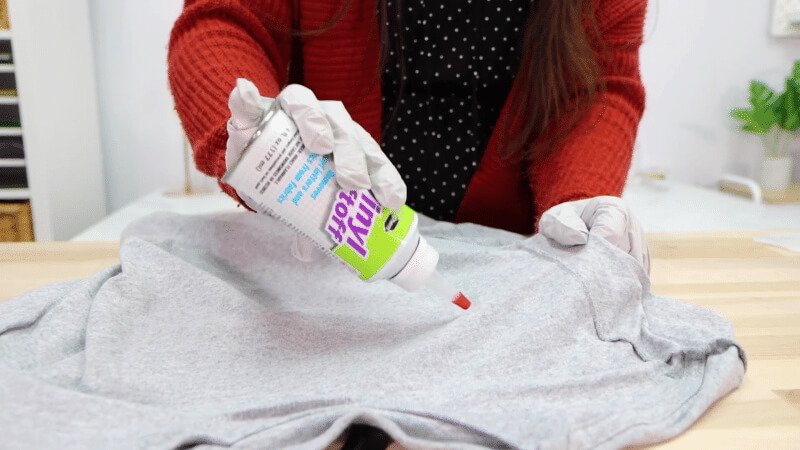
4.3 Applying the solvent
- Turn inside out: Turn the garment inside out to expose the back of the iron-on letters.
- Protect work surface: Place a clean cloth or towel underneath the garment to protect your work surface from the solvent.
- Apply with precision: Use a cotton swab to apply the solvent directly to the back of the fabric, saturating the area where the iron-on letter is located.
- Wait time: Wait for 1-2 minutes
4.4 Stretching and wiggling the fabric
- Gentle manipulation: After applying the solvent, gently stretch and wiggle the fabric around the letter.
- Enhance penetration: The stretching and wiggling create small spaces, allowing the solvent to work its way into the adhesive more effectively.
4.5 Peeling and scraping
- Careful lifting: Once the solvent has had time to work (usually a few minutes, depending on the solvent and adhesive), use tweezers or the edge of a butter knife to carefully lift a corner of the loosened letter.
- Gentle peeling: Peel the letter away from the fabric slowly and gently. If you encounter resistance, reapply a small amount of solvent to the back of the fabric and repeat the stretching/wiggling process.
- Avoid forceful scraping: If peeling is difficult, avoid aggressive scraping, which could damage the fabric.
5. Method 3: Removing iron-on letters with a combination of heat and solvent
5.1. When to use the combination method
The combination method is most effective when dealing with particularly strong adhesives or when previous attempts using heat or solvent alone have been unsuccessful.
5.2. Step-by-step instructions
- Start with heat: Begin by heating the back of the letter with an iron or hairdryer, as described in Method 1.
- Attempt to peel: While the adhesive is warm, carefully try to peel the letter off using tweezers.
- Apply solvent: If heat alone isn’t enough, turn the garment inside-out and apply your chosen solvent to the back of the letter, allowing it to soak in.
- Work the fabric: Gently stretch and wiggle the fabric to help the solvent penetrate the adhesive bond.
- Final peeling: Attempt to peel the letter off again. The combination of heat and solvent should have loosened the adhesive significantly.
- Repeat if needed: If parts remain stubborn, you can alternate between reapplying heat and adding more solvent until the letter is fully removed.
6. Method 4: Removing iron-on letters by freezing
6.1. How freezing works
Freezing works by making the adhesive brittle. Many adhesives, when subjected to very cold temperatures, lose their flexibility and become easier to crack or break.
6.2. Step-by-step instructions
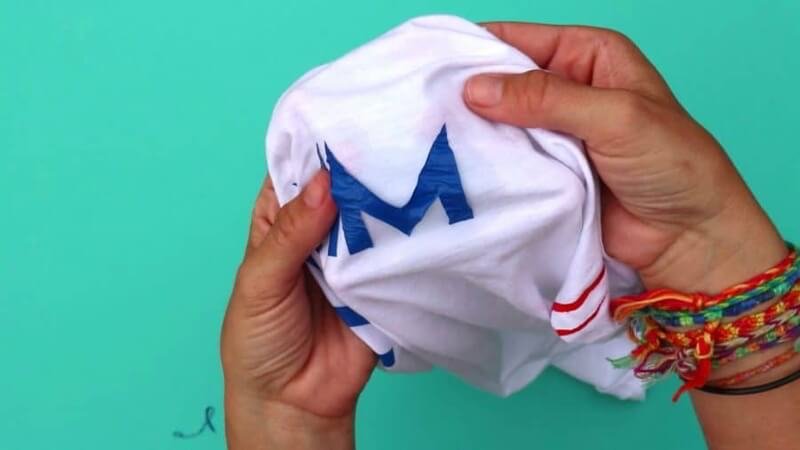
- Prepare the garment: Fold the garment so that the iron-on letters are facing outwards and are not touching other parts of the garment.
- Freeze: Place the garment in the freezer for at least 2-3 hours.
- Scrape: Once the garment is thoroughly frozen, remove it from the freezer. Immediately, use a butter knife, a dull scraper, or even your fingernail (if strong enough) to try to scrape or chip away at the brittle adhesive.
- Repeat if necessary: If some of the adhesive remains, you can repeat the freezing and scraping process.
6.3. Limitations of the freezing method
The freezing method is not universally effective. It works best on adhesives that become hard and brittle when frozen. It’s also less effective for letters that have deeply penetrated the fabric fibers. This is more of a supplementary method than a primary one for many situations.
7. Removing adhesive residue
7.1. Identifying residue
After removing the iron-on letters, it’s common to find some adhesive residue remaining on the fabric. This residue may appear as sticky, slightly discolored, or slightly raised areas.
7.2. Using rubbing alcohol or adhesive remover
- Choose your solution: As discussed before, rubbing alcohol is a good general-purpose option, while a dedicated adhesive remover may be more effective on stubborn residue.
- Test: Always test the chosen solution on a hidden area of the fabric first.
- Apply: Dampen a clean cloth (not a cotton swab for larger areas of residue) with the rubbing alcohol or adhesive remover.
- Rub gently: Gently rub the affected area, working from the outside edges of the residue towards the center.
- Repeat: Repeat the application and rubbing process as needed until the residue is gone.
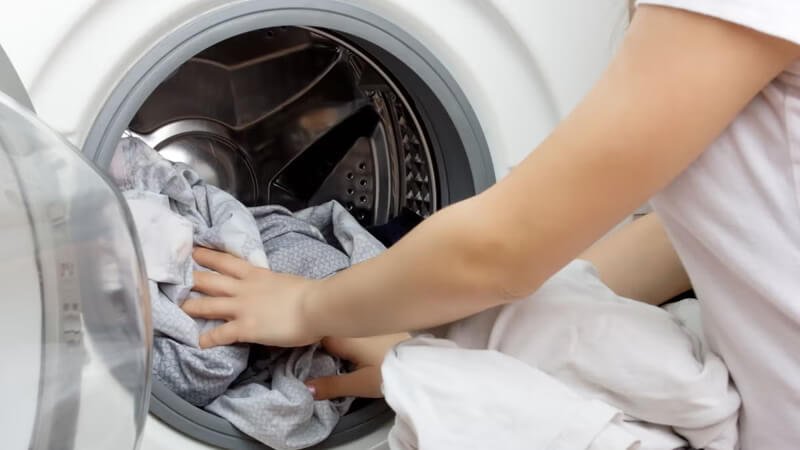
7.3. Washing the garment
- Wash alone: After treating the residue, wash the garment separately from other clothes.
- Use detergent: Use a regular laundry detergent.
- Check care label: Follow the garment’s care label instructions for water temperature and washing cycle.
- Inspect before drying: After washing, carefully inspect the garment to ensure all residue is gone before placing it in the dryer.
- Air dry (recommended): Air drying is generally recommended, especially after using solvents, as it minimizes the risk of setting any remaining residue.
8. Tips for specific fabrics
8.1. Cotton and cotton blends
Cotton and cotton blends are generally quite resilient and can withstand both heat and most solvents.
8.2. Polyester and synthetics
Polyester and other synthetic fabrics require more caution. Use lower heat settings on the iron to avoid melting or damaging the fibers. When choosing solvents, opt for rubbing alcohol or a commercial adhesive remover. Avoid acetone.
8.3. Delicate fabrics
Delicate fabrics like silk, rayon, and lace require the gentlest approach. The hairdryer method (on a low heat setting) is often the safest option for applying heat. If you need to use a solvent, rubbing alcohol is generally the best choice, but always test it first.
8.4. Denim
Denim is a durable fabric that can usually tolerate more aggressive removal methods. You can use higher heat settings and a wider range of solvents, including rubbing alcohol, a commercial adhesive remover, and even acetone (with a spot test). The combination method (heat and solvent) is often effective on denim.
9. Troubleshooting common problems
9.1. Letters won’t peel off
If the letters are stubbornly refusing to peel off, even after applying heat or solvent, try the following:
- Reapply heat: Ensure you’re applying sufficient heat for the fabric type.
- Stronger solvent (with caution): If you started with rubbing alcohol, you might consider a stronger commercial adhesive remover (always testing first).
- Combination method: Try using the combination of heat and solvent (Method 3) for the most stubborn adhesives.
- Increase application time: Give the solvent more time to penetrate the adhesive before attempting to peel.
9.2. Fabric is discolored
Fabric discoloration can occur due to several reasons:
- Solvent reaction: The solvent may have reacted with the dye in the fabric.
- Overheating: Excessive heat can scorch or damage certain fabrics, leading to discoloration.
- Potential solutions: If the discoloration is due to residue, washing the garment may help. For dye reactions, there’s often little that can be done.
9.3. Adhesive residue remains
Persistent adhesive residue can be frustrating. Here are some solutions:
- More solvent: Apply more rubbing alcohol or adhesive remover.
- Repeat cleaning process: Repeat the steps of applying solvent, rubbing, and washing the garment.
- Professional cleaning: For valuable garments or stubborn residue, consider professional dry cleaning.
9.4. Fabric is damaged
If the fabric has been damaged (holes, stretching, etc.), assess the extent of the damage:
- Small holes: Small holes might be repairable with a needle and thread.
- Stretching: Stretching is often difficult to reverse completely.
- Irreversible damage: If the damage is significant and irreparable, you may need to consider repurposing the garment or discarding it.
10. Related questions
10.1 Can you reapply iron-on letters after removing them?
It’s generally not recommended to reuse iron-on letters after they’ve been removed.
10.2 Can you iron over iron-on letter?
No, because the adhesive on the letter will melt. You should use parchment paper between the iron and letters to avoid damage.
10.3 How do you remove iron-on letters from a backpack?
The same methods used for clothing can generally be applied to backpacks, but with extra caution. Consider the backpack’s material (nylon, canvas, etc.) and test any heat or solvents in an inconspicuous area first.
Read more:
Removing iron-on letters from clothing might seem like a daunting task, but with the right methods and a bit of patience, it’s entirely achievable. This guide has outlined various techniques, from using heat and solvents to the freezing method, each suited to different situations and fabric types. Don’t be afraid to experiment (with caution!) and discover what works best for your specific needs. Now you’re equipped to confidently tackle this common clothing challenge!


