


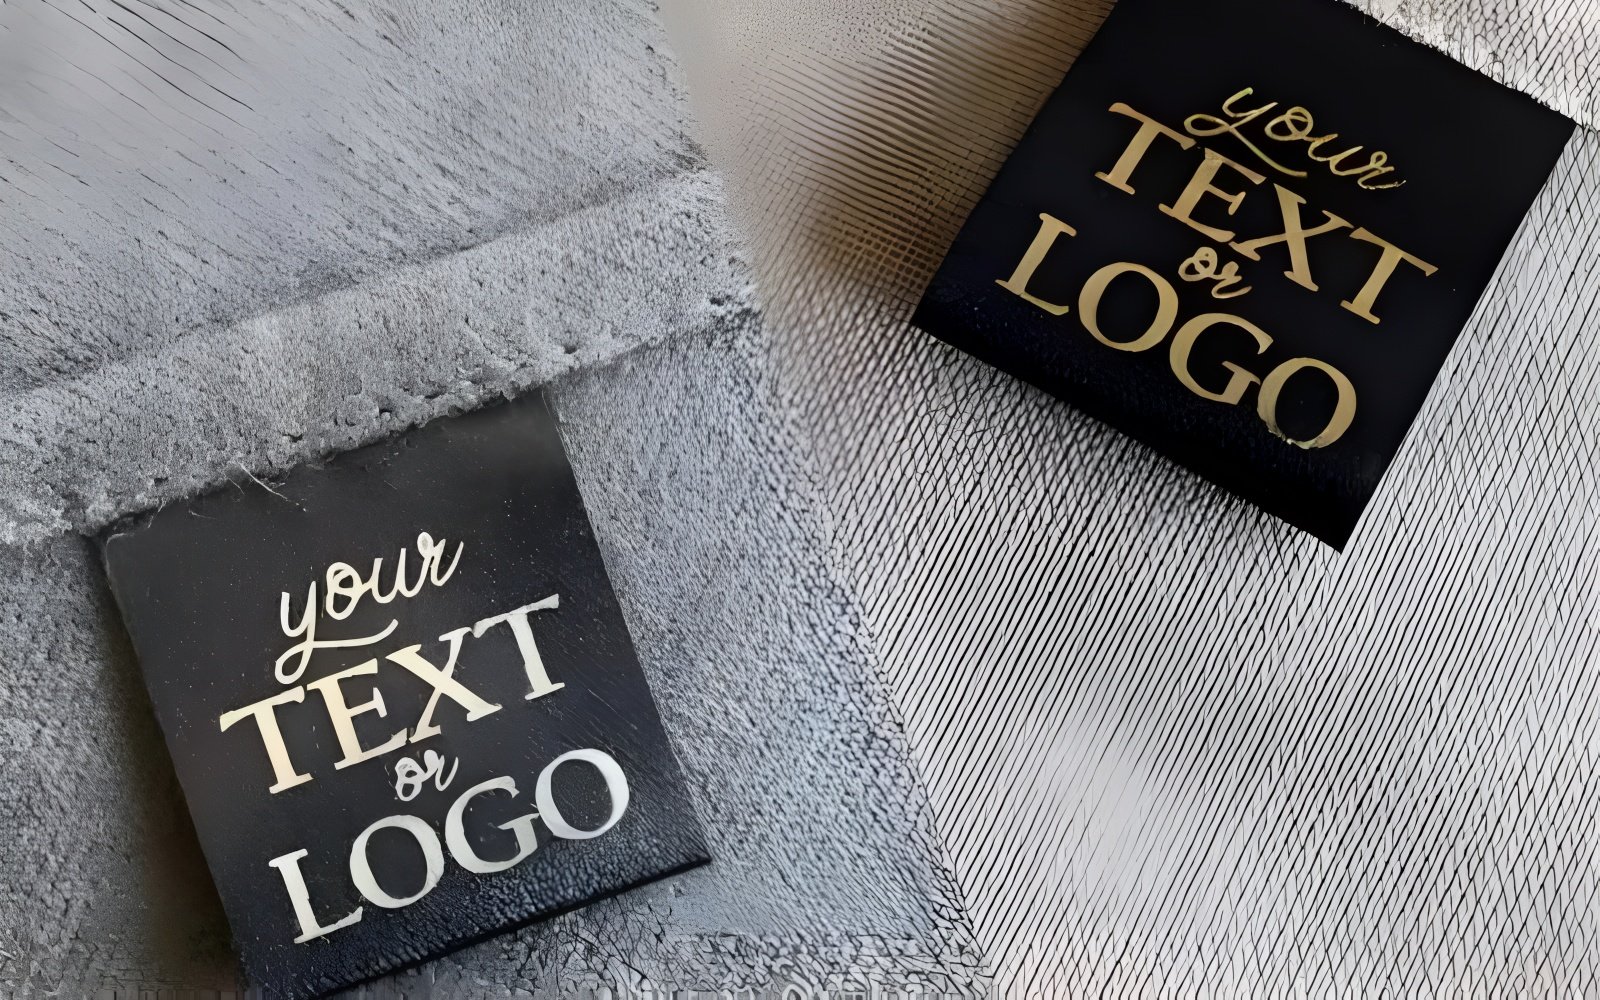
Sew-In Labels: Essential For Clothing Line Branding


In the world of fashion, every detail counts and your clothing label is no exception. Far more than just a tag, a well-designed sew-in label is a powerful branding tool that speaks volumes about your product’s quality, professionalism, and identity.
Whether you’re launching a boutique clothing line or scaling up your production, investing in professional sew-in labels helps build trust with customers and reinforces your brand with every stitch. In this guide, we’ll explore the importance of sew-in labels, different types and materials, and how to apply them like a pro to elevate your garments from good to unforgettable.
1. Why professional sew-in labels are essential for your clothing line
For any clothing line, particularly for small businesses aiming to establish a strong presence, the details matter immensely. After assessing the main fabric and construction, customers often look to the label as a key indicator of quality and legitimacy.
Professional sew-in labels offer a permanence and polished appearance that temporary methods like iron-ons or stickers cannot match. This contributes significantly to positive brand perception and perceived value, fostering trust with consumers.
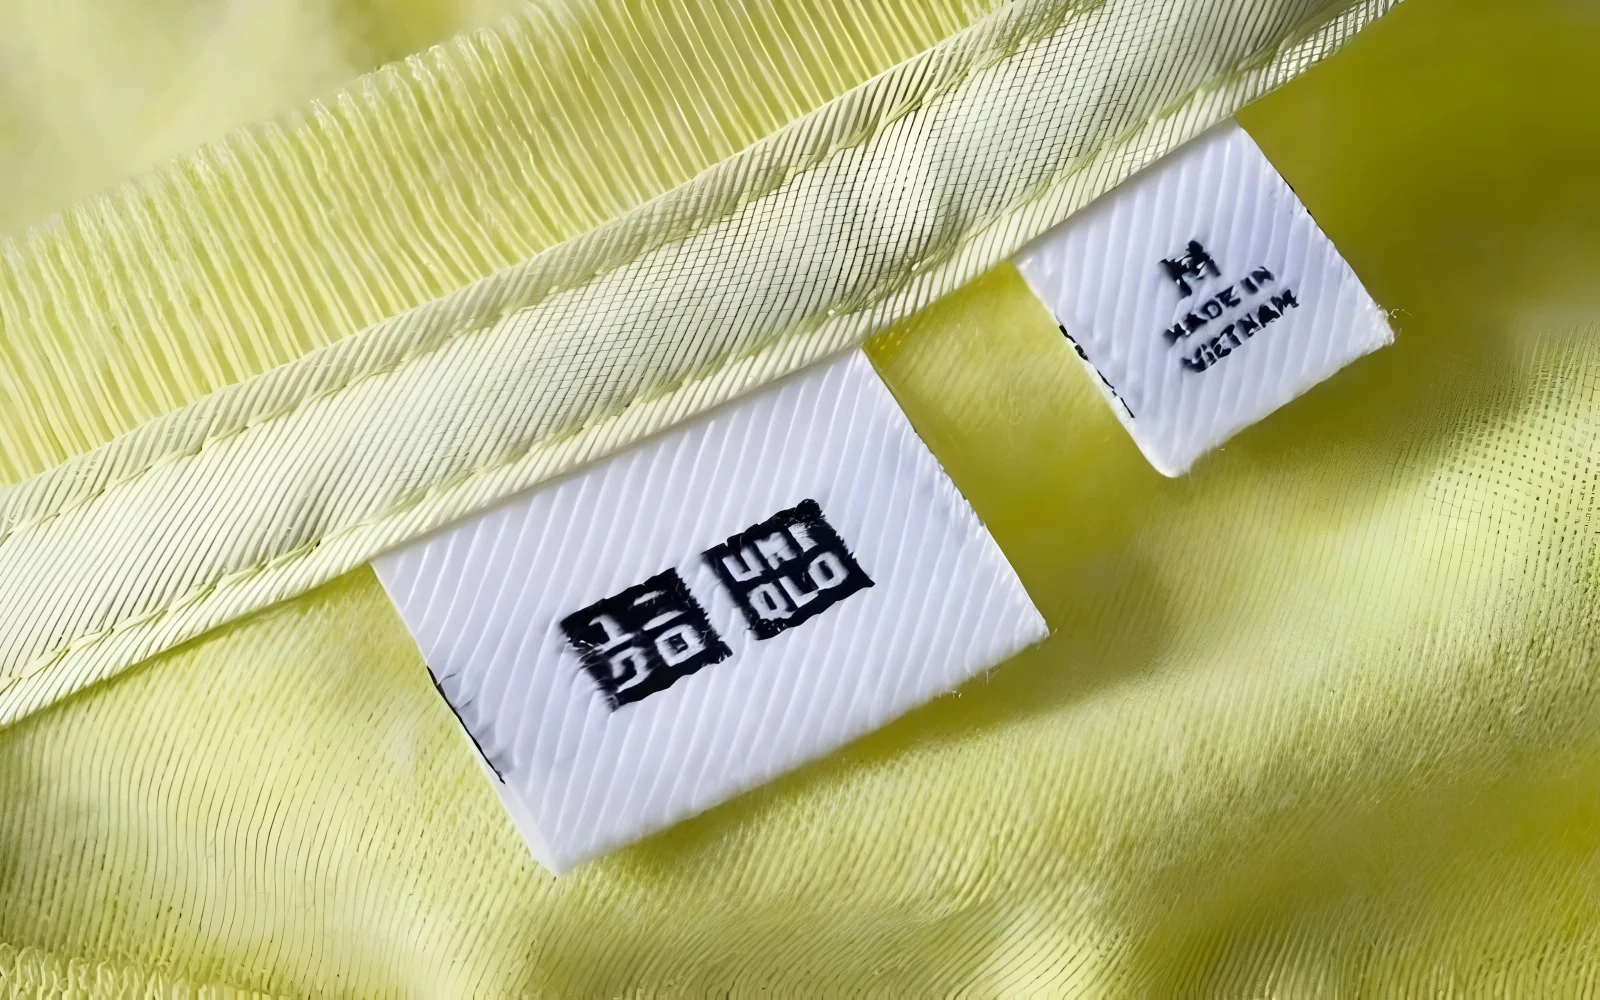
Beyond aesthetics, proper garment labeling fulfills legal requirements. In the United States, the Federal Trade Commission (FTC) mandates specific textile product information, including fiber content labels and care labels with washing instructions.
Sew-in labels provide the necessary durability to ensure this information remains legible throughout the garment’s lifespan, making them a practical necessity for compliance and reinforcing the professional labeling standard expected in the market. A well-executed label signals attention to detail across your entire clothing line.
1.2. Woven vs. printed fabric labels: finding your match
Choosing between woven and printed fabric labels depends on your specific branding needs, design complexity, and desired feel.
Woven labels: These are created by weaving threads together on a loom to form the design and text. The most common high-quality type is Woven Damask, known for its high density and ability to capture detail.
- Pros: Excellent durability, classic high-end texture and feel, ideal for simple logos and text requiring longevity.
- Cons: Limited ability to reproduce photographic images or smooth color gradients, potentially longer production time for intricate designs, higher minimum order quantities might apply.
Printed labels: The design is printed directly onto a base fabric, typically satin labels or cotton labels. Various printing techniques exist, from basic flexographic printing for care labels to sophisticated digital printing for full-color images.
- Pros: Excellent for detailed graphics, photographic reproduction, and complex color gradients; potentially faster turnaround for intricate, multi-color designs; can achieve very soft finishes depending on material and printing method.
- Cons: Print may fade over extensive washing cycles (though quality printing methods minimize this), can sometimes feel less integrated into the garment compared to a woven label, durability depends heavily on print method and base label materials.
Guidance: For primary brand labels where durability and a premium tactile feel are paramount, woven labels (especially damask) are often the preferred choice. For detailed care labels containing washing instruction symbols, labels featuring vibrant, multi-color graphics, or when needing faster production for complex artwork, printed labels offer greater flexibility. Consider the overall aesthetic and functional requirements of your customization.
| Feature | Woven labels | Printed labels |
|---|---|---|
| Detail resolution | Good to excellent (Damask); limited gradients | Excellent; handles photos & gradients well |
| Texture/Feel | Textured, substantial, classic | Smooth, can be very soft (Satin/Cotton) |
| Durability | Very high, threads are part of the structure | Good to high, depends on print method & material |
| Color complexity | Handles multiple solid colors well | Excellent for unlimited colors, gradients |
| Ideal use | Brand logos, high-end feel, long lifespan | Detailed graphics, care instructions, vibrant images |
1.3. Material matters: a closer look at label fabrics
The material chosen for your sew-in labels impacts the look, feel, and durability. Understanding the common label materials helps in selecting the best fit for your garment fabrics:
Polyester/Damask (Woven Damask):
- Characteristics: High thread density allows for sharp detail. Extremely durable and colorfast. It is an industry standard for quality branding and can feel slightly stiffer than satin initially but softens with washing.
- Best For: Brand logos, outerwear, items requiring maximum durability.
Satin labels:
- Characteristics: Offers a smooth finish with a noticeable sheen. It feels soft against the skin and is suitable for both woven and printed labels. It can be prone to snagging over time compared to damask.
- Best For: Lingerie, t-shirts, garments where softness is prioritized, detailed printed labels.
Cotton labels:
- Characteristics: Provides a natural feel and matte appearance. It is breathable and soft, an excellent choice for organic, sustainable, or children’s brands. It may fray more readily if edges aren’t properly finished (e.g., ultrasonic cut or folded). Print detail might appear softer than on polyester satin.
- Best For: Baby clothes, organic cotton garments, brands emphasizing natural materials.
- Characteristics: A more basic woven option. It is less durable and detailed compared to damask or satin, often feels thinner and potentially scratchier, and has a lower cost.
- Best For: Basic care labels where cost is the primary driver, less common for branding.
Relate your choice directly to the garment. A rugged denim jacket benefits from a sturdy Woven Damask label, while delicate baby clothes call for soft cotton labels or smooth satin labels. Matching the label material appropriately enhances the overall quality perception of your textile labels.
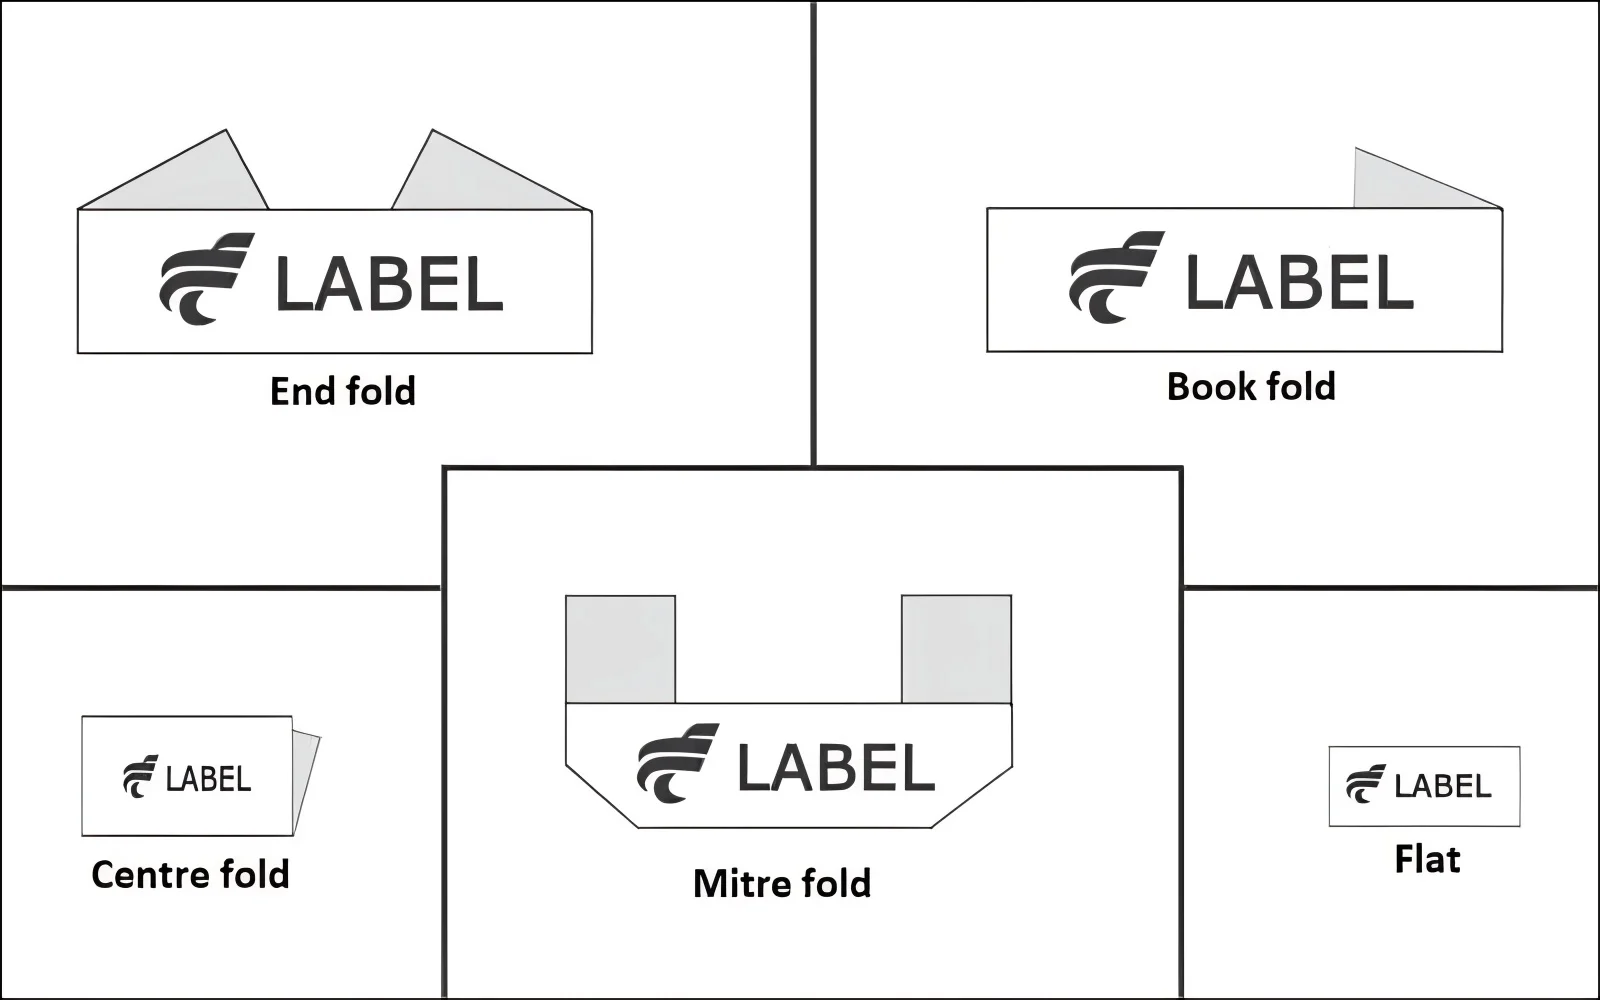
1.4. Understanding label folds and their professional application
The way a label is folded (fold type) is not just for aesthetics; folds serve crucial functions like hiding raw edges to prevent fraying and providing a clean sewing allowance for attachment within a garment seam or on the surface. Understanding common folds helps ensure a professional finish and dictates the appropriate sewing technique and placement location.
Straight cut / flat: No folds. The edges are heat-sealed or ultrasonically cut to prevent fraying. It requires sewing around all four edges.
- Use: Often used for branding patches on outerwear, bags, or inside waistbands where all edges are stitched down.
- Sewing: Stitch close to the perimeter on all sides.
End fold: The ends are folded inward (approx. 1/4 inch or 6mm) and pressed. The label lays flat against the garment.
- Use: Common for branding labels sewn flat onto a garment surface, like the outside back neck of a t-shirt or inside a waistband. It hides raw short ends.
- Sewing: Stitch close to the edge across the short, folded ends only.
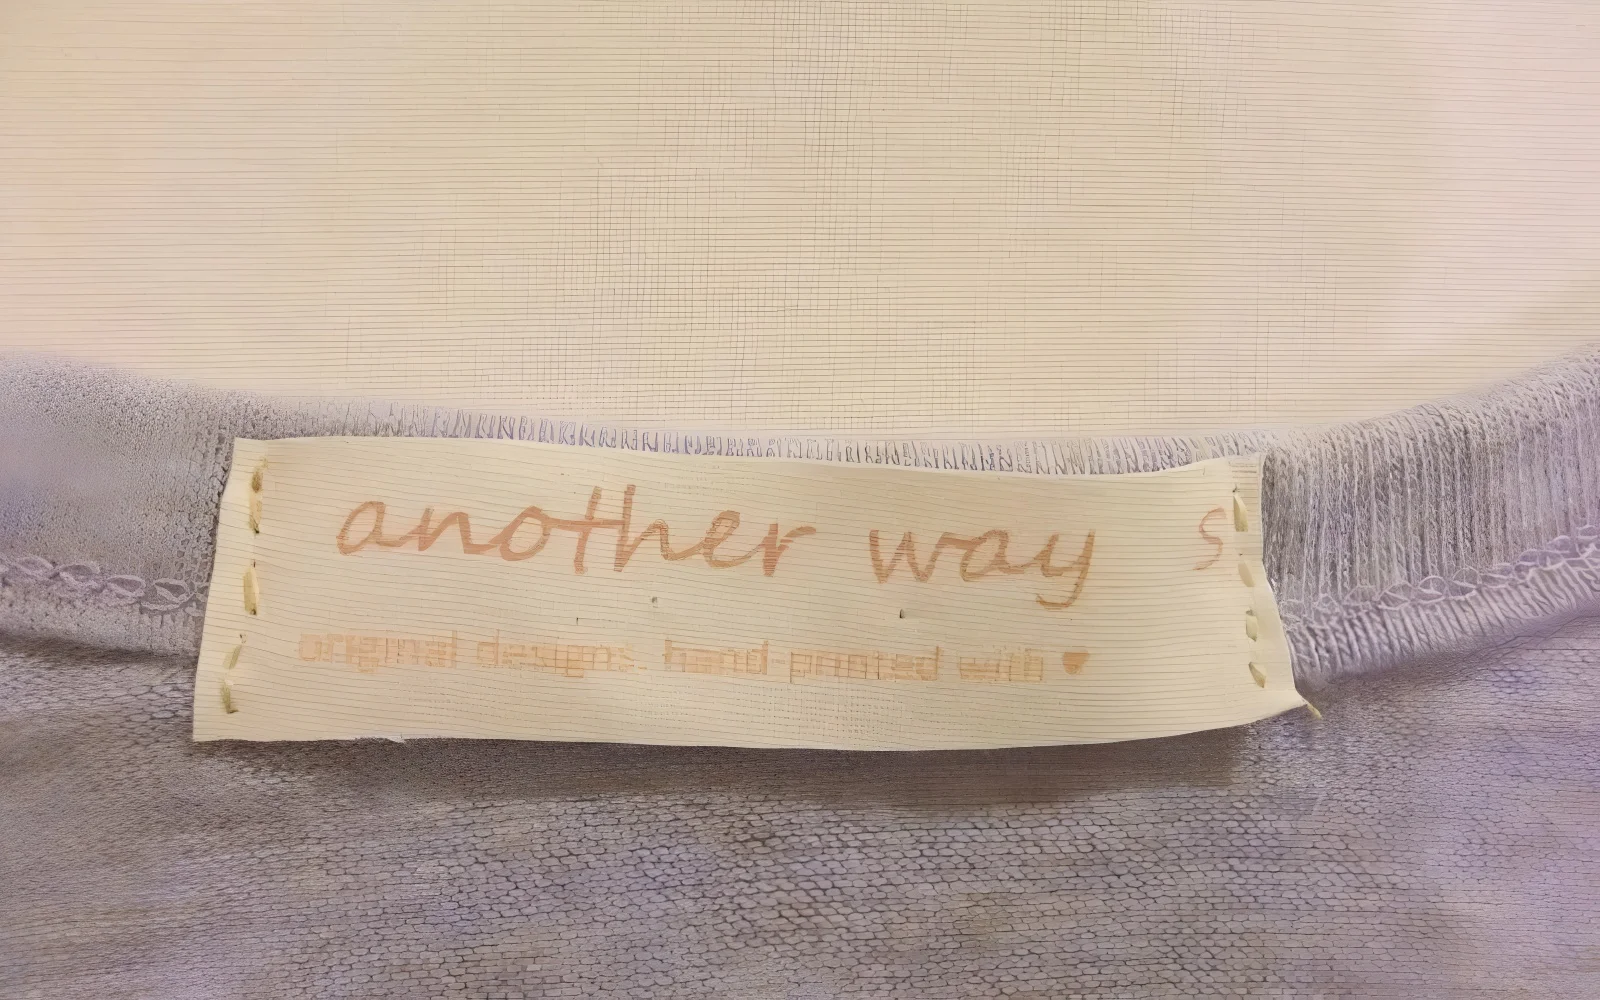
Center fold: The label is folded in half vertically. The main logo/design is on the front, and often care/content info is on the back.
- Use: Very common for brand labels inserted into a seam (e.g., neckline seam, side seam). It is also used for hem tags. Only the fold is visible from one side.
- Sewing: Insert the raw edges into the seam allowance and stitch through all layers during garment construction, or topstitch close to the folded edge if applying later.
Loop fold: Similar to a center fold but typically longer, allowing it to hang down more prominently. It is often used for hem tags or decorative elements and is folded in half.
- Use: Exterior hem tags, decorative tabs on sleeves or pockets.
- Sewing: Usually inserted into a seam or hem allowance.
Mitre fold: The ends are folded up at a 45-degree angle, creating points for sewing. This allows the label to be hung like a small tab.
- Use: Often seen hanging from the back neck yoke of shirts or jackets.
- Sewing: Stitch across the angled ends to secure.
Manhattan fold: Combines a center fold with an end fold. The label is first folded in half (center fold), then the top raw edges are folded down together, creating a clean top edge.
- Use: Premium finish for neckline brand labels, provides a very clean look when sewn along the top folded edge.
- Sewing: Stitch along the top folded edge.
Choosing the right fold impacts both the final look and the ease of label placement and sewing.
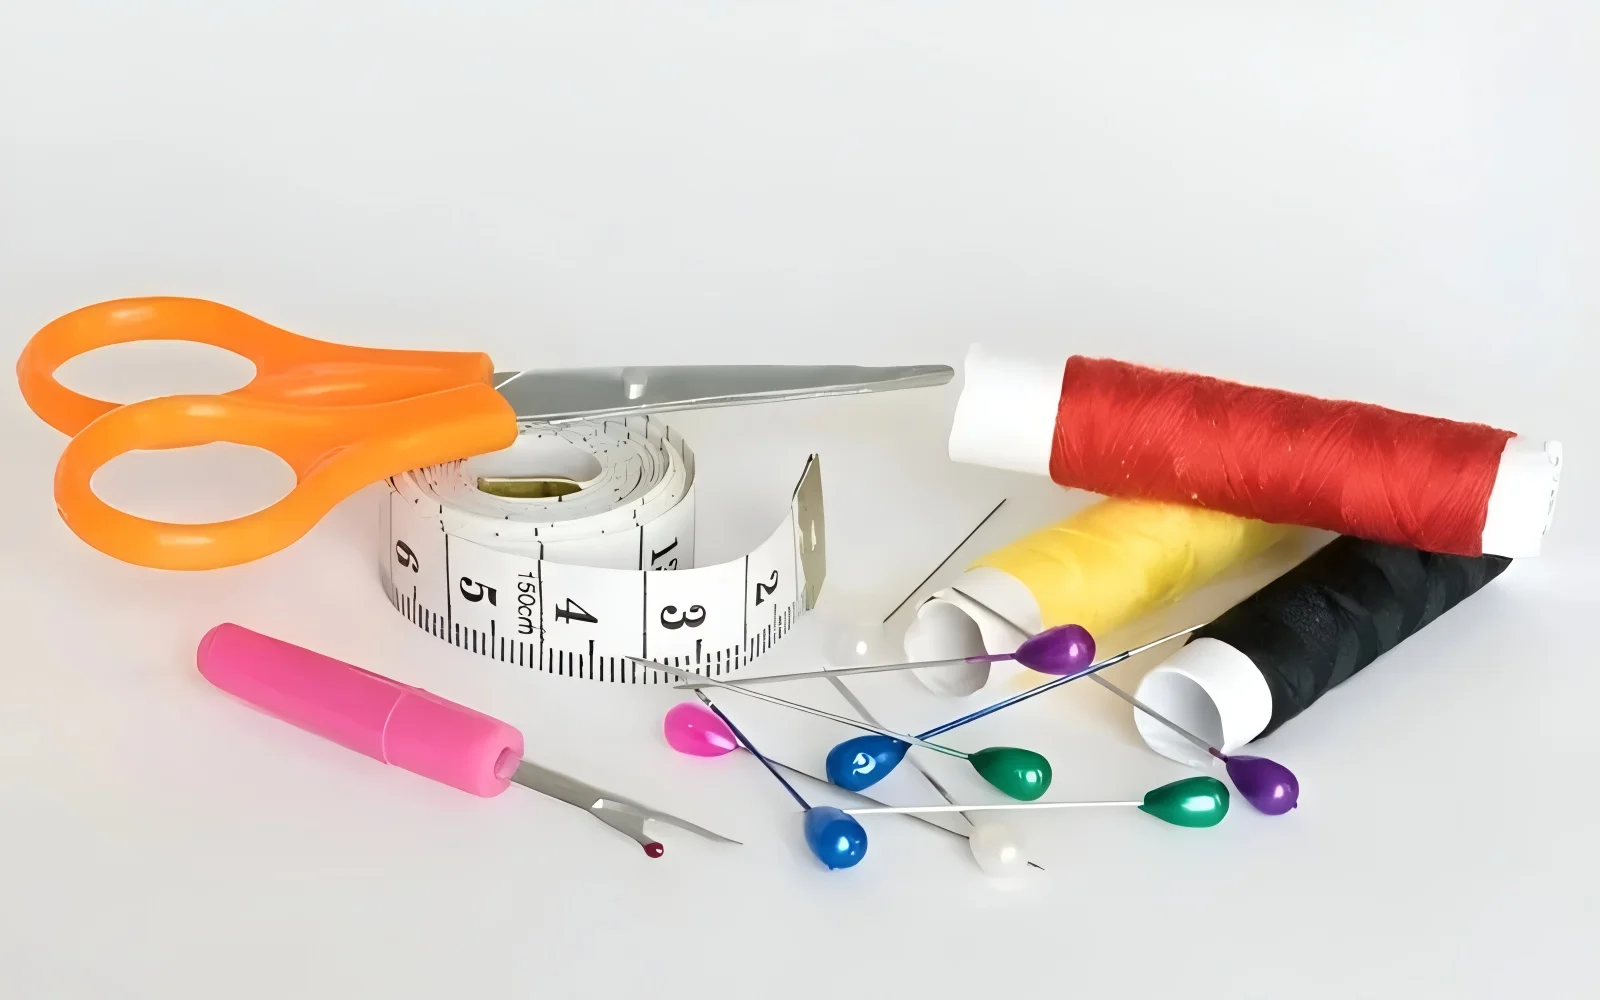
1.5. Gearing up: essential tools and smart preparation
Attaching sew-in labels professionally doesn’t require elaborate equipment, but having the right tools makes the process smoother and yields better results.
Essential tools:
Needles: Choose the correct needle size and type for your fabric types.
- Sharps: Good for tightly dense weaves like damask or twill.
- Ballpoints: Essential for knits, as they slide between fabric threads rather than piercing them, preventing runs.
- Universal needle: A good starting point for many woven fabrics (size 70/10 or 80/12 is common).
Thread: Use a quality polyester thread. Polyester offers strength, durability, and colorfastness, ensuring the thread lasts as long as the garment and label.
Pins or wonder clips: To hold the label securely in place while sewing. Clips are excellent for thicker materials or areas where pins might leave permanent marks.
Sharp small scissors or snips: For precise thread trimming close to the fabric.
Seam ripper: Essential for correcting mistakes without damaging the garment or label.
Preparation tips:
- Thread color: Match your thread color as closely as possible to the label’s edge or the garment fabric where the stitches will be visible. A neutral color like grey, beige, or off-white often blends well.
- Placement guides: If needed, lightly mark placement guides on the garment using a removable fabric marker or chalk pencil. Ensure marks can be easily removed.
- Pressing: Press labels with low heat if they arrive creased (check material tolerance first – avoid high heat on polyester/satin). A smooth label is easier to sew neatly.
- Clean surface: Ensure the garment area where the label will be attached is clean and flat before you begin sewing.
Proper tools and preparation using needle and thread set the stage for a professional finish.
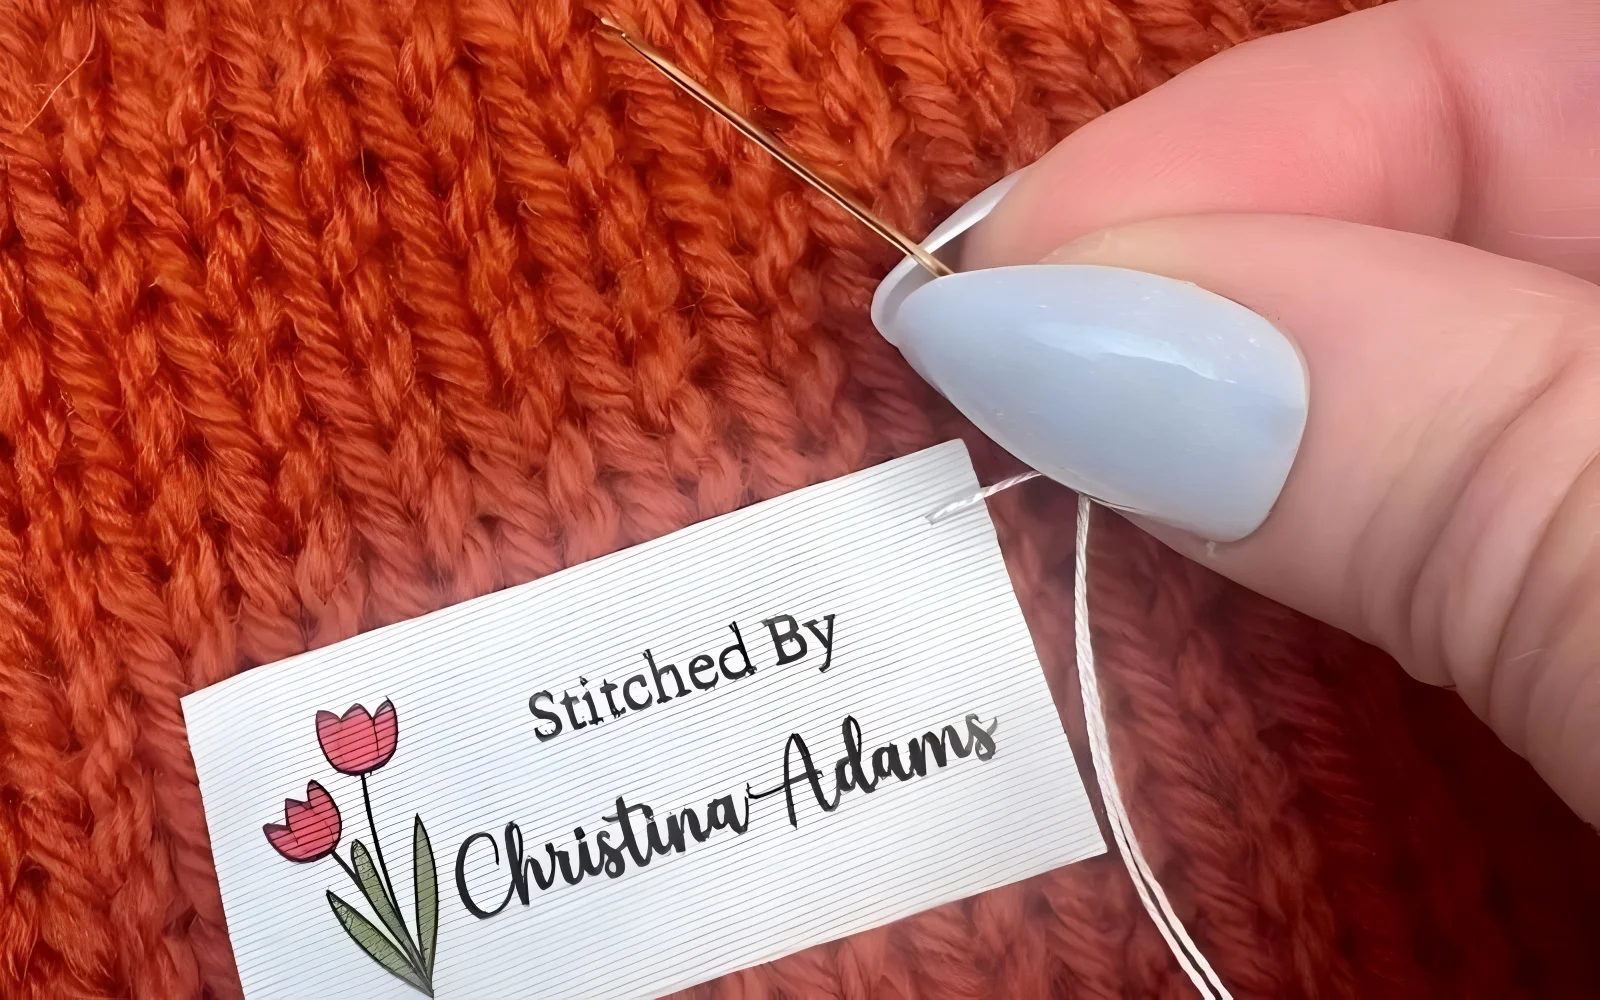
1.6. The art of hand sewing labels: precision and control
Hand sewing offers maximum control for precise label placement and is ideal for delicate fabrics or when working without a machine. The key is neatness and security.
Steps:
Prepare: Thread your needle with a single strand of matched polyester thread (about 18 inches long) and tie a small, secure knot at the end. Position the label accurately using pins or clips.
Start: Bring the needle up from the underside of the garment fabric, just inside where the label edge will sit, and hide the knot under the label.
Choose your stitch:
- Slip stitch / blind stitch: Ideal for end fold or flat labels where invisibility is desired. Take a tiny stitch (~1-2mm) through the folded edge or back of the label, then pick up just one or two threads from the garment fabric directly below. Bring the needle back up through the label edge a short distance away (approx. 1/4 inch / 6mm). Keep stitches small, even, and tension consistent but not tight enough to pucker the fabric. The goal is for the thread to be barely visible on the garment’s right side when stitching labels.
- Whipstitch: Suitable for attaching center fold labels inside seams or when a slightly more visible but very secure stitch is acceptable. Bring the needle diagonally over the label edge and pick up a few threads of the garment fabric, bringing the needle back up through the label close to the edge. Keep stitches small and close together.
Continue: Work your way around the label edges that require sewing, removing pins/clips as you go.
Secure: To finish, make two or three tiny stitches in the same place on the underside (behind the label), create a small knot, and trim the thread close.
Adapting the technique for different folds is simple – for a center fold in a seam, you might only need to secure the top corners after machine construction. Attaching labels by hand ensures a meticulous finish.
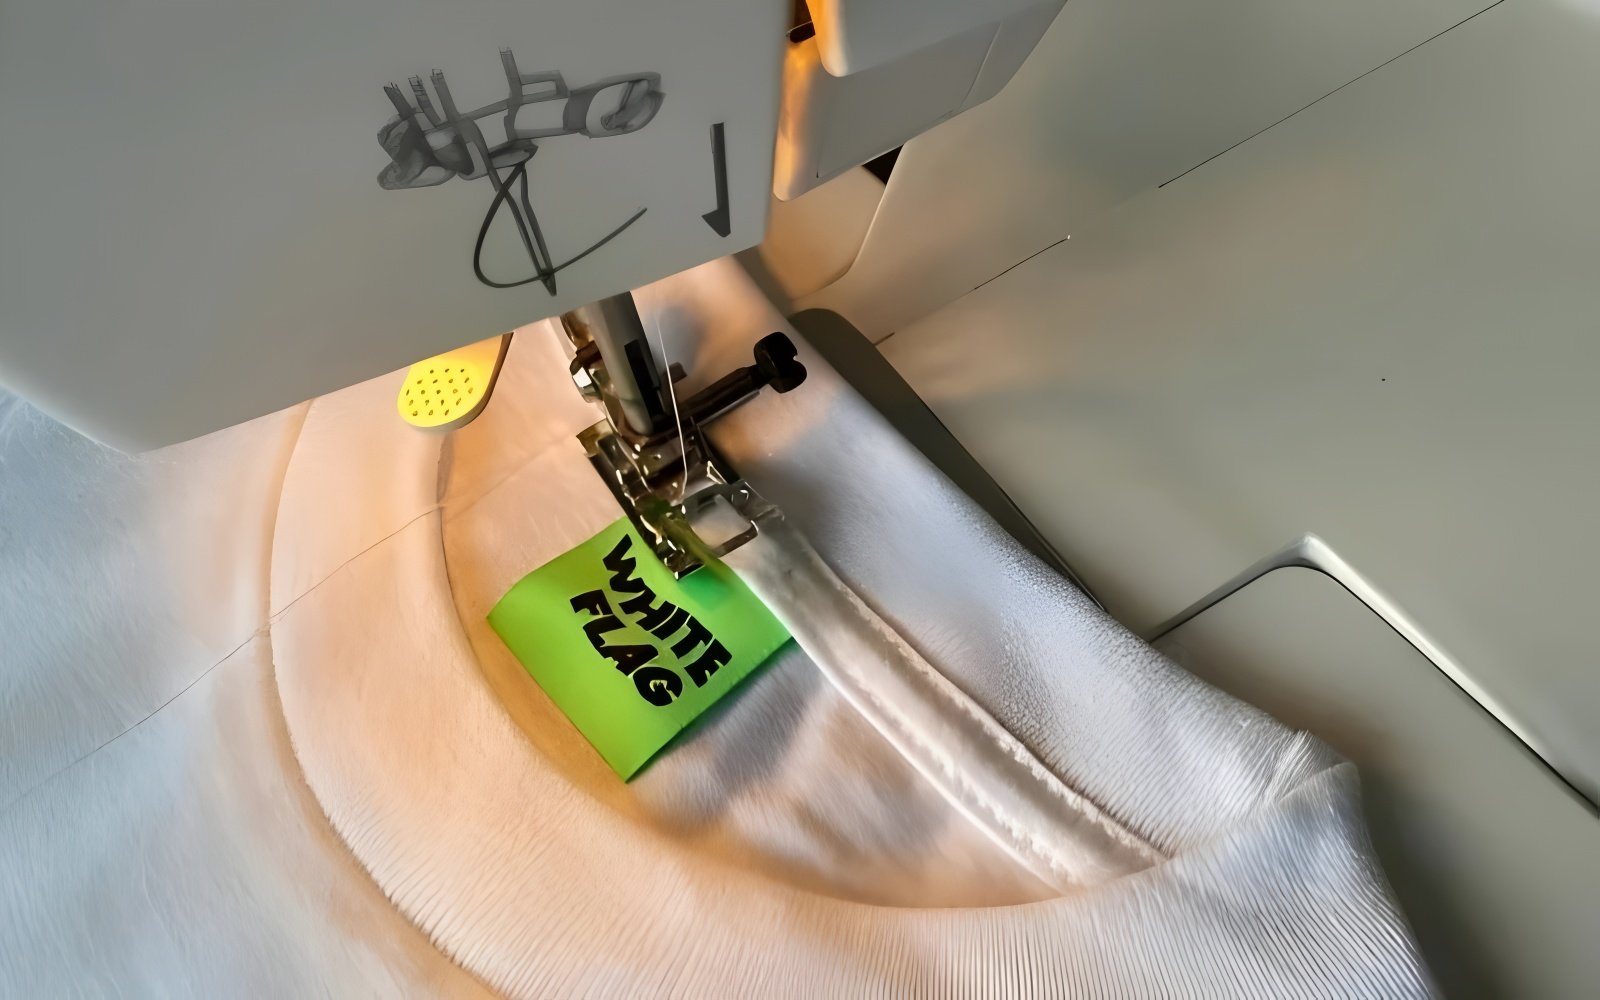
1.7. Machine sewing labels: efficiency for production
Using a sewing machine significantly speeds up the process of attaching labels, especially when dealing with multiple garments. Proper setup and technique ensure efficiency without sacrificing neatness.
Setup:
- Machine settings: Select a standard straight stitch. Set the stitch length relatively short, around 2.0mm to 2.5mm, for security and a clean look.
- Needle & thread: Use the appropriate needle type and size for your garment fabric and a quality polyester thread (matched color).
- Presser foot: A standard presser foot usually works well. An edge guide foot can be helpful for maintaining a consistent distance from the label edge.
Steps (Example: Straight cut or end fold label):
- Position: Place the label accurately on the garment, securing it with pins or clips placed outside the sewing path.
- Start sewing: Position the garment under the presser foot. Lower the needle precisely where you want to start stitching labels (e.g., near one corner). Lower the presser foot.
- Backstitch: Sew forward 2-3 stitches, then use the reverse/backstitch function to sew back 2-3 stitches to lock the beginning of the seam.
- Sew forward: Continue sewing forward smoothly, close to the edge of the label (typically 1/16″ to 1/8″ or 1.5-3mm). Guide the fabric gently; don’t push or pull.
- Pivot (if needed): For square corners on flat labels, stop with the needle down just before the corner, lift the presser foot, pivot the fabric 90 degrees, lower the presser foot, and continue sewing. For end fold labels, you typically only sew across the short ends.
- Finish: When you reach the end, backstitch 2-3 stitches again to secure the thread.
- Trim: Lift the presser foot, remove the garment, and trim the threads close to the fabric.
Tips:
- Sew slowly, especially when starting, for better control.
- Always test your stitch settings on a scrap piece of similar fabric and label materials first.
- Ensure the label lies flat and the garment fabric is not stretched during sewing.
Machine sewing offers a fast and durable method for label application.
2. Strategic label placement: visibility, comfort, and consistency
Effective label placement is a careful balance between brand visibility, wearer comfort, and maintaining consistency across your product line. A label should ideally reinforce the brand identity without causing irritation. Consistent placement locations help customers recognize your products and find information easily.
Here are common suggestions for placement locations:
T-shirts/Tops:
- Brand label: Typically centered inside the back neckline seam. A center fold or Manhattan fold is often used.
- Care/content label: Often found in the lower side seam on the wearer’s left side and can be combined with a secondary brand mark.
Trousers/Skirts:
- Brand label: Center back waistband, either inside or sometimes as a patch outside (jeans).
- Care/content label: Usually in the side seam near the pocket bag or along the waistband facing.
Dresses:
- Brand label: Center back neck or upper side seam.
- Care/content label: Lower side seam.
Outerwear:
- Brand label: Prominent placement in the center back neck. Sometimes an additional exterior brand label (e.g., sleeve patch, chest logo) is used.
- Care/content label: Inside pocket or lower side seam.
Accessories (Bags, Hats): Placement depends heavily on the item, aiming for a location that is visible but feels integrated into the design.
Consider garment construction points for the easiest application. Incorporating labels into seams like the neckline or side seam during the main sewing process is often cleaner and more secure than topstitching onto a finished garment.
Always prioritize comfort – avoid placing thick or scratchy labels in high-friction areas like the back of the neck if possible, or choose softer materials and folds for these spots. Ensure both brand labels and legally required care labels / content labels are included appropriately.
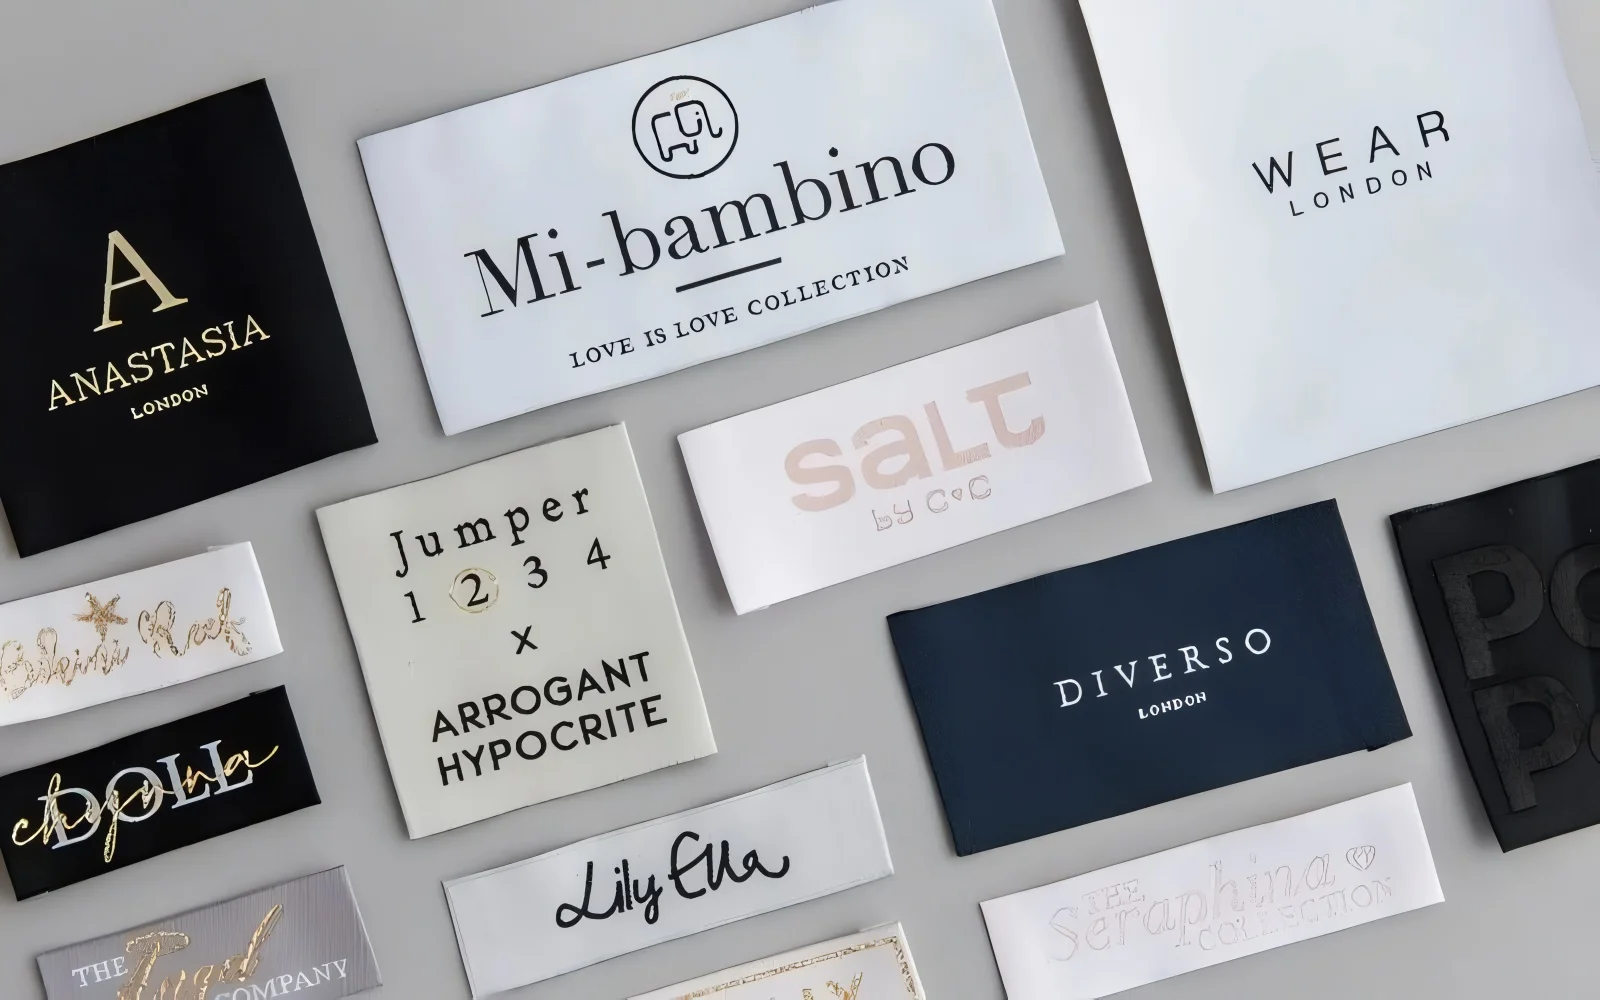
3. Sourcing your sew-in labels: partnering with the right supplier
For small businesses, finding a reliable label supplier is crucial for achieving consistent quality and timely production. When evaluating potential partners for your custom clothing labels, consider these key factors:
- Quality: Always request samples. Assess the weave density (for woven), print clarity and color accuracy (for printed), material feel, and the finish of the edges. Poor label quality reflects badly on your brand.
- Minimum Order Quantities (MOQ): Ensure the supplier’s MOQ aligns with your production scale. Some suppliers cater specifically to smaller businesses with lower minimums.
- Turnaround Time: Understand their production lead times and factor this into your overall manufacturing schedule. Ask about rush options if needed, but expect higher costs.
- Customization Capabilities: Verify that the supplier can accurately reproduce your brand logo, desired colors, and any fine details. Confirm they can produce the specific fold type you require.
- Material Availability: Check if they offer the range of label materials (damask, satin, cotton, etc.) you might need for different products in your line.
- Customer Service: Look for clear communication, responsiveness to inquiries, and helpful guidance throughout the ordering process.
The proofing process: Before full production begins, reputable suppliers will provide a digital proof (a visual mock-up) for your approval. For woven labels or complex printed designs, requesting a physical sample proof is highly recommended, even if there’s a small cost. This allows you to check the actual look, feel, and colors before committing to a full order.
Be aware that factors like design intricacy, number of colors (especially for woven), choice of premium materials, specific folds, and order quantity will influence the final price per label.

4. Related questions
4.1. Which type of sew-in label is the most durable?
Generally, high-density Woven Damask polyester labels offer the highest durability. The design is woven directly into the fabric structure using strong polyester threads, making them highly resistant to fading, fraying, and degradation through repeated washing and wear compared to some printed options or lower-density weaves like taffeta.
4.2. Can I sew labels onto stretchy knit fabrics?
Yes, absolutely. For best results on stretchy knit fabrics:
- Use a ballpoint needle in your sewing machine or for hand sewing. This type of needle slides between the knit loops instead of piercing them, preventing holes or runs.
- If machine sewing, consider using a narrow zig-zag stitch (e.g., 0.5mm width, 2.0-2.5mm length) or a specific stretch stitch if your machine has one. A straight stitch can sometimes pop threads when the knit stretches.
- Do not stretch the fabric or the label while sewing. Let the machine feed the fabric naturally.
- For very lightweight or unstable knits, you might temporarily place a small piece of tear-away or wash-away stabilizer behind the fabric where the label will be sewn for extra support.
4.3. What’s important for labels on children’s clothing?
- Safety and comfort are paramount for children’s clothing.
- Prioritize soft materials like woven satin or natural cotton to avoid skin irritation.
- Ensure labels are securely attached using flat application methods (like end fold or straight cut sewn flat) to minimize scratchy edges or bulky folds against sensitive skin.
- Verify that the labels (including materials and any inks used) comply with relevant safety regulations for children’s wear in your target market (e.g., CPSC regulations in the US regarding lead content, phthalates, and small parts if the label could detach). Your label supplier should be able to provide compliance information.
4.4. How can I safely remove an existing sew-in label?
To remove a label without damaging the garment:
- Carefully use a sharp seam ripper. Work from the back side of the label if possible.
- Slide the point of the seam ripper under a stitch and gently lift or cut the thread. Repeat for all stitches holding the label. Avoid catching and cutting the garment fabric itself.
- Once all stitches are cut, the label should lift off easily. Pull out any remaining loose thread ends.
- Be aware that on some fabrics, faint needle marks might remain where the label was previously stitched. Pressing the area sometimes helps minimize their appearance.
Read more:
Incorporating professional sew-in labels is a strategic investment in your brand. At Packlove, we specialize in creating high-quality custom clothing labels that bring your vision to life. Whether you need durable Woven Damask for outerwear or soft satin labels for delicate garments, our team is here to guide you through every step—from design to delivery. Explore our options and elevate your brand with Packlove today.


