


Sewing Bag Patterns Explained: Select And Sew


Embarking on a new sewing project, especially in the realm of bag making, can be both exciting and slightly daunting. You might be drawn to creating stylish tote bags, practical pouches, or unique custom pieces for your DIY fashion endeavors or small business, yet find yourself unsure where to start. This guide focuses on sewing bag patterns, essential tools that transform creative ideas into tangible, professional-looking results.
1. What exactly is a sewing bag pattern?
1.1 Definition
At its core, a sewing bag pattern serves as a detailed blueprint or template designed specifically for constructing a fabric bag. Think of it as the architectural plan for your sewing project. Its primary purpose is to provide all the necessary shapes and instructions to guide you accurately from flat pieces of fabric to a finished, three-dimensional bag. For anyone new to sewing bags, understanding this foundation is the first step toward successful creation.
1.2 Common formats
Bag patterns typically come in two main formats. PDF patterns, available as a digital download, offer instant access after purchase. You can print them at home on standard paper, which usually requires assembling the pages together like a puzzle. While convenient, this does require a printer and some initial setup. Alternatively, traditional paper patterns, printed on large tissue-like sheets, arrive ready to use. However, these often involve shipping time and costs, and they are becoming less common in the digital age, especially from independent designers.
1.3 Key components
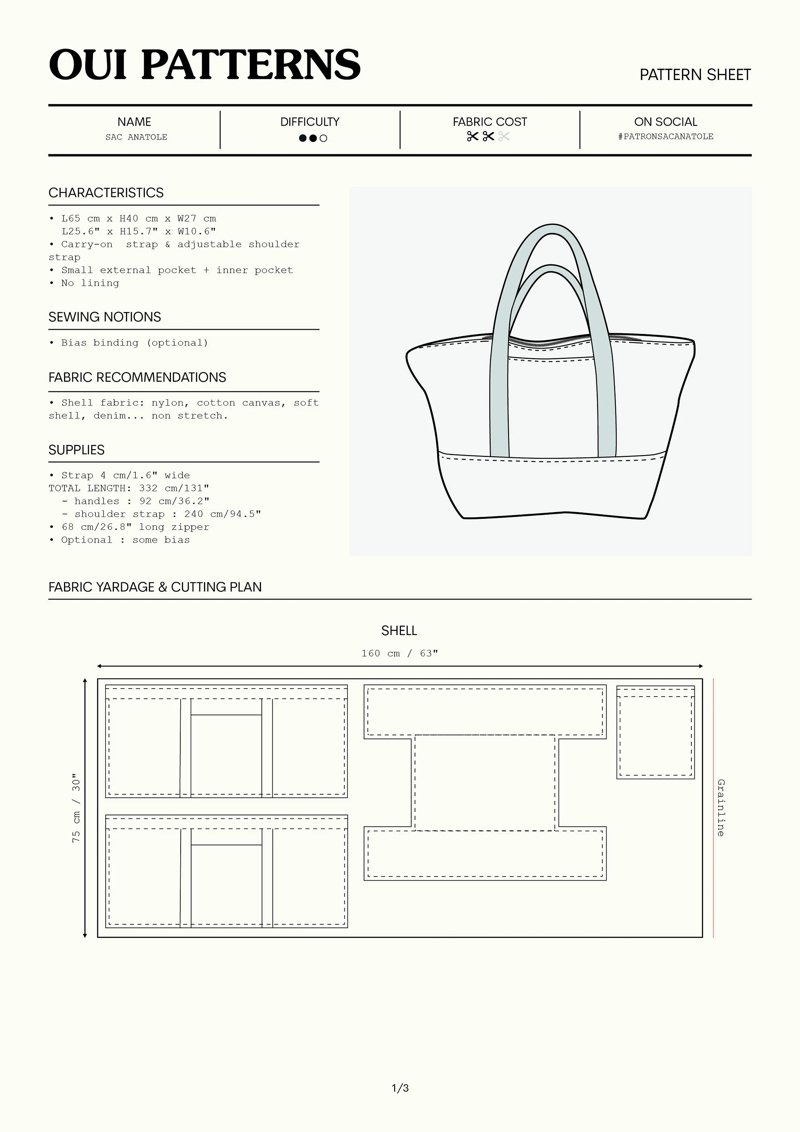
A well-designed sewing bag pattern typically includes several essential elements:
- Sewing instructions: These are the step-by-step directions, often accompanied by diagrams or photos, explaining precisely how to construct the bag. They guide you through each stage, from preparing the pieces to the final finishing touches.
- Pattern pieces: These are the actual shapes you need to cut from your fabric, interfacing, and lining. Each piece is usually labeled (e.g., “main body”, “pocket”, “strap”) and includes important markings.
- Cutting layouts: These diagrams illustrate the most efficient way to arrange the pattern pieces on your fabric before cutting. Following these helps minimize fabric waste, which is particularly important for businesses managing material costs.
Some patterns may also include a glossary defining specific sewing terms used in the instructions, which can be very helpful for beginners.
2. The advantages of using a sewing bag pattern
2.1 Consistency and professional results
Utilizing a sewing pattern is fundamental for achieving consistent results, particularly important if you plan to sell your creations or create multiple identical gifts. Patterns ensure that every bag produced follows the exact same dimensions and construction details. This uniformity translates directly into a more polished, professional finish, enhancing the perceived quality and value of your handmade items. Reproducibility becomes straightforward, eliminating guesswork and variations between individual pieces.
2.2 Access to diverse designs and styles
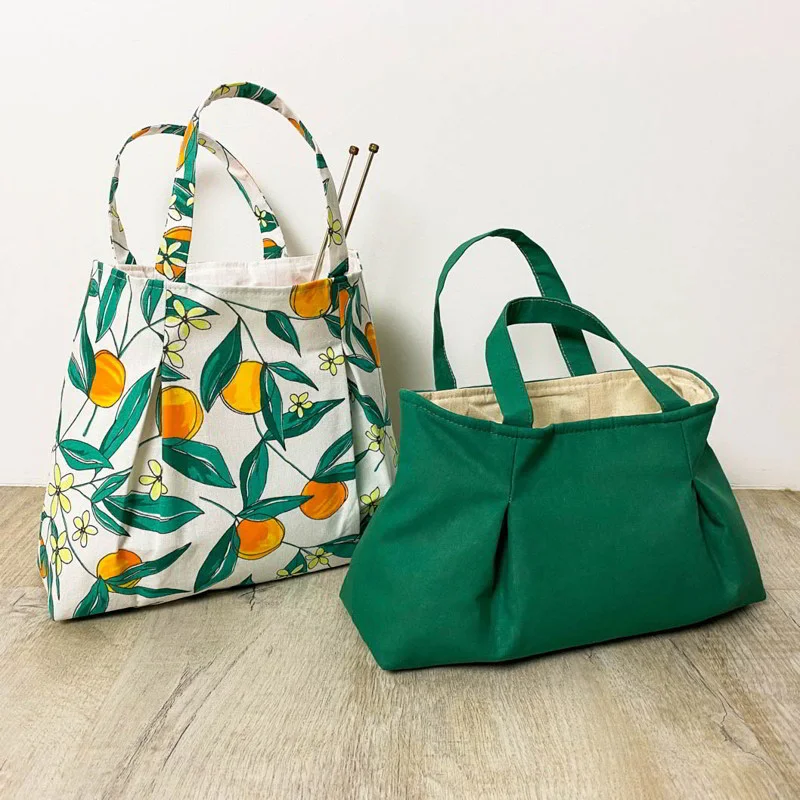
The world of sewing patterns opens doors to an incredible variety of bag designs far beyond basic shapes. Whether you envision crafting a sturdy tote bag, a chic crossbody bag, a functional backpack, or a simple zipper pouch, there is likely a pattern available. This vast selection allows sewists of all levels to explore different aesthetics, constructions, and functionalities, fostering creativity and enabling the creation of unique, stylish accessories.
2.3 Skill development
Following a well-drafted pattern is an excellent way to learn and refine your sewing abilities. Patterns guide you through specific construction methods you might not discover otherwise. They teach essential sewing techniques for bags, such as properly boxing corners (creating a flat bottom), constructing durable straps, installing zippers smoothly, or adding various types of pockets and hardware. Each project becomes a practical lesson, building your skills and confidence progressively.
2.4 Time and material efficiency
Compared to drafting a design from scratch or relying on guesswork, using a pre-tested pattern significantly saves both time and materials. Patterns come with optimized cutting layouts designed to minimize fabric waste. Furthermore, the clear, step-by-step instructions prevent costly errors and reduce the time spent deciphering construction steps. This efficiency contrasts sharply with the trial-and-error process often involved in self-drafting, allowing for a more focused and rewarding creation process.
3. How to choose the right sewing bag pattern for your needs
3.1 Assess your skill level
Choosing a pattern that matches your current sewing ability is crucial for a positive experience. Beginner sewing projects typically involve simple shapes, minimal hardware, basic straight stitching, and perhaps straightforward pockets. Intermediate patterns might introduce curves, more complex pocket constructions, zipper installations, or basic hardware. Advanced patterns often feature intricate designs, tailoring techniques, extensive hardware, or challenging materials. Be honest about your comfort level; pattern descriptions usually indicate the intended skill level (e.g., “beginner friendly”, “confident beginner”, “intermediate”). Starting with something manageable builds confidence for more complex projects later.
3.2 Consider the bag type and function
Think carefully about how the finished bag will be used. Are you aiming for a sturdy shopper bag capable of carrying groceries? A small, elegant handmade purse for evenings out? Or a durable gym bag with specific compartments? The intended function heavily influences the appropriate pattern complexity, size, required features (like closures or pockets), and suitable materials. A pattern designed for a lightweight clutch won’t be suitable if you need a heavy-duty backpack. Aligning the pattern with the bag’s purpose ensures the final product is both beautiful and practical for its intended DIY fashion projects or for your customers.
3.3 Free vs. paid patterns
Both free and paid sewing patterns have their place:
- Free patterns: Often provide simpler designs, making them excellent for practicing basic techniques or trying out a new style without financial commitment. However, the quality of instructions and drafting can vary significantly, and support from the designer might be limited.
- Paid patterns: Generally offer more detailed and professionally drafted instructions, unique or complex designs, and are often thoroughly tested. Many paid patterns come with additional support resources, such as detailed photo tutorials, sew-along blog posts, or even a video tutorial. This investment can lead to a smoother sewing process and a higher-quality finished product, especially for more intricate designs.
3.4 Research
Before committing to a pattern, especially a paid one, do a little homework. Look for reviews or comments from other sewists who have used the pattern. Search for photos of finished bags made from the pattern (social media hashtags or pattern listing galleries are good places) to see real-life examples. Check the reputation of the pattern designer or company; established designers often have websites showcasing their style and quality. See if there’s an associated community (like a dedicated Facebook group) where you can ask questions or see others’ work – this can be invaluable support.
3.5 Understanding material requirements
Every pattern should list the necessary materials. Pay close attention to the recommended fabric types (canvas, cotton, leather, etc.), as the pattern is designed with specific fabric properties in mind. The list will also specify the type and amount of interfacing, lining fabric, and necessary bag hardware (like zippers, D-rings, sliders, clasps). Crucially, check these requirements before you purchase the pattern to ensure you have or can realistically source the needed supplies. This step avoids discovering later that the pattern requires expensive hardware or a specific fabric choice for bags that’s hard to find.
4. Decoding your pattern: Understanding instructions and markings
4.1 Reading the instructions
Before you even think about cutting your fabric, take the time to read all the sewing instructions provided with the pattern from start to finish. This might seem tedious, but it gives you a complete overview of the construction process, highlighting any potentially tricky steps or techniques you might need to prepare for. Pay close attention to the specified seam allowance (the distance between the stitching line and the raw edge of the fabric), as consistency here is vital for the pieces to fit together correctly. Understanding the step-by-step logic beforehand prevents confusion and potential mistakes mid-project.
4.2 Common symbols and markings
Sewing patterns use a standard set of symbols and markings to convey crucial information concisely. Understanding these is key to accurately cutting and assembling your bag. Here are some of the most common ones:
| Symbol | Visual example (description) | Meaning |
|---|---|---|
| Grainline arrow | A long line with arrows at one or both ends | Indicates how to align the pattern piece with the fabric’s grain (usually parallel to the selvage edge). |
| Fold line bracket | A bracketed line, often labeled “place on fold” | Indicates that this edge of the pattern piece should be placed directly on the fold of the fabric. |
| Notches | Small triangles or diamonds along cutting lines | Used as matching points to align adjacent pattern pieces accurately during sewing. |
| Dots/circles | Small filled or open circles within the piece | Mark specific points for matching pieces, starting/stopping stitching, or positioning elements like darts. |
| Buttonhole markings | An I-bar shape | Shows the exact placement and length for sewing a buttonhole. |
| Zipper placement | Lines indicating start/end points or alignment | Shows precisely where a zipper should be positioned and attached. |
4.3 Preparing your pattern pieces
If you’re using a PDF pattern, careful preparation is essential. Always ensure your printer settings are set to “Actual Size” or “100% Scale” – never “Fit to Page”. Print the page containing the test square first and measure it accurately to confirm the scale is correct before printing the remaining pages. Once printed, you’ll typically need to trim the edges and tape the pages together following the pattern’s guide. Whether using a PDF or paper pattern, decide if you will cut the pattern pieces directly or trace them onto pattern paper or interfacing first. Tracing preserves the original pattern for future use or size adjustments. Whichever method you choose, prioritize accuracy during cutting – precision now prevents problems later.
5. Essential tools and materials for bag making with patterns
5.1 Fabric selection
Choosing the right fabric is fundamental to the success of your bag project. The pattern will usually suggest suitable types. Sturdy materials like canvas or denim are excellent choices for durable tote bags or backpacks due to their strength. Quilting cottons, while offering a vast array of prints, are lighter and often best suited for linings or smaller bags, unless heavily interfaced. Corduroy and faux leather can add interesting texture. Consider the fabric’s weight, drape (how it hangs), and structure in relation to the bag’s design. This is also where customization potential truly shines – selecting unique fabrics makes your creation stand out.
5.2 The role of interfacing and stabilizers
Interfacing/stabilizer is arguably one of the most crucial components in bag making. Its primary purpose is to provide structure, shape, and support to the fabric, preventing the finished bag from looking limp or “floppy”. Without it, many bags would collapse under their own weight. Interfacing comes in various weights (light, medium, heavy) and types (fusible, which irons on, or sew-in). The pattern will specify the recommended type and weight based on the chosen fabric and desired structure. Using the correct interfacing for bags is key to achieving a professional finish.
5.3 Necessary notions
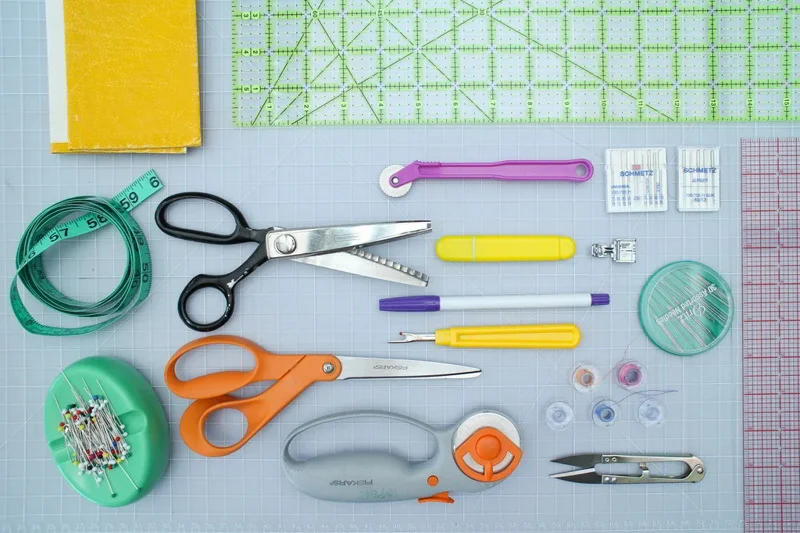
Beyond fabric and interfacing, you’ll need several essential notions:
- Quality thread: Polyester thread is generally recommended for its strength and durability, suitable for most bag fabrics.
- Appropriate zippers: Nylon coil zippers are common and flexible, while metal zippers offer a different aesthetic. Ensure you get the correct length and type specified.
- Closures: Depending on the pattern, this could include magnetic snaps, turn locks, buckles, or standard snaps.
- Pins or sewing clips: To hold fabric pieces together accurately while sewing. Clips are often preferred for thicker layers or materials like vinyl where pins leave permanent holes.
- Fabric marker or chalk: For transferring pattern markings onto your fabric. Choose one that is easily removable or will be hidden in the seams.
- Clear ruler: Essential for measuring and marking accurately.
- Sharp scissors: Dedicated fabric scissors are a must. A rotary cutter and self-healing mat can significantly speed up cutting, especially for straight lines.
5.4 Your sewing machine
You don’t necessarily need a fancy, expensive sewing machine for most bag patterns. A reliable basic machine that offers a straight stitch and a reverse function is usually sufficient. More important is using the correct needle type and size for your chosen fabric. For instance, a denim needle (size 90/14 or 100/16) is recommended for heavy materials like canvas or multiple layers, while a universal needle might suffice for quilting cottons. Ensure your machine is in good working order and consult its manual if needed.
6. Expert tips for success when using sewing bag patterns
6.1 Read through everything first
It bears repeating: Fully read and understand the pattern instructions and overview before you begin cutting or sewing. Familiarizing yourself with the entire bag making process from start to finish helps anticipate challenges, gather all necessary supplies, and grasp the construction logic. This simple step prevents costly misunderstandings and ensures a smoother workflow.
6.2 Accurate cutting is crucial
The precision of your cutting directly impacts the final quality of your bag. Even small errors in cutting pattern pieces can compound, leading to misalignment, puckering, or difficulty fitting pieces together later. Adhere strictly to the “measure twice, cut once” philosophy. Pay close attention to grainlines and ensure pieces placed on the fold are perfectly aligned. Following the step-by-step visual instructions for cutting layouts provided in the pattern is invaluable for accuracy and minimizing fabric waste.
6.3 Pressing makes a difference
Don’t underestimate the power of your iron during bag construction. Pressing seams open or to one side, as directed by the pattern, isn’t just for garment sewing. It helps to flatten bulk, create crisp edges, sharp corners, and ultimately gives your bag a much more professional and polished appearance. Take the time to press at each relevant step – it truly elevates the final result.
6.4 Don’t fear zippers
Installing zippers can seem intimidating for beginners, but many modern bag patterns include very clear, detailed steps often with helpful diagrams. Acknowledge the apprehension, but don’t let it stop you. A simple tip is to use a zipper foot on your sewing machine, which allows you to stitch close to the zipper coils accurately. Basting (using long, temporary stitches) the zipper in place before final stitching can also help keep it from shifting. Take it step by step, follow the pattern’s guidance, and you’ll master them.
6.5 Practice on scraps if unsure
If you encounter a technique you’re unfamiliar with – perhaps installing a specific type of hardware, sewing a tricky curve, or tackling the pattern’s recommended zipper installation method – practice it first on scrap fabric. Use leftover pieces of your project fabric and interfacing to mimic the actual conditions. This allows you to test the process, adjust your machine settings if needed, and build confidence before attempting it on your main bag pieces. This helps solidify your understanding of the technique and reduces the risk of making irreversible mistakes.
7. Where to find quality sewing bag patterns
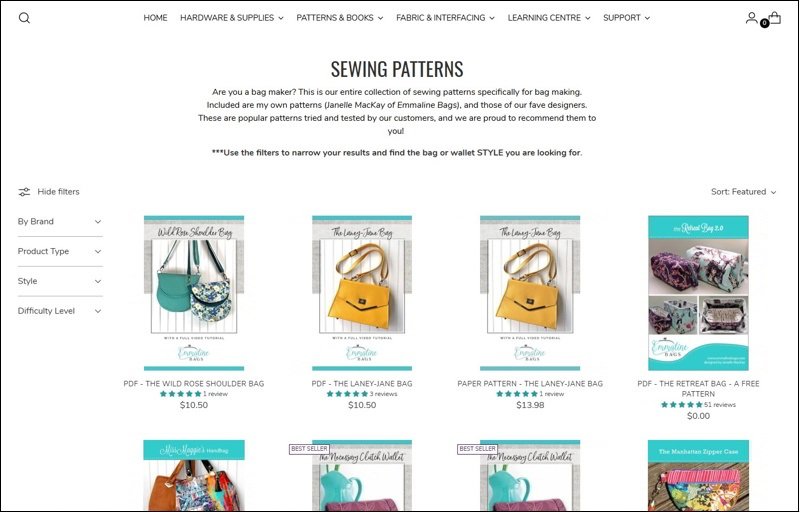
7.1 Online marketplaces & designer shops
The internet offers a vast array of options for finding bag patterns. Online marketplaces host thousands of independent designers, offering patterns ranging from simple pouches to complex backpacks. Be sure to check reviews and seller ratings. Additionally, many dedicated bag pattern designers sell directly through their own websites. Purchasing directly from a designer often means access to more comprehensive support, tutorials, or pattern-specific communities.
7.2 Sewing communities & blogs
Many passionate sewists share their knowledge and creativity through blogs, YouTube channels, and online forums or Facebook groups. These platforms are excellent resources for finding free sewing patterns, particularly for beginner-friendly projects like simple totes or drawstring bags. You can also discover numerous DIY bag tutorials that walk you through the creation process, which is a fantastic way to learn new techniques and build confidence before tackling more complex paid patterns.
And once your bag is complete, consider adding a custom woven labels or branded tag for that final professional touch, especially important for small businesses looking to build brand recognition. Finishing details like these elevate the perceived value of your handmade items. Resources like Packlove specialize in creating these tailored solutions for apparel and accessory brands.
8. Related questions
8.1 Can I sell bags I make from a purchased pattern?
In most cases, independent pattern designers allow small-scale selling of items made from their patterns by home-based businesses. However, mass production or factory manufacturing is almost always prohibited. It is crucial to check the specific designer’s terms of use or licensing agreement before selling. This information is usually found on their website, the pattern listing page, or sometimes within the pattern document itself. Always respect the designer’s intellectual property rights.
8.2 What’s the easiest type of bag pattern for a total beginner?
For someone completely new to bag making, the best starting points are typically simple tote bags, especially those that are unlined or feature basic drop-in linings. Drawstring bags are also very straightforward. Basic zippered pouches that don’t involve complex pockets, gussets (side panels), or extensive hardware are also excellent beginner projects. These patterns help build foundational skills and confidence.
8.3 How do I print a PDF sewing pattern correctly?
To print a PDF sewing pattern accurately:
- Open the file using Adobe Acrobat Reader (most designers recommend this free software).
- Go to the print settings.
- Crucially, select Actual Size, 100% or No Scaling. Do NOT use Fit to Page or Shrink to Fit.
- Find the page containing the test square (usually 1 inch or a few centimeters). Print only this page first.
- Measure the test square precisely with a ruler. If it matches the dimension stated on the pattern, proceed to print the remaining pages using the same settings.
8.4 Do I always need interfacing for bag making?
While not always mandatory, using interfacing is highly recommended for the vast majority of bag projects. It provides essential structure, body, and durability, preventing the bag from looking limp or collapsing. The need depends heavily on the outer fabric choice (e.g., very heavy canvas might need less support than lightweight quilting cotton) and the desired final appearance. Simple, very casual bags like foldable shoppers might omit it, but most structured bags rely on interfacing for a professional finish.
Read more:
As we’ve explored, sewing bag patterns are far more than just lines on paper; they are accessible templates and invaluable tools that empower creators of all skill levels. They offer structure, guidance, and access to a world of design possibilities, transforming fabric into functional and stylish accessories.
Hopefully, this guide has demystified the process of choosing, understanding, and using patterns. Don’t hesitate to take that first step – select a simple project that excites you, apply the techniques discussed, and embrace the rewarding experience of creating something truly handmade.
The satisfaction derived from using or gifting a bag you’ve crafted yourself is a unique aspect of the sewing craft. Start your bag pattern journey with confidence. For businesses looking to elevate their handmade items with professional labels, tags, or packaging, explore the tailored solutions at Packlove!


