


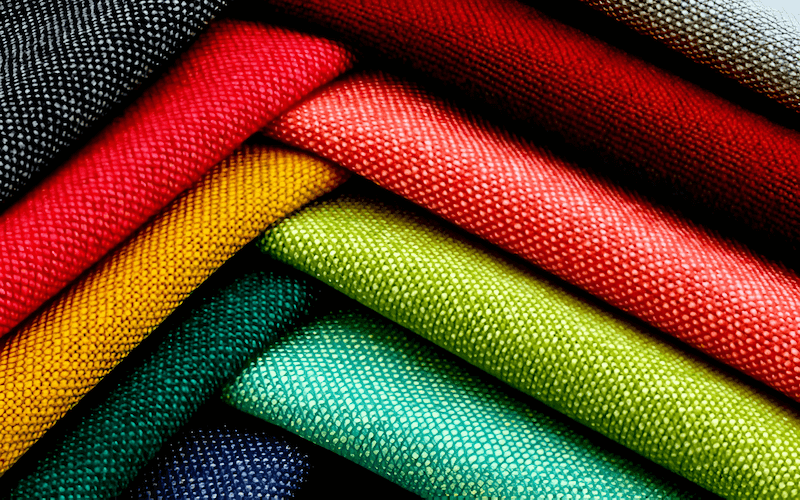
Sewing Fabric Types: Your Expert Guide to Mastering Different Materials


Are you ready to elevate your sewing skills and confidently create projects with any fabric you desire? Many sewers, from enthusiastic beginners to growing small clothing businesses, often feel lost in the vast world of fabrics. The sheer variety can be overwhelming, leading to confusion about which fabric to choose, frustration with handling different textures, and uncertainty about the right tools and techniques. Choosing the wrong fabric can lead to project disasters, wasted materials, and a lot of unnecessary stress.
But understanding fabrics doesn’t have to be daunting! This article is your comprehensive guide to decoding the world of textiles. We’ll break down fabric types, explain their unique properties, and equip you with practical sewing techniques to master each one. You’ll gain expert tips on selecting the right needles and threads, adjusting stitch settings, handling tricky fabrics, and ensuring proper care for your finished creations. Prepare to sew with confidence, unlock your creative potential, and achieve truly professional results, no matter the fabric you choose.
1. Understanding fabric basics for sewing success
Embarking on any sewing project begins with a fundamental understanding of fabric. Fabric is more than just colorful cloth; it’s the very foundation of your creation.
To sew successfully and achieve the desired results, grasping the basic language and properties of fabrics is essential. This section will lay the groundwork, equipping you with the knowledge to confidently navigate the world of textiles and make informed choices for your sewing endeavors.
1.1. The language of fabrics: key textile terms
Like any craft, sewing has its own vocabulary. Understanding key textile terms is crucial for deciphering fabric descriptions, following patterns, and communicating effectively about your projects. Let’s define some essential terms that form the building blocks of fabric knowledge:
- Fiber: The fundamental unit from which fabrics are made. Fibers can be natural (like cotton, linen, silk, wool) or synthetic (like polyester, rayon, nylon). The fiber content significantly influences a fabric’s properties, such as its feel, drape, and care requirements.
- Weave: Refers to how yarns are interlaced to create woven fabrics. Common weaves include plain weave (simple criss-cross), twill weave (diagonal lines), and satin weave (smooth, lustrous surface). The weave structure affects the fabric’s stability, drape, and texture.
- Knit: Describes fabrics constructed by interlooping yarns. Knit fabrics are known for their stretch and drape. Common knit structures include jersey knit (smooth face, looped back), rib knit (vertical ribs), and interlock knit (double-knit, stable).
- Warp: In woven fabrics, the warp yarns run lengthwise, forming the fabric’s foundation. They are typically stronger and less stretchy than weft yarns.
- Weft: Also known as filling yarns, weft yarns run across the width of woven fabrics, interlacing with the warp yarns.
- Grain: Refers to the direction of the warp and weft yarns in woven fabrics. The lengthwise grain (parallel to the selvage) is typically the strongest and least stretchy direction. The crosswise grain runs perpendicular to the lengthwise grain. Sewing along the grain is important for garment structure and drape.
- Bias: The diagonal direction of a woven fabric, at a 45-degree angle to the warp and weft. The bias has the most stretch and drape in woven fabrics, often used for shaping and creating fluid designs.
- Drape: Describes how a fabric hangs or falls. Drape can range from fluid and flowing (like silk charmeuse) to stiff and structured (like canvas). Drape is influenced by fiber content, weave/knit structure, and fabric weight.
- Weight: Refers to the heaviness of a fabric, often described as light, medium, or heavy weight. Fabric weight is influenced by fiber content and construction and impacts the fabric’s drape, warmth, and suitability for different garment types.
- GSM (Grams per Square Meter): A metric measurement of fabric weight, indicating the weight of one square meter of fabric in grams. GSM provides a more precise way to compare fabric weights, especially when shopping online.
1.2. Why fabric choice matters: setting yourself up for sewing success
The selection of fabric is not merely an aesthetic decision; it’s a fundamental factor that dictates the success of any sewing project. Fabric choice profoundly impacts the final garment’s look, feel, drape, durability, and even its care requirements.
Choosing the right fabric is about aligning the material’s properties with the intended design and function of your sewn creation.
For instance, a flowing silk charmeuse, with its luxurious drape, would be ideal for a soft, elegant evening gown. However, the same fabric would be entirely unsuitable for a structured blazer that requires crisp lines and stability.
Conversely, sturdy denim, known for its durability and structure, is perfect for jeans or jackets but would be too stiff and heavy for a delicate summer dress.
Understanding fabric properties allows you to make informed decisions. Considering factors like drape, weight, stretch, and fiber content ensures that your chosen fabric is appropriate for the pattern and design you intend to sew.
Selecting the right fabric from the outset sets you up for sewing success, minimizing frustration during construction and maximizing satisfaction with the finished garment. Thoughtful fabric choice is a cornerstone of achieving professional-looking and well-fitting sewn creations.

2. Decoding fabric structure and fluidity: woven vs. knit fabrics
One of the most crucial distinctions in the world of fabrics is the difference between woven and knit constructions. Understanding whether a fabric is woven or knit is fundamental because it dictates its inherent properties, such as stretch, drape, and stability, which in turn significantly impacts how it behaves when sewn and how it will look and feel as a finished garment. Let’s unravel the structures of woven and knit fabrics to gain a clearer understanding of their unique characteristics.
2.1. Woven fabrics: Structure and stability
Woven fabrics are constructed by interlacing two sets of yarns at right angles: the warp yarns running lengthwise and the weft yarns running across the width. Imagine a simple grid-like structure where these yarns interlock, creating a fabric that is generally stable and less prone to stretching, especially along the lengthwise and crosswise grain. This inherent stability is a defining characteristic of woven fabrics.
Examples of common woven fabrics include broadcloth, poplin, linen, canvas, denim, and corduroy. Each of these fabrics, despite variations in fiber content and weave type, shares the fundamental woven structure that contributes to their relative stability.
Due to their structured nature, woven fabrics are particularly well-suited for garments that require defined shapes, crisp lines, and less drape. Think of tailored jackets, structured skirts, fitted shirts, and durable pants – these are all garment types that often benefit from the stability and form-holding properties of woven fabrics.
2.2. Knit fabrics: Drape and stretch
In contrast to the structured grid of woven fabrics, knit fabrics are created by interlooping yarns in a series of connected loops. This looped construction is what gives knit fabrics their characteristic stretch and drape. Unlike woven fabrics, knit fabrics inherently possess elasticity, allowing them to stretch and recover, providing comfort and ease of movement.
Examples of popular knit fabrics include jersey, interlock, rib knit, and fleece. Jersey knit, often used for t-shirts, is known for its soft drape and one-way stretch.
Interlock knit is a double-knit structure, offering more stability than jersey but still retaining stretch. Rib knit, with its vertical ribbed texture, is highly elastic and often used for cuffs and neckbands.
Fleece, with its soft, napped surface, provides warmth and stretch. Knit fabrics are ideal for garments that prioritize comfort, ease of movement, and a more relaxed, form-fitting silhouette. Think of t-shirts, leggings, sweaters, and comfortable dresses – these are garment types where the drape and stretch of knit fabrics truly shine.

2.3. Beyond structure: Considering fabric weight and texture
While the woven versus knit distinction is fundamental, understanding fabric weight and texture adds another layer of nuance to fabric selection. Fabric weight, typically categorized as light, medium, or heavy weight, significantly impacts a fabric’s drape, feel, and suitability for different projects.
Lightweight fabrics, like chiffon or voile, are airy and flowing, ideal for delicate blouses or linings. Medium-weight fabrics, such as quilting cotton or linen, offer versatility for a wide range of garments. Heavyweight fabrics, like denim or canvas, are sturdy and durable, suited for outerwear or home décor projects.
Fabric texture also plays a crucial role in the final outcome of a sewn project. Textures can range from smooth (like satin) to textured (like crepe) to napped (like velvet or corduroy).
Texture affects the fabric’s visual appearance, its tactile feel, and how it interacts with light. A smooth fabric might showcase print details beautifully, while a textured fabric can add visual interest and depth to a solid-colored garment. Napped fabrics, like corduroy, have a directional pile that needs to be considered during cutting and sewing to ensure a consistent appearance.
Considering both fabric weight and texture, in addition to woven or knit structure, allows for even more refined and informed fabric choices, leading to truly successful and satisfying sewing projects.
3. Sewing with common fabric types: a practical guide
Now that we’ve covered the foundational knowledge of fabric basics and the distinction between woven and knit structures, let’s get into the practical aspects of sewing with specific fabric types. This section will serve as your go-to guide for navigating the nuances of sewing with various common fabrics, providing expert tips and techniques to achieve successful and beautiful results. We’ll begin with the realm of natural fibers, exploring the characteristics and sewing considerations for cotton, linen, silk, and wool.
3.1. Working with natural fibers: cotton, linen, silk, wool
Natural fibers, derived from plants and animals, are beloved for their breathability, comfort, and often unique textures. Each natural fiber possesses distinct properties that influence its behavior during sewing and its suitability for different projects. Let’s explore the specific techniques for working with cotton, linen, silk, and wool.
3.1.1. Sewing with cotton: tips and techniques
Cotton is arguably the most popular and widely used natural fiber in the world, and for good reason. It’s breathable, comfortable, relatively easy to sew, and comes in a vast array of weights, weaves, prints, and colors. Cotton is incredibly versatile, suitable for everything from apparel and quilting to home decor.
- Properties: Breathable, absorbent, relatively durable, can wrinkle easily, available in many weights and weaves.
- Common Uses: Apparel (shirts, dresses, skirts, pants), quilting, home décor (curtains, bedding), crafting.
- Needle & Thread: For most cotton fabrics, a universal needle (size 70/10 or 80/12) works well. Use cotton or polyester thread; both are suitable for cotton fabrics.
- Stitch Length: A standard stitch length of 2.5mm is generally appropriate for sewing cotton.
- Pressing: Cotton generally presses well. Use a medium to high heat setting on your iron and steam for crisp seams.
- Seam Finishes: Cotton frays moderately. Simple seam finishes like a zigzag stitch along the raw edge or serging (overlocking) are effective to prevent fraying.
- Lightweight Cotton (e.g., Cotton Lawn): For finer, lightweight cottons like cotton lawn or voile, use a finer needle (size 60/8 or 70/10) and consider shortening the stitch length slightly to 2mm for delicate seams. Handle gently to avoid stretching.
Cotton is a fantastic fabric to learn on and to work with throughout your sewing journey. Its forgiving nature and wide availability make it a staple in any sewist’s fabric stash.
3.1.2. Sewing with linen: tips and techniques
Linen, derived from flax fibers, is another beloved natural fiber prized for its breathability, distinctive texture, and elegant drape. Linen offers a relaxed yet sophisticated aesthetic and is particularly popular for warm-weather clothing and home textiles. While linen can be slightly more challenging to sew than cotton due to its tendency to wrinkle and fray, understanding its properties and using specific techniques will lead to beautiful linen creations.
- Properties: Breathable, absorbent, strong, becomes softer with washing, wrinkles easily, can fray significantly.
- Common Uses: Apparel (summer clothing, dresses, shirts, pants), home décor (tablecloths, napkins, curtains), bedding.
- Needle & Thread: A universal needle (size 70/10 or 80/12) is generally suitable for linen. Use cotton or polyester thread; both work well. For heavier linens, you might consider a slightly heavier needle (size 90/14).
- Stitch Length: A slightly longer stitch length than cotton is often recommended for linen, around 2.5-3mm. This helps to accommodate the fabric’s slightly looser weave and prevent puckering.
- Pressing: Linen wrinkles easily but also presses beautifully. Use a high heat setting on your iron and plenty of steam. Press firmly to achieve crisp seams and remove wrinkles. Pressing linen is often an integral part of the sewing process.
- Seam Finishes: Linen frays readily. Robust seam finishes are essential. French seams are a beautiful and durable option for linen, encasing the raw edges within the seam. Serging (overlocking) is also a quick and effective way to finish linen seams and prevent fraying.
- Linen Blends: Linen is often blended with other fibers like cotton or rayon to reduce wrinkling and improve drape. Sewing with linen blends can be slightly easier than sewing with 100% linen, while still retaining some of linen’s desirable qualities. Adjust your techniques based on the blend composition, leaning towards the fiber it is blended with most (e.g., cotton-linen blend sew closer to cotton techniques).
Linen sewing rewards patience and attention to detail. Its unique texture and drape make it a worthwhile fabric to master, resulting in garments and home items with a timeless and natural elegance.
3.1.3. Sewing with silk: tips and techniques
Silk, a natural protein fiber produced by silkworms, is synonymous with luxury and elegance. Known for its exquisite drape, smooth texture, and subtle sheen, silk is a coveted fabric for special occasion garments and delicate lingerie. However, silk’s very qualities – its fluidity and delicate nature – can also make it more challenging to sew than more stable fabrics. With the right approach and techniques, sewing with silk can be a rewarding experience, resulting in truly stunning creations.
- Properties: Luxurious drape, smooth and soft texture, delicate sheen, lightweight, can be slippery and prone to snagging, requires gentle handling.
- Common Uses: High-end apparel (blouses, dresses, scarves, lingerie, evening wear), linings, delicate accessories.
- Needle & Thread: Use a fine needle specifically designed for delicate fabrics, such as a microtex or silk needle (size 60/8 or 70/10). Opt for fine thread, such as silk thread or a fine polyester thread. Thick thread can overwhelm delicate silk fabrics.
- Stitch Length: Use a shorter stitch length than you would for cotton or linen, around 1.5-2mm. This creates more secure and delicate seams in the fine silk fabric.
- Pinning: Silk is easily marked by pins. Use extra-fine pins (silk pins or fine glass head pins) and pin within the seam allowance to minimize visible pinholes. Alternatively, consider using pattern weights and carefully cutting silk to avoid excessive pinning.
- Pressing: Silk is heat-sensitive. Use a low heat setting on your iron and always use a dry iron (no steam, or very minimal steam if absolutely necessary). Press from the wrong side of the fabric and use a pressing cloth to protect the delicate surface and prevent scorching or shine.
- Seam Finishes: Delicate seam finishes are best for silk. French seams are an excellent choice for enclosing raw edges beautifully. Rolled hems create a delicate and professional finish for edges and hems. Consider serging with a very fine thread for lightweight silks if appropriate for the design.
- Slippery Fabric Tips: Silk’s slippery nature can make it challenging to handle and sew accurately.
- Walking Foot: Using a walking foot (even feed foot) on your sewing machine can help feed slippery silk fabric layers evenly, preventing shifting and puckering.
- Tissue Paper: Sandwiching silk between layers of tissue paper while sewing can provide extra grip and stability. Tear away the tissue paper carefully after sewing.
- Starch or Fabric Stabilizer: Lightly starching silk or using a fabric stabilizer can temporarily make it less slippery and easier to handle. Test on a scrap first to ensure it doesn’t alter the fabric’s appearance.
Sewing with silk requires patience, a gentle touch, and meticulous techniques. However, the results – garments with unparalleled drape and luxurious feel – are well worth the effort for those seeking to create truly special pieces.
3.1.4. Sewing with wool: tips and techniques
Wool, a natural fiber derived from sheep, is celebrated for its warmth, durability, and resilience. Wool fabrics range from soft and draping to sturdy and structured, making them suitable for a wide array of garments, from cozy outerwear and tailored suits to warm blankets and accessories. Sewing with wool requires understanding its unique characteristics, particularly its tendency to felt or shrink with improper handling. However, with the right techniques, wool is a rewarding fabric to sew, resulting in garments that are both beautiful and functional.
- Properties: Warm, insulating, durable, wrinkle-resistant, can felt or shrink with heat and agitation, available in various weights and textures.
- Common Uses: Outerwear (coats, jackets), suits, sweaters, skirts, blankets, accessories (hats, scarves), home décor (upholstery, rugs).
- Needle & Thread: A universal needle (size 80/12 or 90/14) is generally suitable for most wool fabrics. For heavier wools like coating or tweed, use a heavier needle (size 90/14 or 100/16). Use wool thread or polyester thread. Wool thread is a traditional choice for wool garments, while polyester offers good strength and durability.
- Stitch Length: A slightly longer stitch length, around 2.5-3mm, is often recommended for wool fabrics. This prevents seams from being too tight and allows for some give in the fabric.
- Pressing: Wool responds well to pressing, but heat and steam must be used carefully to avoid felting or shrinking. Use steam and a medium to high heat setting, but always use a press cloth to protect the wool surface and prevent shine. Lift the iron and press, rather than sliding it, to avoid stretching the fabric.
- Seam Finishes: Seam finishes for wool depend on the fabric weight and garment style. Serged (overlocked) seams are a quick and effective finish for many wool types, especially for less structured garments. For tailored garments or finer wools, consider bound seams or lining the garment to neatly encase the seam allowances.
- Wool Types: Wool encompasses a wide variety of types, each with slightly different sewing considerations:
- Worsted Wool: Smooth, tightly woven wool, often used for suits and tailored garments. Sewing is generally straightforward.
- Wool Tweed: Textured, heavier wool, often used for jackets and outerwear. Can be slightly bulkier to sew, may require a heavier needle and longer stitch length.
- Wool Felt: Non-woven wool, often used for crafts and appliqué. Does not fray, making seam finishing less critical. Can be sewn with a basic straight stitch.
Sewing with wool offers the opportunity to create classic and enduring garments. Understanding the nuances of pressing and handling wool correctly is key to achieving professional results and preserving the fabric’s beautiful qualities.
3.2. Sewing with synthetic fabrics
Synthetic fabrics, created from manufactured fibers, offer a wide range of properties and price points, expanding the possibilities for sewing projects. While they may not always possess the same breathability as natural fibers, synthetics often excel in areas like wrinkle resistance, durability, and affordability. Let’s explore the techniques for sewing with rayon, polyester, three commonly used synthetic or semi-synthetic fabrics.
3.2.1. Sewing with rayon: tips and techniques
Rayon, also known as viscose, is a semi-synthetic fiber derived from cellulose. It’s often praised for its beautiful drape, soft feel, and silk-like appearance, making it a popular choice for dresses, blouses, and linings. However, rayon can be delicate and prone to wrinkling and shrinking, requiring specific sewing and care techniques.
- Properties: Silky drape, soft texture, breathable (more so than some synthetics), can wrinkle and shrink, can be delicate and prone to fraying, absorbent.
- Common Uses: Apparel (dresses, blouses, skirts, linings), scarves, home décor (curtains, drapes).
- Needle & Thread: A universal needle (size 70/10 or 80/12) or a fine universal needle is generally suitable for rayon. Use polyester thread for good strength and durability.
- Stitch Length: A slightly shorter stitch length, around 2-2.5mm, is often recommended for rayon to create secure seams in this somewhat delicate fabric.
- Pressing: Rayon is heat-sensitive and can scorch easily. Use a low heat setting on your iron and press from the wrong side of the fabric. Dry ironing is generally recommended, or use very minimal steam if needed. Always test on a scrap first.
- Seam Finishes: Rayon tends to fray, so proper seam finishes are important. Zigzag stitching along the raw edge or serging (overlocking) are effective and common seam finishes for rayon. For finer rayons or delicate garments, consider French seams for a more enclosed and refined finish.
- Fraying Tendency & Delicate Handling: Rayon’s tendency to fray and its delicate nature require careful handling.
- Pre-treat edges: Consider serging or zigzagging the raw edges of pattern pieces before sewing to minimize fraying during handling and construction.
- Gentle Handling: Avoid excessive stretching or pulling on rayon fabric while sewing, as it can distort easily. Support the fabric as it feeds through the machine.
Sewing with rayon allows you to create garments with beautiful drape and a luxurious feel. Gentle handling and appropriate techniques are key to successfully working with this semi-synthetic fabric.
3.2.2. Sewing with polyester: tips and techniques
Polyester is one of the most widely used synthetic fibers globally, prized for its durability, wrinkle resistance, and affordability. Polyester fabrics are incredibly versatile, found in everything from everyday clothing and sportswear to home furnishings and industrial applications. While generally easy to sew, polyester has some unique characteristics that are worth considering for optimal results.
- Properties: Durable, wrinkle-resistant, water-resistant (to varying degrees), strong, relatively inexpensive, can be less breathable than natural fibers, can sometimes feel less soft than natural fibers, may be prone to static cling.
- Common Uses: Apparel (clothing for all types, especially sportswear and outerwear), linings, home décor (upholstery, curtains), bedding, industrial fabrics.
- Needle & Thread: A universal needle (size 70/10 or 80/12) is generally excellent for sewing polyester fabrics. Use polyester thread. Polyester thread is a natural match for polyester fabric, offering good strength and durability for seams.
- Stitch Length: A standard stitch length of 2.5mm is usually appropriate for sewing polyester. Adjust slightly based on fabric weight – slightly shorter for lighter polyesters, slightly longer for heavier ones.
- Pressing: Polyester is heat-sensitive and can melt or develop a shine with excessive heat. Use a low to medium heat setting on your iron and always test on a scrap first. Dry ironing is generally recommended. If steam is needed, use sparingly and with caution. Press from the wrong side of the fabric whenever possible.
- Seam Finishes: Polyester generally frays less than natural fibers like cotton or linen, but seam finishes are still recommended for durability and a clean interior. Zigzag stitching along the raw edge or serging (overlocking) are effective and common seam finishes for polyester.
- Static Cling & Potential Skipped Stitches: Polyester can sometimes generate static cling, which can make it slightly more challenging to handle and can occasionally lead to skipped stitches.
- Anti-static spray: Using an anti-static spray on your fabric can help reduce static cling and make it easier to manage.
- Sharp Needle: Ensure you are using a sharp needle. A slightly dull needle can increase the chance of skipped stitches in polyester. Change your needle regularly.
- Needle Size: If you are experiencing skipped stitches, try slightly increasing your needle size (e.g., from 70/10 to 80/12) to ensure the needle is properly penetrating the fabric.
Sewing with polyester is generally straightforward and rewarding due to its durability and wrinkle resistance. Paying attention to heat settings when pressing and managing potential static are the main considerations for achieving excellent results with polyester fabrics.
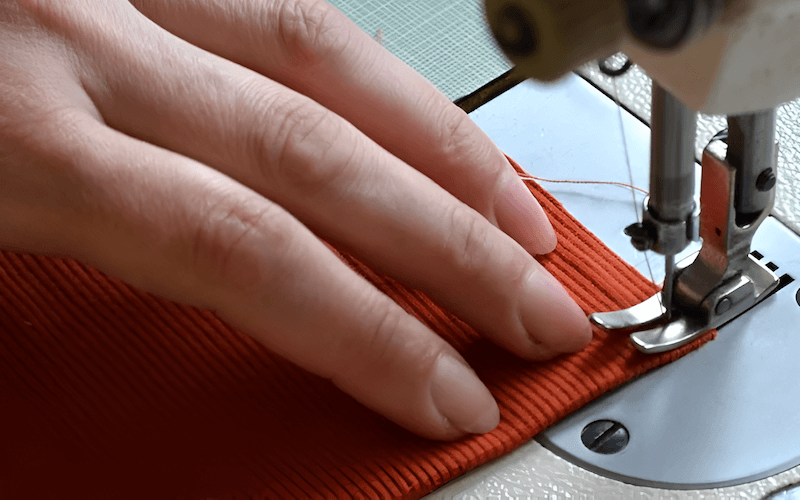
3.2.3. Sewing with corduroy: tips and techniques
Corduroy is a distinctive fabric characterized by its raised “ribs” or “wales” running lengthwise. This textured surface gives corduroy a unique visual appeal and a soft, plush feel. Made from cotton or cotton blends (and sometimes polyester), corduroy is popular for pants, jackets, skirts, and children’s wear. Sewing with corduroy requires attention to its nap and wale direction to ensure a professional and consistent finish.
- Properties: Textured surface with lengthwise ribs (wales), soft and plush feel, warm, durable, can vary in wale width (fine to wide wale), nap direction affects color appearance, can crush easily if pressed incorrectly.
- Common Uses: Apparel (pants, jackets, skirts, dresses, children’s wear), home décor (upholstery, pillows), accessories (bags, hats).
- Needle & Thread: A universal needle (size 80/12 or 90/14) is generally suitable for corduroy. For heavier corduroys, use a heavier needle (size 90/14 or 100/16). Use polyester or cotton thread. Polyester thread offers good strength, while cotton thread is a traditional choice for cotton corduroy.
- Stitch Length: A slightly longer stitch length, around 2.5-3mm, is often recommended for corduroy to accommodate its thickness and texture and prevent puckering along the wales.
- Pressing: Pressing corduroy requires special care to avoid crushing the nap (the raised ribs).
- Nap Direction: Always press corduroy from the wrong side.
- Needle Board or Towel: Use a needle board (a specialized pressing surface with fine needles) or a thick towel underneath the corduroy when pressing from the wrong side. This allows the wales to sink into the soft surface and prevents them from being crushed flat.
- Steam: Use steam sparingly and avoid direct contact of the iron with the right side of the fabric.
- Finger Pressing: Whenever possible, finger press seams open or to one side to minimize ironing directly on the corduroy.
- Seam Finishes: Corduroy can fray, especially at the raw edges. Serging (overlocking) is a quick and effective seam finish. Bound seams or lining can also provide a neat and durable finish, especially for garments.
- Wale Count & Nap Direction Importance:
- Wale Count: Corduroy is described by its wale count, which refers to the number of ribs per inch. Fine-wale corduroy is lighter and more delicate, while wide-wale corduroy is heavier and more textured. Adjust needle size and stitch length accordingly.
- Nap Direction: Corduroy has a nap, meaning the wales have a direction. The color appears richer and deeper when viewed with the nap running “downward” (from waist to hem in a garment). Always cut pattern pieces with the nap running in the same direction for all garment pieces to ensure consistent color and texture. Cutting against the nap can result in a different shade and feel. Run your hand down the fabric – the direction that feels smoother is typically the nap-down direction.
Sewing with corduroy adds a wonderful textural element to garments and home décor. Paying close attention to pressing techniques and nap direction are essential for achieving professional-looking corduroy creations.

3.3. Sewing with knit fabrics: jersey and beyond
Knit fabrics, with their inherent stretch and drape, offer a unique set of challenges and rewards for sewists. Unlike woven fabrics, knits require different needles, stitches, and handling techniques to accommodate their elasticity and prevent distortion. This section will guide you through the essentials of sewing with knit fabrics, starting with the foundational jersey knit and then expanding to broader knit fabric considerations.
3.3.1. Sewing with jersey: tips and techniques
Jersey knit is a staple in the knit fabric world, known for its soft drape, comfortable stretch, and versatility. Often made from cotton, rayon, or blends, jersey is commonly used for t-shirts, dresses, leggings, and casual wear. Sewing with jersey requires understanding its stretch and using techniques to prevent stretched-out seams and wavy hems.
- Properties: Soft drape, comfortable stretch (often one-way or two-way stretch), can be lightweight to medium weight, edges tend to curl, can be prone to stretching out of shape if not handled carefully.
- Common Uses: Apparel (t-shirts, dresses, leggings, pajamas, casual wear), baby clothes, knit tops and bottoms.
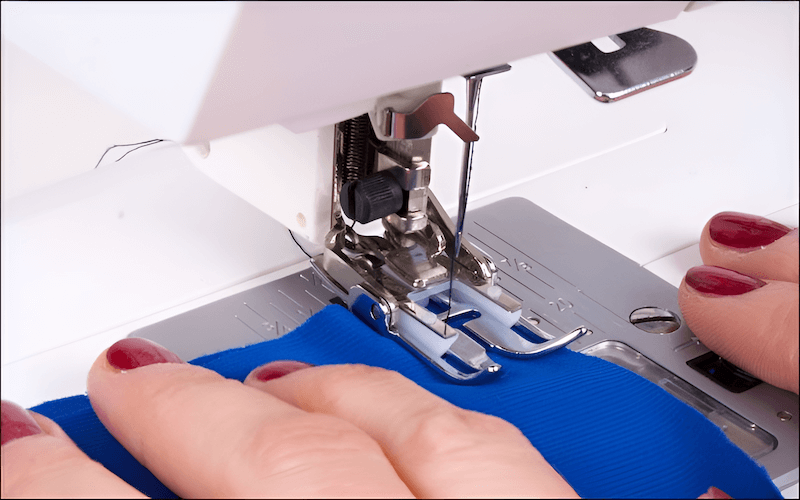
- Needle & Thread: Crucially, use a ballpoint needle (also called jersey or knit needle) when sewing jersey knit. The rounded tip of a ballpoint needle pushes between the knit fibers rather than piercing them, preventing skipped stitches and fabric damage. Use polyester thread. Polyester thread offers the necessary stretch and durability for knit seams.
- Stitch: Avoid straight stitches for seams in jersey knit, as they lack stretch and can pop when the fabric is stretched. Use a zigzag stitch or a dedicated stretch stitch (if your machine has one). A narrow zigzag stitch provides enough stretch for seams while maintaining a relatively straight appearance. A stretch stitch, if available, is designed specifically for knit fabrics and offers optimal stretch and seam security.
- Stitch Length: A standard stitch length of 2.5mm is generally suitable for jersey knit.
- Preventing Stretching: Jersey knit is prone to stretching out of shape, especially along seams and hems.
- Walking Foot: Using a walking foot (even feed foot) is highly recommended when sewing jersey knit. It helps feed the layers of fabric evenly, preventing the top layer from stretching ahead of the bottom layer and causing wavy seams.
- Gentle Handling: Handle jersey knit gently. Avoid pulling or stretching the fabric as you sew. Let the feed dogs of your machine guide the fabric through.
- Stabilize Seams (Optional): For seams that require extra stability, you can use a narrow strip of fusible knit interfacing or clear elastic sewn into the seam allowance to prevent stretching.
- Seam Finishes: Jersey knit edges tend to curl rather than fray significantly. Serging (overlocking) is a popular and effective seam finish for jersey knit, providing a clean and stretchy edge. A narrow zigzag stitch along the raw edge can also be used as a simple seam finish. Hems are often finished with a double-needle hem or a coverstitch machine for a professional, stretchy finish.
Sewing with jersey knit opens up a world of comfortable and stylish garment possibilities. Using the right needles, stitches, and handling techniques to manage its stretch is key to achieving professional-looking jersey creations.
3.3.2. Sewing with other knit fabrics: tips and techniques
While jersey knit is a foundational knit fabric, the world of knits is vast and diverse, encompassing various constructions with different properties and uses. Whether you’re working with interlock, rib knit, fleece, or other knit types, the fundamental principles of sewing knits remain consistent. This subsection will provide general advice applicable to sewing most knit fabrics, building upon the techniques discussed for jersey knit and highlighting key considerations for successful knit sewing.
General Knit Sewing Advice:
- Always use a ballpoint needle: This remains crucial for all knit fabrics to prevent skipped stitches and fabric damage by gently pushing between the loops of the knit structure.
- Utilize zigzag or stretch stitches for seams: Straight stitches are generally unsuitable for knit seams due to their lack of stretch. Zigzag stitches or dedicated stretch stitches provide the necessary elasticity to accommodate the fabric’s movement and prevent seam breakage.
- Handle knit fabrics gently: Avoid pulling or stretching knit fabrics excessively during cutting and sewing. Their inherent stretch means they can distort easily if mishandled. Let the machine’s feed dogs guide the fabric.
- Prevent stretching, especially at edges and seams: Techniques like using a walking foot, gentle handling, and potentially stabilizing seams with fusible knit interfacing or clear elastic are beneficial for most knit fabrics to prevent distortion and wavy seams.
- Test stitch settings on scraps: Always test your chosen stitch, stitch length, and tension on fabric scraps before sewing your actual project. Knit fabrics can behave differently, and testing ensures your settings are appropriate for the specific knit you are using.
Exploring Knit Fabric Types (Beyond Jersey): While jersey is common, familiarize yourself with other knit types:
- Interlock Knit: A double knit fabric, more stable and less prone to curling than jersey. Often easier to sew than jersey for beginners. Good for t-shirts, dresses, and baby clothes.
- Rib Knit: Characterized by vertical ribs, highly elastic, and excellent recovery. Used for cuffs, neckbands, and form-fitting garments like tank tops and dresses. Requires careful handling due to its high elasticity.
- Fleece Knit: Soft, napped surface, warm and cozy. Used for sweatshirts, jackets, blankets, and loungewear. Can be bulky to sew, may require a longer stitch length and a walking foot.
- Sweater Knits: Looser knit structures with varying textures and weights, used for sweaters and cardigans. Can be delicate and prone to snagging, handle with care.
- Double Knit: Generally more stable and less stretchy than single knits like jersey. Easier to sew and good for structured knit garments.
Seam Finishes for Knits: Serging (overlocking) remains a highly recommended seam finish for most knit fabrics, providing a clean, stretchy, and durable edge. Zigzag stitching along the raw edge is a simpler alternative. For hems, consider double-needle hems, coverstitch hems, or narrow zigzag hems for a stretchy and professional finish.
By understanding the general principles of sewing knits and recognizing the variations between different knit types, you can confidently expand your sewing repertoire and create comfortable and stylish garments from a wide array of knit fabrics.
4. Sewing fabric tips for beginners: start simple, build confidence
Learning to sew with different fabrics is a journey of exploration and skill-building. It’s natural to feel a bit intimidated by the vast array of textiles and techniques. The key to beginner sewing success is to start simple, gradually expand your fabric repertoire, and celebrate each milestone along the way. This section offers practical tips to help you build confidence and enjoy the process of learning to sew with various fabrics.
4.1. Best fabrics to learn on: beginner-friendly choices
Choosing the right fabrics to begin with can significantly impact your initial sewing experience. Starting with beginner-friendly fabrics will make the learning process smoother, less frustrating, and more rewarding. Here are some top fabric recommendations for beginners:
Plain Cotton: Often referred to as quilting cotton or craft cotton, plain cotton is an excellent starting point. It’s stable, easy to handle, doesn’t stretch excessively, and is relatively forgiving of minor sewing mistakes. It’s readily available in a huge range of colors and prints, making it perfect for practicing basic sewing techniques and creating simple projects like pillowcases, tote bags, or simple garments.
Cotton Lawn: A lightweight woven cotton, cotton lawn is slightly finer and softer than quilting cotton but still maintains good stability. It’s a step up in terms of drape and feel but remains relatively easy to sew. Great for practicing garment sewing with slightly more delicate fabrics, such as simple blouses or summer dresses.
Poplin: Another stable woven cotton, poplin has a slightly smoother surface than quilting cotton and a bit more drape. It’s a versatile choice for beginner garments like shirts, skirts, and dresses, offering a slightly more polished look than basic quilting cotton.
Linen (and Linen Blends): While 100% linen can wrinkle easily, it’s still a relatively stable woven fabric to learn on, especially for simple projects. Linen blends, particularly cotton-linen blends, offer a good balance of linen’s texture and drape with reduced wrinkling and increased ease of sewing. Good for practicing garment sewing with natural fibers and exploring different textures.
These fabrics are recommended for beginners because they are:
- Stable: They don’t stretch or shift excessively while sewing, making them easier to control under the machine needle.
- Easy to handle: They are generally not slippery or overly delicate, making them easier to cut, pin, and sew.
- Forgiving: They can withstand a bit of seam ripping and re-sewing without significant damage, which is helpful when learning and making mistakes is part of the process.
Starting with these beginner-friendly fabrics will allow you to focus on mastering basic sewing techniques without the added challenge of dealing with tricky or unstable materials.
4.2. Tackling more challenging fabrics: when you’re ready to level up
As you gain confidence and master basic sewing skills with beginner-friendly fabrics, you’ll naturally want to explore more challenging and diverse materials. Fabrics like knits, silks, and very slippery fabrics offer unique properties and design possibilities, but they also require more refined techniques and patience.
Knits: Knit fabrics, with their stretch and drape, are fantastic for comfortable garments but require ballpoint needles, stretch stitches, and careful handling to prevent stretching and distortion. Start with more stable knits like interlock or double knits before moving on to trickier jerseys or rib knits.
Silks and other Slippery Fabrics: Silk charmeuse, satin, and other slippery fabrics are luxurious and beautiful but can be challenging to cut and sew accurately due to their fluid nature. Slow down, use fine pins, consider tissue paper or fabric stabilizer for added control, and practice patience.
Heavier Fabrics: Denim, canvas, and upholstery fabrics require a more powerful machine and heavier needles. Start with lighter-weight versions of these fabrics before tackling very heavy-duty materials.
When you feel ready to level up and tackle more challenging fabrics:
- Practice on scraps: Before starting your project, always practice sewing on fabric scraps to get a feel for how the fabric behaves and to adjust your machine settings as needed.
- Take it slow: Don’t rush. Sewing with challenging fabrics often requires a slower pace and more deliberate movements.
- Don’t be afraid to experiment: Try different needles, threads, stitches, and techniques to find what works best for the specific fabric you are using.
Be patient with yourself: Sewing with more challenging fabrics can be frustrating at times. Remember that it’s a learning process, and mistakes are part of it. Don’t give up!
Tackling more challenging fabrics expands your sewing skills and opens up exciting new creative possibilities. Approach them with patience, practice, and a willingness to learn, and you’ll be rewarded with beautiful and unique sewn creations.
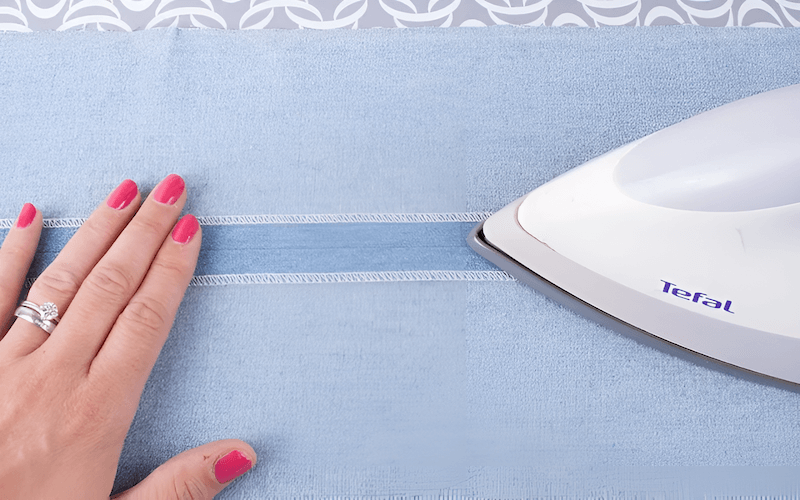
4.3. The power of pressing: your secret weapon for professional results
Pressing is not just ironing; it’s a fundamental sewing technique that is often underestimated but is absolutely essential for achieving professional-looking results. Pressing seams at each step of the sewing process, not just at the end, is your secret weapon for crisp edges, flat seams, and a polished finish.
Press seams after sewing: After stitching each seam, press it immediately before proceeding to the next step. This sets the stitches and creates a flatter, neater seam.
Press seams open or to one side: Depending on the pattern instructions and fabric type, press seams either open (with seam allowances spread apart) or to one side (with both seam allowances pressed in the same direction). Pressing seams open reduces bulk, while pressing to the side can provide more strength in certain areas.
Use the correct iron temperature for your fabric: Always use the iron temperature recommended for your fabric type to avoid scorching or damaging the material. Refer to fabric care guides or test on a scrap.
Use steam appropriately: Steam can be very helpful for pressing out wrinkles and setting seams, but use it cautiously on delicate fabrics like silk or heat-sensitive synthetics. Dry ironing is often preferred for these fabrics.
Use a pressing cloth: A pressing cloth (a piece of thin cotton fabric) placed between the iron and your project fabric protects delicate fabrics from direct heat and prevents shine or scorching, especially on wool and some synthetics.
Incorporating pressing into your sewing routine at every stage, not just as a final step, will dramatically improve the quality and appearance of your sewn projects. It’s a simple yet powerful technique that elevates your sewing from “homemade” to “handmade with professional finesse.”
5. Caring for your sewn creations: fabric care essentials
Creating your own garments and home items is a rewarding endeavor, and proper care is essential to protect your time and effort. Understanding fabric care is just as important as mastering sewing techniques. This section will cover two fundamental aspects of fabric care: pre-washing before you sew and following care labels after your creations are complete. These steps are vital for maintaining the quality, fit, and appearance of your sewn projects.
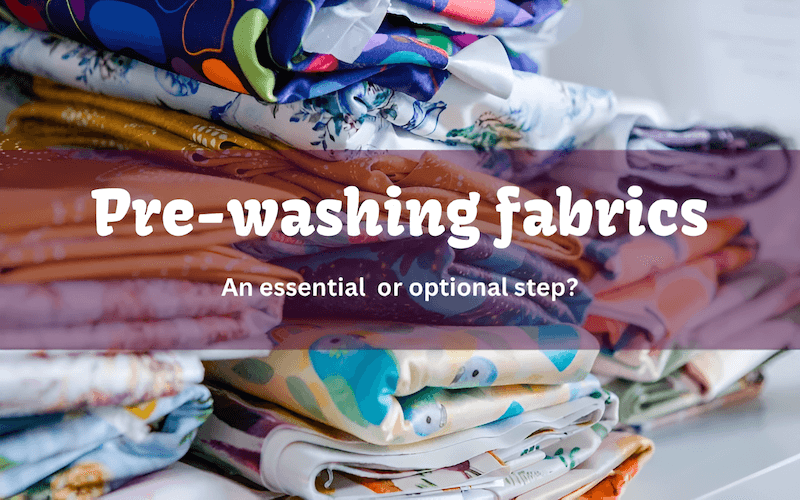
5.1. Pre-washing: why it’s a must-do before you sew
Pre-washing fabric before you cut and sew is not just an optional step; it’s a crucial practice that can prevent headaches and ensure the success of your sewing projects. Skipping pre-washing can lead to disappointment down the line due to shrinkage and color bleeding in your finished garments.
Preventing Shrinkage: Many fabrics, especially natural fibers like cotton, linen, and rayon, are prone to shrinkage when washed for the first time. Pre-washing mimics the washing process your finished garment will undergo, allowing the fabric to shrink before you cut and sew. If you skip pre-washing, your beautifully sewn garment might shrink after its first wash, altering the fit and potentially ruining the project.
Preventing Color Bleeding: Some fabrics, particularly brightly colored or deeply dyed ones, can bleed excess dye during washing. Pre-washing helps to release any loose dyes before you sew, preventing color bleeding onto other parts of your garment or other items in the wash later on.
Pre-washing Methods: The best pre-washing method depends on the fabric type:
- Machine Washing (for most cottons, linens, and durable synthetics): Wash the fabric in the same way you intend to wash the finished garment (e.g., warm or cold water, gentle cycle). Dry in the dryer on a medium or low setting, or hang to dry, depending on the fabric and your usual care routine.
- Hand Washing (for delicate fabrics like silk or some rayons): Hand wash in cool water with a gentle detergent designed for delicates. Roll in a towel to remove excess water and hang or lay flat to dry, avoiding direct sunlight or heat.
- Dry Cleaning (for fabrics that will be dry cleaned in the finished garment): If your chosen fabric and intended garment will require dry cleaning, pre-treating by dry cleaning the fabric before sewing is recommended to account for any potential changes in texture or drape from the dry cleaning process.
Pre-washing is a small investment of time that yields significant benefits in the long run, ensuring your sewn creations maintain their intended size, shape, and color after washing.
5.2. Following care labels: extending the life of your garments
Once you’ve poured your time and creativity into sewing a garment, you’ll want to ensure it lasts and looks its best for as long as possible. Care labels, often found on fabric bolts or garment patterns, provide essential instructions for washing, drying, and ironing your finished creations. Paying attention to and following these care labels is crucial for extending the life of your handmade items.
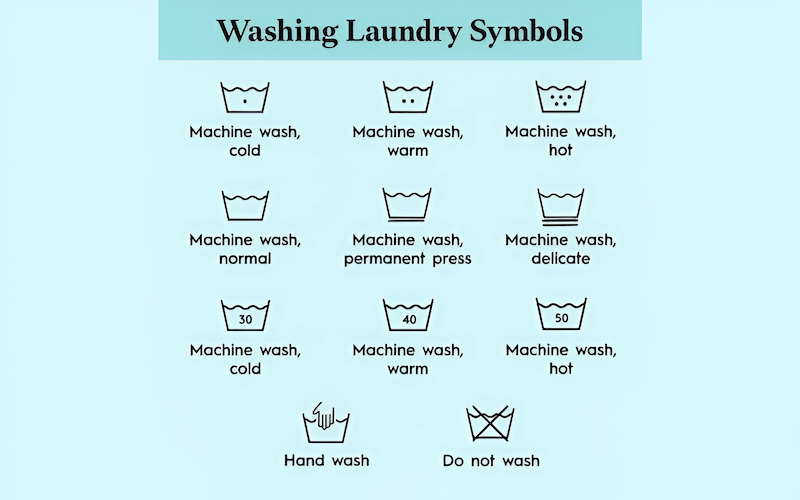
Understanding Care Label Symbols: Familiarize yourself with common care label symbols for washing, drying, ironing, and dry cleaning. These symbols provide concise instructions at a glance. Online resources and fabric care guides can help you decode any unfamiliar symbols.
General Care Advice by Fabric Type: While care labels are specific to each fabric, here’s some general guidance based on the fabric categories we’ve discussed:
- Cotton: Generally machine washable and dryable. Warm or cold water is usually recommended. Iron at medium to high heat.
- Linen: Machine washable, often benefits from line drying to minimize shrinkage and wrinkles. Iron at high heat with steam.
- Silk: Often requires hand washing or gentle machine washing in cool water. Air dry or lay flat to dry. Iron at low heat, dry iron or minimal steam. Dry cleaning may be recommended for some silks, especially delicate or structured garments.
- Wool: Often requires hand washing or dry cleaning to prevent felting and shrinkage. Lay flat to dry. Iron at medium heat with a press cloth and steam.
- Rayon: Often requires hand washing or gentle machine washing in cool water. Hang to dry or lay flat to dry to minimize shrinkage and wrinkling. Iron at low heat, dry iron.
- Polyester: Generally machine washable and dryable. Warm or cold water is usually recommended. Tumble dry on low heat. Iron at low heat.
- Corduroy: Machine washable. Tumble dry on low heat. Iron on the wrong side using a needle board or thick towel to protect the nap.
Refer back to the fabric-specific sections in this guide for more detailed care recommendations for each fabric type. Always prioritize the specific care label instructions provided for your fabric, as these are tailored to the particular fiber content and construction.
By diligently pre-washing your fabrics and consistently following care label instructions, you are investing in the longevity and beauty of your sewn creations, ensuring they remain cherished items for years to come.
6. Smart fabric shopping: finding the perfect material for your project
Finding the perfect fabric is an exciting part of the sewing process. Whether you’re browsing online or visiting a local fabric store, knowing how to shop smart will save you time, money, and potential frustration. This section will equip you with practical tips for understanding fabric quantities, deciphering online descriptions, and considering key factors before you commit to a fabric purchase, ensuring you find the ideal material for your sewing vision.
6.1. Understanding fabric width and quantity: buying the right amount
One of the most common questions for sewists, especially beginners, is “How much fabric do I need?” Understanding fabric width and how to calculate yardage is essential to avoid running short or overbuying.
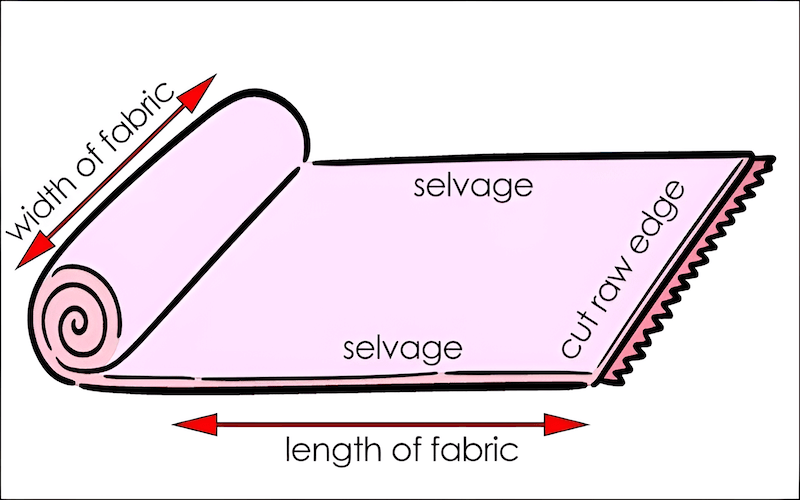
Fabric Width: Fabric width refers to the measurement from selvage to selvage (the finished edges of the fabric). Common fabric widths are 45 inches (approximately 114cm) and 60 inches (approximately 152cm). Wider fabrics generally mean you need less yardage for larger pattern pieces, but width availability varies by fabric type. Pattern instructions will usually specify fabric requirements based on a particular width.
Fabric Quantity (Yardage): Fabric quantity is typically measured in yards (or meters). Your pattern instructions will indicate the yardage needed for each fabric width option and for different garment sizes. Always check the pattern’s “fabric requirements” section carefully.
Calculating Fabric Quantity:
- Follow Pattern Instructions: The most reliable way to determine fabric quantity is to strictly adhere to the fabric requirements listed in your sewing pattern for your size and chosen fabric width.
- Consider Fabric Width: If your pattern provides requirements for a 45-inch wide fabric and you are using a 60-inch wide fabric, you may need slightly less yardage. However, it’s generally safer to buy the amount specified for the narrower width, especially if your pattern pieces are large or directional.
- Account for Pattern Matching: If your fabric has a large print, stripes, or a directional design that requires pattern matching, you will need to purchase extra fabric to ensure the design aligns across seams. Pattern instructions will often indicate extra yardage needed for pattern matching.
- “Better to have too much than too little”: It’s always wise to err on the side of caution and buy slightly more fabric than you think you need, especially if you are a beginner or working with a fabric you haven’t used before. Extra fabric allows for cutting errors, pattern adjustments, and future repairs or additions to your project.
Yardage Estimation Tips:
- Lay out pattern pieces: If you are unsure about yardage, lay out your pattern pieces on a flat surface, mimicking the fabric width you plan to purchase. This visual estimation can help you get a better sense of how much fabric you’ll need.
- Consult online fabric calculators: Many online fabric calculators are available that can help you estimate yardage based on garment type, size, and fabric width. These can be helpful tools, but always double-check against your pattern instructions.
- Ask for help at the fabric store: Fabric store staff are often experienced sewists and can provide valuable advice on yardage requirements based on your pattern and fabric choice.
6.2. Decoding online fabric descriptions: weight, GSM, and fiber content
Shopping for fabric online offers incredible variety and convenience, but it also requires learning to decipher fabric descriptions to understand what you’re actually buying. Online fabric descriptions often include key details like weight, GSM, and fiber content, which provide valuable clues about the fabric’s properties.
Fiber Content: The fiber content is usually listed as a percentage breakdown (e.g., 100% cotton, 50% linen 50% rayon). Understanding fiber content is crucial as it directly impacts the fabric’s feel, drape, care, and suitability for different projects, as discussed throughout this guide.
Fabric Weight: Online descriptions often use terms like “lightweight,” “medium-weight,” or “heavyweight” to indicate fabric weight. These are relative terms, but they give you a general idea of the fabric’s heaviness and drape. Lightweight fabrics are typically sheer and flowing, medium-weight fabrics are versatile for garments, and heavyweight fabrics are sturdy and structured.
GSM (Grams per Square Meter): GSM is a more precise measurement of fabric weight, indicating the grams per square meter. Higher GSM values indicate heavier fabrics. Comparing GSM values can be helpful when shopping online to get a more objective sense of fabric weight, especially when comparing similar fabric types. Online fabric retailers often provide GSM information in the product details.
Weave or Knit Type: The description should clearly state whether the fabric is woven or knit, and often specify the weave type (e.g., plain weave, twill weave, satin weave) or knit type (e.g., jersey knit, rib knit, interlock knit). This information is crucial for understanding the fabric’s structure and properties, as discussed in section 2.
Reading Reviews & Ordering Swatches Online:
- Read Reviews: Customer reviews can provide valuable insights into the fabric’s quality, color accuracy, drape, and sewing experience. Pay attention to reviews that mention the intended use of the fabric and whether it met expectations.
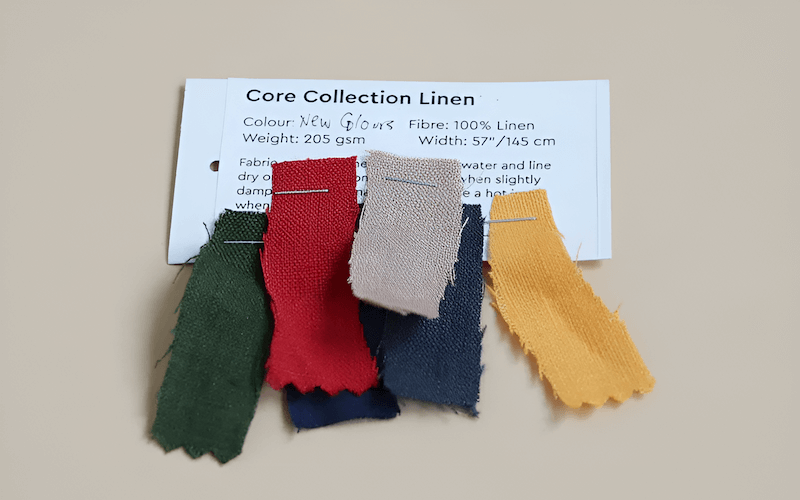
- Order Swatches: When shopping online, colors can appear differently on screens, and it’s impossible to assess the fabric’s texture and drape from a picture alone. Always order swatches (small fabric samples) before committing to a larger purchase, especially for important projects or when color matching is critical. Swatches allow you to see the fabric in person, feel its texture, assess its drape, and check color accuracy in different lighting conditions.
6.3. Considering fabric price and care before you buy
Beyond the technical details, smart fabric shopping also involves considering practical factors like price and care requirements in relation to your budget and lifestyle.
Fabric Price vs. Budget: Fabric prices vary widely depending on fiber content, quality, and retailer. Set a budget for your project before you start shopping and look for fabrics that fit within your price range. Remember that investing in good quality fabric can often result in a more beautiful and long-lasting finished garment, but there are also many affordable and excellent fabric options available.
Fabric Care vs. Lifestyle: Consider the care requirements of the fabric and how they align with your lifestyle. If you prefer easy-care garments, choose fabrics that are machine washable and wrinkle-resistant, like cotton blends or polyester. If you are willing to invest more time in garment care, you might opt for fabrics that require hand washing or dry cleaning, like silk or delicate rayons. Be realistic about your willingness to maintain the fabric’s care requirements.
Fabric Suitability for Climate: Consider the climate where you live and the intended season for your garment. Breathable natural fibers like cotton and linen are ideal for warm climates, while warmer fabrics like wool and fleece are better suited for colder weather. Choose fabrics that will be comfortable and appropriate for the intended wearing conditions.
Sustainable Fabric Options: If sustainability is a priority for you, explore eco-friendly fabric options like organic cotton, recycled polyester, linen, hemp, and Tencel (lyocell). These fabrics are produced with more environmentally conscious practices. Look for certifications like GOTS (Global Organic Textile Standard) or Oeko-Tex to ensure fabric sustainability claims are verified.
Smart fabric shopping is a balance of understanding fabric properties, considering practical factors, and aligning your choices with your project goals and personal preferences. By taking a thoughtful approach to fabric selection, you set yourself up for sewing success and create garments you’ll love to wear and cherish.
7. FAQs about sewing with different fabric types
7.1. What’s the best needle type for sewing cotton?
A universal needle is generally the best choice for sewing most cotton fabrics, working well for a wide range of cotton weaves and weights.
7.2. How do I prevent knit fabric from stretching out of shape while sewing?
To prevent knit fabric from stretching, use a ballpoint needle, employ a walking foot on your sewing machine, and handle the fabric gently without pulling or stretching it as you sew.
7.3. What stitch length should I use for lightweight fabrics like chiffon?
For lightweight fabrics like chiffon, a shorter stitch length, around 1.5-2mm, is recommended to create delicate and secure seams.
7.4. How can I stop silk fabric from slipping when I sew?
To prevent silk fabric from slipping, use extra-fine pins, try placing tissue paper underneath the fabric layers while sewing, and consider using a walking foot for better fabric feed control.
7.5. Do I need to pre-wash all fabrics before sewing?
Yes, pre-washing all fabrics before sewing is highly recommended to prevent shrinkage and color bleeding in your finished garments, ensuring a better fit and preventing color mishaps.
Creating beautiful sewn items with a deep understanding of different fabrics is a rewarding achievement. To truly complete your handmade creations and ensure they are properly cared for, consider the importance of garment labels and tags. This is where Packlove can assist you. With over 8 years of experience in the garment industry, Packlove specializes in providing high-quality clothing labels and tags. Just as understanding fabric care is essential for the longevity of your sewn items, clear and durable care labels are vital for communicating washing instructions to yourself or your customers.
For handmade garments or small clothing businesses, custom labels and tags not only provide essential care information but also elevate your brand presentation and add a professional finishing touch. Explore the range of label and tag options offered by Packlove to enhance your sewn creations and provide that crucial final detail.
Visit our website at https://mypacklove.com/ or contact us [email protected] to explore our options and contact us for a free consultation.
Read more:
- Can You Iron Nylon? Safe Ironing Tips and Tricks | MyPackLove
- Printed Fabric Types: A Guide to Patterns, Uses and More
- Knit Fabric: Types, Uses, and Care Guide
Mastering the art of sewing with different fabric types is a journey that unlocks endless creative possibilities. From understanding the fundamental language of textiles to navigating the nuances of natural and synthetic fibers, and from mastering essential sewing techniques to ensuring proper garment care, this guide has equipped you with the knowledge to confidently approach any fabric you choose. Embrace the textures, drapes, and unique characteristics of each material, and remember that every sewing project is an opportunity to learn and refine your skills. With patience, practice, and a willingness to experiment, you can confidently sew beautiful and lasting creations from a vast and exciting world of fabrics. So, dive into your fabric stash, choose your next project, and enjoy the rewarding process of bringing your sewing visions to life!


