


Sewing Facing: Guide to Professional Garment Finishes


This guide explores the technique of sewing facings, a fundamental skill for achieving clean, professional edges on garments. Readers will gain an understanding of what facings are, why they are crucial for quality clothing, the different types available, detailed instructions on how to sew a common shaped facing, expert troubleshooting tips, and answers to frequently asked questions.
Mastering facings elevates the construction and perceived value of apparel, and this guide will walk you through every essential step.
1. Understanding the basics: defining facing in garment construction
In sewing and garment construction, a facing is essentially a piece of fabric applied to finish a raw fabric edge, usually turned to the inside of the garment. This technique serves as a method of edge finishing. A facing differs from hemming (where the garment’s edge fabric is simply folded over on itself), binding (where a separate strip of fabric encases the raw edge), and a full lining (which covers a much larger internal area of the garment).
The primary function of a facing is to conceal raw edges neatly, providing a clean, professional finish internally that also helps support the shape of the apparel or clothing externally. This tailoring technique is commonly used on necklines, armholes, openings, and sometimes hems.
2. Why facings are essential for quality clothing
Utilizing facings significantly contributes to garment quality. They provide a clean, hidden finish for fabric edges, meaning no raw edges or visible construction stitching (like topstitching used for a simple hem) show on the outside, particularly important for focal areas like necklines and armholes.
Beyond aesthetics, facings add essential support and structure. This reinforcement prevents the garment edge from stretching, sagging, or distorting over time, especially on curved areas or edges cut on the fabric’s bias grain. This structural integrity enhances the garment’s durability.
Often, interfacing (a separate layer of material fused or sewn to the facing piece before attachment) is applied to the facing fabric. Interfacing gives the facing additional body, preventing the edge from collapsing and contributing further to a crisp finish. These technical advantages translate directly into a more professional appearance, elevating the perceived value of the clothing and enhancing customer satisfaction.
3. Exploring the main types of facings and their applications
Several types of facings exist within garment construction, each suited to different needs and applications. The most common varieties are shaped facings, extended facings, and bias facings. Understanding when to use each type allows for better construction choices.
3.1 Shaped facings: the versatile standard
A shaped facing is a distinct piece of fabric, cut using a pattern piece specifically designed to mirror the exact shape of the garment edge being finished. Common examples include a neckline facing or an armhole facing. These are frequently cut from self-fabric (the same material as the main garment) to ensure invisibility and consistent drape.
However, for very bulky main fabrics, a compatible, lighter-weight fabric might be substituted to reduce thickness at the edge. Occasionally, a contrast fabric is used for a shaped facing if a decorative element is intended, although this is less typical for standard internal facings.
3.2 Extended facings: seamless integration
An extended facing is not cut as a separate piece. Instead, the pattern for the main garment piece incorporates an extension designed to be folded back along a designated fold line to finish the edge. This method is most often employed on straight edges, such as the center front opening of a shirt or jacket, or a center back opening.
The primary benefit is the elimination of a seam directly at the garment’s edge. Applying interfacing correctly, typically up to the fold line on the wrong side of the extension, remains crucial for stability.

3.3 Bias facings: flexible finish for curves and delicate fabrics
A bias facing consists of a narrow strip of lightweight fabric cut on the true fabric bias (a 45-degree angle to the fabric’s lengthwise and crosswise threads). The key advantage of cutting on the bias is the inherent flexibility gained, allowing the strip to be smoothly shaped around pronounced curved edges (like tight curves on armholes or scalloped edges) where a shaped facing might prove cumbersome or add unwanted bulk. Bias facings are particularly suitable for finishing edges on sheer fabrics or as a less bulky alternative when working with very heavy garment fabrics.
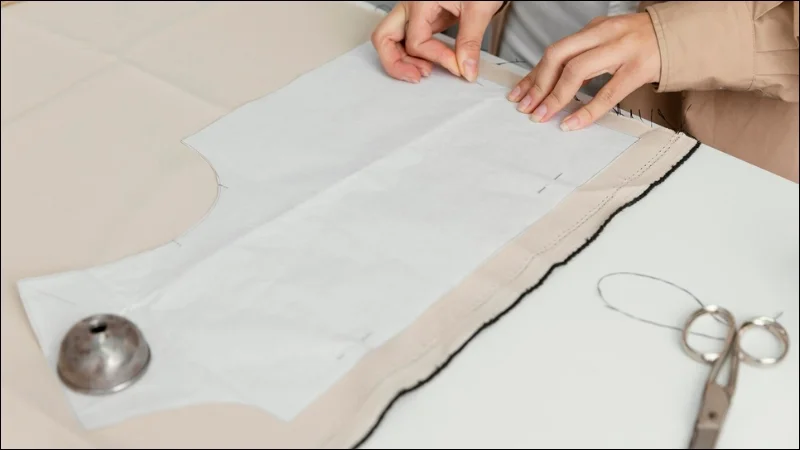
4. How to sew a facing: step-by-step for a shaped neckline
This section provides a practical guide on how to sew facing pieces, using a shaped neckline facing as a common example. The fundamental steps – preparing with interfacing, attaching the facing, managing seam allowances, and applying understitching – are principles applicable to most facing applications, although minor variations might exist depending on the specific garment and facing type. Each stitch plays a role in the final quality.
4.1 Preparation is key
Thorough preparation ensures a smoother sewing process and a better result:
- Interfacing application: Apply the chosen interfacing (fusible or sew-in, matching the weight and type to your garment fabric) to the wrong side of the facing pattern pieces. Follow the manufacturer’s instructions carefully for application (e.g., heat, steam, pressure for fusible types).
- Staystitching: Staystitch the garment’s raw edge curve (the neckline, in this example) just inside the designated seam allowance line (e.g., stitch at 1/2 inch if the seam allowance is 5/8 inch). Staystitching is a line of regular machine stitching that prevents the curved edge from stretching out of shape during handling and sewing.
- Join facing sections: Sew the individual facing pieces together at their connecting seams (e.g., stitch the front and back neckline facing pieces together at the shoulder seams). Press these seams open to reduce bulk.
- Edge finishing: Finish the outer, unnotched edge of the assembled facing unit (the edge that will ultimately be loose inside the garment). Common edge finishing methods include using a serger (overlocker), a zigzag stitch on a standard sewing machine, or turning the raw edge under by about 1/4 inch and stitching near the fold. The best method depends on the fabric’s tendency to ravel and the desired level of bulk.
4.2 Attaching the facing
With preparations complete, attach the facing to the garment:
- Pinning: Place the facing unit onto the garment section with right sides together. Carefully align the raw edges (e.g., the neckline edges). Match any pattern notches and corresponding seams (like shoulder seams). Secure the layers together using pins placed perpendicular to the edge.
- Stitch: Stitch the facing to the garment along the designated seamline (e.g., the neckline seam). Use the pattern’s specified seam allowance. Sewing with the facing side up is often recommended, as the interfacing provides stability and makes following the seamline easier.
4.3 Finishing for a flat, smooth seam
Properly finishing the seam allowance after stitching is critical for reducing bulk and allowing the facing to turn smoothly:
- Grade seam: Grade the seam allowances by trimming them to different widths. Trim the facing’s seam allowance slightly narrower (e.g., to 1/4 inch) and the garment’s seam allowance slightly wider (e.g., to 3/8 inch). This layering or staggering reduces the ridge created by the seam allowances, contributing to bulk reduction.
- Clip curve: For inward curves like most necklines, clip into the seam allowance. Cut small triangular notches out of the seam allowance or make straight clips perpendicular to the edge, cutting up to, but not through, the stitching line. Space these clips roughly every 1/2 inch or closer on tighter curves. Clipping allows the seam allowance fabric to spread open when the facing is turned right side out, preventing puckering and enabling the curve to lie flat. (For outward curves, cutting V-shaped notches out of the seam allowance serves a similar purpose, allowing the fabric to compress smoothly).
4.4 The crucial step: understitching
Understitching is a vital technique often considered a hallmark of quality tailoring. Understitching involves sewing a line of stitching close to the original seam line, going through the facing and all layers of the seam allowance. Critically, the main garment fabric is kept free and is not caught in this line of stitching.
To understitch: First, press the entire seam allowance towards the facing piece. Then, working from the right side of the facing, stitch approximately 1/8 inch away from the original seam line, ensuring the needle catches both the facing and the seam allowances underneath.
The purpose of understitching is to encourage the seam line to roll naturally towards the inside of the garment. This action effectively prevents the edge of the facing from peeking out on the garment’s exterior, ensuring a clean, professional look.
4.5 Turning and pressing
Carefully turn the facing completely to the inside of the garment. Use your fingers to gently roll the seamline slightly towards the faced side, ensuring the main garment fabric is smooth at the edge. Careful pressing is essential for setting the shape and achieving a crisp, flat finish.
Begin by pressing the edge from the facing side. Follow with a final press from the garment’s right side; using a pressing cloth may be advisable depending on the fabric type to prevent shine or damage.
5. Expert tips for flawless facings every time
Achieving consistently excellent results with facings involves attention to detail and understanding a few key practices:
Interfacing choice: Always match the interfacing weight and type to the garment fabric. For example, use lightweight fusible interfacing for lightweight wovens, a knit interfacing for knit fabrics (to maintain stretch), and sew-in interfacing for fabrics sensitive to heat or requiring a softer structure. The correct interfacing choice is fundamental.
Edge finishing: Select the finish for the facing’s outer edge based on the fabric and desired outcome. Serging provides a clean, durable finish for fabrics prone to fraying. A zigzag stitch offers a simpler alternative. Turning and stitching the edge provides a very neat finish but adds slight bulk. Pinking shears (creating a zigzag edge) offer minimal fray prevention suitable only for stable fabrics inside a lined garment.
Pressing technique: Effective pressing throughout the construction process—pressing seams open after joining facing sections, pressing seam allowances towards the facing before understitching, and final pressing—is crucial for professional results, not just a final touch.
Securing the facing: Avoid the temptation to stitch the facing’s finished outer edge down to the garment all around its perimeter. Doing so often leads to visible stitching on the outside or puckering. Instead, tack the facing loosely only at intersecting seam lines (like shoulder seams and side seams). This can be done with a few secure hand stitches or by using a machine technique called “stitch-in-the-ditch” (stitching precisely in the existing seam line from the right side, catching the facing edge underneath) for invisibility. This secures the facing while allowing the garment layers to move slightly independently.
Troubleshooting: Address common facing issues by understanding their likely causes:
- Facing rolling to the outside: Often indicates skipped or improperly executed understitching.
- Bulkiness at the edge: May result from inadequate grading or clipping of seam allowances, or using interfacing that is too heavy.
- Puckering along the seam: Can be caused by incorrect sewing machine tension, stretching the fabric while sewing, inaccurate cutting of pattern pieces, or insufficient pressing. Proper sewing technique and careful handling are key.
6. Related questions about garment facings
6.1 What’s the difference between a facing and a lining?
The primary difference lies in the area covered. A facing is used to finish only the immediate edge of a garment opening – like a neckline, armhole, front opening, or sometimes a hem. Its purpose is primarily structural finish and support for that specific edge.
A lining, conversely, is a separate layer of fabric constructed to cover a much larger internal area, often mirroring the shape of a main garment section (like a bodice lining) or even the entire inside of a garment (like a jacket or skirt lining).
Linings primarily add comfort, opacity, conceal internal construction details (like seams and interfacing), and help the garment slide easily over other clothing. So, the answer to facing vs lining depends on the scope of the finish.
6.2 Do I always need interfacing for facings?
Generally, yes, interfacing is almost always needed for facings. The interfacing provides crucial stability to the garment edge, prevents the facing and the edge from stretching or collapsing, adds support for closures like buttons or snaps if applicable, and helps achieve a crisp, professional finish. Even with relatively stable fabrics, interfacing contributes significantly to the quality and longevity of the faced edge.
While very specific couture techniques on delicate or sheer fabrics might employ alternative stabilization methods, for standard garment construction across most fabric types, applying appropriate interfacing to the facing pieces is standard and highly recommended practice.
6.3 Can I use a different fabric for my facing?
Yes, using different facing materials is possible and sometimes advantageous. There are two main reasons for doing so:
- To reduce bulk: If the main garment fabric is particularly heavy or bulky (like wool coating or thick denim), using a compatible but significantly lightweight fabric (such as cotton batiste, lining fabric, or silk organza) for the facing can greatly reduce thickness and create a neater, flatter edge finish. Ensure the substitute fabric has similar care requirements (washing temperature, ironing needs) to the main garment fabric.
- As a design feature: A contrast fabric (different color, print, or texture) can be used for the facing as an intentional design element. This is more common in applications where the facing might intentionally peek out slightly or be designed to be turned to the outside decoratively, rather than for standard hidden facings.
Read more:
Mastering the techniques for creating and attaching facings is a fundamental sewing skill indispensable for achieving professional finishes on clothing. Well-executed facings contribute significantly to the overall garment quality, providing not only a clean internal appearance at edge finishing points but also essential structure and durability.
By carefully following the steps for preparation, stitching, grading, clipping, understitching, and pressing, anyone can elevate the construction standard of their garments. Practicing these techniques, paying close attention to details like interfacing choice and seam finishing, will lead to consistently superior results.
For specific challenges with unique fabrics or integrating finishes with elements like brand labels or hang tags, consulting specialists in garment production can provide valuable solutions.


