Sewing Machine Troubleshooting: Fix Common Faults and Sew Smoothly
As a small clothing business owner, garment maker, or dedicated sewing enthusiast, are you tired of wrestling with frustrating sewing machine issues? Problems like thread nests, skipped stitches, and snapped needles can bring your production to a screeching halt, costing you precious time, wasting valuable materials, and jeopardizing the quality of your work.
Sewing machine downtime directly translates to lost time and money, particularly when deadlines loom large. This guide, drawing upon years of experience in the garment industry, is designed to empower you to diagnose and resolve common sewing machine faults quickly and effectively, keeping your machines humming and your projects on track.
We’ll walk you through practical solutions, expert tips, and preventative measures, transforming you into a troubleshooting pro and ensuring efficient, enjoyable crafting sessions.
1. Common sewing machine faults: a troubleshooting guide
1.1 Why sewing machine troubleshooting skills are essential
Troubleshooting skills are invaluable because they empower you to fix minor issues yourself, saving time and money on professional repairs. Quick diagnosis minimizes downtime and keeps production schedules on track, a critical factor for small businesses with tight deadlines.
By identifying and resolving problems early, you prevent them from escalating into more significant and costly repairs down the line. Moreover, regular maintenance, informed by troubleshooting knowledge, significantly contributes to the longevity and efficiency of your sewing machines.
1.2 Understanding the basics: key sewing machine components & how they function
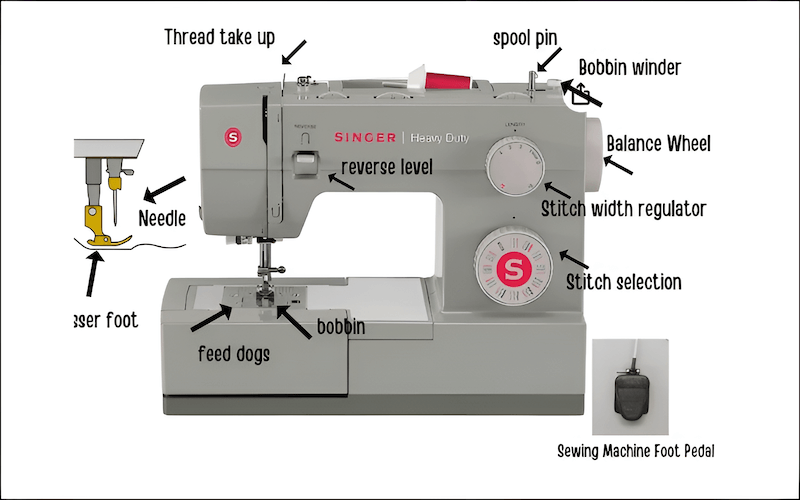
A basic understanding of your sewing machine’s key components is fundamental to effective troubleshooting. The needle pierces the fabric to create stitches, while the bobbin holds the bottom thread that interlocks with the top thread.
Thread tension, controlled by tension discs and bobbin tension, ensures balanced stitch formation. Feed dogs move the fabric evenly, and the presser foot applies pressure for consistent feeding. The take-up lever manages thread flow and tension, and the bobbin case houses and control
2. Diagnosing and fixing top sewing machine faults
2.1 Thread bunching up under the fabric (bird’s nesting)
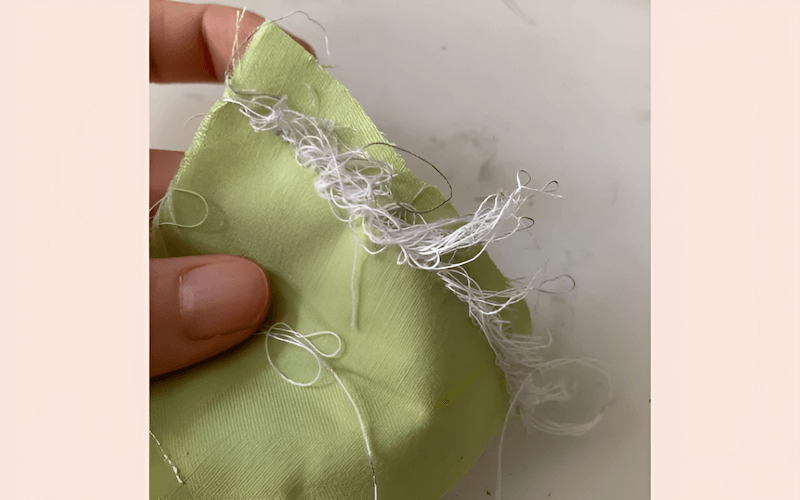
A “bird’s nest” is a colloquial term used to describe a dense accumulation of knotted and tangled thread found on the underside of the fabric during sewing. It typically occurs when the upper thread fails to properly interlock with the bobbin thread, leading to a build-up of excess thread below the fabric surface instead of forming a balanced stitch.
2.1.1 Causes of thread bunching
Thread bunching underneath your fabric, a common sewing frustration, often stems from seemingly small oversights in machine setup and maintenance. The most frequent culprit is an incorrect threading of the top thread path, particularly if the needle thread isn’t properly positioned within the take-up lever, disrupting the essential tension.
Similarly, a bobbin incorrectly inserted or wound unevenly can create inconsistent thread delivery. Even with correct threading, insufficient pressure from the presser foot can prevent proper fabric feed, contributing to looping. Furthermore, dirt or lint accumulation in the tension discs disrupts the thread’s smooth passage, leading to erratic tension and ultimately a tangled mess.
2.1.2 Remedies for thread bunching
When thread bunches occur, carefully remove the fabric and cut the tangled threads to prevent machine damage. Often, simply re-threading the top thread meticulously, following your sewing machine’s manual precisely and ensuring the presser foot is raised, resolves the issue and also, check the bobbin’s insertion and orientation.
If the problem persists, ensure matching thread types are used, adjust the top thread tension slightly, and clean the tension discs to remove any obstructions.
2.2 Bent or broken needles
Bent or broken needles pose safety hazards and cause frustration.
2.2.1 Causes of bent or broken needles
Bent or broken needles often result from pushing your sewing machine beyond its limits or neglecting basic needle maintenance. Using a dull or worn-out needle from extended use weakens the metal, making it more susceptible to bending or snapping under stress.
Similarly, selecting the incorrect needle type for the fabric, such as using a universal needle on delicate knit fabric, can cause excessive friction and strain. Finally, attempting to sew through excessively thick or dense materials that exceed your machine’s capacity can overload the needle, leading to breakage.
2.2.2 Remedies for bent or broken needles
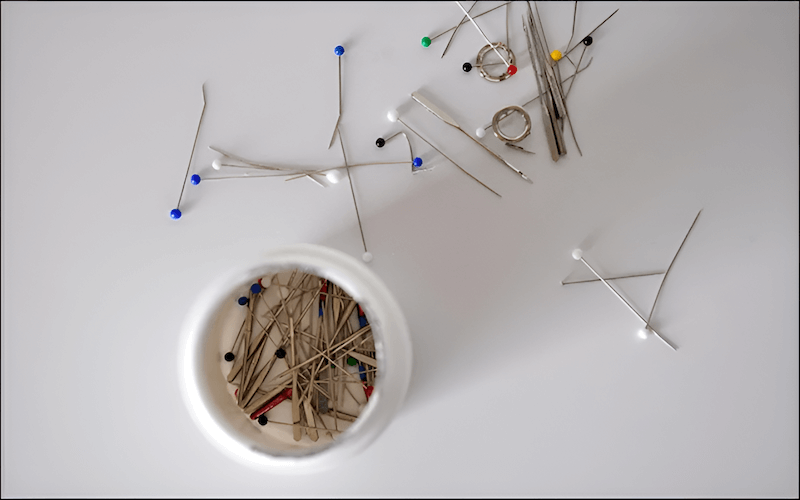
When dealing with bent or broken needles, prioritize safety and prevention: replace needles frequently, ideally at the start of each project, and immediately stop sewing if a needle breaks or bends. Safely remove and dispose of broken needles in a sharps container, and install a new needle of the correct type, following your sewing machine’s manual. Also, regularly inspect needles for any signs of damage.
Remember, a fresh needle, even if the old one doesn’t appear damaged, significantly improves stitch quality and prevents future issues.
2.3 Fabric not feeding
The frustrating issue of “fabric not feeding” occurs when the material remains stationary despite the sewing machine operating normally. This problem, typically linked to issues within the sewing machine feed mechanism such as feed dog problems, or insufficient presser foot pressure, prevents the fabric from advancing and creating a consistent seam.
2.3.1 Causes of fabric not feeding
Several factors can prevent your sewing machine from feeding fabric correctly. Often, it’s a simple oversight, such as the accidental activation of the drop-feed setting, which lowers the feed dogs, or the attachment of an embroidery or darning plate that covers them entirely.
Alternatively, failing to lower the presser foot prevents the fabric from engaging with the feed dogs, while insufficient presser foot pressure may not provide adequate grip, and setting the stitch length to zero will halt fabric advancement completely.
2.3.2 Remedies for fabric not feeding
To restore proper fabric feeding, begin by ensuring the feed dogs are raised by deactivating the drop-feed setting and removing any covering plates; always lower the presser foot before sewing and, if necessary, increase the presser foot pressure, and also increase the stitch length setting from zero.
Make sure the feed dogs are clear of obstructions. If needed, gently guide the fabric slightly under the needle before lowering the presser foot to start the seam.
2.4 Thread keeps breaking
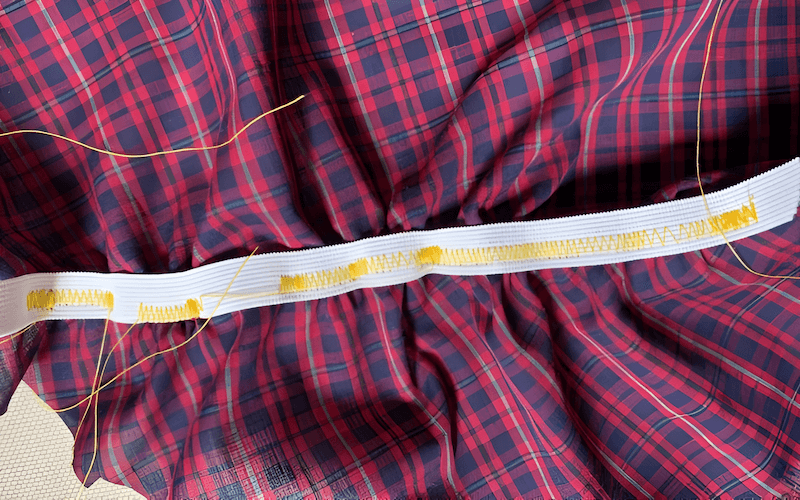
Frequent thread breakage, or thread snapping, during sewing is a frustrating problem that can halt any project, often stemming from issues like thread tension too high or using weak thread. To resolve this, it’s essential to examine potential causes such as improper re-threading of the top thread, and the thread quality itself.
2.4.1 Causes of thread breakage
Frequent thread breakage often results from using materials mismatched to the sewing task, such as delicate or lightweight threads that lack sufficient strength for the fabric being used. Furthermore, employing poor quality thread with inherent weaknesses exacerbates the problem, while excessive top thread tension pushes the thread beyond its breaking point.
2.4.2 Remedies for thread breakage
To combat thread breakage, first select a stronger, high-quality thread suited for the fabric and project, then re-thread the top thread completely, making sure the presser foot is up and the path is clear of snags, and gradually decrease the top thread tension to reduce stress.
Starting to sew smoothly and avoiding jerky motions, along with using a new, suitable needle can prevent undue strain. Remember that investing in good quality thread significantly reduces breakage and elevates stitch quality.
2.5 Machine is skipping stitches
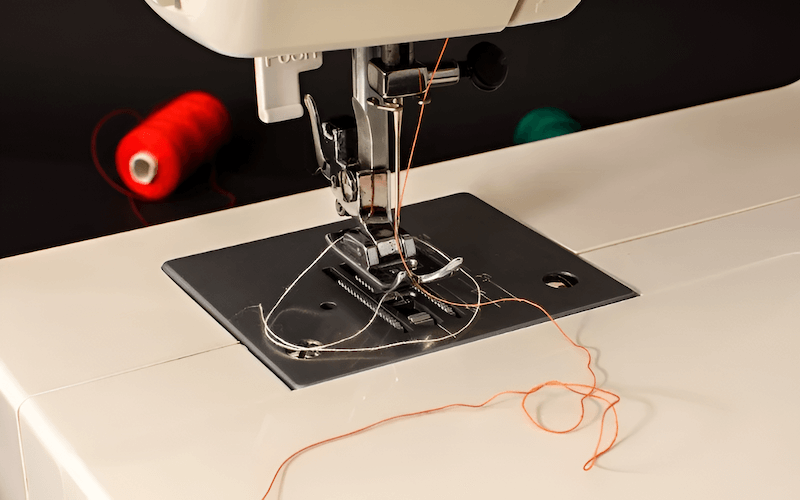
Skipped stitches, or inconsistent stitches, are a frustrating sewing problem where stitches are missed along the seam, leaving gaps and weakening the construction. This issue, a form of stitch quality issues, often points to underlying needle problems or a disruption in the hook timing, impacting the reliable formation of each stitch. Using the correct needle size is also key to avoiding this.
2.5.1 Causes of skipped stitches
Skipped stitches frequently arise from using a compromised needle – a bent, damaged, or dull needle hinders proper stitch formation. Another common cause is the top thread failing to properly engage with the bobbin thread, preventing the interlocking action necessary to create a complete stitch, a problem that can be worsened by using an incorrect needle size or style for the chosen thread and fabric. In more complex cases, timing issues with the hook, looper, or needle may disrupt synchronization.
2.5.2 Remedies for skipped stitches
To address skipped stitches, first inspect the needle and replace it if bent or damaged, and then re-thread both top and bobbin threads completely, ensuring the presser foot is raised during the process. Then, change to a needle size and style suitable for your thread and fabric.
If these steps don’t solve the issue, check machine clearances and timing, consulting a professional if needed.
2.6 Bobbin tension not consistent
Bobbin tension that’s not consistent leads to uneven or erratic stitch quality, manifesting as loose loops on one side of the fabric or puckering along the seam. This issue, stemming from bobbin problems or bobbin case issues, can be influenced by the type of bobbin used (metal bobbin vs plastic bobbin) and requires careful adjustment to ensure balanced stitches.
2.6.1 Causes of inconsistent bobbin tension
Inconsistent bobbin tension can frequently be traced back to the bobbin itself, as using worn or damaged plastic bobbins can lead to deformation, affecting thread delivery and tension consistency. Furthermore, accumulation of lint or debris within the bobbin case interferes with smooth thread flow, while incorrect bobbin winding results in uneven thread distribution, further disrupting tension.
2.6.2 Remedies for inconsistent bobbin tension
To address inconsistent bobbin tension, start by carefully inspecting the bobbin for cracks, chips, or warping, and consider replacing worn plastic bobbins, as metal bobbins are generally more reliable than plastic ones and provide more consistent tension. To confirm this, try testing with a new metal bobbin to see if it resolves the tension issue, eliminating a potentially faulty bobbin as the source of the problem.
2.7 Seams in stretch fabrics coming out wavy
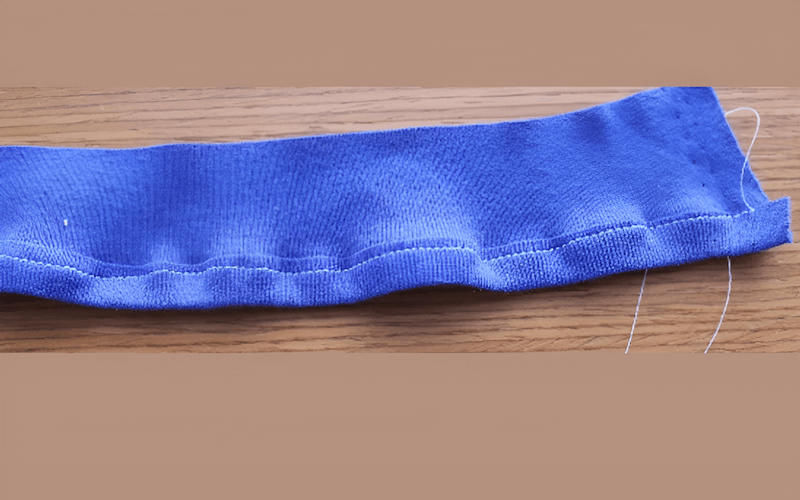
Wavy seams, characterized by rippled or puckered lines, are a common challenge when working with stretch fabrics due to their inherent elasticity and tendency to distort during sewing. These wavy seams, a type of stretch fabric problems, often stem from uneven fabric feed issues that can be mitigated with adjustments to machine settings and techniques.
To achieve smooth seams on stretch fabrics and combat waviness, ensure the entire project is supported to prevent pulling and allow the feed dogs to control the fabric feed without any stretching. To achieve even fabric feed securely pin all fabric pieces and reduce the presser foot pressure, but for even better results switch to a walking foot to feed both fabric layers.
2.8 Sewing machine seizes up or won’t sew
A completely seized sewing machine, or a machine that won’t sew at all, is a distressing situation indicating a mechanical blockage or malfunction that prevents normal operation. This “jammed sewing machine” state often results from significant lint buildup or entanglement around the bobbin winder shaft and requires careful troubleshooting, starting with thorough machine cleaning, to restore its functionality.
2.8.1 Causes of sewing machine seizing
Causes of sewing machine seizing often stem from either overexerting the machine or neglecting routine cleaning. Attempting to sew excessively thick or tough fabrics beyond machine capability can strain its internal mechanisms, while the accumulation of lint, thread, and debris creates physical blockages that impede movement.
2.8.2 Remedies for sewing machine seizing
When a sewing machine seizes up, immediately stop forcing the handwheel if it’s difficult to turn to avoid further damage. Start by verifying that the needle is correctly installed, of the right type, and not bent, then consult your machine’s manual for cleaning instructions and thoroughly clean the bobbin area, feed dogs, and internal mechanisms to remove lint, as well as check if the bobbin winder shaft is engaged and disengage it if necessary.
2.9 Needle comes unthreaded before sewing
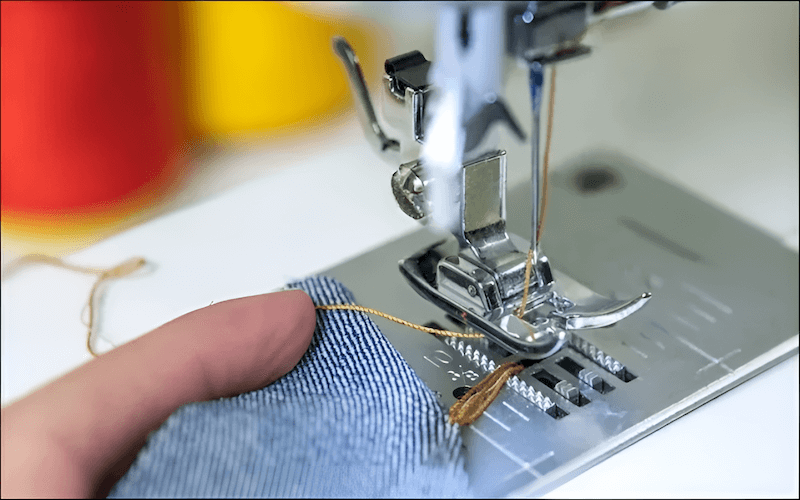
The frustrating occurrence of the needle unthreading, or thread slipping out of the needle eye, before sewing even begins indicates underlying threading issues that need attention. This often happens if the needle is not at its highest point when you stop sewing or if the thread path isn’t properly secured, leading to slack that allows the thread to escape. Using the handwheel or the up/down function correctly can prevent this.
To prevent the needle from unthreading, ensure the needle is at its highest position before threading by using the handwheel to raise the needle (turning it towards yourself) or by using the machine’s “up/down” needle function if available. By always threading the needle when it’s at its highest point you’ll guarantee that the thread is properly seated and secured.
2.10 Fabric or threads are bunching at start/end of seams
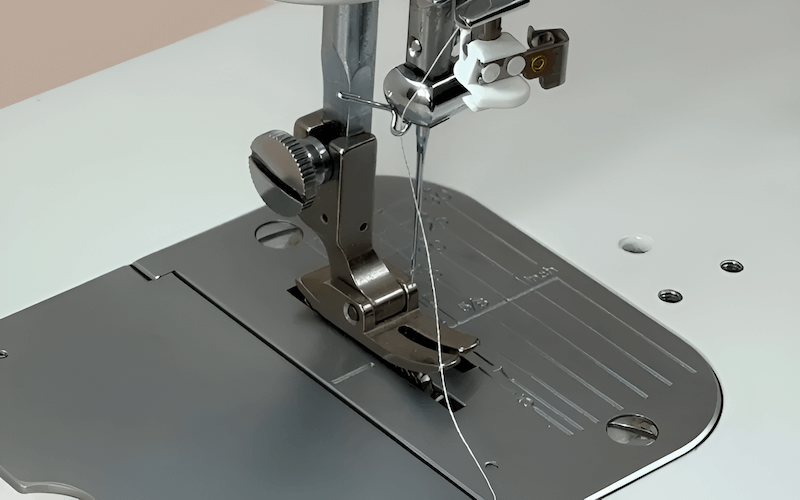
Thread bunching at seams and fabric tangling, particularly at the start and end of stitching, are common issues that can mar the appearance and integrity of your finished work. These problems often occur due to improper tension, inadequate seam finishing techniques such as backstitching problems, or neglecting secure back tacking to lock the stitches in place.
2.10.1 Causes of bunching at seam ends: Backstitching directly over the fabric edge is bad technique.
2.10.2 Remedies for bunching at seam ends
To prevent bunching at the beginning and end of seams, start seams a few millimeters into the fabric before backstitching to secure the beginning within the layers, and when ending seams, backstitch slightly before reaching the fabric edge, then sew off the edge for a clean finish. Practicing proper backstitching technique is key to achieving clean and professional seam starts and ends.
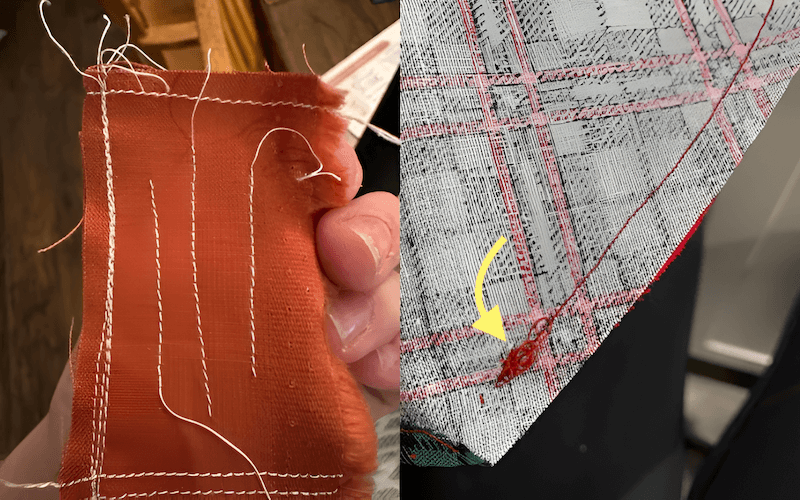
2.11 Thread inconsistently knots, loosens, or tangles
Erratic thread behavior, characterized by sudden thread knots, inexplicable thread tangles, and inconsistent stitches, often signals underlying issues with the sewing machine’s tension system or thread path. This inconsistent thread tension, frequently caused by lint buildup or bobbin case cleaning neglect, necessitates careful troubleshooting and diligent sewing machine maintenance to restore smooth and reliable stitch formation.
2.11.1 Causes of inconsistent thread behavior
Accumulation of fluff and lint within the sewing machine, particularly in the bobbin case area, can damage threads.
2.11.2 Remedies for inconsistent thread behavior
To combat inconsistent thread behavior, regularly clean the sewing machine according to the manual’s instructions, using brushes or vacuum attachments to remove lint from the bobbin area, feed dogs, and other accessible parts. Consistent cleaning will help you remove lint which is the enemy of smooth sewing.
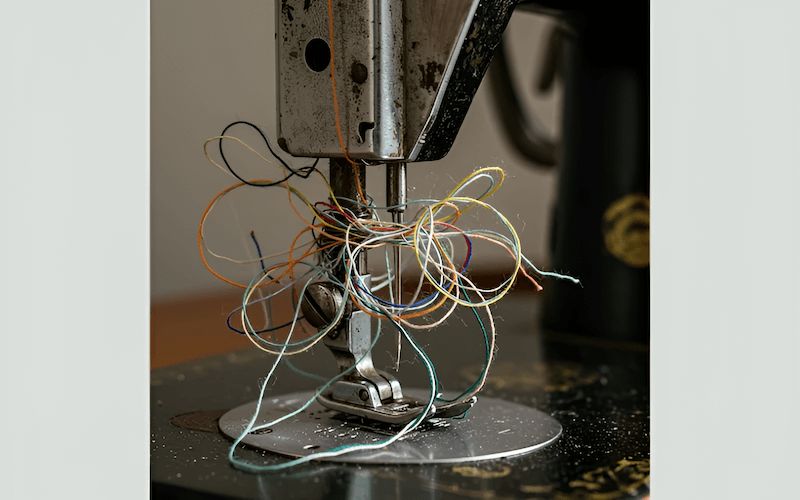
2.12 Thread fraying, shredding, and breaking
Thread fraying, thread shredding, and thread breaking during sewing are frustrating indicators of stress or damage to the thread itself, hindering smooth stitching and weakening seam integrity. These problems often arise from an incompatible needle and thread, an undersized needle eye size that causes friction, or simply poor needle quality.
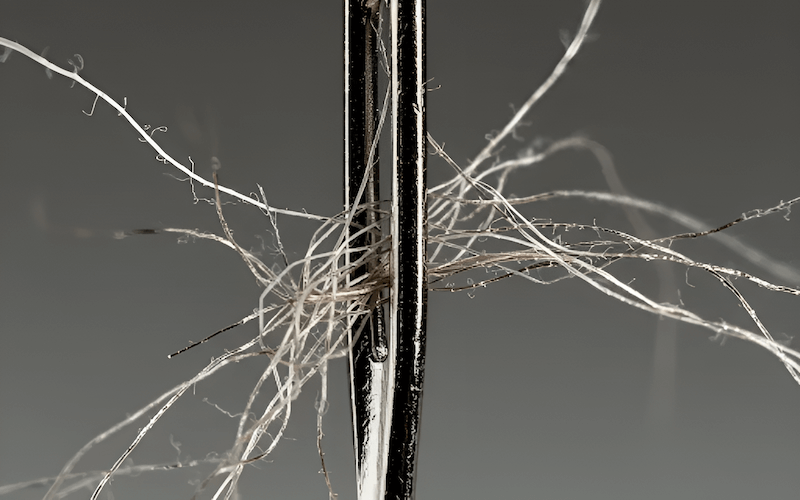
2.12.1 Causes of thread fraying: Thread fraying can be caused by using a needle with a needle eye that is too small for the thread.
2.12.2 Remedies for thread fraying
To prevent thread fraying, shredding, and breaking, ensure the needle eye is appropriately sized to allow the thread to pass freely and verify compatibility of needle and thread types with the fabric being sewn. It’s also beneficial to use a higher quality needle with a smooth eye. The ultimate goal is to ensure the needle eye is large enough for the thread to pass through smoothly.
2.13 Fabric feed is inconsistent
Uneven pressure from the presser foot will cause issues for the fabric feed.
2.13.1 Causes of inconsistent fabric feed
Inconsistent fabric feed often stems from uneven presser foot pressure, worn-down feed dogs that lack grip, or lint and debris accumulation around the feed dogs, all of which hinder the fabric’s smooth and consistent movement through the machine. These factors prevent the feed dogs from properly engaging with the fabric, resulting in uneven stitching.
2.13.2 Remedies for inconsistent fabric feed
To remedy inconsistent fabric feed, especially in older machines, consider replacing worn feed dogs; for newer models, thoroughly clean around the feed dogs to remove lint, and increase presser foot pressure to ensure consistent fabric contact.
2.14 Machine is making strange noises
Unusual sounds coming from your sewing machine, like loud thumping or clunking, indicate that something isn’t running smoothly and warrants investigation. These strange sewing machine noises suggest internal friction or obstruction that could lead to more significant issues if not addressed..
If your sewing machine emits unexpected thumping or clunking noises, stop sewing immediately, thoroughly clean and oil the machine following the manual’s instructions, and then test it on scrap fabric to see if the noise is resolved.
2.15 The machine is running, but the needle won’t move!
This problem occurs when the sewing machine motor is running, but the needle is stationary and not moving up and down.
2.15.1 Causes of needle not moving: Machine accidentally set in bobbin-winding mode, disengaging the needle mechanism.
2.15.2 Remedies for needle not moving
To remedy a stationary needle despite a running motor, check the bobbin winder lever or post and ensure it is disengaged from winding mode, as this common and easily overlooked issue often prevents needle movement and make sure to always check the bobbin winder position first. Double check these to prevent delays and unnecessary frustration.
2.16 Decorative stitch settings aren’t working
When decorative stitches aren’t working, carefully check the stitch length and width settings and consult your sewing machine manual to confirm the correct settings for the desired pattern, as decorative stitches often require specific parameters that are best found in your trusty manual. Always check your manual, to help assist.
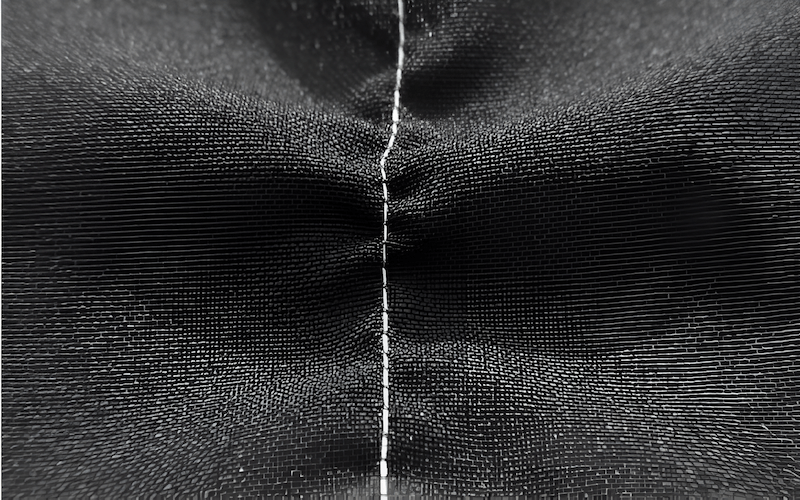
2.17 Seams are puckered and distorted
Seams that are puckered and distorted, particularly on lightweight fabrics, appear wrinkled and uneven instead of lying flat and smooth.
2.17.1 Causes of puckered seams
Using thick or stiff thread that is too heavy for lightweight fabrics or the incorrect thread tension settings lead to pucker.
2.17.2 Remedies for puckered seams
To remedy puckered seams, especially on delicate fabrics, check the thread weight and switch to a lighter one if necessary, review and generally loosen the top thread tension, ensure proper presser foot pressure and feed dog function, and consider using a walking foot to improve even fabric feed, as the right thread is crucial, and a thinner one often resolves the issue. These steps help you with better stitching results.
2.18 Machines fail to turn on
When a sewing machine fails to turn on, it means there is no power being supplied to the machine, and it remains completely unresponsive.
2.18.1 Causes of machine not turning on
It is possible the Machine power switch is not turned to the “on” position.
2.18.2 Remedies for machine not turning on
When your machine fails to turn on, start with the simplest checks: ensure the power switch is in the “on” position, verify it’s properly plugged into a functioning outlet, and inspect the power cord for damage or loose connections. Please always begin with the basics – is it plugged in and switched on? It’s essential to prevent greater complications.
2.19 Needle thread breakage (advanced causes)
Beyond basic threading and tension issues, advanced causes of needle thread breakage involve complex factors like thread package alignment, tension disc problems, sharp edges on thread paths, needle heat, hook overheating, and ultimately, the quality of the thread itself.
2.19.1 Causes of needle thread breakage (advanced)
Advanced causes of needle thread breakage range from misaligned thread unwinding and snagging, excessive top thread tension, and broken check springs to sharp edges on various machine parts, thread fraying due to needle heat, hook mechanism overheating, and the use of inherently weak, poor-quality thread. These factors, often less obvious, significantly impact thread integrity and contribute to frustrating breakage issues during sewing.
2.19.2 Remedies for needle thread breakage (advanced)
For persistent needle thread breakage, move beyond basic solutions and address these technical factors: ensure proper thread package alignment with an overhead guide and foam pad, reduce thread stand height, re-thread after breakage to avoid snagging, adjust tension discs, use stronger thread or reduce tension, replace faulty check springs, polish rough thread path edges, use appropriate needles, improve fabric finish, lubricate the needle, ensure adequate hook lubrication and timing, and switch to high-quality thread. Addressing these advanced causes can lead to significantly improved sewing outcomes.
2.20 Bobbin or looper thread breakage (advanced causes)
Advanced reasons for bobbin or looper thread breakage, primarily relevant for sergers and overlock machines, delve into issues beyond simple threading and tension, exploring factors related to bobbin winding, tension settings, sharp edges, and bobbin case fit.
2.20.1 Causes of bobbin/looper thread breakage (advanced)
Advanced causes of bobbin or looper thread breakage include uneven or poorly wound thread, excessively tight bobbin tension leading to overrunning and tangling, sharp edges or burrs on bobbin components or looper eyelets (for sergers), and the bobbin case not fitting correctly within the machine. These intricate issues often require a more detailed examination to pinpoint the exact cause and implement effective solutions.
2.20.2 Remedies for bobbin/looper thread breakage (advanced)
Adjust bobbin winder alignment for even winding. Consider using pre-wound bobbins for consistent quality. Adjust bobbin case tension to appropriate level. Insert a small washer or spring in bobbin case to prevent overrunning if needed. Polish or smooth any sharp edges on bobbin case, spring, or looper eyelet and Check bobbin size and type to ensure correct fit in the bobbin case.
2.21 Thread fusing when machine stops (advanced)
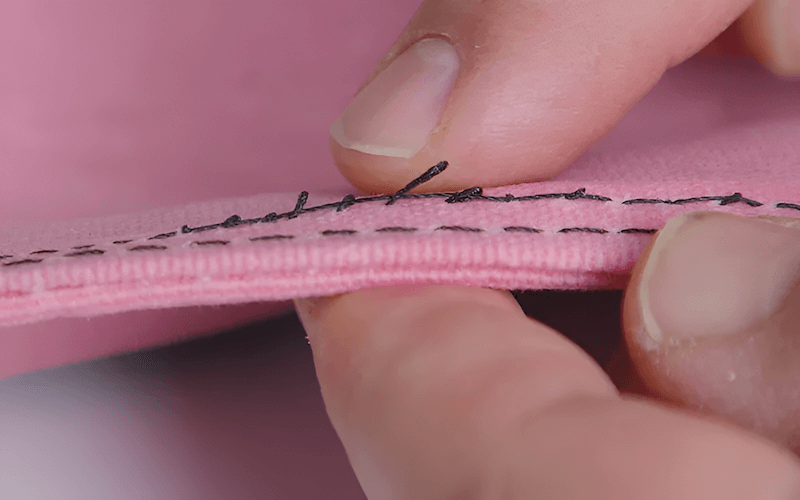
Thread fusing, or the melting together of thread ends when the sewing machine stops, is an advanced issue indicating excessive heat buildup and requires a closer look at thread quality, fabric finish, and needle condition.
2.21.1 Causes of thread fusing
Thread fusing is primarily caused by using thread prone to melting under heat, sewing densely woven fabrics that generate excessive friction, or using a damaged, overheated needle that retains excessive heat after a thread breakage. These conditions create enough heat to melt or fuse the thread ends together when the machine stops.
2.21.2 Remedies for thread fusing
To remedy thread fusing, switch to higher heat resistance thread, improve fabric finish, use needle types designed to reduce heat, and apply needle coolants; remember that thread fusing is often a sign of heat buildup, so consider needle-cooling techniques, especially with synthetic fabrics, and always replace the needle after thread breakage. Addressing heat and friction will result in better seams.
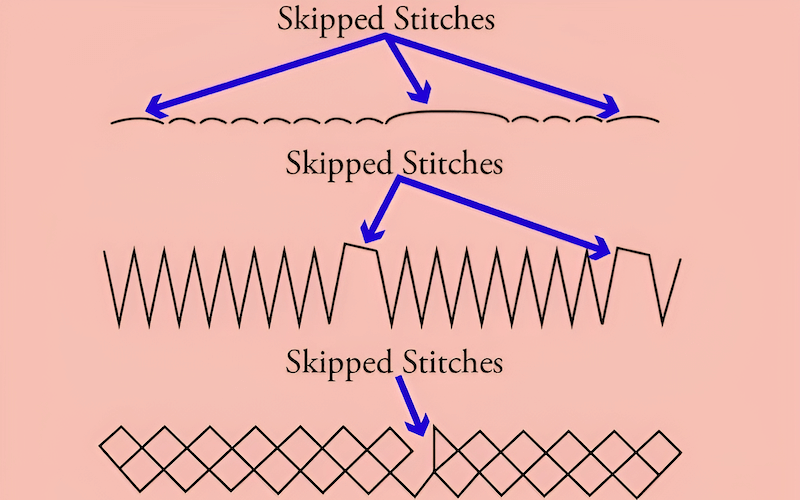
2.22 Skipped stitches (advanced causes)
Advanced causes of skipped stitches delve beyond basic needle and thread problems, exploring complex issues such as hook timing, thread loop failure, fabric flagging, needle deflection, and sewing tension, all impacting proper thread loop formation.
2.22.1 Causes of skipped stitches (advanced)
Advanced causes of skipped stitches encompass timing misalignment, thread loop failure (due to incorrect needle or thread control settings), fabric flagging (caused by poor presser foot control), needle deflection, and incorrect sewing tension, all ultimately impacting the formation of a proper thread loop. These complex factors reveal a deeper understanding of machine mechanics and materials.
2.22.2 Remedies for skipped stitches (advanced)
To address advanced skipped stitch issues, check machine clearances and timing (potentially needing professional adjustment), ensure correct needle insertion and use a needle with a deeper scarf, adjust needle size/style to match the thread, reset the thread control mechanism and check loop formation, readjust presser foot pressure and throat plate size to minimize flagging, use a reinforced needle, and readjust sewing tensions, keeping in mind that these complex problems require a deeper understanding of machine mechanics and timing. Always seek professional help.
2.23 Imbalanced / variable stitching (advanced)
Imbalanced or variable stitching refers to seams where stitches appear uneven, loose, or generally inconsistent, indicating underlying issues with tension, threading, or the machine’s mechanics.
2.23.1 Causes of imbalanced stitching
The reason that imbalanced stitching occurs is: incorrect sewing tensions between top and bobbin threads and and incorrect threading of the machine, affecting tension consistency
2.23.2 Remedies for imbalanced stitching
To solve this issue you must check for thread snarling or twisting in the thread path. Adjust thread tensions to achieve balanced stitches. Re-thread the machine completely, ensuring correct threading path and switch to superior quality threads with consistent lubrication and smooth finish.
2.24 Staggered stitching (advanced)
Staggered stitching describes a situation where stitches fail to form a straight line, instead appearing offset or “staggered” along the seam. This misalignment suggests potential issues with needle stability, fabric control, or the machine’s feed mechanism.
2.24.1 Causes of staggered stitching
Staggered stitching can arise from needle vibration or deflection during sewing, especially at high speeds, the use of an incorrect or blunt needle causing uneven fabric movement, an incorrect needle-to-thread size relationship leading to needle instability, feed dog sway resulting in inconsistent fabric feed, or poor fabric control by the operator or presser foot bounce allowing the fabric to shift. The variety of these causes shows that precision is important.
2.24.2 Remedies for staggered stitching
To remedy staggered stitching, increase needle size or use a reinforced/tapered needle, change to a sharp needle, adjust needle/thread size for better needle stability, tighten the feed dog mechanism if loose, improve fabric handling and control, and reset presser foot pressure, as staggered stitching often indicates issues with needle stability or fabric control.
2.25 Variable stitch density (advanced)
Variable stitch density, where stitches are inconsistently spaced with some areas denser than others, indicates an underlying problem with fabric feed control during the sewing process.
2.25.1 Causes of variable stitch density
Variable stitching results from: poor or inconsistent fabric feed control during sewing.
2.25.2 Remedies for variable stitch density
To achieve consistent stitch density, increase presser foot pressure to improve fabric contact with the feed dogs and, if possible, switch to a more positive fabric feed mechanism like a walking foot, always keeping in mind that consistent stitch density relies on consistent fabric feed and that presser foot pressure is a crucial factor. Better control leads to greater quality.
2.26 Seam pucker (advanced)
Seam pucker, beyond basic tension problems, can stem from more complex causes including variable differential feed, high tension, thread balance, thread type and even the fabric feed mechanism itself.
2.26.1 Causes of seam pucker
Advanced causes of seam pucker extend beyond simple tension adjustments to include variable differential fabric feed leading to uneven layers, excessively high thread tension drawing fabric edges together too tightly, incorrect thread balance between top and bobbin threads, and the selection of an improper thread type causing excessive shrinkage or draw-up. All these factors highlight potential underlying material and machine setup issues that could greatly affect the final results.
2.26.2 Remedies for seam pucker
To remedy seam pucker, improve the fabric feed mechanism by cleaning/replacing feed dogs and reducing sewing speed, keep bobbin tension low while adjusting needle thread tension, ensure proper top/bottom thread balance, and use threads with controlled elongation and shrinkage properties. Please always remember that seam pucker can be complex, so consider all factors from fabric feed to thread type.
3. Preventative sewing machine maintenance: keeping faults at bay
3.1 Regular cleaning: the first line of defense
Regular cleaning, akin to brushing your teeth for long-term health, is the most crucial preventative measure for your sewing machine, requiring diligent lint and thread removal from the bobbin area, feed dogs, and other accessible parts after each project or regularly with a small brush and vacuum attachments. Making it a habit is important for machine longevity.
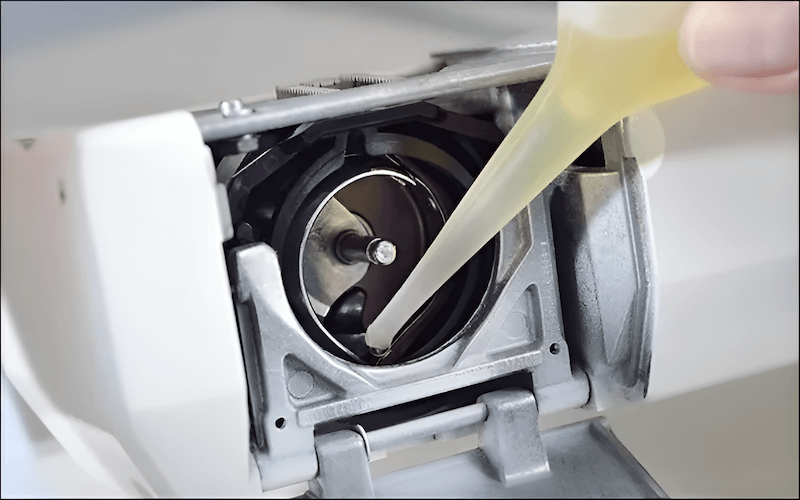
3.2 Oiling your sewing machine: ensuring smooth operation
Oiling your sewing machine, which keeps everything moving smoothly and prevents wear and tear with just a few drops, reduces friction on moving parts, ensuring smooth operation, with key oiling points (detailed in your machine manual) requiring specifically designed sewing machine oil applied regularly based on usage. Always ensure your machine is well oiled.
3.3 Needle care and replacement schedule
Maintaining sharp, undamaged needles through regular replacement (even if visually okay after around 8 hours of sewing) is crucial for both stitch quality and machine health, requiring inspection before each project for signs of dullness like skipped stitches, fabric damage, or thread fraying, with used needles properly disposed of in a sharps container.
3.4 Proper thread and bobbin management
Good stitching hinges on proper thread and bobbin management, which includes using high-quality threads to minimize breakage and lint, winding bobbins evenly and consistently, and storing both bobbins and threads properly to prevent damage and tangling, emphasizing that good thread and well-wound bobbins are the foundation of any quality sewing endeavor. Keeping your materials in good shape helps.
3.5 Annual sewing machine servicing (when to seek professional help)
While DIY troubleshooting is valuable, annual sewing machine servicing by a qualified technician is recommended for a thorough check-up and for complex mechanical, electrical, or timing issues that DIY methods cannot resolve; remember, professional servicing for complex problems or annual check-ups is a worthwhile investment that can prevent long-term headaches and potential damage. Seeking qualified help is a good practice.
4. FAQs about sewing machine faults
4.1 Why does my sewing machine keep jamming?
Sewing machine jams are often caused by a buildup of lint and thread in the bobbin area. Regular cleaning, especially around the bobbin case and feed dogs, is crucial. Other causes include incorrect threading, tangled thread on the spool, or using the wrong size bobbin.
Try re-threading your machine, cleaning out lint, and ensuring you’re using the correct bobbin for your machine model. If the jamming persists, there might be a more serious mechanical issue requiring professional attention.
4.2 How often should I oil my sewing machine?
The frequency of oiling depends on how often you use your sewing machine. For regular use (several times a week), oiling every 1-2 months is recommended. If you sew daily or for extended periods, oil it more frequently, perhaps every 2-4 weeks. Signs that your machine needs oiling include increased noise, stiffness in movement, or a decrease in smooth operation. Always use sewing machine oil and apply only 1-2 drops to each oiling point as indicated in your machine’s manual. Over-oiling can also cause problems.
4.3 What type of needle should I use for fabric type?
Choosing the right needle is essential for stitch quality and preventing fabric damage. For general sewing on woven fabrics like cotton or linen, a universal needle is a good starting point. For knit fabrics, use a ballpoint or jersey needle to prevent skipped stitches and fabric runs.
Denim and heavy fabrics require sturdy denim or jeans needles. For delicate fabrics like silk or microfiber, use a sharp or microtex needle. Always consult your fabric and needle guides for specific recommendations, and test on scrap fabric first.
4.4 My sewing machine is making a loud banging noise. Is it serious?
Seek professional help if a loud banging noise is heard.
4.5 Where can I find a reliable sewing machine repair service?
A loud banging or clunking noise from your sewing machine is definitely a cause for concern and should not be ignored. Stop sewing immediately. First, check for any obvious obstructions like a jammed bobbin case or a needle hitting the needle plate.
Clean and oil your machine thoroughly as per the manual. If the noise persists after cleaning and oiling, it could indicate a more serious mechanical problem within the machine’s internal mechanisms. In such cases, it’s best to seek professional servicing from a qualified sewing machine technician to diagnose and repair the issue to avoid further damage.
5. Packlove – Supporting your garment business with quality sewing supplies
At Packlove, with over 8 years of experience serving the garment industry, we understand the importance of smooth and efficient production. Just as we provide quality labels, tags, and packaging to enhance your brand, we also want to equip you with the knowledge to keep your sewing machines running at their best.
Efficient sewing is the backbone of any successful clothing business, and minimizing downtime from machine faults is crucial. We hope this guide helps you troubleshoot common issues and maintain your machines effectively. When you’re ready to elevate your brand presentation, Packlove offers a wide range of custom solutions, including:
- Woven Labels and Care Labels to professionally brand your garments.
- Custom Zipper Bags for Clothes to protect and present your items.
- Branded Poly Mailers for secure and stylish shipping.
Visit our website at https://mypacklove.com/ or contact us [email protected] to explore our options and contact us for a free consultation.
Read more:
In summary, mastering sewing machine troubleshooting is immensely valuable for every garment maker and sewing enthusiast. Consistent preventative maintenance is key to maintaining the performance and health of the machine for the long term. This guide is intended to be a useful tool to help you approach sewing machine problems with assurance. Ultimately, we hope you can make use of this information and experience better, more effective, and less stressful sewing.


