


Sewing Pillow Covers: A Beginner’s Easy DIY Guide


Making things by hand for your home is a special joy. This guide will give you simple, step-by-step instructions to sew your own pillow covers. It’s perfect if you are new to sewing. Creating your own pillow covers is fun and practical.
You can make them just how you like them! These handmade covers are great for your own home. They also make lovely gifts or unique items to sell. Welcome! This easy-to-follow guide is a wonderful starting point for your journey into DIY home projects like sewing pillow covers. Let’s start making something beautiful!
1. Why sew your own pillow covers?
Making your own pillow covers is a great DIY home decor project. It opens up many interior design ideas using custom pillows to perfectly match your style. There are many good reasons to sew your own pillow covers:
- Perfect fit & style: You can make covers that exactly match your pillows. Choose fabrics and colors that fit your room’s decor perfectly.
- Save money: It’s often cheaper than buying pillow covers, especially if you want a custom or high-end look.
- Learn a skill: Sewing pillow covers is an excellent beginner project. You’ll learn basic sewing skills and build your confidence.
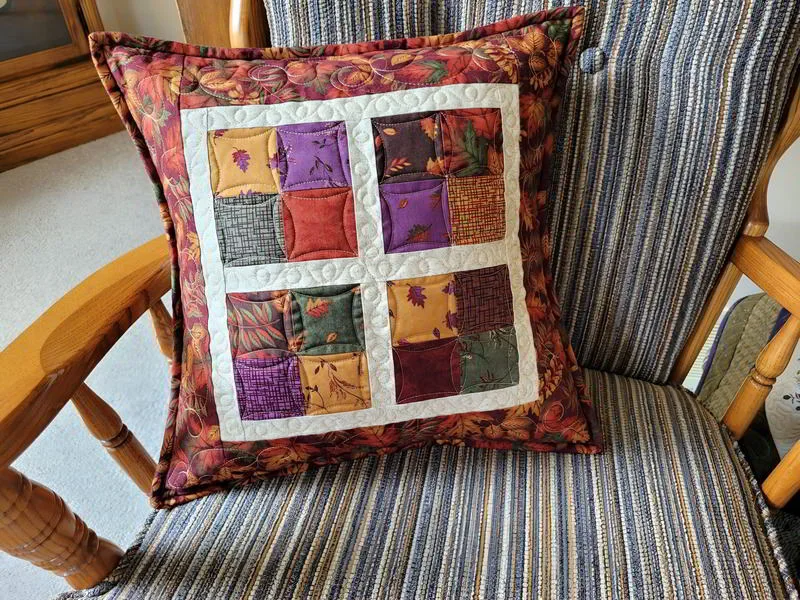
- Unique designs: You can create pillow covers that are one-of-a-kind. Show off your personal style with unique patterns and details.

2. Getting started: Your pillow-making toolkit
To start sewing your pillow covers, you’ll need a few materials and tools. Don’t worry, you don’t need anything too fancy. We’ll go through what you need and why. You’ll learn how to choose the right fabric, measure your pillows, and what basic sewing tools are essential. A simple sewing machine is all you need!
2.1 Choosing your fabric
The fabric you choose will affect how your pillow cover looks, feels, and lasts. Here are some popular fabric types (cotton, linen, velvet) and their qualities:
- Cotton is easy to sew and comes in many colors and patterns. It’s affordable and great for beginners. Cotton is perfect for everyday pillows.
- Linen: Linen looks elegant and has a natural feel. This fabric material is durable and gets softer with each wash. It’s good for a sophisticated, relaxed look.
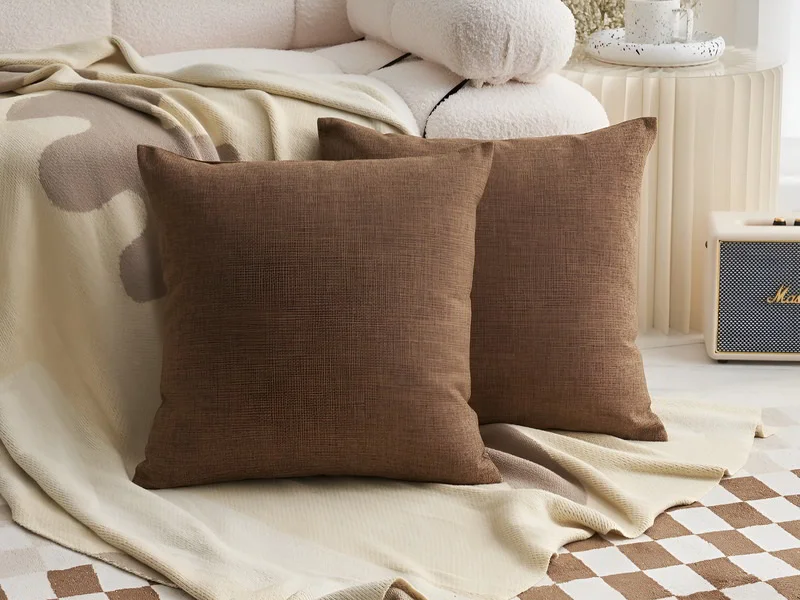
- Canvas (e.g., Cotton Duck Canvas): Cotton Duck Canvas is very strong and durable. It’s a good pillow cover fabric for pillows that get a lot of use, like on a family sofa. Some canvas is also good for outdoor seating if specified.
- Velvet: Velvet is soft and has a rich texture. It gives a luxurious look. Velvet is best for decorative pillows that won’t be washed very often.
- Flannel: Flannel is very soft, warm, and cozy. It’s perfect for bedroom pillows or winter-themed decor.
When making your fabric selection, think about these things:
- Durability: How much will the pillow be used? A living room sofa pillow needs stronger fabric than a decorative bed pillow.
- Texture/Feel: Do you want it soft like flannel, smooth like cotton, or textured like linen?
- Washability: Check if the fabric is washable. This is important for pillows in high-use areas or homes with kids and pets.
- Home Style/Aesthetics: Choose colors and patterns that match your room and style.
For the amount of fabric, you’ll typically need a piece slightly larger than your pillow form. We’ll explain exact calculations for each pillow style later.
2.2 Pillow insert (the stuffing)
The pillow insert is the cushion part that goes inside your cover.
- How to measure: If you already have a pillow insert, lay it flat. Measure its length and width from seam to seam using a measuring tape. These are your pillow insert measurements.
- Common sizes: Common square pillow form sizes are 16×16 inches, 18×18 inches, and 20×20 inches. Rectangular ones, like 12×20 inches, are also popular.
- Sizing Tip for a Full Look: For a plump, professional-looking pillow, your finished pillow cover should be the same size as your pillow insert, or even 1 inch smaller in both width and height. For example, for an 18×18 inch insert, make an 18×18 inch or 17×17 inch cover. This makes the pillow look full and not saggy.
2.3 Essential sewing tools
Here are the basic tools you’ll need:
- Sewing Machine: A basic sewing machine that can do a straight stitch is perfect. You don’t need a fancy one!
- Thread: Good quality all-purpose polyester thread is strong and suitable for most fabrics. Match the thread color to your fabric, or choose a neutral color like white, cream, or grey.
- Fabric Scissors or Rotary Cutter & Mat: Use sharp scissors only for fabric to keep them sharp. A rotary cutter with a cutting mat makes cutting straight lines faster and easier, but good scissors work just fine.
- Pins: Straight pins are used to hold fabric pieces together before and during sewing.
- Measuring Tape or Ruler: A flexible measuring tape for curves and a clear acrylic ruler for straight lines are essential for accurate measuring.
- Iron and Ironing Board: Very important! Pressing seams as you sew makes your pillow cover look neat and professional. Don’t skip this!
- Seam Ripper: A small tool to remove stitches if you make a mistake. Every sewist needs one!
- Fabric marker or chalk: To draw cutting lines or marks on your fabric. Choose one that will wash out or fade.
3. Sewing basics: Quick tips before you start stitching
Before you start sewing, a few basic steps and tips will help you get great results. Understanding these will make your sewing smoother and your finished pillows look more professional.
3.1 Prepare your fabric
- Pre-wash and Dry: It’s a good idea to wash and dry your fabric before you sew, especially natural fibers like cotton or linen. This is called pre-washing. It helps prevent your finished pillow cover from shrinking or changing shape the first time you wash it.
- Press Your Fabric: After pre-washing (or if using fabric that doesn’t need it), iron your fabric thoroughly to remove all wrinkles. Smooth, flat fabric is much easier to measure, cut, and sew accurately.
3.2 Measuring and cutting
- “Measure Twice, Cut Once”: This popular saying is very true for sewing! Always double-check your measurements before you cut your fabric. Mistakes here are hard to fix.
- Cutting Straight: Place your fabric flat on a large surface. Use a clear ruler and sharp fabric scissors or a rotary cutter and mat. If using scissors, make long, smooth cuts. If you’ve marked lines, cut carefully along them.
- Always carefully follow the dimensions from your pattern.
3.3 Your sewing machine
- Basic Stitches: For these pillow covers, you’ll mainly use a straight stitch. It’s also very important to learn how to backstitch (or reverse stitch). You do this by sewing a few stitches forward, then a few stitches backward, then forward again at the very beginning and very end of each seam. Backstitching locks your stitches so they don’t unravel. This is part of basic sewing machine operation.
- Stitch Length: A medium stitch length is usually good for pillow covers. On most machines, this is around 2.5 mm to 3.0 mm. Check your machine’s manual if you’re unsure how to adjust it.
- Threading & Needle: Make sure your machine is threaded correctly (top thread and bobbin). Use a universal needle (size 80/12 or 90/14) for most cotton/linen fabrics. If your needle is old or damaged, change it.
3.4 Seam allowance
The seam allowance is the distance from the raw edge of your fabric to the line where you sew your stitches. For most pillow covers, a 1/2 inch (or 1.3 cm) seam allowance is common. The tutorials will specify this.
It’s very important to use the same seam allowance for all seams in a project unless told otherwise. This makes sure your pieces fit together correctly and affects the finished dimensions of your pillow cover. Most sewing machines have guide lines on the needle plate to help you keep your seam allowance even. Line up the edge of your fabric with the correct guide line as you sew.
3.5 Finishing seams
Why it’s important: Finishing the inside raw edges of your seams prevents the fabric from fraying (when threads come loose). This makes your pillow cover stronger, last longer, and look neater inside, especially after washing. This improves the pillow’s durability.
Simple methods:
- Zig-Zag Stitch: Most sewing machines have a zig-zag stitch. Sew this stitch along the raw edge of your seam allowance, after you’ve sewn the seam. Be careful not to let the needle go off the fabric.
- Pinking Shears: These are special scissors with a zig-zag blade. Trimming the seam allowance edge with pinking shears helps reduce fraying. This is a quick no-sew option for finishing.
- Some machines have an overcast stitch specifically for edge finishing, which is also a great option.
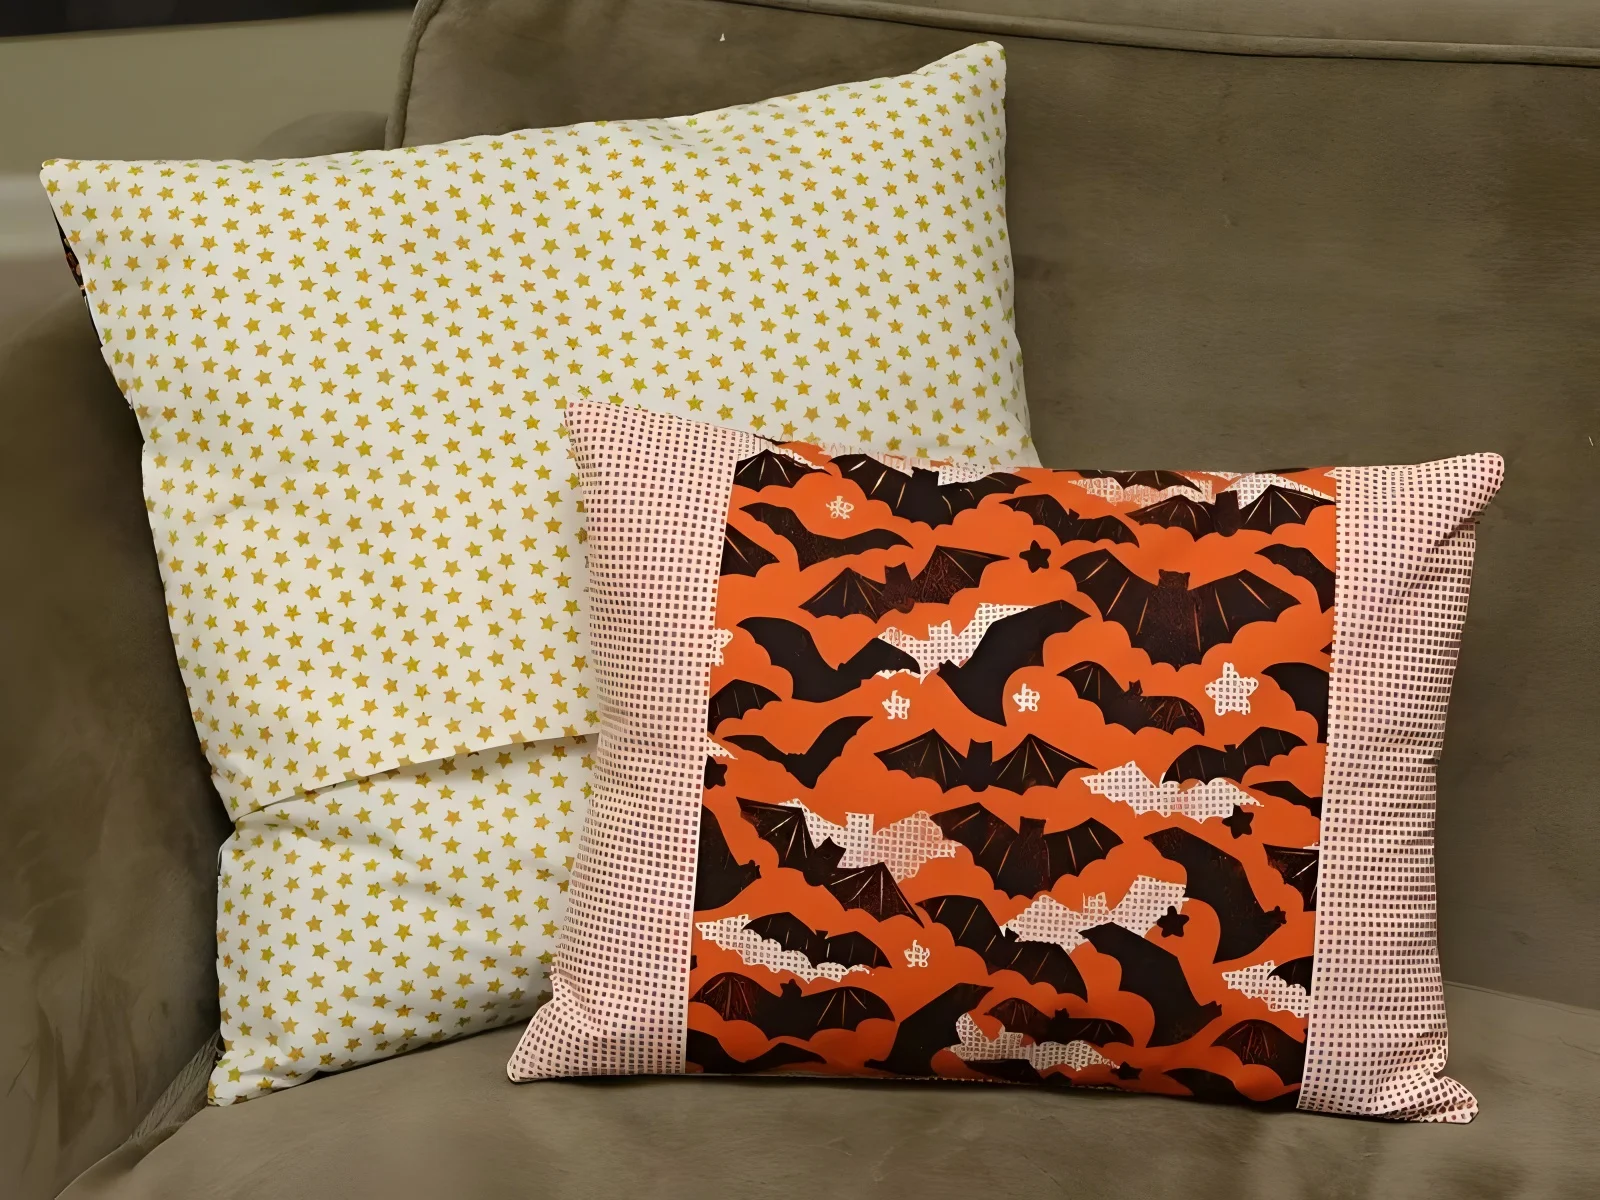
4. Tutorial 1: How to sew an easy envelope pillow cover
This is the easiest pillow cover style, perfect for a beginner’s first project. It’s called an envelope pillow cover because it has an opening in the back made from overlapping flaps, like an envelope. This makes it a great way to learn how to sew easy envelope pillow covers for beginners.
4.1 What you’ll need
- Fabric.
- Pillow Insert.
- Basic Sewing Tools.
4.2 Calculating fabric
We’ll use a 1/2 inch seam allowance for these calculations. This pillow cover requires three pieces of fabric.
For the Front Piece (Cut 1):
- Width = Pillow Insert Width + 1 inch (for two 1/2″ seam allowances).
- Height = Pillow Insert Height + 1 inch (for two 1/2″ seam allowances).
- Example: For a 16×16 inch pillow insert, your Front Piece will be 17×17 inches.
For the Two Back Pieces (Cut 2, they will overlap):
- Width (for each back piece) = Same as Front Piece Width (e.g., 17 inches for our example).
- Height (for each back piece) = (Pillow Insert Height / 2) + 5 inches. This 5 inches allows for a double-fold hem on one edge and a generous overlap.
- Example: For a 16×16 inch pillow insert, Back Piece Height = (16 / 2) + 5 = 8 + 5 = 13 inches. So, you will cut two back pieces, each 17 inches wide x 13 inches tall.
4.3 Step-by-step sewing instructions
This tutorial demonstrates sewing steps clearly.
- Cut Your Fabric: Using your measurements from the ‘Calculating Fabric’ step, carefully cut one Front Piece and two Back Pieces from your fabric.
- Hem the Back Pieces: Take one Back Piece. On one of the long edges (the 17-inch edge in our 16×16 pillow example), you will make a hem. First, fold this edge over by 1/2 inch towards the wrong side of the fabric and press it flat with your iron. Next, fold it over by another 1/2 inch and press again; this hides the raw edge. (If you want a wider hem, like 1 inch, you can fold it over 1 inch the second time. You would have adjusted the “+5 inches” in your calculation if you planned for a wider hem). Then, sew close to the inner folded edge with a straight stitch, backstitching at the start and end. Repeat this entire process for the second Back Piece on one of its long edges.
- Assemble the Pillow Cover: Lay your Front Piece on your table with the right side facing up. Take one hemmed Back Piece and place it on top of the Front Piece, with right sides together. Align the raw edges of this Back Piece with one side of the Front Piece, ensuring the hemmed edge of this Back Piece is towards the center of the pillow. Next, take the second hemmed Back Piece and place it on top of the Front Piece (and the first Back Piece), again with right sides together. Align its raw edges with the opposite side of the Front Piece. The hemmed edge of this second Back Piece will overlap the hemmed edge of the first Back Piece in the middle.
- Pin and Sew: Pin all around the four outer edges of the layered pieces, making sure to catch all three layers where they overlap. Using a 1/2 inch seam allowance, sew all the way around the four sides of the square/rectangle with a straight stitch. Remember to backstitch at the beginning and end of your sewing, and also backstitch when you sew over the bulky overlapped area for extra strength.
- Clip Corners: Carefully snip off the fabric at each of the four corners, diagonally. Get close to the stitching but don’t cut your stitches. This helps make the corners look sharp and less bulky when you turn the cover right side out.
- Seams: If you want to, finish the raw seam allowances inside the pillow cover using a zig-zag stitch or pinking shears. This will make your pillow cover last longer.
- Turn Right Side Out and Press: Carefully turn the pillow cover right side out through the envelope opening in the back. The envelope opening makes this step easy! Gently poke out the corners using your finger or a dull pointed tool (like a chopstick or a point turner). Press the entire pillow cover flat with your iron, paying attention to the seams to make them crisp.
A zippered pillow cover looks neat and professional. This DIY pillow cover with zipper tutorial step by step shows a straightforward method. While zippers might seem tricky, this way is easy to learn. It shows how to insert zippers for a clean finish. This method is a common closure type.
5.1 What you’ll need
- Fabric.
- Pillow Insert.
- Zipper: An ‘all-purpose’ or ‘nylon coil’ zipper. Choose one that is the same length as the bottom edge of your pillow cover pieces, or 1-2 inches shorter. For example, if your cut fabric piece is 17 inches wide, a 14-16 inch zipper is good. The color should match or complement your fabric.
- Zipper Foot for your sewing machine: This special foot is essential for sewing zippers neatly. It allows your needle to get very close to the zipper teeth. Check your sewing machine manual to see what kind of zipper foot it uses.
- Basic Sewing Tools.
5.2 Calculating fabric
You’ll need two identical pieces of fabric for this style.
For Front and Back Pieces (Cut 2 identical pieces):
- Width = Pillow Insert Width + 1 inch (for 1/2″ seam allowances).
- Height = Pillow Insert Height + 1 inch (for 1/2″ seam allowances).
- Example: For a 16×16 inch pillow insert, cut two pieces, each 17×17 inches. This will determine your finished pillow cover dimensions.
5.3 Step-by-step sewing instructions:
This tutorial demonstrates sewing steps for a centered zipper.
- Cut Your Fabric: Cut your two fabric pieces (Front and Back) to the size calculated above.
- Prepare Zipper Seam: Take your two fabric pieces. Place them with right sides together. Pin along ONE edge – this will be the bottom edge where the zipper goes.
- Sew Seam for Zipper Opening: On this pinned edge, first mark 1.5 inches in from each side. This mark should be slightly more than half the difference between your fabric edge length and your zipper length. For example, if your fabric is 17 inches and your zipper is 14 inches, the difference is 3 inches. Half of that is 1.5 inches. Your marks should be slightly further in, say 2 inches, to ensure the zipper pull and stop are covered. Then, using your normal seam allowance (e.g., 1/2 inch) and a regular stitch length, sew from the fabric edge to your first mark, backstitching well. Next, change your sewing machine to the longest stitch length available (this is a basting stitch) and sew from the first mark to the second mark, using the same seam allowance; DO NOT backstitch at the start or end of this basting section. Finally, change back to your regular stitch length and sew from the second mark to the other fabric edge, backstitching well.
- Press Seam Open: Take the fabric to your ironing board. Press the entire seam you just sewed open flat. The seam allowances should be pressed open.
- Position Zipper: Place your pillow piece wrong side up. Lay the zipper FACE DOWN on top of the pressed-open seam. Center the zipper teeth directly over the seam line (the basted part). The top of the zipper (pull tab end) should be just below where your regular stitching started at one end of the basting. Pin the zipper tapes to the seam allowances ONLY. Try not to pin through to the right side of the fabric yet.
- Attach Zipper Foot & Sew Zipper: Change the foot on your sewing machine to a zipper foot. This sewing technique for zipper insertion requires this foot. You may need to adjust its position depending on which side of the zipper you are sewing. From the right side of your fabric, start sewing about 1/4 inch to 3/8 inch away from the center seam line, along one side of where the zipper is. Stitch down one side of the basted seam, pivot at the end of the zipper, sew across the zipper, pivot again, and sew up the other side, creating a long rectangle of stitches around the zipper. Keep your stitching an equal distance from the center seam. You are sewing through the main fabric and the zipper tape underneath. This is how to insert zippers.
- Open Basted Seam: Carefully use your seam ripper to remove the long basting stitches from the center seam line, between your rectangular zipper stitching. This will reveal your neatly inserted zipper!
- Open Zipper & Pin Pillow: Very important: Open the zipper at least halfway! Now, fold your pillow cover so the right sides are together again, with the zipper at the bottom edge. The Front and Back pieces should align. Pin the remaining three sides (top and two sides).
- Sew Remaining Sides: Using your regular seam allowance (e.g., 1/2 inch) and a normal stitch length, sew these three pinned sides. Backstitch at the start and end of each seam.
- Clip Corners: Carefully snip off the fabric at each of the four corners, diagonally. Get close to the stitching but do not cut your stitches. This helps make the corners look sharp and less bulky when you turn the cover right side out.
5.4 Tips for sewing zippers smoothly
- Always use a zipper foot. It makes a huge difference in getting close, even stitches.
- Sew slowly and guide the fabric; don’t push or pull it.
- If your fabric is slippery, you can use wash-away wonder tape to hold the zipper tape in place on the seam allowance instead of pins.
- When you get near the zipper pull, stop with the needle down in the fabric, lift the presser foot, carefully move the zipper pull out of the way, lower the presser foot, and continue sewing.
6. How to sew a pillow cover with a flange edge?
A flange is a flat, decorative border or frame around the pillow. It adds an elegant, tailored look. For integrated flange detailing, you cut your fabric pieces larger than your pillow insert. After constructing the basic pillow, you topstitch a border a few inches in from the outer edge, all around the pillow front. This creates the flat flange.
This technique requires more fabric and an extra stitching step. It’s a great way to make your pillows look even more custom. This is just an overview to inspire you. Feeling adventurous? A quick search for ‘how to sew a flange pillow cover’ will give you detailed tutorials!
7. Make it your own: Creative ideas for personalizing your pillow covers
Once you know the basics, you can get creative! Here are some ideas for unique pillow cover designs:
- Mix & Match Fabrics: Use a patterned fabric for the front and a coordinating solid color for the back. Or, combine different textures like a cotton front with a velvet border or strip.
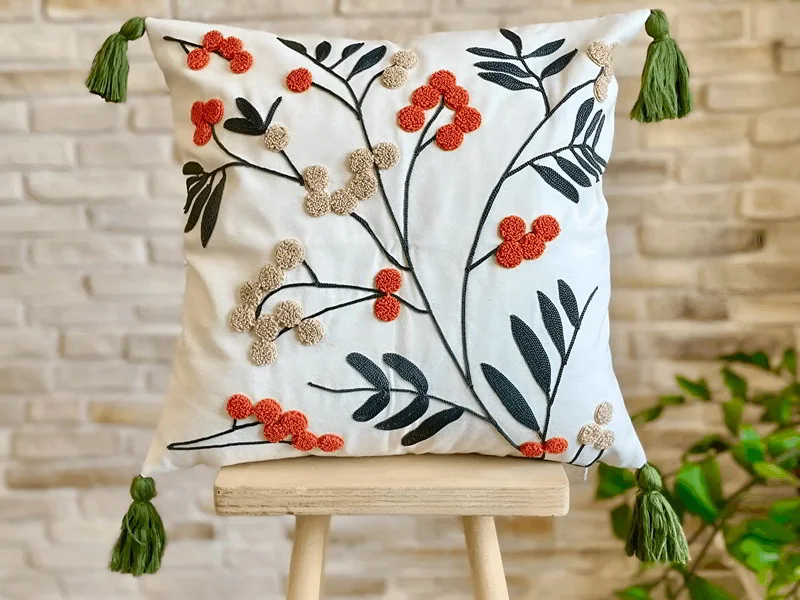
- Add Trims: Sew pom-pom trim, fringe, or tassels into the seams as you construct the pillow. You can also buy or make fabric piping to insert into the edges for a defined, professional look. This is another form of integrated piping or flange detailing.
- Easy Embellishments: Try simple appliqué: cut shapes from felt and sew them onto the pillow front. Or, add a few basic hand-embroidery stitches for a name, monogram, or simple design.
- Upcycle & Repurpose: Give old clothes a new life! A favorite sweater, a pair of jeans, or a nice flannel shirt can be cut up and sewn into a unique pillow cover. This is a great way to create designs utilizing upcycled or repurposed materials creatively, such as by sewing pillow covers from old clothes.
8. Add a special touch: Custom labels for your handmade pillows
Adding a label is a lovely way to finish your handmade pillow covers. It makes them feel more special and professional.
8.1 Why add a label?
- Professional Look for Sellers: If you plan to sell your pillow covers (e.g., at craft fairs or online), a custom brand label helps with branding and selling handmade textile goods. It makes them look more professional and helps customers remember your brand.
- Your Personal Mark: It’s like signing your artwork! It shows pride in your handmade creation.
8.2 Consider woven labels from Packlove
Woven labels are made by weaving threads together to create your design. They look very high-quality, feel soft, are durable, and won’t fade easily.
You can design your own custom woven labels for handmade pillow covers with your name, your small business logo, a simple graphic, or ‘Handmade by…’. They are easy to sew into a side seam of your pillow cover as you make it, or you can sew them flat onto the back of the pillow.
Care tags for handmade textiles are very important. They provide instructions on how to wash and care for the pillow cover. This is very helpful for the recipient, especially if it’s a gift or a sold item. It helps the pillow cover last longer.
Your care label should include simple washing instructions: ‘Machine wash cold, gentle cycle, tumble dry low’ or ‘Hand wash only, lay flat to dry’. You can also list the fabric content, like ‘100% Cotton’.
Packlove also creates custom printed care tags where you can include this important information. They can be sewn into a seam alongside your brand label or separately.
9. Common pillow sewing problems & how to fix them
Everyone makes mistakes when learning to sew. Here are some common problems and simple fixes:
Problem: Uneven or skipped stitches.
Fix: Check if your machine is threaded correctly (top and bobbin). Is the needle old, bent, or the wrong type for your fabric? Try a new needle. Are you pulling the fabric? Let the machine feed it.
Problem: Fabric bunching or puckering while sewing.
Fix: Don’t push or pull the fabric too hard; guide it gently. Your thread tension might be too tight; consult your machine manual to adjust it slightly. Make sure your presser foot is down.
Problem: Corners are not sharp or pointy.
Fix: Remember to clip the fabric diagonally at the corners before turning right side out. After turning, gently push out the corners from the inside using a dull point like a chopstick or a point turner.
Problem: Pillow cover is too small or too big for the insert.
Fix: Always double-check your measurements before cutting fabric! Ensure you are sewing with a consistent seam allowance (e.g., 1/2 inch) as specified in the tutorial. You need to understand fabric requirements for pillow covers.
10. Caring for your beautiful handmade pillow covers
How you wash your pillow cover depends on the fabric used. Most cotton and linen covers can be machine washed on a gentle cycle with cold water and mild detergent. Delicate fabrics like velvet or silk, or those with special embellishments, might need to be hand-washed carefully or spot-cleaned (cleaning only the soiled area).
If you’re ever unsure, hand washing in cool water with a gentle soap and letting it air dry flat is usually the safest option. If you added a care label, follow those specific instructions.
11. Frequently Asked Questions (FAQs)
11.1 What’s the best fabric for beginner pillow covers?
Medium-weight cotton, such as quilting cotton or canvas, is excellent for beginners. Good fabric selection is key. These fabrics are stable, easy to sew, don’t fray too much, and come in many colors and patterns.
11.2 Do I really need to pre-wash my fabric before sewing pillow covers?
Yes, it’s highly recommended, especially for natural fibers like cotton and linen. Pre-washing removes any manufacturing finishes and pre-shrinks the fabric, so your finished pillow cover won’t shrink or get distorted after its first wash.
11.3 How much fabric do I need for a standard 18×18 inch pillow?
It depends on the style. A pillow cover requires fabric that varies. For an 18×18 inch envelope pillow cover (using fabric that’s at least 44 inches wide), you’ll typically need about 3/4 of a yard. For a zippered cover, about 1/2 yard for the front and back pieces might be enough if you cut carefully.
11.4 Can I make these pillow covers without a sewing machine?
This guide focuses on machine sewing for durability and a professional finish. While you can find ‘no-sew’ pillow cover tutorials online that use fabric glue or fusible hem tape, these methods may not be as strong or long-lasting, especially for items that will be used and washed. Hand-sewing is also an option but will take much longer.
11.5 Where can I get custom labels for my handmade pillows if I want to sell them or give them as special gifts?
Packlove offers a wonderful selection of custom woven labels and printed care tags that are perfect for adding a professional and personal touch to your handmade pillows. This will help you discover how to label handmade pillow covers for sale.
They are great for branding if you sell your items, or for adding a ‘Handmade by’ message to gifts. You can find more details in Section 8 of this guide, or visit our website directly to explore options and get a quote!
Explore more:
Making your own custom pillow covers is fun and rewarding. Congratulations on learning a new skill or creating something beautiful for your home! We hope you are inspired to continue exploring different styles, fabrics, and the creative ideas in this guide.
Enjoy your cozy, new handmade projects and the satisfaction of crafting your own home decor! We hope you enjoyed this guide to sewing your own pillow covers! Looking for more fun and creative DIY ideas? Explore other inspiring projects on the Packlove’s blog!


