


Topstitching Guide: Enhance Apparel Quality And Durability


This article explores the technique of topstitching, detailing its definition, dual functions, and significant advantages for apparel businesses. Readers will gain insights into differentiating topstitching from edge stitching, selecting the right tools and materials, executing the technique flawlessly step-by-step, and troubleshooting common issues.
Furthermore, expert tips and answers to frequently asked questions provide comprehensive guidance for achieving professional-quality results that enhance garment appeal and durability.
1. Understanding topstitching
1.1 Defining topstitching
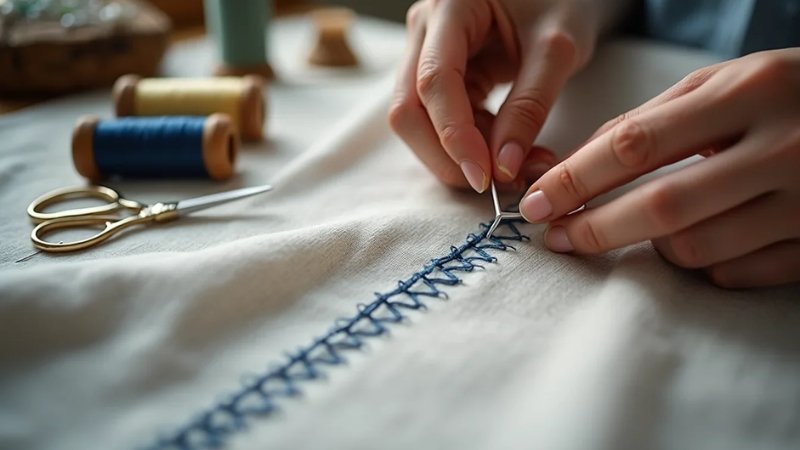
Topstitching refers fundamentally to a line of stitches sewn on the right side of a garment or textile item. This placement makes the stitching clearly visible. Typically, these stitches run parallel to an existing seam, an edge (such as a hem or neckline), or a fold.
The technique is notably versatile, serving multiple purposes beyond simple construction, encompassing both aesthetic and functional roles in garment creation. Understanding these sewing techniques is crucial for quality garment construction.
1.2 The dual role
Topstitching fulfills two primary functions in apparel manufacturing. First, the decorative aspect: topstitching can significantly enhance visual appeal. Designers utilize this technique to outline shapes like pockets, create textural patterns, or introduce visual contrast using a different colored thread (contrast thread), a common feature on denim jeans.
Second, the functional or structural role: topstitching provides structural reinforcement to seams, increasing their strength, particularly in high-stress areas like armholes or crotch seams. Additionally, this process aids in making facings lie flat, secures hems neatly, and helps keep seam allowances tidy and controlled on the inside of the garment, contributing to overall seam finishing quality.
2. How quality topstitching elevates your apparel
2.1 Achieving a professional look and high-end finish
Crisp, evenly spaced topstitching serves as a clear indicator of professionally manufactured garments. To the discerning customer, such detail signals meticulous attention during production and overall quality craftsmanship.
A garment featuring precise topstitching often carries a higher perceived value compared to one with basic construction seams alone. This detail elevates the product’s retail appeal, contributing positively to its market position and suggesting a high-end finish.
2.2 Enhancing garment durability and longevity
The structural benefits of topstitching directly contribute to a garment’s lifespan. By adding an extra line of stitching, stress is distributed more evenly across seams. This reinforcement is particularly valuable in areas subjected to frequent wear and tear, such as armholes, waistbands, and pocket attachments.
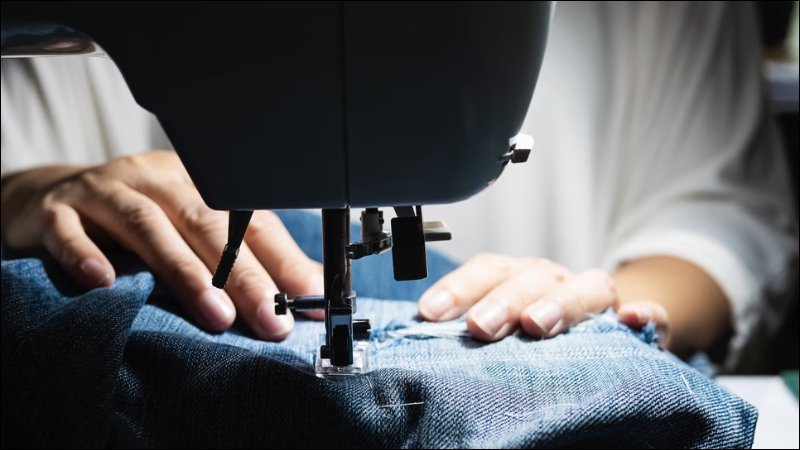
The widespread use of topstitching in durable goods like workwear, denim jeans, and sturdy bags attests to its effectiveness in enhancing structural strength and longevity, potentially reducing returns due to seam failure. This technique is especially relevant for heavyweight fabric applications.
2.3 Highlighting design details
Strategically placed topstitching effectively draws attention to or defines specific garment features. For instance, outlining patch pockets makes them stand out; defining the edges of a shirt placket lends structure; applying the technique to collars and cuffs provides crispness and shape retention.
Topstitching is also commonly used along zippers to secure the tape neatly and reinforce the area. The technique provides designers and manufacturers a tool to guide the eye and emphasize key elements on necklines, hems, and other design details.
2.4 Building brand reputation through consistent quality
Consistent application of high-quality finishing techniques, including precise topstitching, significantly shapes a brand’s reputation for quality. This consistency builds trust with both retailers and end consumers.
A reputation for well-constructed garments can justify a higher price point and foster customer loyalty, contributing to the long-term success of an apparel business. Consistent quality enhances brand perception and customer satisfaction, bolstering trustworthiness.
3. Topstitching vs. edge stitching
3.1 Key distinctions
While both topstitching and edge stitching appear on the right side of the fabric, they differ in placement, typical stitch length, and primary purpose. Topstitching is generally sewn 1/4″ (6mm) or more away from a seam or edge. Edge stitching, conversely, is sewn very close to the edge, typically between 1/16″ and 1/8″ (1.5-3mm).
For topstitching, a slightly longer stitch length (3.0-4.0mm) is often preferred for visual definition or strength, whereas edge stitching usually employs a standard or slightly shorter length (2.0-3.0mm) for a neat, secure finish close to the edge.
Topstitching can be decorative or functional, while edge stitching is primarily functional, aimed at keeping edges flat and controlling the seam allowance.
| Feature | Topstitching | Edge stitching |
|---|---|---|
| Distance from edge | 1/4″ (6mm) or more | 1/16″ – 1/8″ (1.5-3mm) |
| Typical stitch length | 3.0 – 4.0mm | 2.0 – 3.0mm |
| Primary purpose | Decorative and/or functional | Primarily functional (holding edges) |
| Common use cases | Defining pockets, reinforcing seams, decorative accents | Keeping facings flat, neatening necklines/collars, securing zipper tape close to teeth |
3.2 When to choose topstitching over edge stitching in garment construction
The decision between topstitching and edge stitching depends on the desired outcome for the specific garment construction step. Opt for topstitching when a more visible decorative effect is intended, when stronger reinforcement is needed further away from the seam itself, or when working with heavier fabrics where a wider, longer stitch appears more balanced and proportional.
Choose edge stitching for a subtle finish whose main goal is to keep edges crisp, prevent facings or linings from rolling towards the outside, or secure seam allowances very close to the fold. The design choice hinges on functional vs. aesthetic priorities and fabric weight.
4. Essential tools and materials for perfect topstitching
4.1 Choosing the right thread
Selecting the appropriate thread is crucial for successful topstitching. Several options exist:
- Topstitching thread: This is a heavier weight thread (often around 30wt), typically made of polyester for strength and sheen. Its thickness creates a more pronounced, visible stitch, making this thread ideal for decorative applications or use on heavy fabrics like denim or canvas.
- All-purpose thread: This standard weight thread (usually 40wt or 50wt) is suitable for less prominent topstitching, applications on lighter fabrics, or situations where function outweighs decoration. Polyester thread is common due to its durability.
- Bobbin thread: A critical point is to always use standard all-purpose thread in the bobbin, even when using heavier topstitching thread in the needle. Using heavy thread in both can lead to tension problems and create excessive bulk underneath the fabric. Proper thread weight selection prevents issues.
4.2 Selecting the correct sewing needle
The sewing needle must be compatible with both the chosen thread and the fabric type.
- Topstitch needle: This needle type features a larger needle eye to accommodate thicker topstitching thread easily. A larger groove down the front also helps protect the thread as stitches form, preventing shredding or breakage.
- Microtex (Sharp) needle: With its very sharp point, a Microtex needle excels at creating precise stitches on tightly woven fabrics or microfibers when using all-purpose thread for topstitching.
- Universal needle: While a universal needle might suffice for topstitching with all-purpose thread on basic woven fabrics, it’s generally less ideal than specialized needles, especially when using thicker threads or sewing challenging materials. Matching needle size to fabric weight is also essential (e.g., a size 90/14 for medium weights, 100/16 or 110/18 for denim).
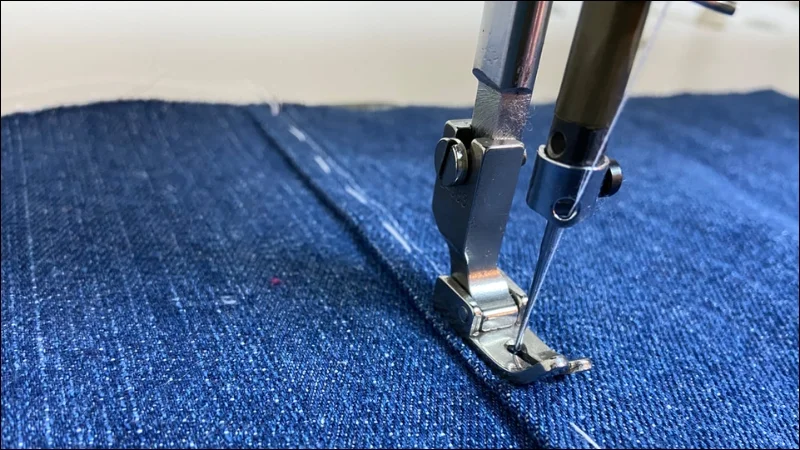
4.3 Helpful sewing machine presser feet for precision
Using specialized sewing machine attachments, specifically certain presser feet, can significantly enhance topstitching accuracy.
- 1/4″ quilting foot: Designed for quilting, this foot has a built-in guide exactly 1/4″ from the needle, making consistent 1/4″ topstitching straightforward.
- Adjustable guide foot: This foot features a guide that can be moved and locked via a screw, allowing the user to set a precise, custom distance for topstitching. While the standard presser foot can be used with careful manual guiding or fabric markings, these specialized feet offer greater ease and precision.
4.4 Fabric considerations
The fabric type and weight heavily influence topstitching choices.
- Heavyweights (e.g., denim, canvas): These fabrics benefit from thicker topstitching thread, a larger needle (like a Jeans/Denim needle or Topstitch needle size 100/16 or 110/18), and a longer stitch length (typically 3.5-4.0mm or even slightly longer).
- Medium-weights (e.g., cotton twill, poplin, linen): These can be topstitched effectively with either all-purpose or topstitching thread, using a medium-sized needle (80/12 or 90/14), and a stitch length around 3.0mm.
- Lightweights (e.g., voile, lawn, rayon challis): For these delicate fabrics, use all-purpose thread and a smaller needle (70/10 or 80/12, potentially Microtex). A slightly shorter stitch length (2.5-3.0mm) may look best. Exercise caution to prevent puckering; stabilization might be needed.
- Stable knits: Topstitching is possible on stable knits (those with limited stretch) with careful adjustments. Proper needle size and stitch length adjustment are vital for adapting to different wovens and knits.
5. How to execute flawless topstitching
5.1 Preparation
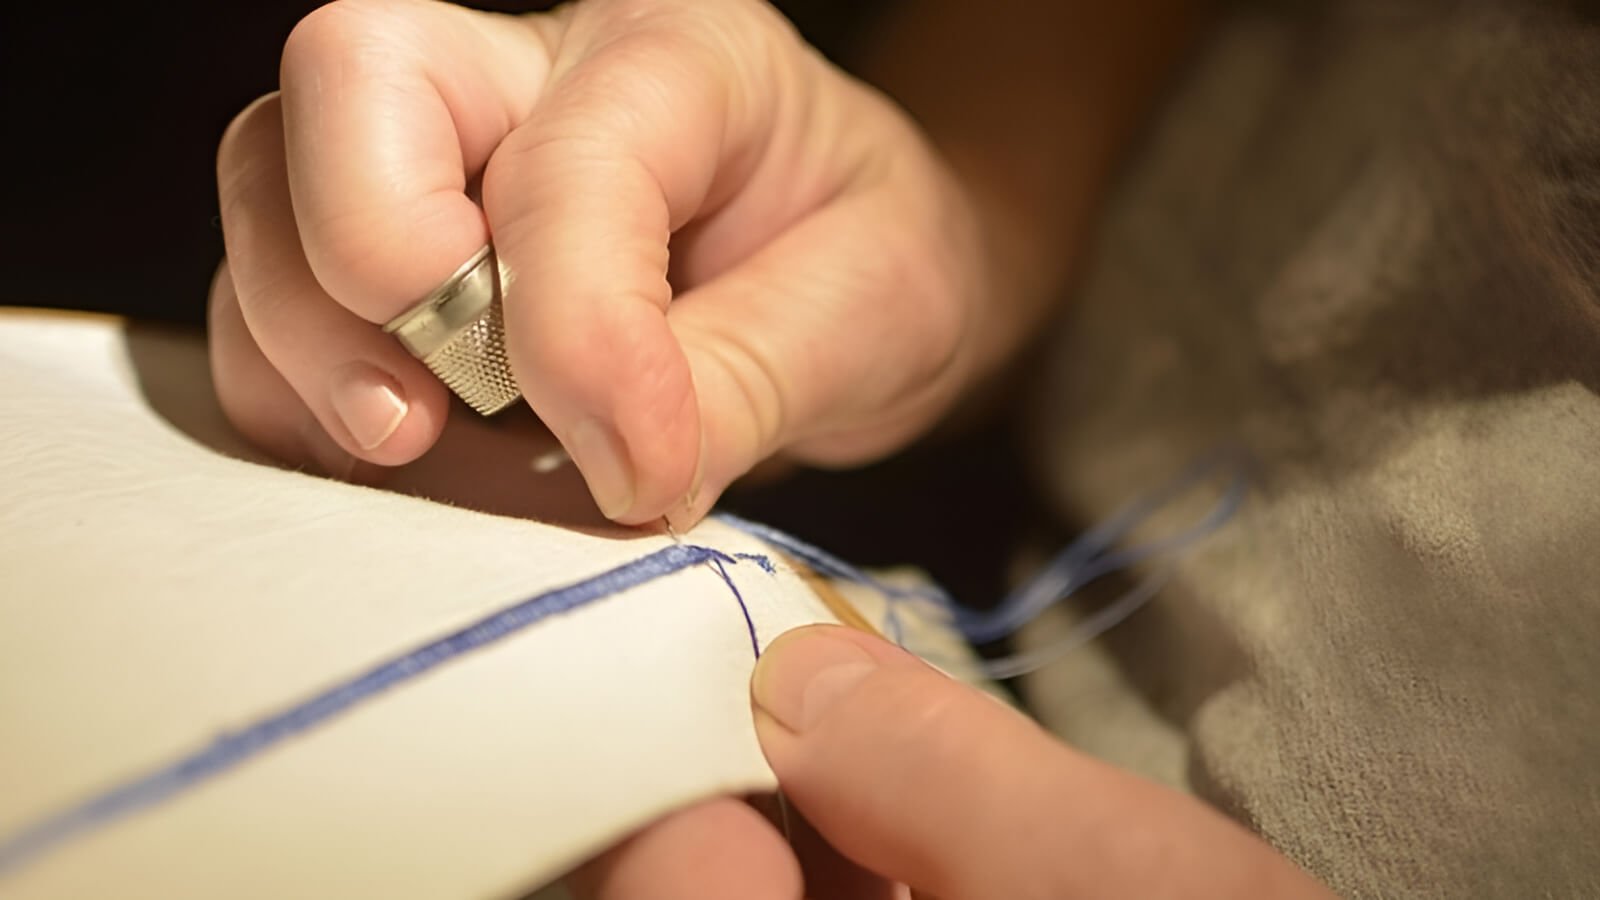
- Plan: Decide precisely where the topstitching line should be placed and determine the desired distance from the seam or edge. If necessary, mark the line lightly on the right side of the fabric using removable marking tools (like chalk or a water-soluble pen).
- Press: Prepare the underlying seam allowances according to the project requirements. Often for topstitching, seam allowances are pressed to one side so the topstitching catches them underneath. Sometimes they are pressed open if stitching further away. Ensure the entire area to be stitched is pressed perfectly flat and smooth. Excellent pressing is a non-negotiable part of seam preparation for quality results.
5.2 Setting up your sewing machine
- Install: Mount the correct needle type and size for your fabric and thread choice. Thread the machine with the selected top thread and ensure the bobbin contains all-purpose thread.
- Select stitch: Set the machine to a straight stitch.
- Set length: Adjust the stitch length. A good starting point is often 3.0mm to 3.5mm, but adjust based on fabric weight and desired look (longer for heavier fabrics, potentially shorter for very light ones). Refer to your test results.
- Test tension: This step is crucial. Using scraps of the exact same fabric layers as your garment section, sew a test line. Examine the stitches on both sides. Adjust the upper thread tension dial until the stitches look balanced: the top and bobbin threads should interlock neatly between the fabric layers, with no thread loops appearing on the bottom and no bobbin thread dots visible on the top.
5.3 Starting your stitch
- Position: Place the fabric under the presser foot, aligning the starting point precisely under the needle. Lower the presser foot.
- Hold tails: Gently hold both the top thread and bobbin thread tails taut behind the presser foot for the first few stitches. This action prevents the threads from getting tangled underneath (nesting).
- Sew forward: Begin sewing forward at a controlled speed. Avoid using the backstitch function at the beginning of a topstitch line, as this creates unwanted bulk and visual disruption on the visible side.
5.4 Sewing straight and consistent lines
- Use guides: Maintain a consistent distance from the seam or edge by using a guide. This could be the edge of your presser foot (standard or specialized), markings on the sewing machine’s throat plate, an installed edge guide attachment, painter’s tape applied to the machine bed, or the marked line on your fabric.
- Steady speed: Sew at a steady, moderate speed. Avoid sudden bursts or slow-downs. Do not push or pull the fabric; allow the machine’s feed dogs to move the material smoothly. Keep your eyes focused on your chosen guide, not directly on the needle as stitching occurs.
- Consistent guidance: Maintain even pressure and guidance throughout the length of the stitch line.
5.5 Finishing neatly
- End point: Sew precisely to the intended end point of the topstitching. Optionally, take one stitch beyond the end, then manually turn the handwheel towards you until the needle comes up out of the fabric.
- Remove fabric: Lift the presser foot. Gently pull the fabric away from the machine, leaving thread tails approximately 4-6 inches (10-15cm) long. Cut the threads.
- Pull top thread: Turn the fabric over to the wrong side. Locate the bobbin thread tail near the end of the stitching. Give the bobbin thread a gentle tug; this action should pull a small loop of the top thread through to the wrong side.
- Complete pull-through: Use the point of a pin, seam ripper, or similar tool to catch the loop of the top thread and pull the entire top thread tail completely through to the wrong side of the fabric.
- Secure knot: Tie the top thread tail and the bobbin thread tail together securely with a small, tight knot (a square knot done 2-3 times is effective). Trim the excess thread tails, leaving about 1/4 inch (6mm). This method provides a very clean finish on the visible side.
6. Expert tips for superior topstitching results
6.1 The non-negotiable
Reiterating this point is essential because testing is fundamental for quality control. Always test your setup on scraps composed of the exact same layers of fabric and interfacing (if used) as your final garment section.
This practice confirms correct tension settings, allows evaluation of the stitch length appearance, verifies that the needle and thread combination works smoothly with the specific fabric, and provides a chance for practice before sewing on the actual project.
Perform a new test whenever the fabric, thread, or needle type changes. Think of the test scrap analysis as a prerequisite step.
6.2 Maintaining consistent distance
Achieving perfectly parallel and evenly spaced topstitching is key to a professional look. Beyond specialized presser feet, consider other methods to maintain consistent distance. Applying a strip of removable painter’s tape to the machine bed at the desired distance from the needle creates an effective temporary guide.
Using removable fabric pens or chalk to draw a guideline directly onto the fabric works well, provided the marks can be completely removed later. Many sewing machine needle plates also have engraved measurement lines that can serve as guides.
Choose the method that works best for the specific situation and practice using the chosen guide effectively. Consistent seam allowance management is crucial.
6.3 Mastering tension for balanced stitches on both sides
Achieving balanced stitch tension means the top and bobbin threads interlock precisely between the fabric layers, resulting in identical-looking stitches on both sides. Remember that using heavier topstitching thread often requires increasing the upper tension slightly compared to sewing with all-purpose thread.
Always inspect both the top and bottom of your test scrap stitching. If loops appear on the bottom, the upper tension is likely too loose. If bobbin thread dots are visible on the top, the upper tension is likely too tight.
Adjust the upper tension dial incrementally, testing after each adjustment. Bobbin tension is typically factory-set and rarely needs adjustment for standard sewing tasks.
6.4 Sewing multiple rows
When executing multiple parallel rows of topstitching, such as the double stitching commonly seen on jeans yokes or pockets, a critical technique is to sew all rows in the same direction. For example, if the first row is sewn from top to bottom, the second parallel row should also be sewn from top to bottom.
Sewing one row down and the subsequent row up can introduce subtle twisting or puckering between the stitch lines because the fabric feed mechanism might engage the layers slightly differently depending on the sewing direction. Following this rule helps keep the fabric smooth between parallel rows.
6.5 Handling corners and curves with precision
Navigating corners and curves requires specific techniques for neat results.
- Sharp corners: Sew up to the corner point, stopping with the needle down in the fabric just before the turn. Lift the presser foot. Pivot the fabric carefully 90 degrees (or the required angle) around the needle. Lower the presser foot, ensure alignment, and continue sewing the next side.
- Curves: Use a slow sewing speed when approaching and navigating curves. Guide the fabric gently with both hands, rotating the material smoothly as stitching progresses. For tight curves, using a slightly shorter stitch length can sometimes help create a smoother line. Stopping frequently with the needle down allows for minor adjustments in fabric direction without losing the stitch line.

7. Troubleshooting common topstitching problems in production
7.1 Why is my fabric puckering?
Problem: The fabric gathers or bunches up along the topstitching line.
Causes:
- Upper thread tension is too tight.
- Stitch length is too short for the fabric weight/type.
- Incorrect needle type or size, or a dull/damaged needle.
- The fabric was stretched or pulled while sewing.
- Issues with the sewing machine’s feed dogs (e.g., not engaged properly).
Solutions:
- Loosen the upper tension incrementally, testing on scraps.
- Lengthen the stitch length.
- Change to a new, correct needle type and size for the fabric.
- Guide the fabric gently, letting the feed dogs do the work without stretching.
- Ensure feed dogs are engaged and functioning correctly.
- Consider using a Walking Foot (even feed foot) for fabrics prone to shifting or puckering. Always test adjustments on scraps. Tension issues are a common culprit.
7.2 Solving skipped stitches
Problem: The sewing machine fails to form complete stitches intermittently, leaving gaps in the stitch line.
Causes:
- Using the wrong needle type or size for the fabric or thread (e.g., universal needle on knit fabric, small eye for thick thread).
- Needle is dull, bent, or damaged.
- Needle is inserted incorrectly (flat side should usually face the back).
- Incorrect machine threading (either top thread path or bobbin insertion).
- Poor quality or incompatible thread.
Solutions:
- Ensure the correct needle choice (type and size) is being used.
- Replace the needle with a new one.
- Verify the needle is inserted correctly according to the machine manual.
- Completely re-thread the machine, both the upper thread path and the bobbin case.
- Try using a different spool or brand of thread. Needle damage and threading issues are frequent causes.
7.3 Achieving straight lines
Problem: The topstitching line wanders, appearing uneven or not maintaining a consistent distance from the edge or seam.
Causes:
- Inconsistent sewing speed (speeding up and slowing down abruptly).
- Pushing or pulling the fabric instead of guiding smoothly.
- Not utilizing a guide (presser foot edge, machine markings, tape, etc.) effectively.
- Poor visibility of the sewing area due to inadequate lighting.
Solutions:
- Practice maintaining a steady, controlled sewing speed.
- Focus on guiding the fabric gently, letting the feed dogs control the movement.
- Diligently use a chosen guide (presser foot, tape, markings) and keep your eye on the guide.
- Ensure adequate task lighting over the needle area.
- Consistent practice improves fabric control and leads to straighter lines.
7.4 Preventing thread breakage
Problem: The top thread (most commonly) snaps or breaks during sewing.
Causes:
- Upper thread tension is set too high.
- Needle eye is too small for the thread thickness (especially common with heavy topstitching thread).
- A burr (a small rough spot) on the needle, throat plate, or bobbin hook area is snagging the thread.
- Poor quality or old thread that lacks strength.
- Incorrect threading path, possibly missing a thread guide, causing friction.
Solutions:
- Reduce the upper tension setting.
- Ensure the correct needle type and size is used (a Topstitch needle has a larger eye specifically for thicker threads).
- Carefully inspect the needle for damage and replace if necessary. Check the throat plate and hook area for burrs (may require professional servicing to smooth).
- Try a different, higher-quality thread.
- Re-thread the machine carefully, ensuring the thread passes through all guides correctly. Tension issues and using the wrong needle size are primary suspects.
8. Related questions about topstitching
8.1 Can I topstitch on knit or stretchy fabrics effectively?
Yes, topstitching on knit or stretchy fabrics is possible but requires specific adjustments. Using a Ballpoint or Stretch needle is essential; these needles have rounded tips that slide between knit fibers instead of piercing and potentially damaging them.
Employing a Walking Foot (or Even Feed Foot) is highly recommended, as this attachment helps feed the top and bottom layers of fabric evenly, preventing the top layer from stretching out during sewing.
For added stability, consider applying a narrow strip of lightweight fusible knit interfacing to the wrong side along the seam line before topstitching. Generally, lengthening the stitch slightly more than for woven is beneficial.
Testing on scraps is crucial, as knit fabrics vary greatly in stretch and behavior. On very stretchy seams, a narrow zigzag stitch or a specific stretch stitch might offer better durability and stretch recovery than a standard straight topstitch.
8.2 What’s the best technique for topstitching curved areas like necklines?
Topstitching curves smoothly requires patience and careful fabric handling. Sew at a significantly slower speed compared to straight sections. Guide the fabric gently around the curve, maintaining the desired distance from the edge consistently.
Stop frequently, always with the needle down in the fabric. Lift the presser foot slightly, pivot the fabric very gently to follow the curve, lower the presser foot, and take a few more stitches. Repeat this needle-down pivot process as needed.
Avoid pulling or stretching the curved edge, as this will distort the shape. Using a slightly shorter stitch length (around 2.5mm) can sometimes help the stitches conform better to tighter curves. Crucially, press the curved seam allowances properly into shape before attempting to topstitch.
8.3 Is special topstitching thread always necessary? When can I use all-purpose thread?
Special topstitching thread is not always required. Choose topstitching thread when the goal is a distinctly visible, pronounced stitch line. This thicker thread is particularly effective for decorative purposes or when working on heavier fabrics like denim, canvas, or corduroy, where its thickness looks balanced and provides enhanced strength.
Opt for standard all-purpose thread for more subtle topstitching, applications on light to medium-weight fabrics, or when the primary purpose is functional (like securing a facing flat) rather than prominently decorative.
Remember the essential rule: regardless of the top thread choice (topstitching or all-purpose), always use standard all-purpose thread in the bobbin to ensure balanced tension and avoid excessive bulk. The decision hinges on the desired aesthetic effect and the fabric weight.
8.4 How does topstitching differ on lightweight vs. heavyweight fabrics like denim?
The approach to topstitching changes significantly based on fabric weight. For heavyweight fabrics like denim or canvas, use thicker topstitching thread paired with a larger, stronger needle (such as a Denim/Jeans needle or a Topstitch needle, typically size 100/16 or 110/18).
A longer stitch length (usually 3.5mm to 4.5mm) is generally appropriate, looking proportional and adding strength. Conversely, for lightweight fabrics like voile, lawn, or silk, use standard all-purpose thread with a smaller needle (e.g., size 70/10 or 80/12, possibly a Microtex/Sharp type for precision).
A slightly shorter stitch length (around 2.5mm to 3.0mm) often yields the best results. Be especially vigilant about testing on lightweight fabrics to prevent puckering; sometimes, stabilizing the seam area with lightweight interfacing is necessary before topstitching. Needle size and stitch length adjustment are key differences.
Read more:
Mastering the technique of topstitching offers a readily accessible means for apparel businesses, particularly small and growing ones, to significantly enhance product quality, increase garment durability, and boost perceived value in the eyes of the customer.
As explored, topstitching skillfully serves both aesthetic purposes, adding decorative details and professional polish, and structural functions, reinforcing seams for longer wear. Achieving consistently excellent results hinges on attention to detail throughout the process: selecting the appropriate tools (thread, needle, presser foot), mastering the technique, and diligently testing adjustments on fabric scraps. Implementing high-quality, masterful topstitching is an investment in building a stronger brand reputation based on visible craftsmanship and reliability.


