


What Is Blind Hem: Secret To Invisible, Professional Stitches


A blind hem is a special way to finish the bottom edge of clothes, like pants or skirts, where the stitch is mostly hidden from the outside. It’s named ‘blind’ because the sewing stitches are very hard to see from the outside of your clothes, making the edge look very clean and smooth.
This technique creates what is often called an invisible hem. Its biggest advantage is giving your garments a professional, store-bought look, creating a clean edge without any visible threads. This guide will explain what ‘blind hem’ means, why it’s a great technique, and show you how to easily create one for your sewing projects.
1. Why choose a blind hem for your sewing projects?
Using a blind hem offers several great benefits for your sewing work. It makes your clothes look much better and last longer.
- Professional and high-quality appearance: A blind hem makes your garments look very neat and tidy, similar to high-quality clothes you buy in a store. This detail shows you care about the finish, giving clothes a clean look. Compared to a standard visible hem, a blind hem offers a much sleeker and more refined edge.
- No visible stitches on the outside: The best part is the smooth finish without noticeable stitch lines on the exterior. This is especially great for fabrics and designs where you want a clean, uninterrupted line, like on dress pants or flowy skirts. The stitch is mainly formed on the inside and only catches a tiny thread or two of the outer fabric.
- Durability for garment edges: Though hidden, a blind hem is strong. It helps the edge of your clothes last longer by preventing fraying and keeping the hem securely in place. The way the fabric is folded and stitched provides a robust edge.
A blind hem is perfect for many items. Common uses for finishing edges of clothes and curtains include:
- Pants: Especially dress pants; you might search ‘what is a blind hem for dress pants’ to achieve that sharp, store-bought look.
- Skirts and dresses: Especially for medium-weight fabrics to give a lovely, flowing edge. It’s a popular choice for skirts and dresses, especially those made from medium-weight fabrics, to give them a lovely, flowing edge.
- Drapes and curtains: For a clean finish where the hem doesn’t distract from the fabric pattern.
- Sleeves and other garment edges: Any edge where a clean, invisible finish is desired.
2. What does a blind hem actually look like?
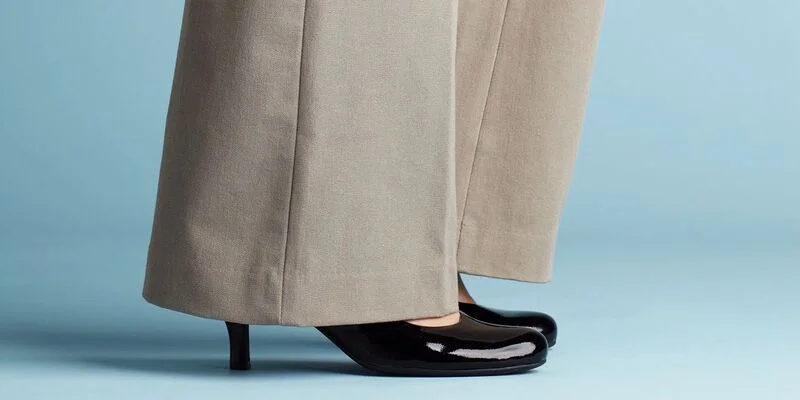
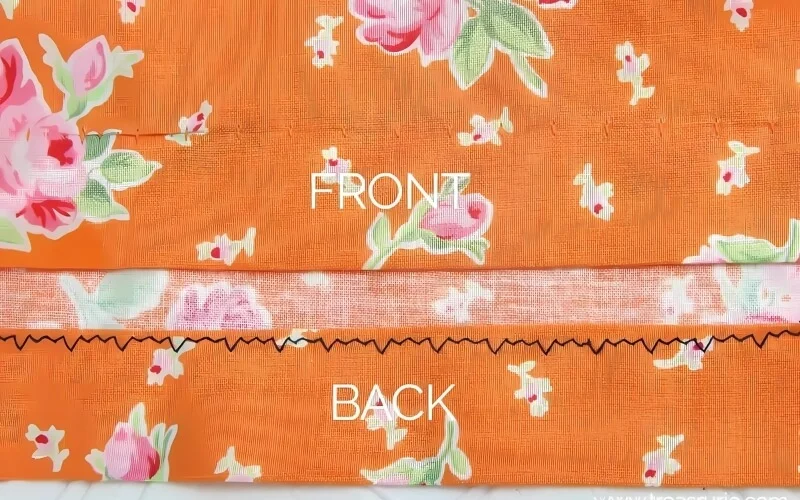
So, what does a blind hem look like? From the outside of your garment, a well-done blind hem is almost invisible. You’ll see a smooth, clean edge with no obvious line of stitches. If you look very closely, especially on certain fabrics, you might see tiny, pin-point ‘pricks’ where the thread catches the fabric.
However, if you use a matching thread, these are very hard to see from the outside. On the inside of your garment, you will see a line of small, even stitches. These stitches typically look like a repeating pattern of straight stitches along the hem allowance edge. A periodic zigzag or V-shaped stitch extends to catch the main fabric fold.
3. Tools and materials you will need for a blind hem
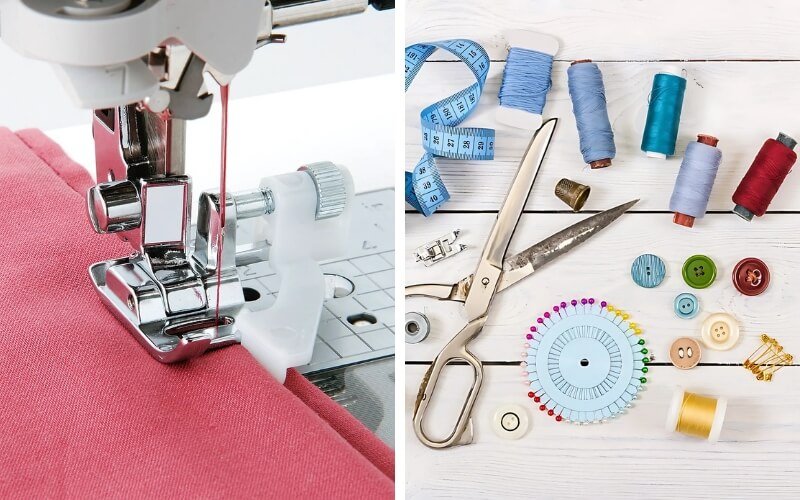
To sew a blind hem, you’ll need a few basic sewing tools. Here’s a list of tools needed, including a special foot and the right needle:
- Fabric for your project: The garment or item you plan to hem.
- Matching sewing thread: Choose a thread that closely matches your fabric’s color to help the stitches blend in seamlessly.
- Sewing machine: While a blind hem can be sewn by hand, many sewing machines have a blind hem stitch.
- Hand sewing needle: If sewing by hand, use a thin, sharp needle.
- Pins: To hold the folded hem in place.
- Fabric marker or chalk: To accurately mark your hemline.
- Ruler or measuring tape: For measuring an even hem allowance.
- Iron and ironing board: Essential! Pressing creates crisp folds.
- Scissors: Sharp scissors for cutting fabric and thread.
4. Preparing your fabric for a blind hem
Proper preparation is key to a beautiful blind hem. Follow these steps carefully.
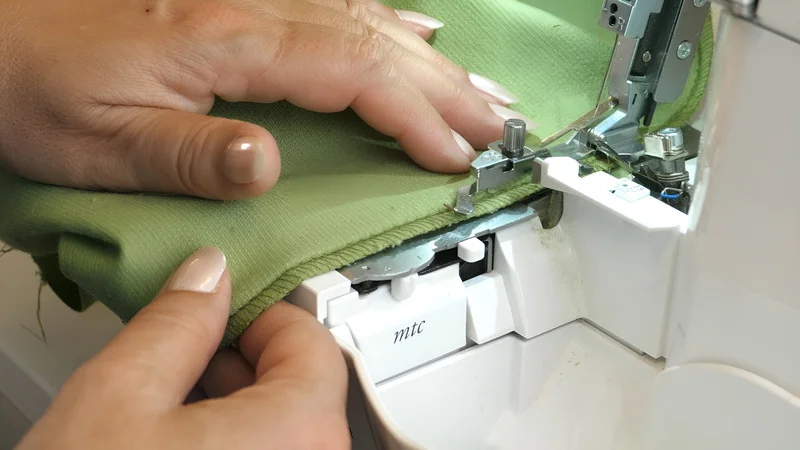
Finish the raw edge of your fabric. Before folding your hem, you must finish the raw fabric edge. This prevents fraying and ensures a neat inside finish. Common methods include using a serger/overlocker for a quick, professional result, applying your sewing machine’s zigzag stitch along the edge, or simply folding the raw edge under by about 1/4 inch (0.6 cm) towards the wrong side and pressing it flat. This essential step ensures the garment’s interior remains tidy and stops the fabric from unraveling.
Measure and mark your hem allowance. Decide your hem depth. For pants, 1-2 inches (2.5-5 cm) is common. For skirts, it can be similar or wider. Use your ruler and marker to draw a line on the wrong side of your fabric. This line is where your final folded edge will be.
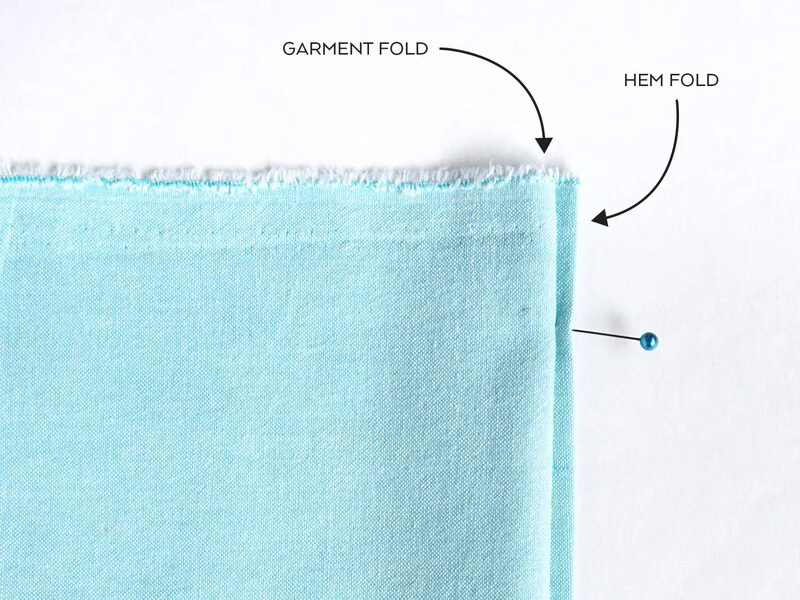
Fold the hem up to the marked line and press with an iron. Take the finished fabric edge and fold it up towards the wrong side. Align the edge with your marked line. Carefully press this fold. A sharp crease is crucial for accuracy.
Fold the hem again in a specific way for the blind hem stitch (the “Z” fold). This is the key fold. With the hem allowance folded up, now fold most of it back down towards the right side of the garment. Leave about 1/4 to 3/8 inch (0.6 to 1 cm) of the finished hem edge (from Step 1) sticking up.
This small protruding edge is what your needle will sew on, while the wider stitch catches the main fabric fold. We strongly advise practicing this fold on a scrap piece of fabric first. A well-pressed Z-fold is half the battle for a perfect blind hem.
5. How to sew a blind hem: step-by-step
5.1 Sewing a blind hem with a sewing machine
This is a common way to create a blind hem. Our sewing machine tutorial will guide you.
Setting up your machine:
- Selecting the blind hem stitch: Most machines have this. It looks like a few straight stitches then a wide zigzag. Check your manual.
- Attaching the blind hem foot: If you have one, snap it on. Its guide bar helps precision.
- Adjusting stitch length and width: Start with medium length (2.5-3.0 mm). The width needs to be just enough for the needle to catch a tiny ‘bite’ of the main fabric.
Crucial tip: Always test your stitch settings on a scrap piece of your exact fabric, folded in the ‘Z’ manner. This is vital to ensure the stitch catches just enough fabric to be secure but remains invisible from the outside.
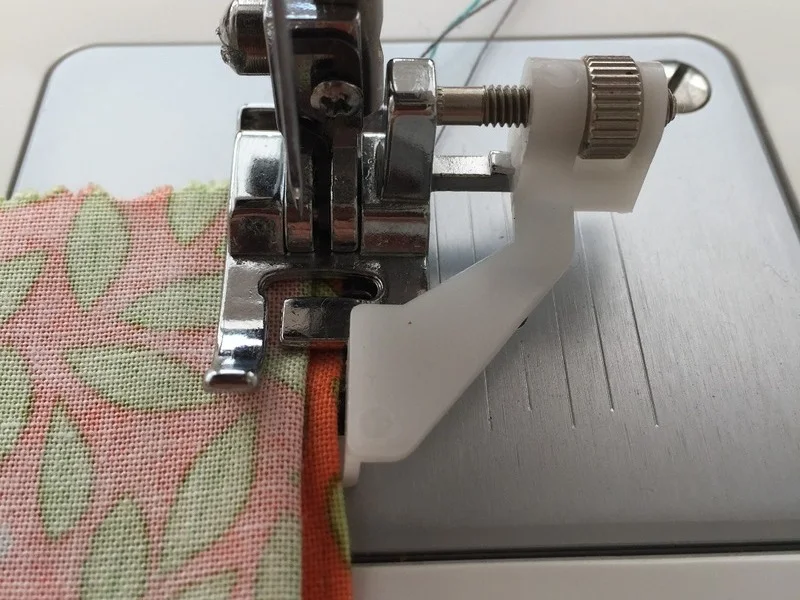
Positioning the fabric under the needle:
- Place your Z-folded fabric under the foot. The foot’s guide should run against the main fabric fold.
- The straight stitches will sew on the protruding hem edge. The zigzag will swing left and barely catch the main fabric fold.
Guiding the fabric:
- Sew slowly. Keep the main fabric fold consistently guided.
- Without a special foot, guide carefully by eye. This needs practice for an easy blind hem stitch for beginners to look truly ‘blind’.
Starting and finishing your stitching:
You can backstitch carefully. Or, leave long thread tails, pull the top thread to the wrong side, and tie them by hand for a neater finish.
5.2 Sewing a blind hem by hand
Hand sewing offers great control, especially on delicate fabrics. Threading your needle and knotting the thread: Use a single strand of matching thread and tie a small knot.
The specific hand stitch technique:
First, hide your knot inside the folded hem allowance. Bring your needle up through the very edge of the upper fold of the hem allowance (the top part of the ‘Z’). Next, take a small horizontal stitch (about 1/4 inch or 0.6 cm long) through this folded edge only.
Directly above, pick up just one or two threads from the main garment fabric, ensuring not to push the needle all the way through. Pull the thread gently taut. Then, move your needle back to the folded edge of the hem allowance, slightly over, and take another horizontal stitch. Repeat this sequence: a small stitch in the hem allowance, followed by a tiny pick-stitch in the main fabric.
How to make stitches small and invisible from the outside:
To achieve this, pick up the smallest amount of fabric possible from the main garment – ideally just one or two threads. It’s also crucial to keep your stitches even and maintain gentle tension, avoiding pulling the thread too tight.
Securing your stitches at the end:
Make a few tiny backstitches within the hem allowance. Knot close to the fabric, then pass the needle through the hem allowance before snipping the thread.

6. Tips for a perfect blind hem every time
Here are some quick tips to help you master the blind hem. These are great for easy sewing projects for beginners.
- Choose the right thread color: Always use thread that perfectly matches your fabric. This is key for invisible stitches.
- Practice on a scrap piece of fabric first: Always test settings or hand stitches on a scrap, prepared with the ‘Z’ fold.
Pressing is important at each step: Don’t skip ironing! Press folds before sewing. Press the finished hem gently from the inside.
Adjusting for different fabric weights:
For lightweight/thin fabrics, use a smaller needle (size 60/8), finer thread, and smaller, shallower stitches; hand-sewing often works best. With heavier fabrics, you may need a longer stitch and an appropriate needle, and the ‘bite’ can be slightly deeper if needed.
For stretchy fabrics/knits (for a blind hem for stretchy fabric), use a ballpoint/stretch needle and a stretch blind hem stitch if your machine has one; by hand, use a catch stitch or ensure stitches have give.
Common mistakes and how to fix them:
If stitches are showing too much on the outside, your zigzag stitch might be too wide, or your hand stitch is picking up too much fabric; reduce the width or pick up fewer threads. For skipped stitches, try a new, sharp needle and check threading and tension.
7. Blind hems, handmade quality, and your brand
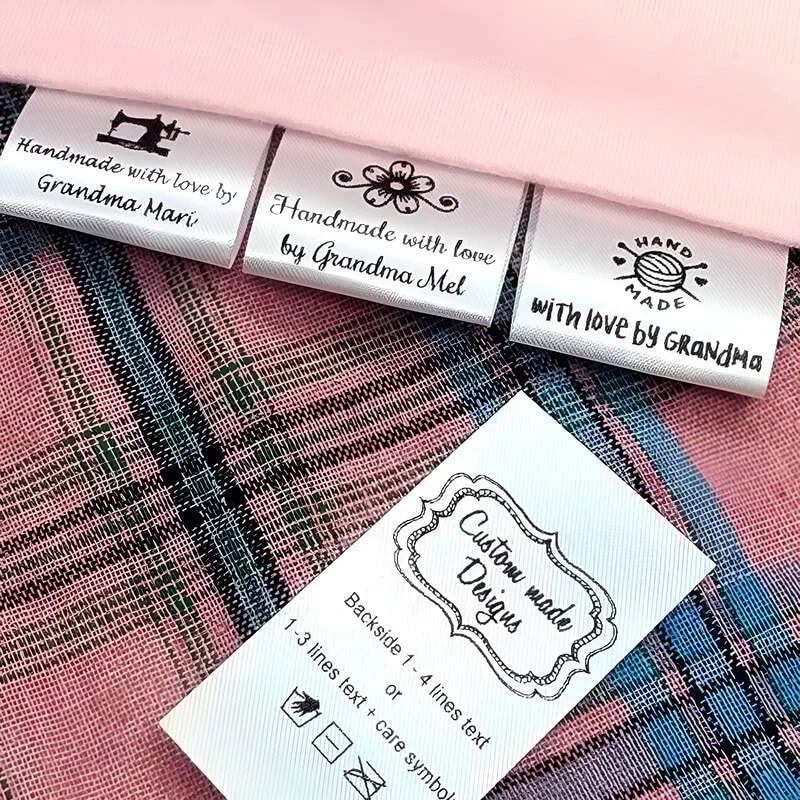
A well-executed blind hem significantly elevates the quality of your handmade items, giving them a polished, professional appeal that reflects true craftsmanship. To complete this professional look, consider adding custom branding. A woven label with your logo, stitched neatly into the neckline or waistband, acts as a signature of your quality.
Additionally, including a care label with washing instructions not only helps the customer maintain the garment but also reinforces your brand’s credibility. These finishing touches turn a well-made item into a branded product. If you’re looking for high-quality woven labels or care tags, Packlove offers a variety of customizable options perfect for handmade apparel.
8. Frequently asked questions about blind hems
Here are answers to some common questions about blind hems.
8.1 Can I use a blind hem on any fabric?
Mostly, yes! It works on many medium-weight wovens like cotton, linen, wool, and some stable knits. For very sheer, thick, or stretchy fabrics, you might need adjustments or consider other ways to finish a hem.
8.2 Do I really need a special blind hem foot for my sewing machine?
Not essential, but a blind hem foot makes it MUCH easier and gives more consistent results. Its guide helps accuracy. We highly recommend it for beginners.
8.3 Why are my blind hem stitches showing on the outside?
Usually, your machine’s zigzag is too wide, or your hand stitch catches too much fabric. Reduce stitch width or pick up only 1-2 threads.
8.4 Is a blind hem strong enough for everyday clothes?
Yes, a properly sewn blind hem is durable for most everyday garments like dress pants and skirts. For heavy-duty items, you might reinforce it.
8.5 What’s the difference between a blind hem and other hems?
The main difference is visibility. A blind hem’s stitches are almost invisible outside. Other hems, like a double-fold, have visible stitch lines.
Explore more:
Now you know the secret! A blind hem is a fantastic technique for giving your clothes making details and other fabric projects a super neat, professional finish. Stitches are practically invisible from the outside. Don’t be intimidated to try the blind hem. It might seem tricky at first, but practice makes perfect.
You’ll be hemming like a pro soon! Remember our tips, always test on a scrap piece first. Soon, the blind hem will be a wonderfully useful skill for all your sewing. Happy sewing from all of us at Packlove, and enjoy your beautifully finished items!
Show us your blind hem projects! Explore more sewing tips and branding ideas on the Packlove blog. Ready to add that professional touch? Check out Packlove’s range of custom labels and tags.


